 Here’s a great beef mince recipe for you that’s quick to make, economical and full of hidden vegetables so it’s a complete meal – Beef Chow Mein! It’s the beef version of everybody’s favourite Chicken Chow Mein, made with the convenience of ground beef. Beef chow mein Here’s something new to try with that packet of... Get the Recipe
The post Beef chow mein – great mince/ground beef recipe! appeared first on RecipeTin Eats.
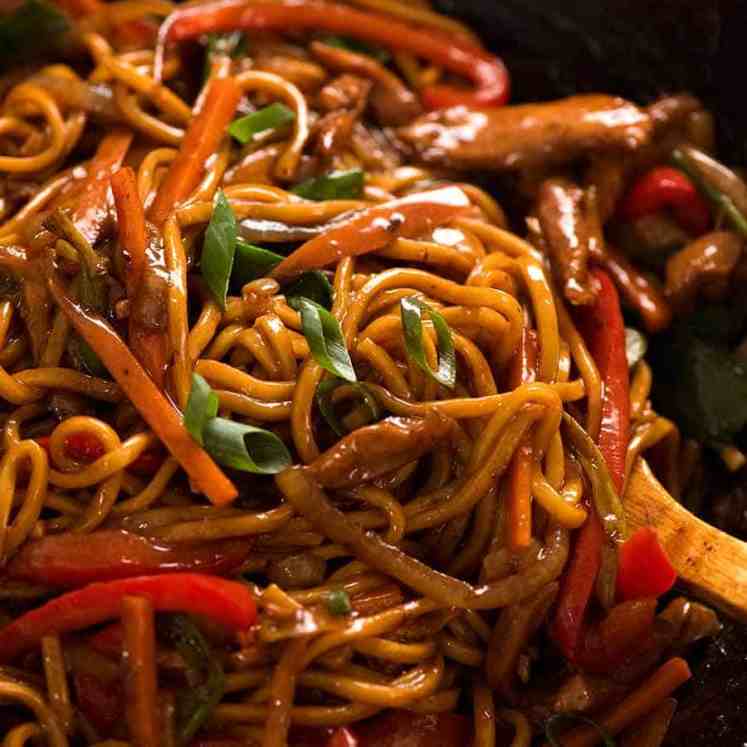
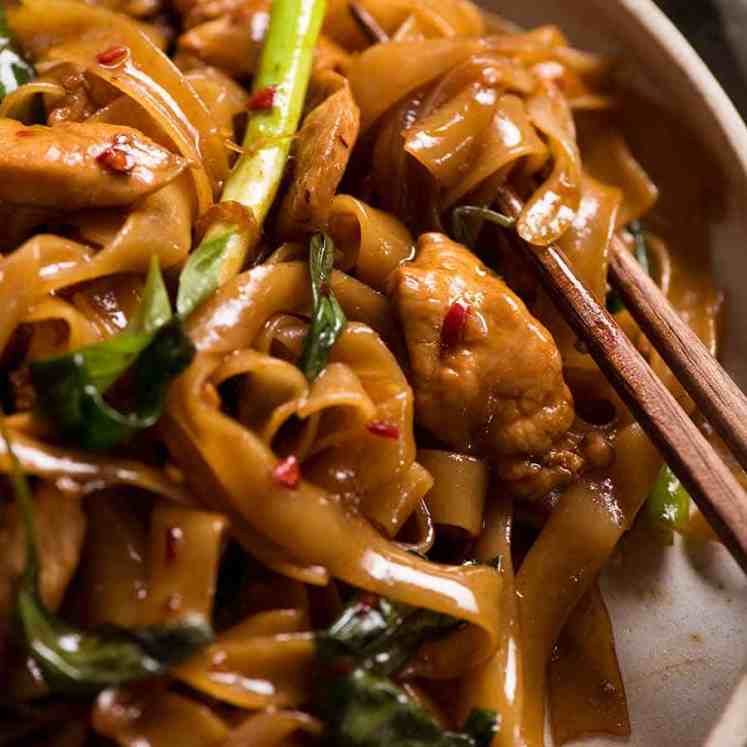
]]>Here’s a great beef mince recipe for you that’s quick to make, economical and full of hidden vegetables so it’s a complete meal – Beef Chow Mein! It’s the beef version of everybody’s favourite Chicken Chow Mein, made with the convenience of ground beef.
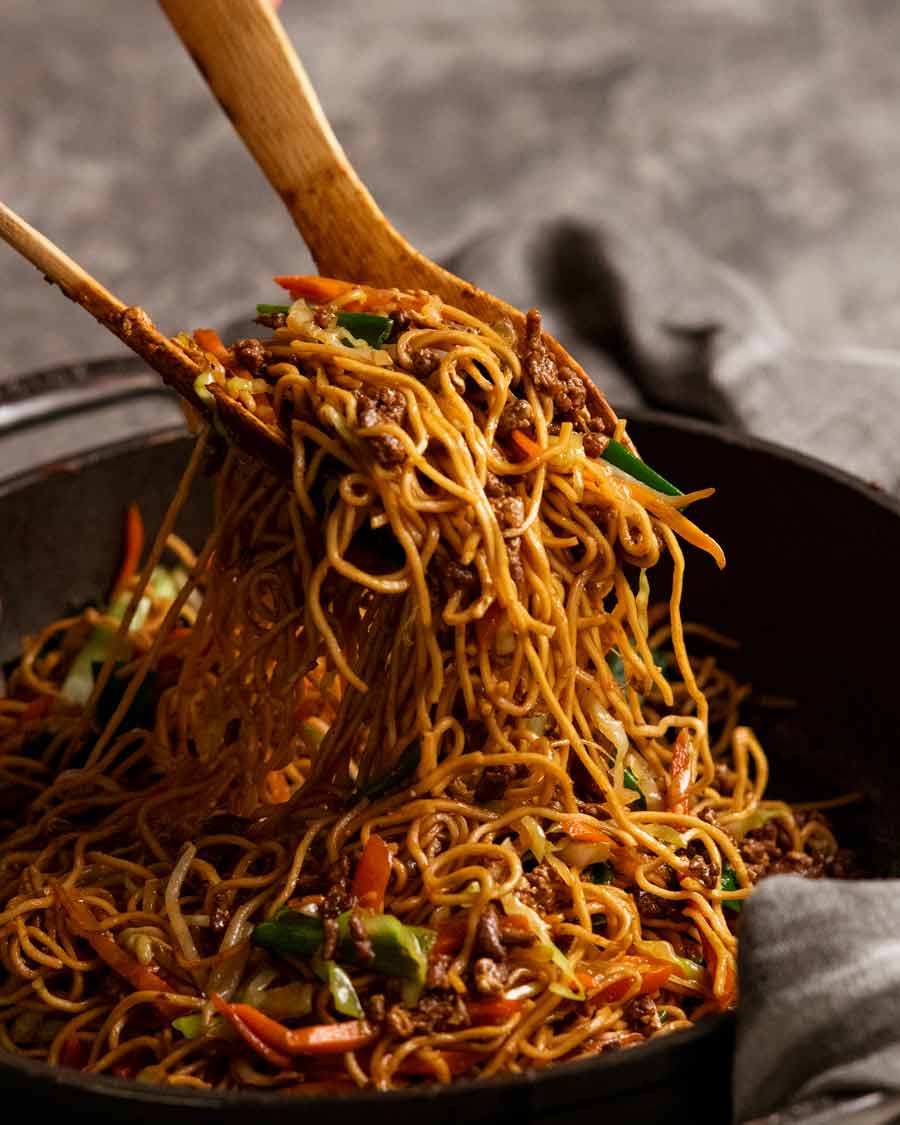
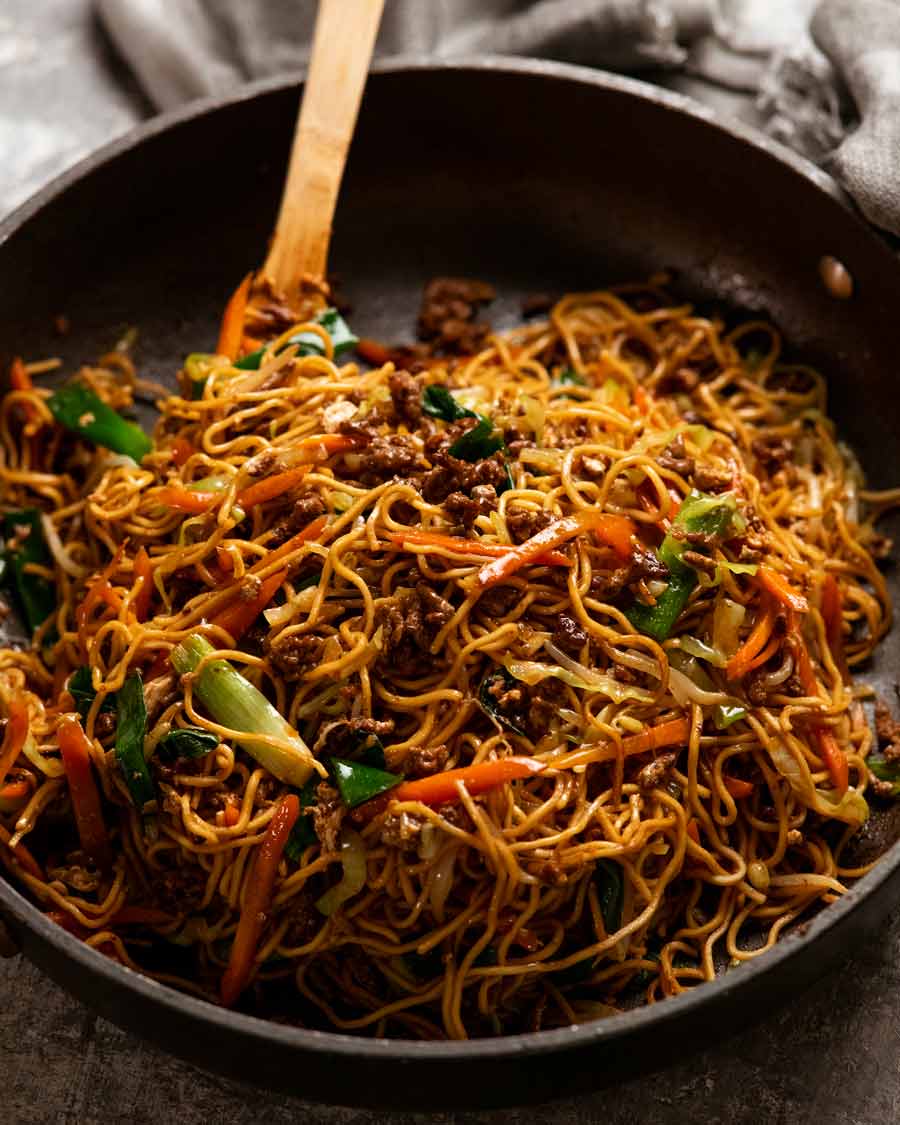
Beef chow mein
Here’s something new to try with that packet of beef mince you throw into your shopping cart every week! The beef is stir fried with chow mein sauce until it’s beautifully caramelised then tossed in a tangle of noodles and vegetables.
A neat trick in today’s recipe is to scramble up an egg with the beef. It makes the beef bits stick to the noodles better, with the added bonus of upping the protein.
Another bonus: chow mein actually has a vast amount of noodle-shaped vegetables hidden in the noodles. A carrot, 2 heaped cups of cabbage and a heaped cup of bean sprouts. That’s a good veg serving for a meal!
What you need
Here’s what you need to make this:
Noodles & add-ins
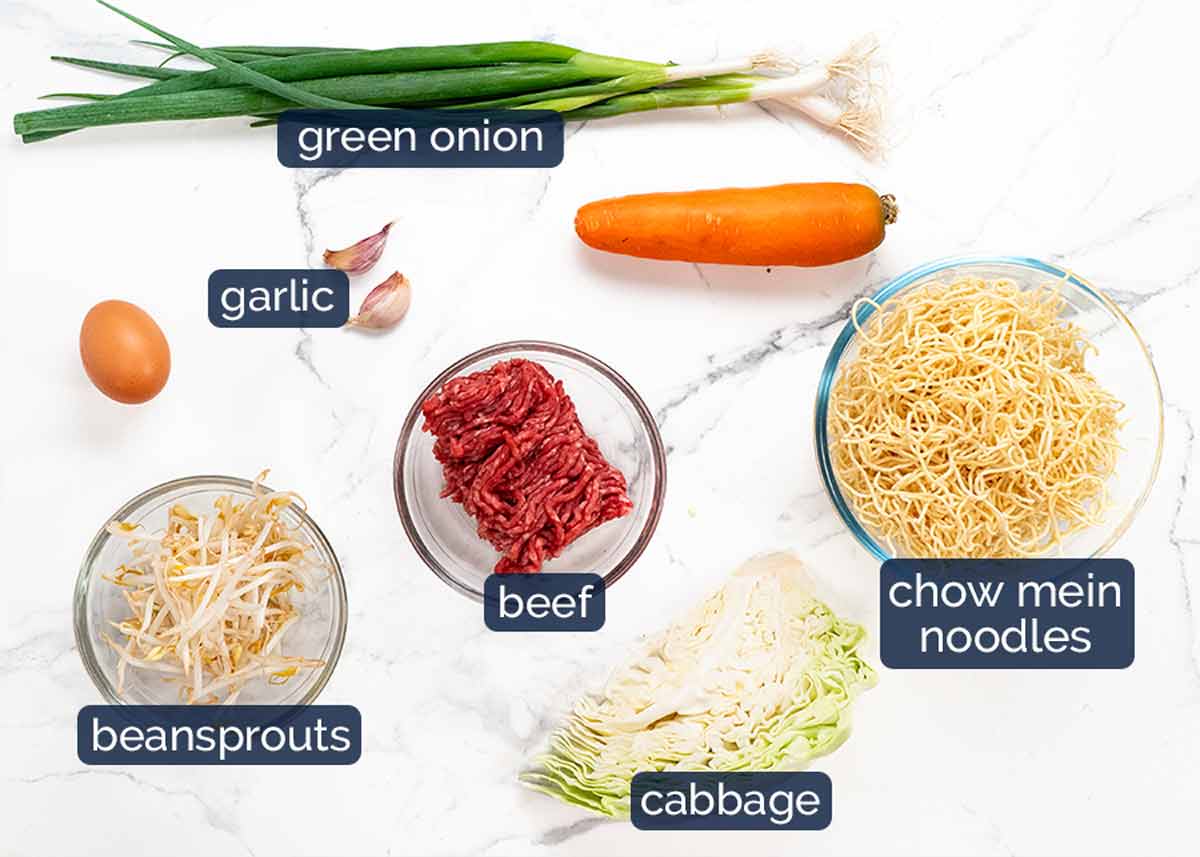
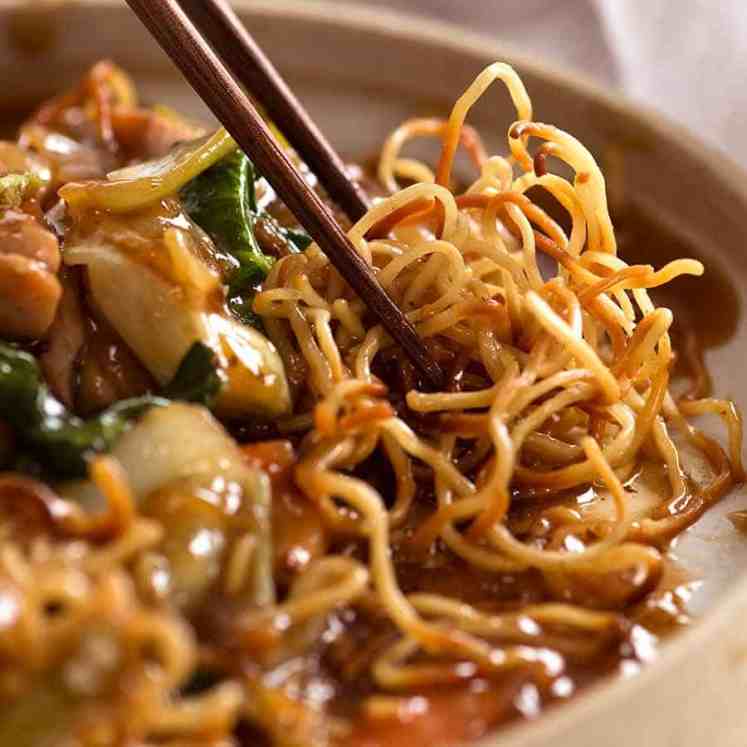
Noodles – Chow mein noodles are sort of dry and crinkly, rather than oily and straight like hokkien noodles, lo mein noodles. But this dish can really be made with any noodles – or even spaghetti (yes really, who’s going to know once tossed in chow mein sauce??). Use the same weight.
Garlic – Rarely do Asian stir fries happen without garlic, and this one is no exception!
Beef mince – That’s ground beef to Americans. Any fat % is fine here though lean beef won’t caramelise quite as well.
Other proteins – Any other mince will work just fine here. Chicken, pork, turkey, even lamb! Though bear in mind the sauce is quite intense flavoured to suit the beefy flavour of beef, so you won’t taste the flavour of white meats through the sauce.
Egg – We use this to scramble into the beef. Neat trick to make the beef stick to the noodles better with the added bonus of a free protein boost!
Green cabbage – Or Chinese cabbage. Finely sliced so it disappears into the tangle of noodles.
Bean sprouts – Excellent grab-and-throw-in vegetable option! STORAGE TIP: Keep bean sprouts in water in an airtight container. Change the water every couple of days. This will increase the shelf life of beansprouts 3x.
Carrot – Cut into thin batons. More noodle shaped vegetables so it all jumbles up together!
Green onion – We use 3 whole stems here. They are the onion in this dish, as well as some fresh green colour.
Chow Mein Sauce
The combination of sauces used in Chow Mein is common in Chinese dishes.
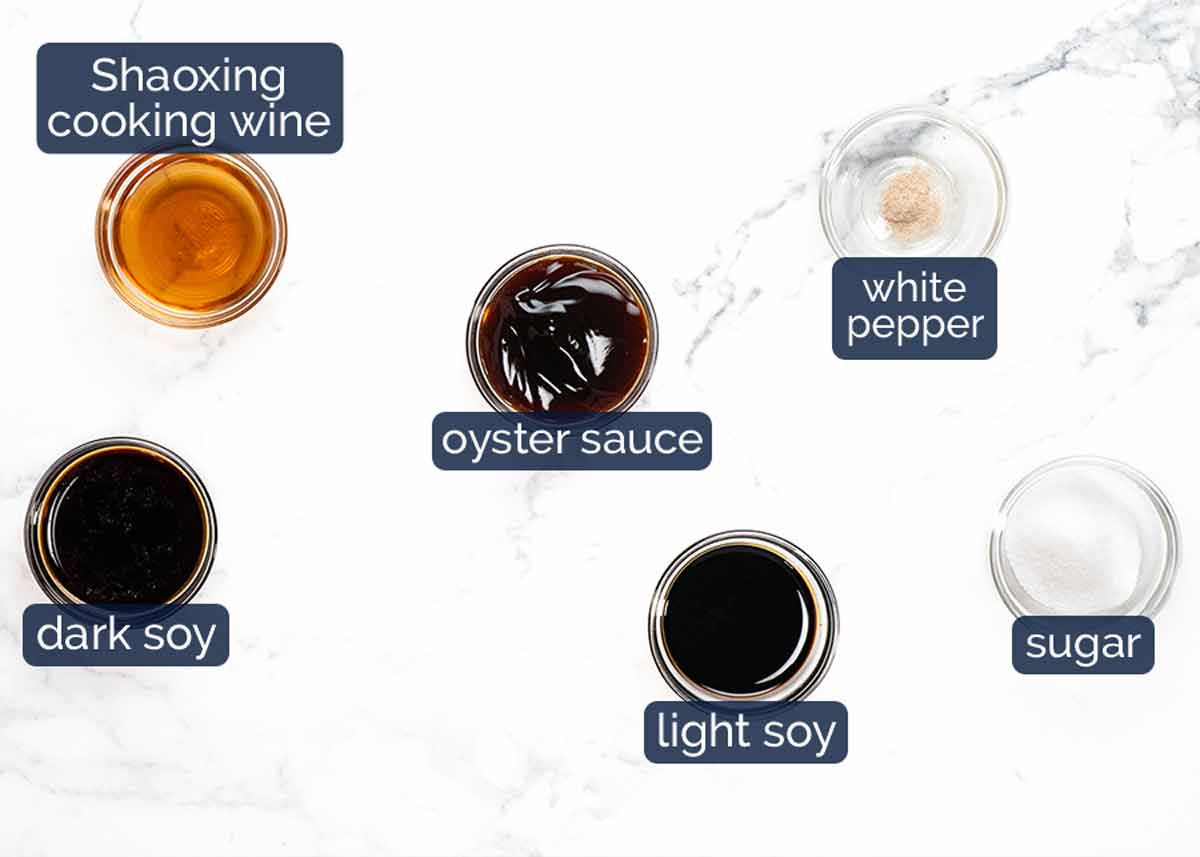
Soy sauces – We’re using both light and dark soy sauce in this recipe. What’s the difference? Dark soy stains the noodles a lovely warm mahogany colour as well as adding soy flavour. Light soy sauce provides the salt without overwhelming with soy flavour, and does not stain the rice.
Substitutions -You can use only light soy sauce or just an all-purpose soy sauce (ie bottle just labelled “soy sauce” without “light” or “dark” in front of it) instead of dark soy sauce. But you cannot use only dark soy sauce as the flavour is too strong! More on different types of soy sauces here.
Oyster sauce – A load of flavour, all in one sauce! It’s sweet and savoury and adds a neat flavour shortcut in dishes. Makes a regular appearance in Asian dishes, from Pad See Ew to Asian Glazed Salmon to Honey Pepper Beef to Supreme Soy Noodles. And Steamed Asian Greens with Oyster Sauce!
Vegetarian oyster sauce is available these days, at Asian stores and some large grocery stores (Australia – there’s Ayam vegetarian oyster sauce at Woolies). Otherwise, hoisin is a good alternative. Slightly different flavour profile (hint of Chinese five spice) but similar savoury / sweetness.
Chinese cooking wine (Shaoxing wine) is an essential ingredient for making truly “restaurant tasting” Chinese dishes. Without it, the dish will be lacking something. Substitute with Mirin, cooking sake or dry sherry.
Non alcoholic sub – sub both the cooking wine and water with low sodium chicken broth/stock.
Cornflour / cornstarch (left out of photo – oops!) – For thickening the sauce so it clings to the noodles. It also makes the sauce lovely and glossy.
White pepper and sugar – For seasoning.
How to make Beef Chow Mein
Be sure to cook the beef well once you add the sauce to get it really nicely caramelised, for a free flavour boost!
1. Sauce & thickener
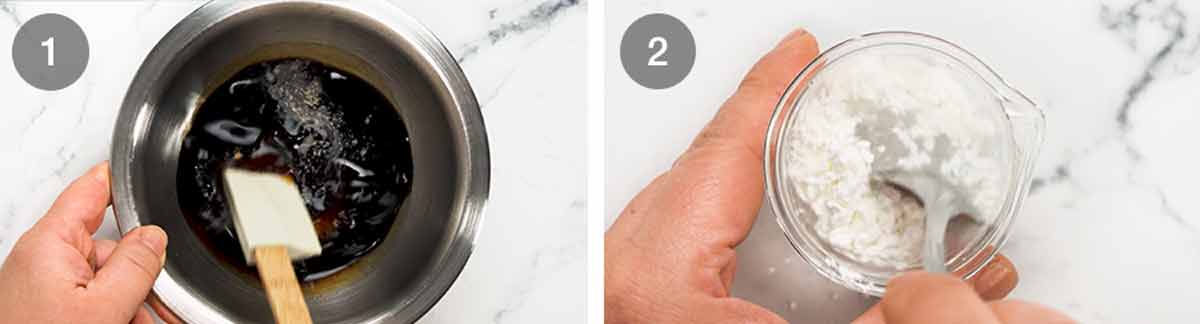
Sauce – Mix the soy sauces, oyster sauce, Chinese cooking wine, sugar and pepper in a small bowl. We’re going to use some to flavour the beef, then we will mix the rest with the sauce thickener (next step) to make the noodle sauce.
Sauce thickener (cornflour slurry) – Mix the cornflour / cornstarch and water in a separate small bowl. This is what thickens the sauce so it coats the noodles, as well as making it shiny and glossy.
2. Making the stir fried noodles

Prepare the noodles per the packet directions then drain. I usually get the water boiling while I’m prepping the vegetables then cook the noodles when I start cooking. The chow mein noodles I get just call for soaking in hot water for 3 minutes. Some brands need to be boiled.
Caramelise beef – Using a large non-stick pan, cook the garlic first to flavour the oil. Then cook the beef, breaking it up as you go, until you can no longer see raw beef.
Then add the white part of the green onions and 1 1/2 tablespoons of the Sauce. We add the white part of the green onions first as it takes longer than the green part. Cook for another 2 minutes to get the beef nicely caramelised.
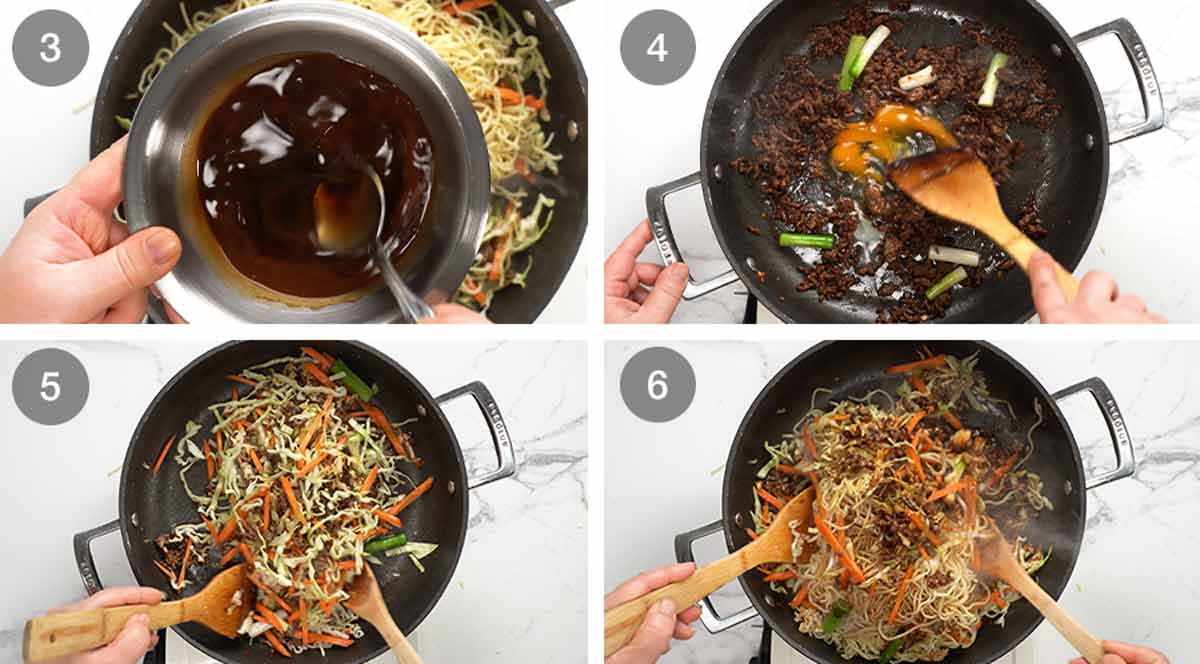
Finish sauce – Meanwhile, mix the cornflour slurry into the remaining sauce.
Scramble egg – Add the egg into the pan then mix it through the beef, it will sort of scramble into the mixture. This is what makes beef stick to the noodles better!
Keep cooking! – When the egg is mostly cooked, add the carrot and cabbage. Cook for 1 minute until cabbage starts to wilt.
Sauce & noodles – Give the sauce a quick mix. Add the bean sprouts, noodles and sauce into the pan. Toss well for 1 minute or until sauce is dispersed through the noodles. Add green part of green onions. Toss for another 1 minute, then serve!
So there you go! Stir fried noodles for dinner, relatively low effort and quick to make. Great way to get a noodle fix, very economical, and highly versatile – switch out the vegetables and proteins with what you’ve got or what you love.
Enjoy! – Nagi x
Watch how to make it
Beef Chow Mein – great beef mince noodle recipe!
Ingredients
Chow Mein:
- 200g/ 7 oz chow mein noodles , or other thin yellow egg noodles or 3 ramen cakes (Note 1)
- 1 1/2 tbsp canola oil
- 2 garlic cloves , finely minced
- 200g/ 7 oz beef mince / ground beef (any fat %)
- 3 green onion stems , cut into 5cm/2″ lengths, white and green parts separated
- 1 egg
- 2 cups green cabbage , finely sliced (or Chinese cabbage)
- 1 carrot , peeled, cut into thin batons
- 1 heaped cups bean sprouts (~ 75g / 2 1/2 oz) (Note 5 – storage tip)
Chow Mein Sauce:
- 1 1/2 tbsp light soy sauce or all-purpose soy sauce (Note 2)
- 1 1/2 tsp dark soy sauce (Note 2)
- 1 1/2 tbsp oyster sauce (Note 3)
- 1 1/2 tbsp Chinese cooking wine (Shaoxing) (Note 4)
- 1 1/2 tsp white sugar
- Pinch white pepper
Sauce thickener:
- 1 1/2 tsp cornflour / cornstarch
- 3 tbsp water
Instructions
- Sauce – Mix ingredients in a small bowl then set aside. Some is used to flavour the beef, then the rest for the noodles.
- Sauce thickener (cornflour slurry) – Mix the cornflour / cornstarch and water in a separate small bowl.
- Prepare noodles per packet directions then drain.
- Cook beef – Heat the oil in a large non-stick pan over high heat. Cook garlic for 10 seconds, then add the beef and cook until you can no longer see pink. Add 1 1/2 tablespoons of the Sauce and the white part of the green onions. Cook for another 2 minutes to get the beef nicely caramelised.
- Finish sauce – Mix the cornflour slurry into the remaining sauce.
- Egg – Add the egg into the pan then mix it through the beef, it will sort of scramble. Egg makes the beef stick to the noodles better!
- Cabbage & carrot – When the egg is mostly cooked, add the carrot and cabbage. Cook for 1 minute until cabbage starts to wilt.
- Sauce & noodles – Give the sauce a quick mix. Add the bean sprouts, noodles and sauce into the pan. Toss well for 1 minute or until sauce is dispersed through the noodles. Add green part of green onions. Toss for another 1 minute.
- Serve – Divide between bowls and serve!
Notes

Nutrition
My noodle life
Life of Dozer
Visited our old stomping ground on the weekend – Bayview dog beach! Plenty of Dozer smiles that morning. 🥰

The post Beef chow mein – great mince/ground beef recipe! appeared first on RecipeTin Eats.
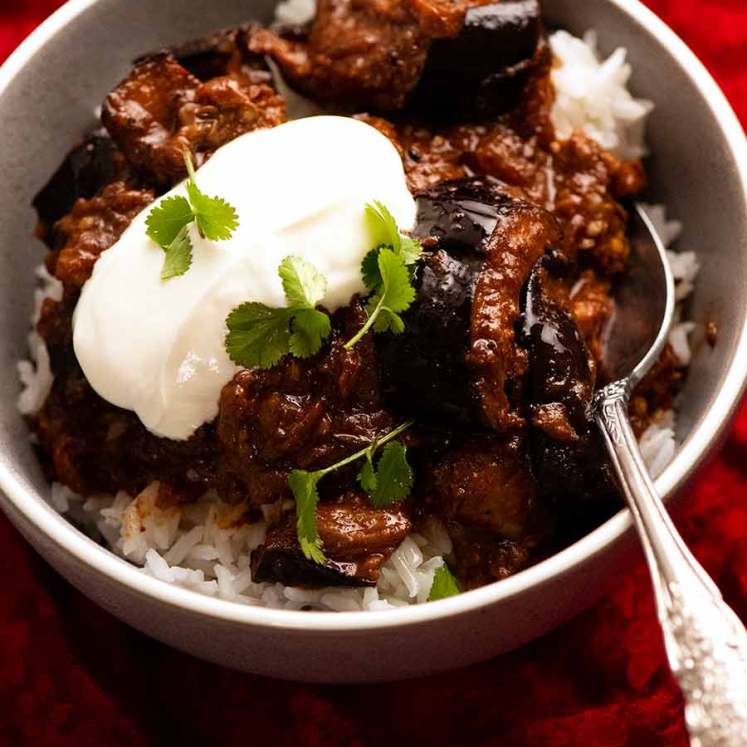
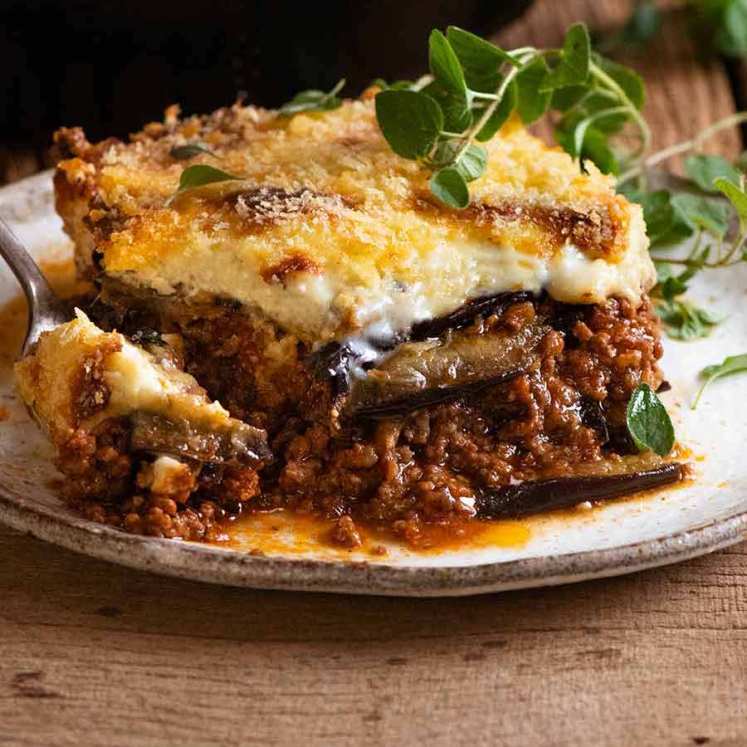
]]> Try this irresistible, simple recipe for stuffed eggplant: oven-roasted eggplant halves topped with Moroccan spiced lamb or beef. Low-cal, low-carb, low effort and utterly delicious! Moroccan stuffed eggplant You’ll often hear me declaring quite passionately that I think eggplant is one of the most underrated vegetables around. They’re cheap. They’re meaty. And they’re fabulously versatile,... Get the Recipe
The post Easy Moroccan Stuffed Eggplant (beef or lamb) appeared first on RecipeTin Eats.
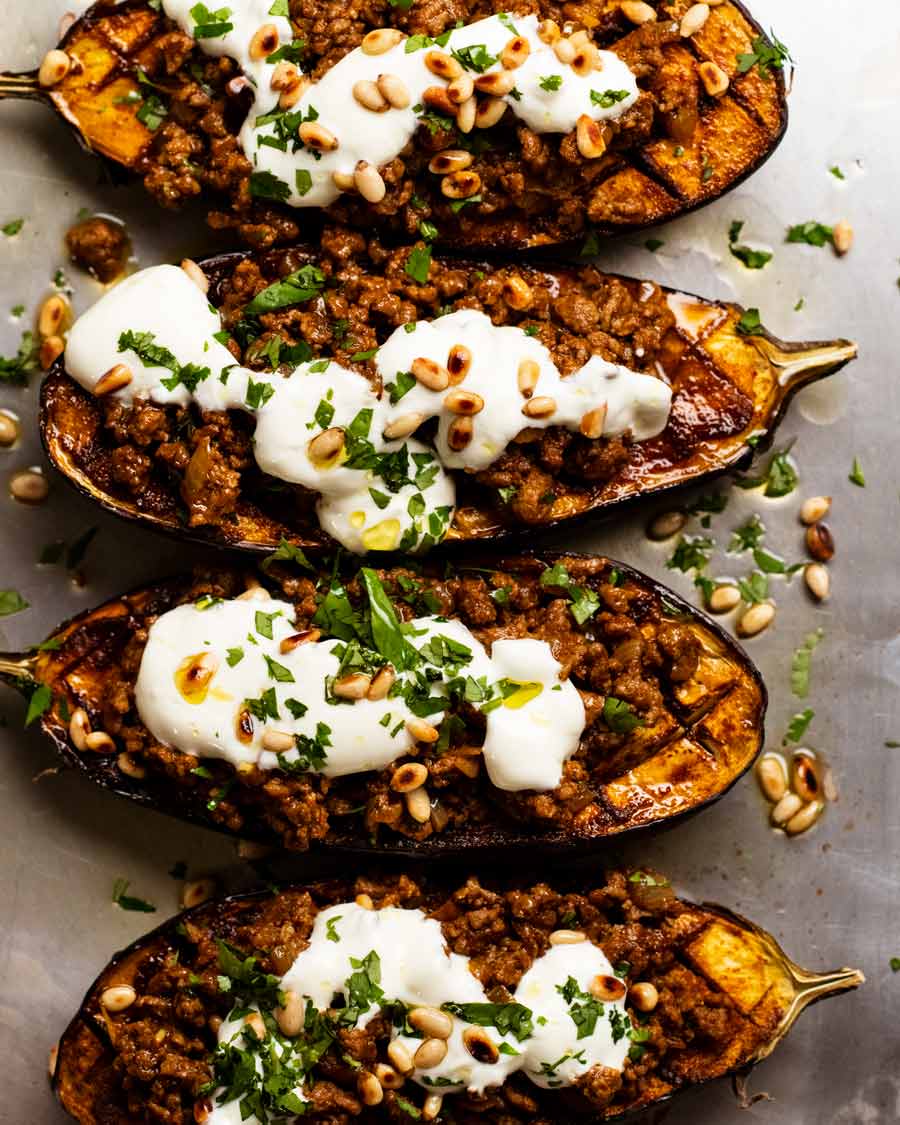
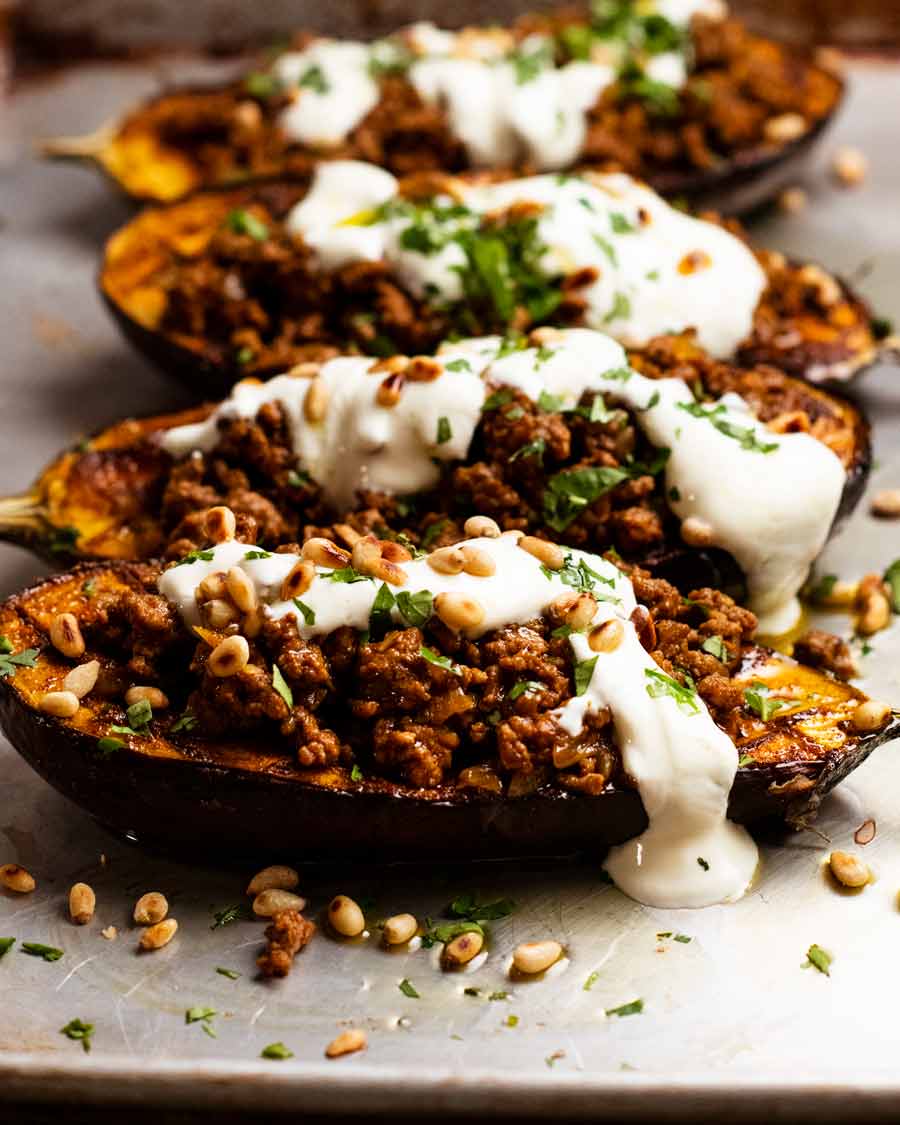
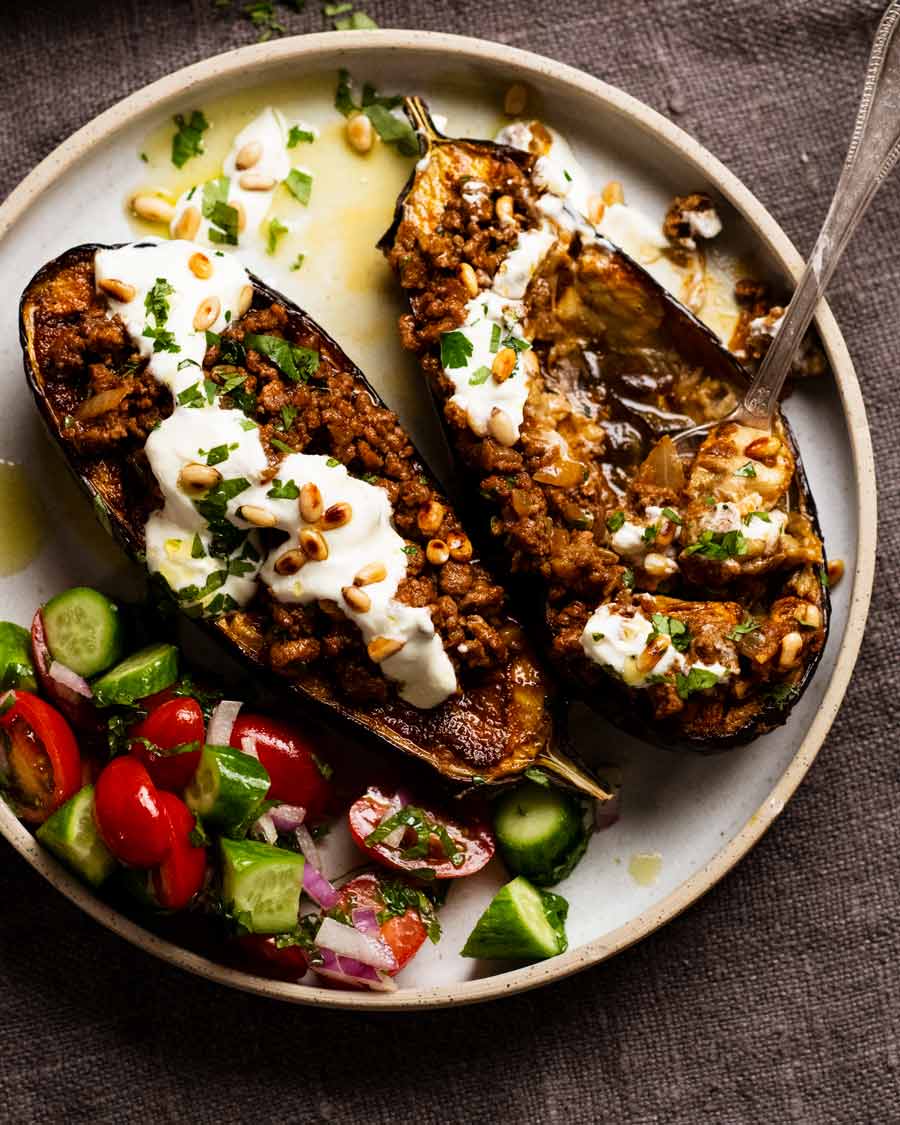
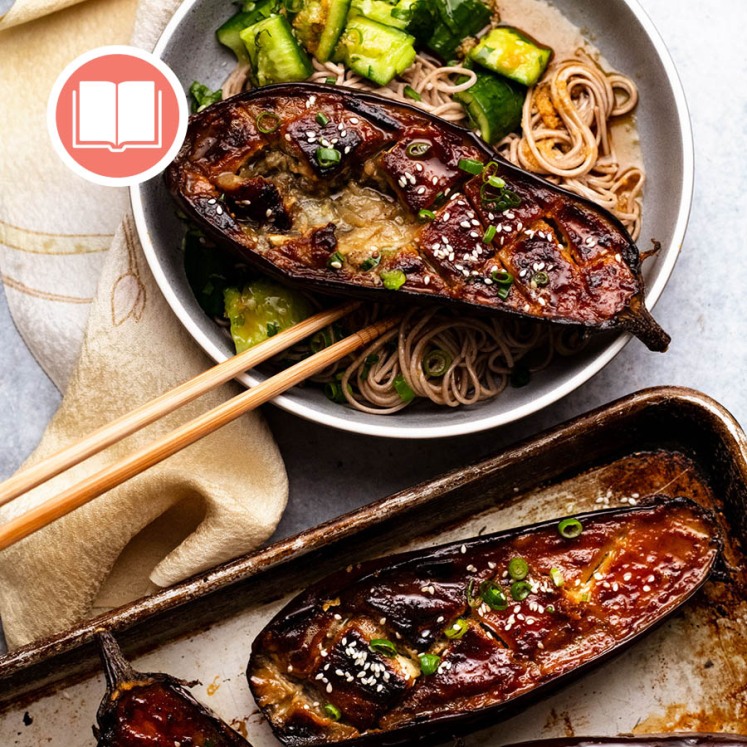
]]>Try this irresistible, simple recipe for stuffed eggplant: oven-roasted eggplant halves topped with Moroccan spiced lamb or beef. Low-cal, low-carb, low effort and utterly delicious!
Moroccan stuffed eggplant
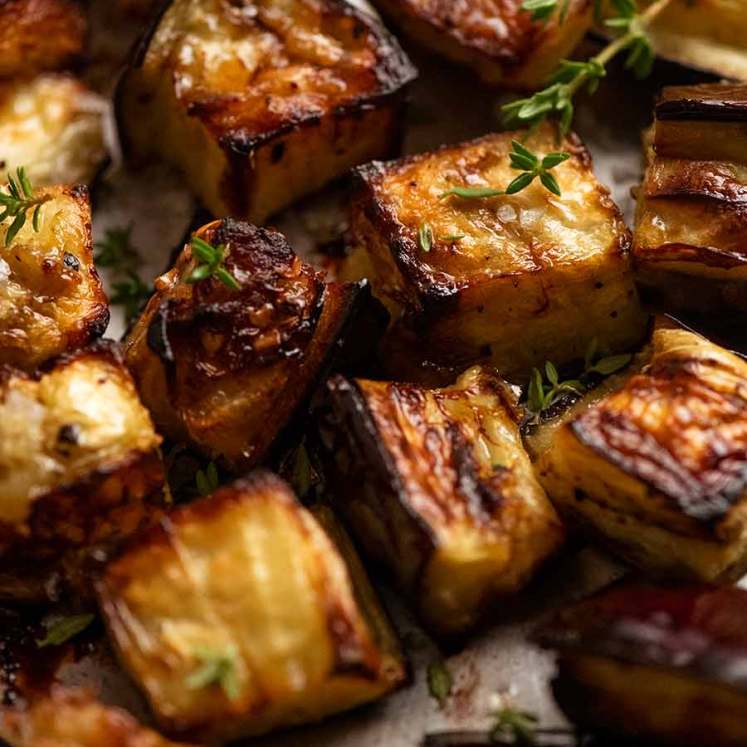
You’ll often hear me declaring quite passionately that I think eggplant is one of the most underrated vegetables around. They’re cheap. They’re meaty. And they’re fabulously versatile, used in cuisines worldwide like Asian, Italian, Greek and Indian, prepared through various cooking methods including frying, steaming, roasting and simmering.
Today, we’re smearing, roasting and stuffing. Well, topping, not scooping-and-stuffing, in a manner that gives it a semi-stuffed vibe. Think of this as a mid-week take on traditional stuffed eggplant dishes you find in Arabic cuisine that involves hollowing out eggplants, stuffing with rice, meat, herbs and nuts, often baked in a tomato sauce. Sounds magnificent, doesn’t it? And it is. but there’s a lot more pots and pans involved! We’re going simple today. You can make this tonight, after work!!
Nice close up of said soft juicy eggplant!
Ingredients in Moroccan stuffed eggplant
The base flavouring for this Moroccan stuffed eggplant is a homemade Chermoula spice mix which does double duty as the spice paste for the eggplant as well as flavouring the meat filling.
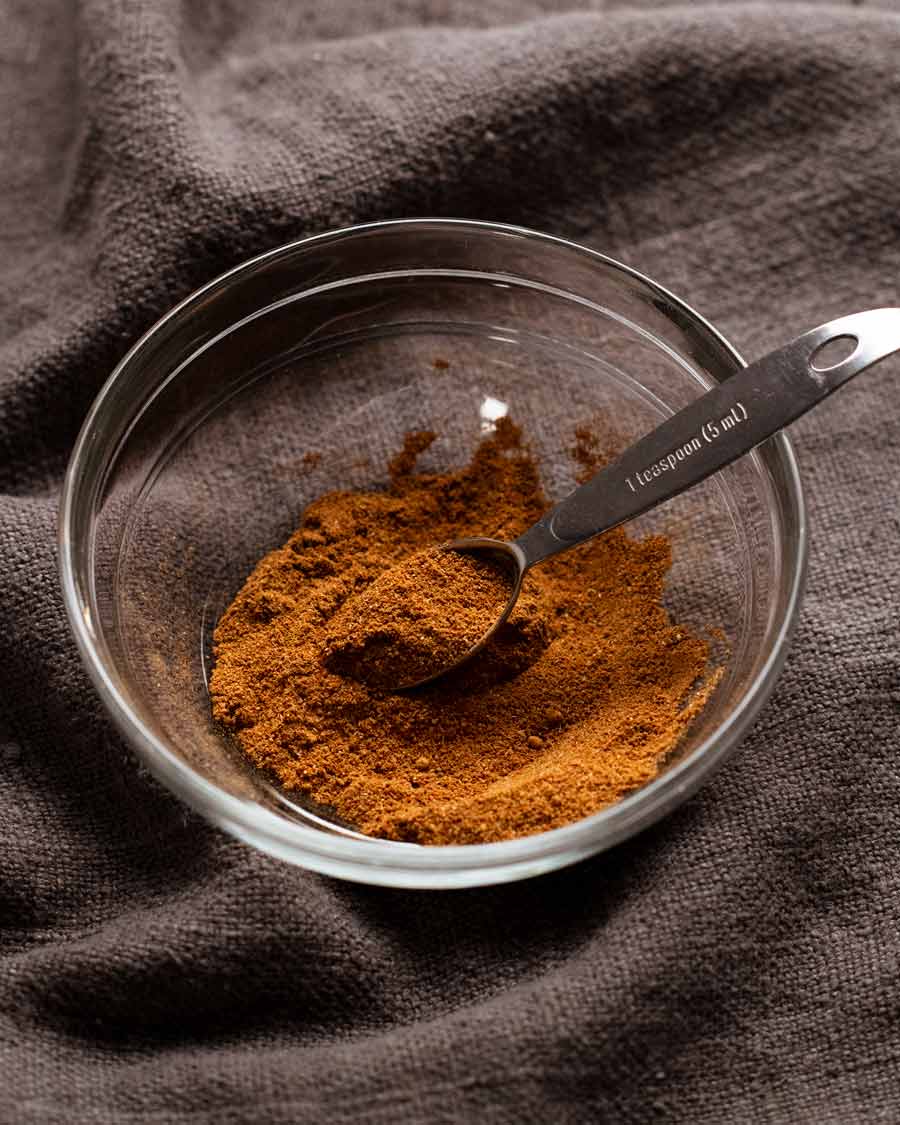
Chermoula spice mix
Chermoula is a North African spice mix that traditionally is a marinade or sauce containing fresh coriander, garlic and spices. Sometimes you can also find it in a dry spice mix form. We’re using the dry blend today for our purposes.
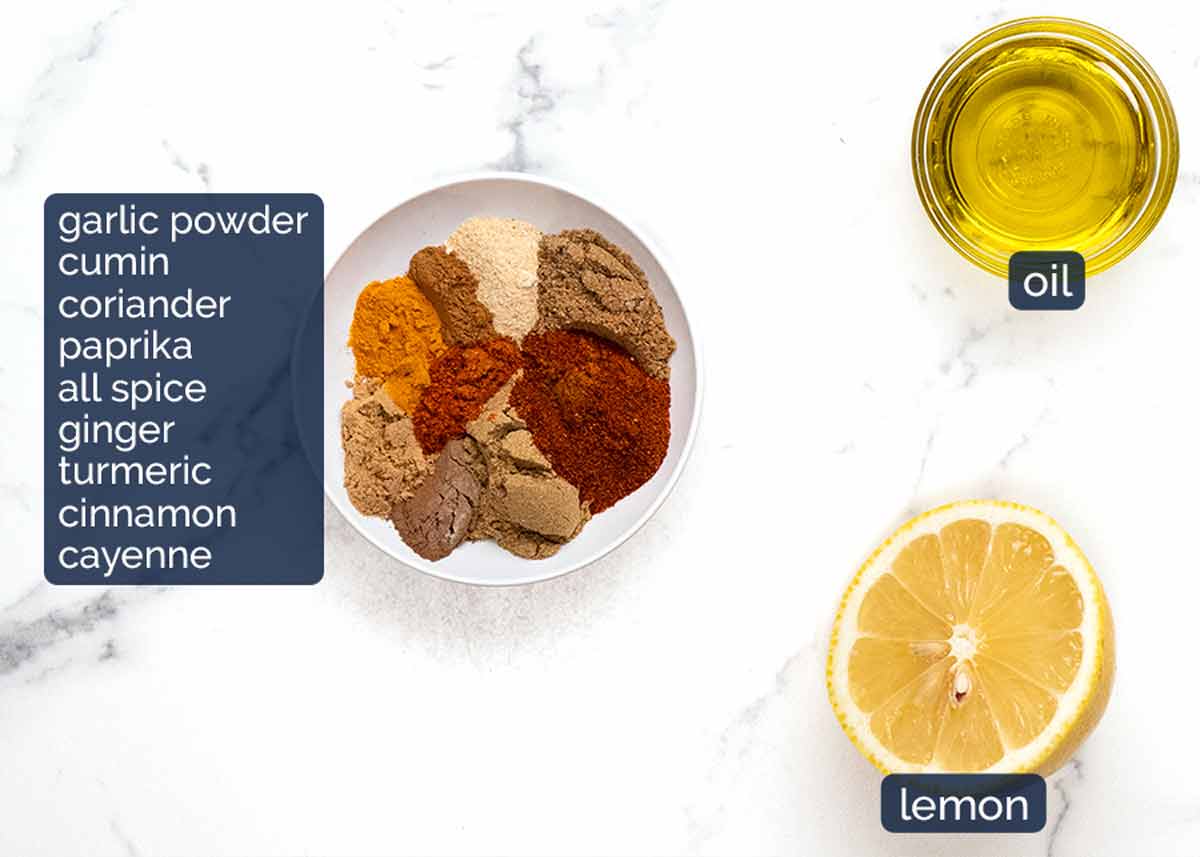
The spices – The majority of the spices are pantry staples, but don’t make a special trip out if you’re missing one or two…or even three! There’s enough in the blend that you can substitute with something else – suggestions are in the recipe notes.
Olive oil and lemon juice – These are used to make the paste. I like to use lemon juice to add a bit of tang as well as cutting down on the oil required to make a smear-able paste.
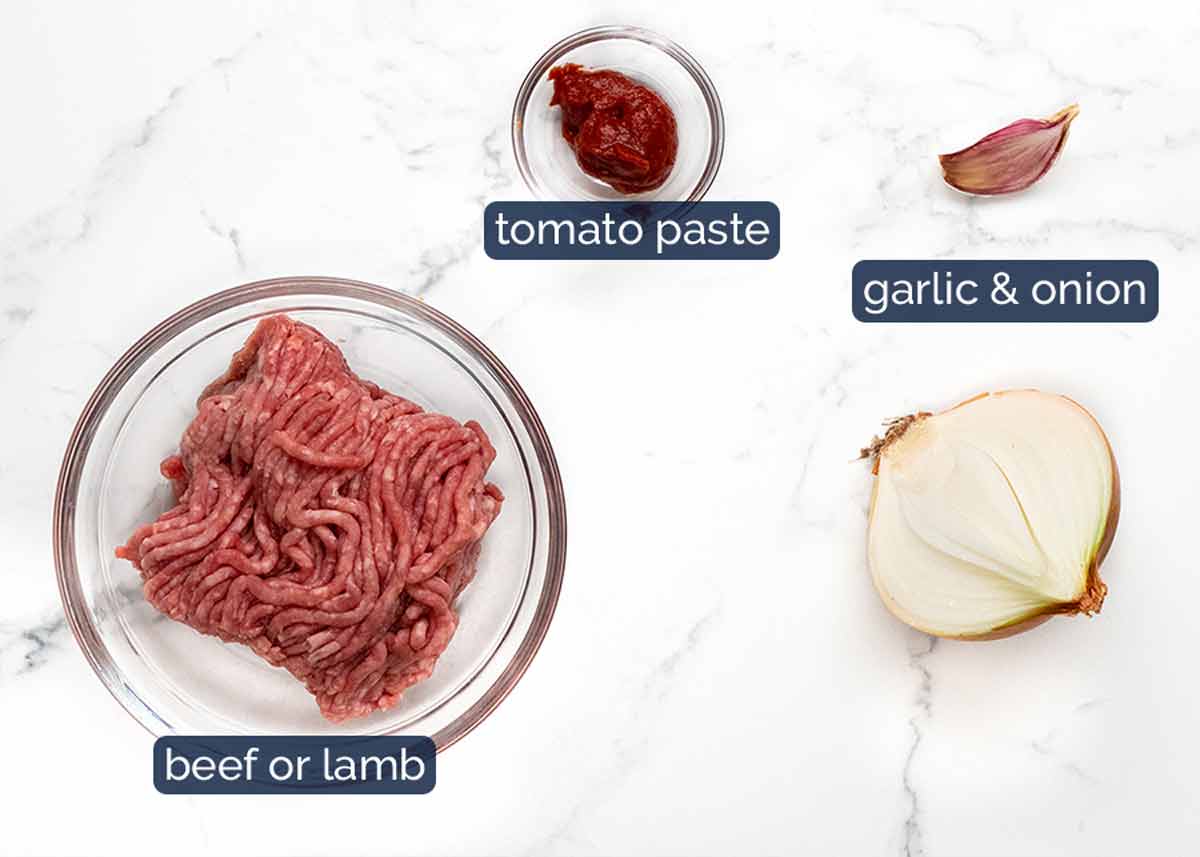
The meat filling (lamb or beef)
Here’s what you need to make the meat filling. You can use lamb or beef, though if I had my pick I’d choose lamb as it’s a classic pairing with flavours from the Arab world.
3 teaspoons of the Chermoula spice blend is used to flavour the filling. In addition to this, we have garlic and onion for aromatics, and a little tomato paste to bind the filling together.
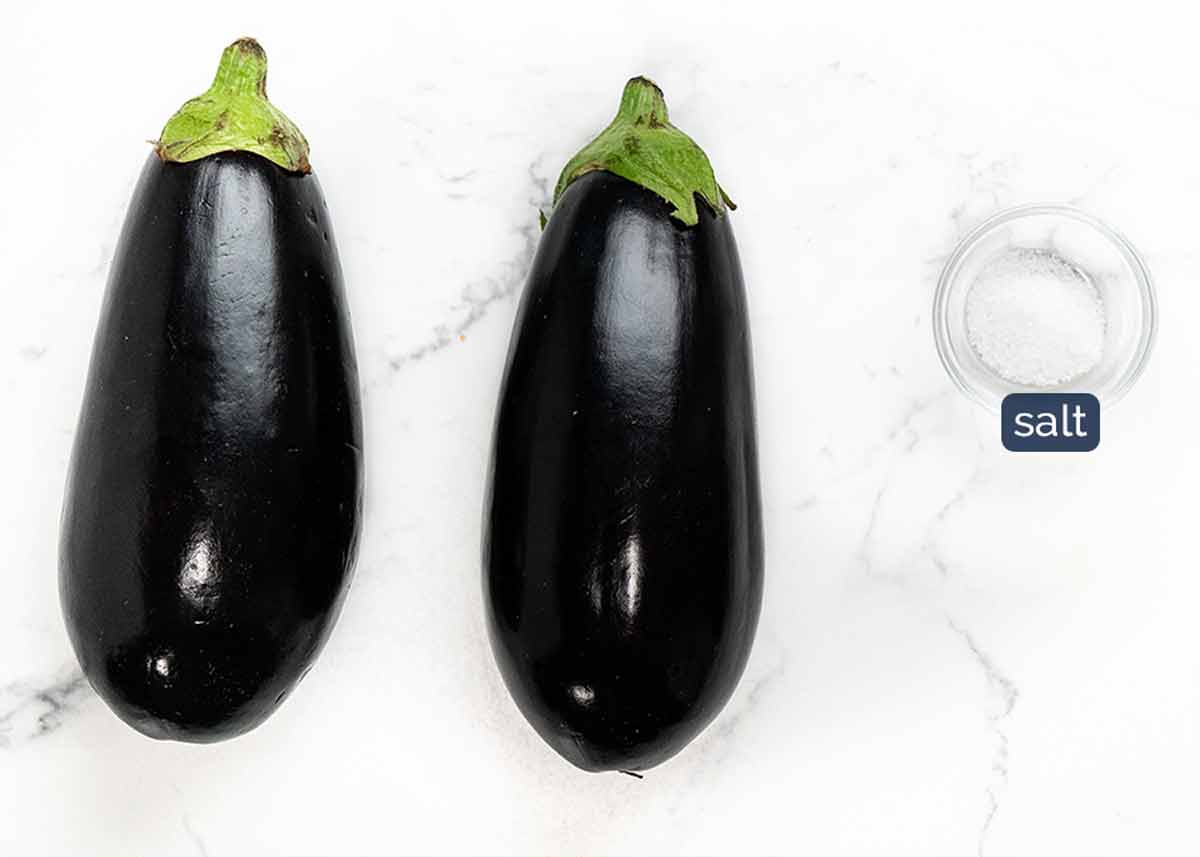
The eggplant
Choose eggplants around 250g/8oz and 17cm/7″ long. Don’t worry about exact size – adjust toppings accordingly. If you end up with larger eggplants, the topping layer might be slightly thinner, but the dish will still be packed with flavor.
Salt helps remove moisture from eggplants. More on this below!
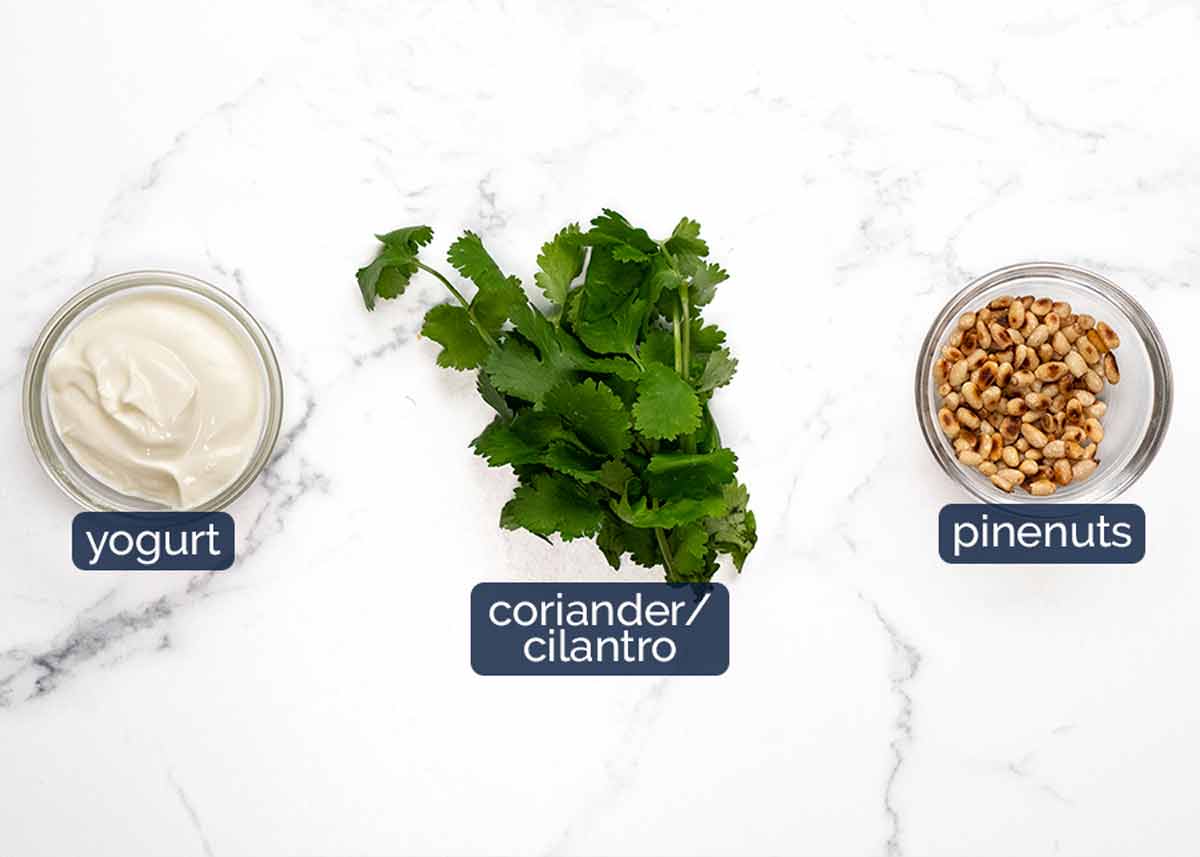
Toppings
And lastly, the toppings! It really finishes this dish so I urge you to use them. The pine nuts are a great finishing touch, though other nuts will make an adequate substitute (almonds, macadamia, walnuts, or seeds).
If you’re anti-coriander/cilantro, switch with parsley!
How to make Moroccan Stuffed Eggplant
As mentioned above, I call it stuffed because describing it as a “topped” eggplant just doesn’t seem to capture the essence of this dish. 😂 But actually, it’s not properly stuffed – which means no scooping necessary, which means it’s easier to make. Win!
Sweating the eggplant (recommended)
Sweating the eggplant to remove excess water is a recommended but not essential step. It seasons the flesh as well as drawing out excess water that otherwise pools in the eggplant which dilutes flavour when you’re eating it.
But you can mostly get around this problem by simply cutting slits in the skin to let the water escape as it roasts. So don’t sweat it if you don’t have time to sweat it! *Sorry, I couldn’t resist!*
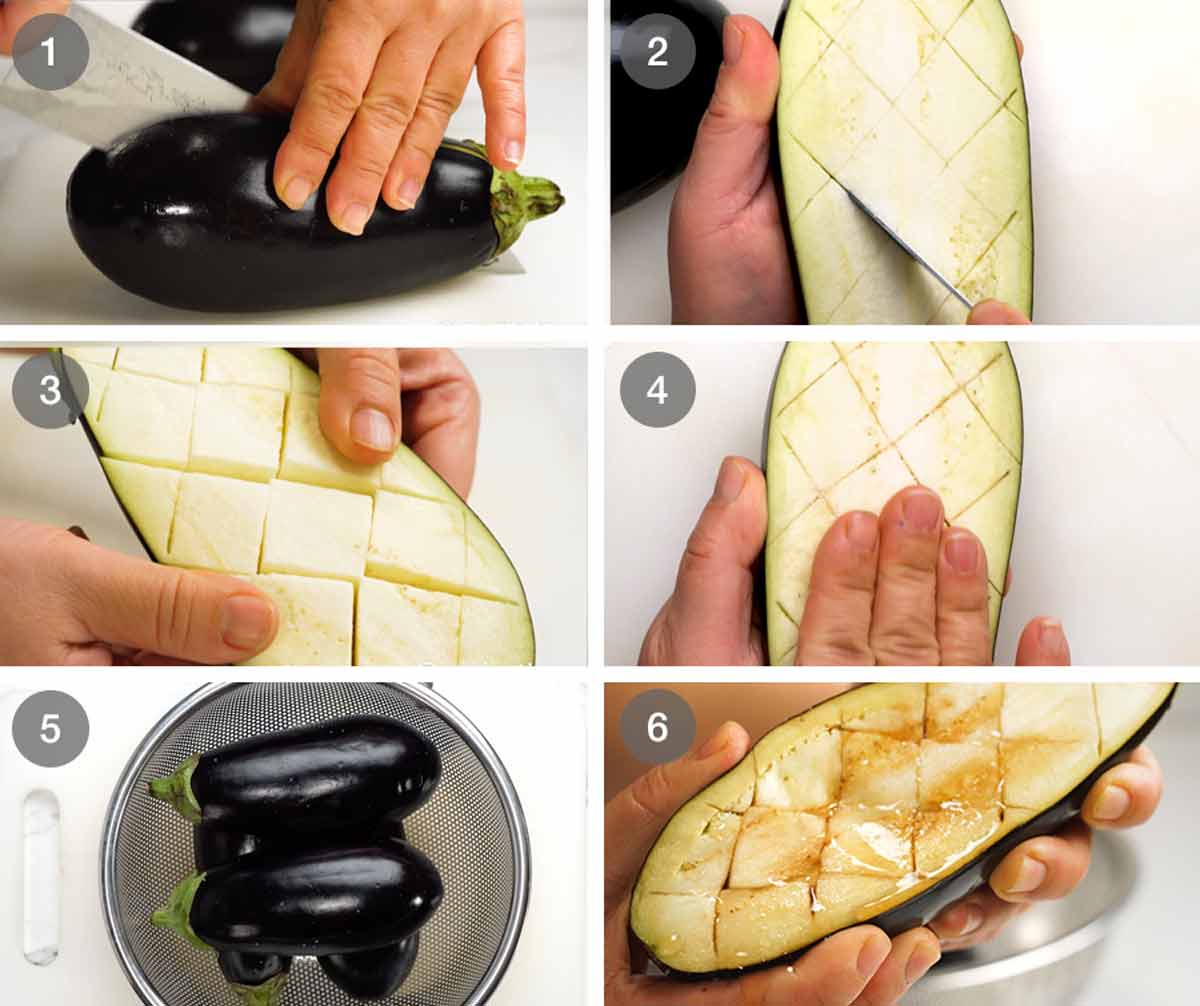
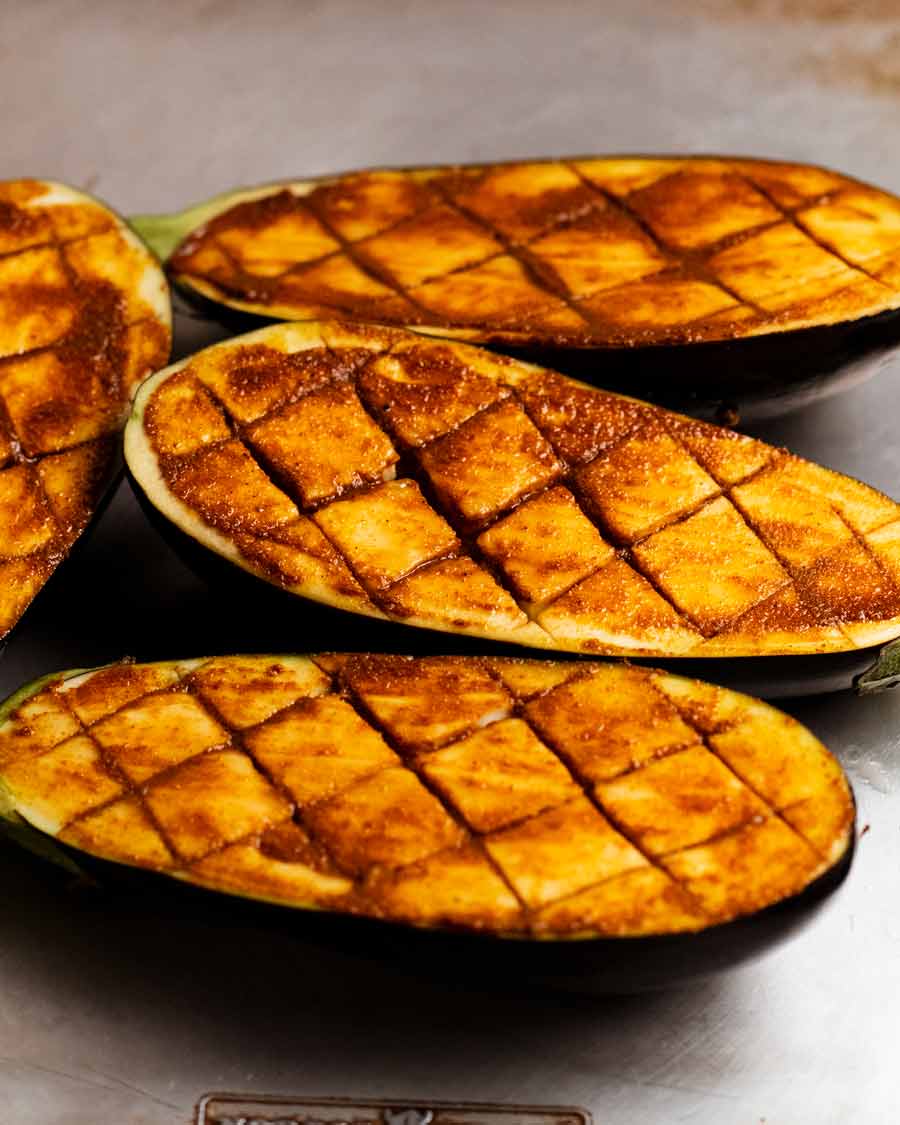
Cut the eggplant in half lengthwise. Keep the cap/stem intact and cut through it, it helps hold the eggplant together once roasted and soft.
Diamonds – Using a small sharp knife, cut 2.5cm/1″ diamonds into the flesh, cutting down as far as you are comfortable without piercing the flesh.
The said diamonds!
Salt – Sprinkle the surface with salt and rub it in. It’s good to get it into the slits but even if you just rub the surface, the salt will make it’s way into the slits.
Sweat for 30 minutes. I put the eggplant upside down in a colander to allow the water to drip out.
Squeeze like sponge to remove the excess water then pat the surface dry.
Making the “stuffed” eggplant
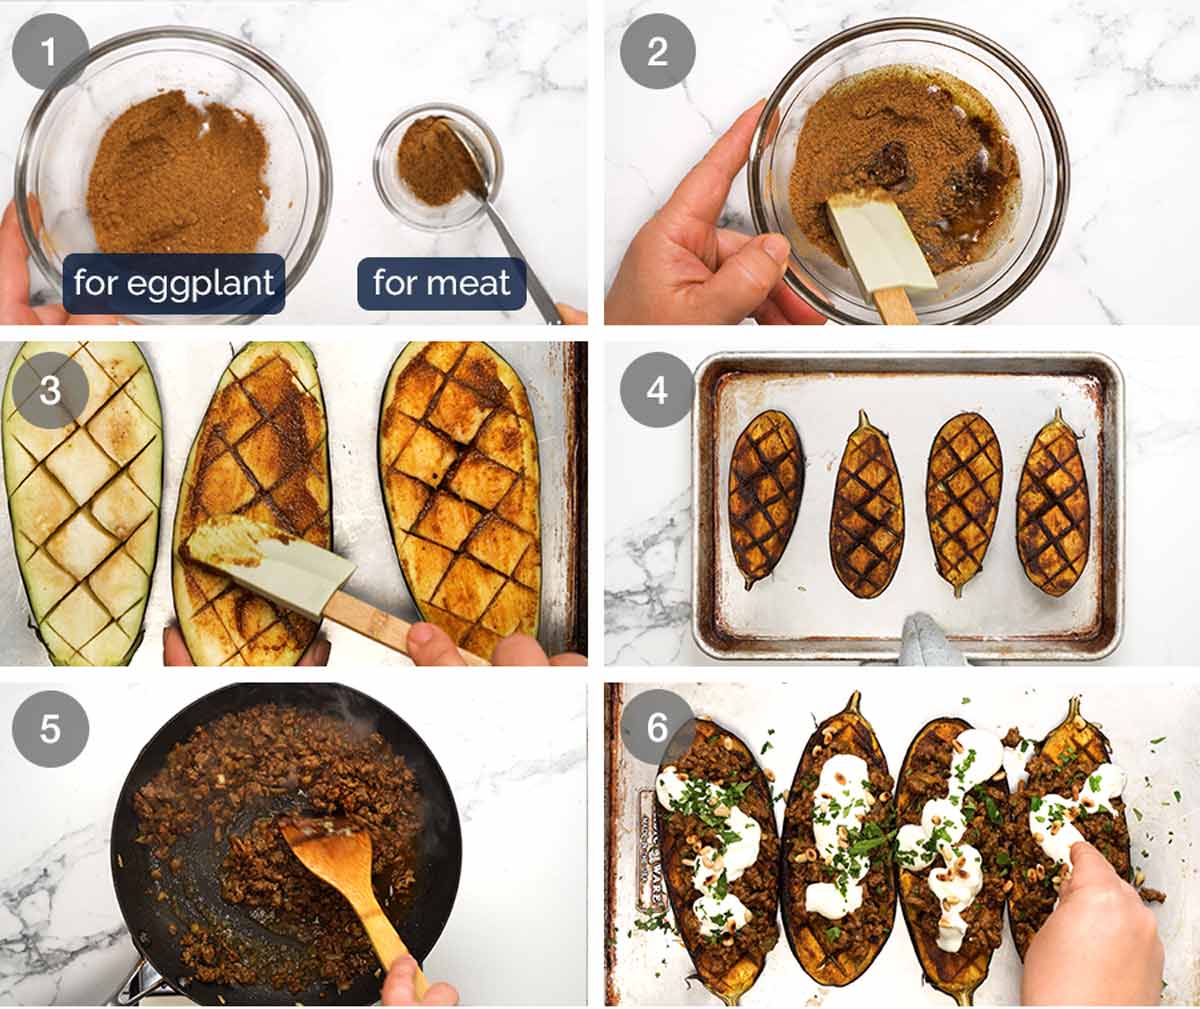
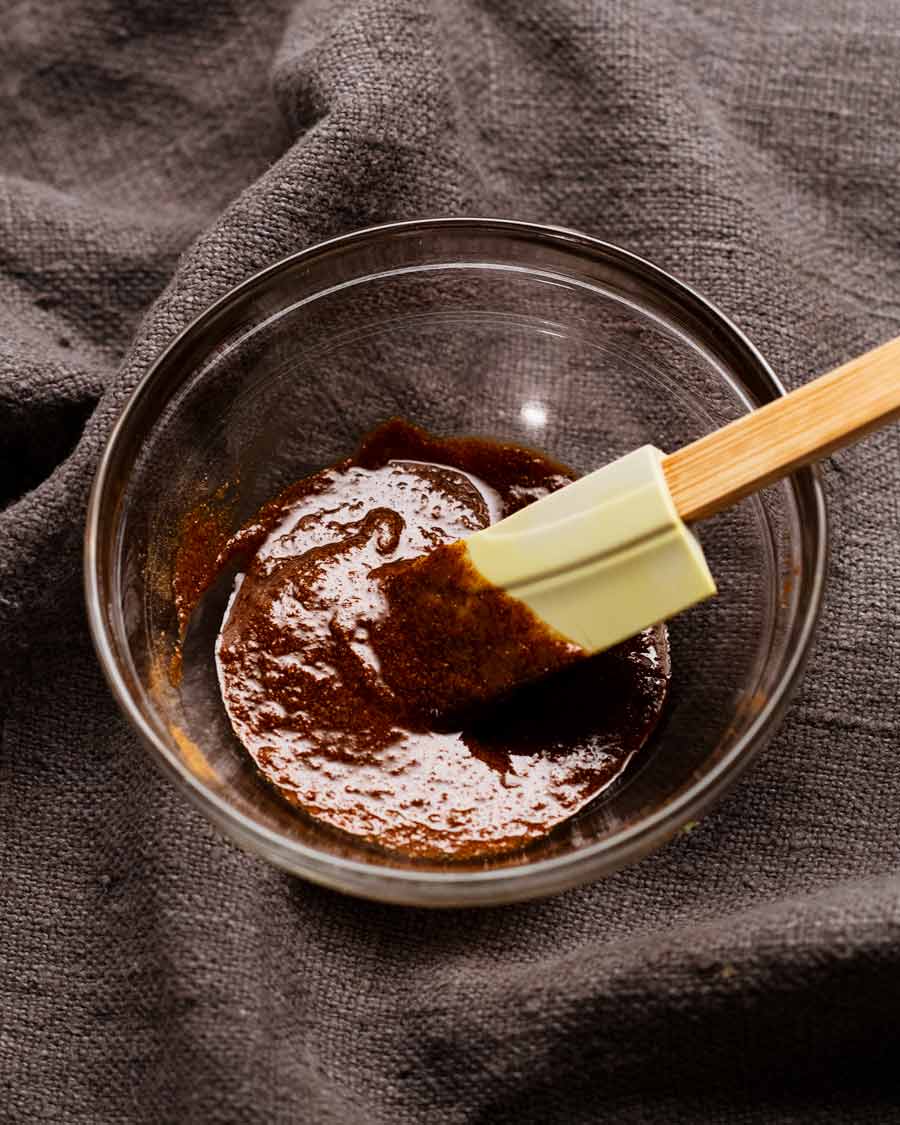
Mix the Chermoula spice blend in a bowl. Measure out 3 teaspoons and set aside for the meat.
Paste – Add olive oil and lemon juice into the remaining chermoula and mix to form a paste.
Smear the paste onto the surface of the eggplant.
Roast for 45 minutes at 180°C/350°F (160°C fan) or until the eggplant is softened. Sometimes it takes longer – don’t forget to check the edges.
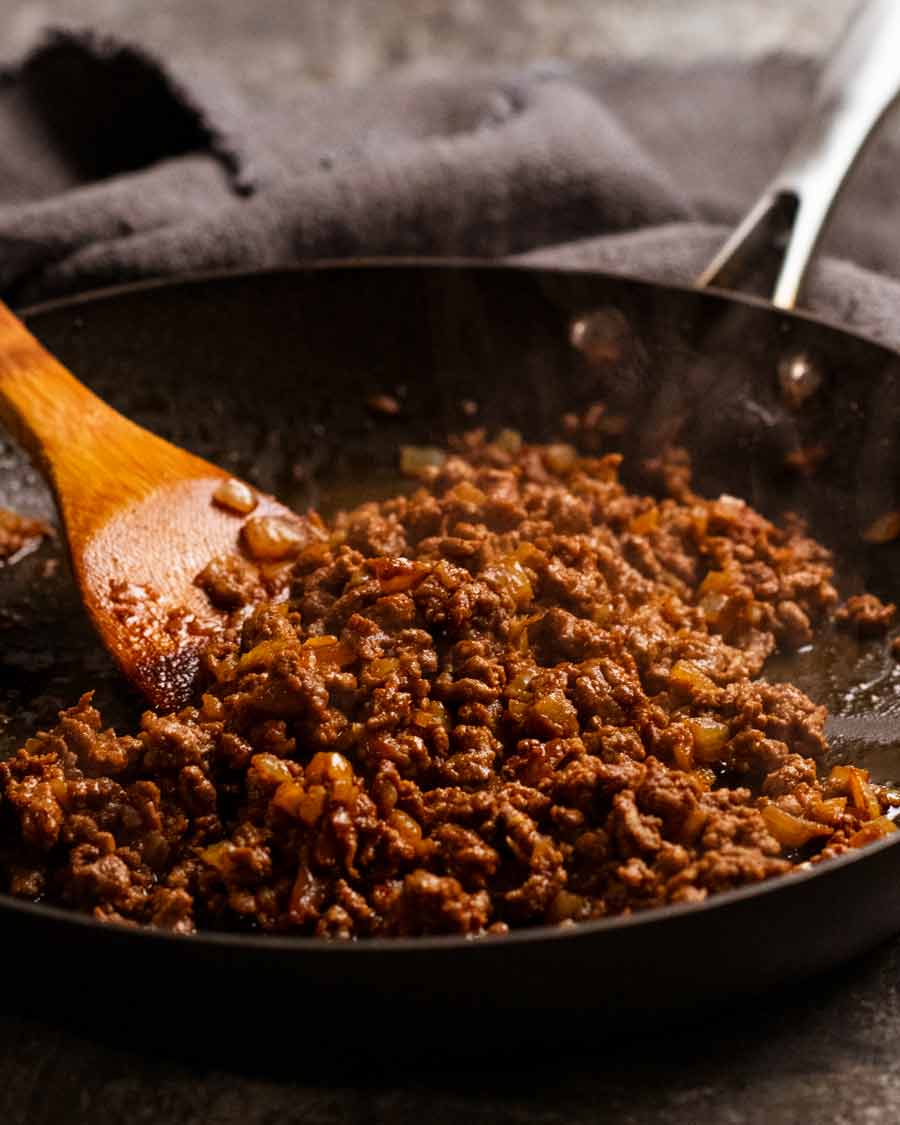
Spiced meat – A quick cook! Sauté the garlic and onion, then cook the lamb with the reserved Chermoula spice blend. Finally, add the tomato paste and water to make the filling “juicy” (rather than dry and crumbly).
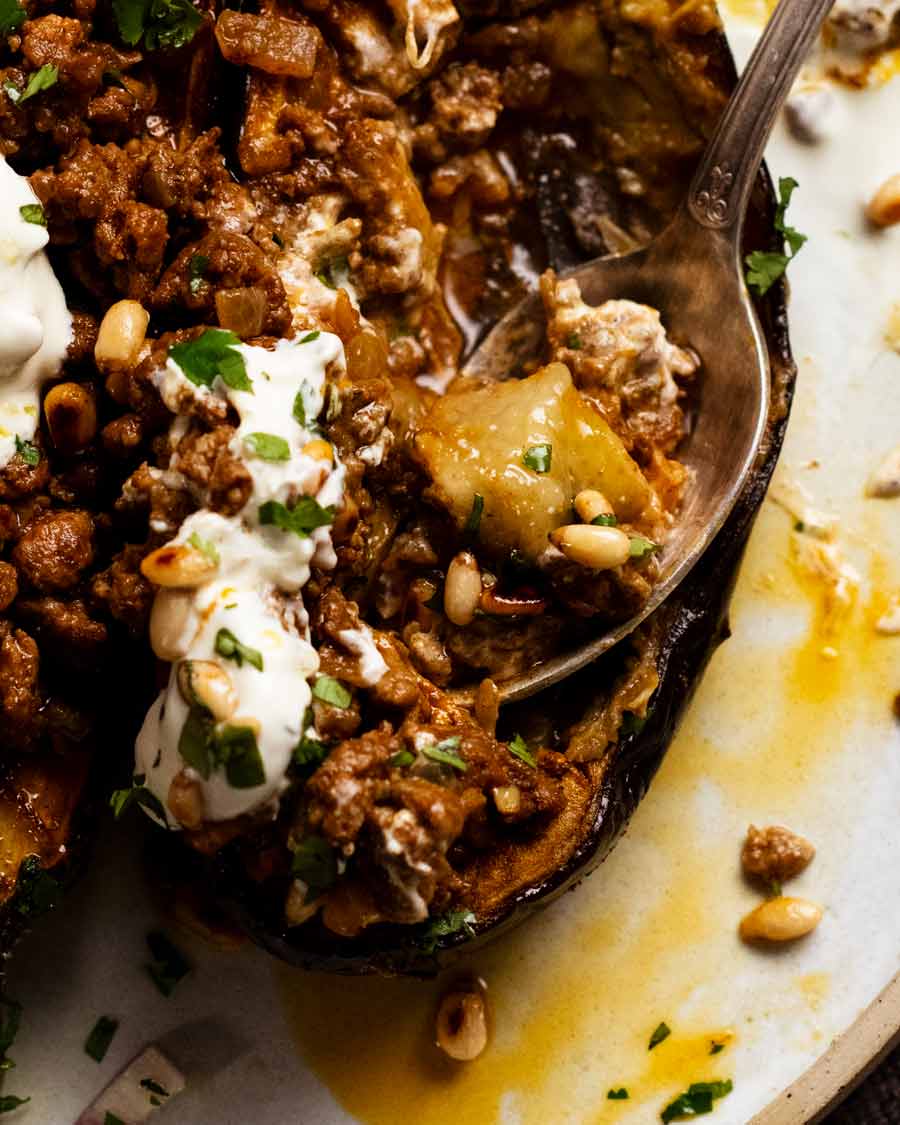
Assemble – Top the roasted eggplant with the lamb filling. Dollop on yogurt, sprinkle with pine nuts and coriander then dig in!
Matters of serving
Servings
This recipe is designed to serve:
2 people as a generous dinner with a small side salad;
4 as a meal with a starch (flatbread, couscous) and a substantial side (like Honey Cinnamon Pumpkin Lentil Salad, roast veg, chickpea salad); or
4 people as a generous starter.
Low carb, low calorie!
For the eggplant alone, it’s a mere 450 calories for a whole eggplant (ie 2 halves) with only 22 grams of carbs. To be honest, a serving of the eggplant alone makes for a satisfying meal – you have protein and vegetables covered! Though I do like to add something fresh on the side, even if it’s just some plain fresh cucumber and tomato.
So, it’s low calorie, low carb, simple to make and a something different to make with beef mince rather than the usual Spag Bol. What do you think?? Feel like giving this a go? I HOPE SO! – Nagi x
Watch how to make it
Easy Moroccan Stuffed Eggplant (beef or lamb)
Ingredients
Eggplant
- 2 x 250g/8oz eggplants (aubergines), ~17cm/7" long (Note 1)
- 3/4 tsp cooking salt / kosher salt
- 1 tbsp extra virgin olive oil
- 1 tbsp lemon juice (or more oil)
Chermoula spice mix (Note 2)
- 1 1/2 tsp EACH coriander, paprika
- 1 tsp cumin
- 3/4 tsp all spice powder
- 1/2 tsp EACH garlic powder, ginger, turmeric powder
- 1/4 tsp cinnamon
- 1/4 tsp cayenne pepper
Spiced beef or Lamb topping
- 1 tbsp olive oil
- 1 garlic clove , finely minced
- 1/2 onion , finely chopped
- 250g / 8oz beef or lamb mince , lean if you can (chicken, turkey, pork also ok)
- 1/2 tsp cooking/kosher salt
- 2 tsp tomato paste (Note 3)
- 1/4 cup water
To Serve
- Yoghurt , plain
- 2 tbsp coriander/cilantro leaves , roughly chopped (sub parsley)
- 2 tbsp pinenuts , toasted (Note 4)
Instructions
- Preheat oven to 180°C/350°F (160°C fan).
- Sweat eggplants (recommended, see Note 5 to skip) – Cut eggplants in half then score with 2.5cm / 1" diamonds. Rub surface with salt, getting some into the slits. Place face down in a colander and set aside for 30 minutes. Gently squeeze like a sponge to remove excess water, pat surface dry.
- Mix Chermoula spice mix ingredients in a bowl. Remove 3 teaspoons for the meat and set aside. Add olive oil and lemon juice into the remaining spice mix and mix into a paste.
- Roast eggplant – Place eggplant on baking tray. Slather spice mix onto the surface. Roast for 45 minutes until softened.
- Spiced topping – Heat oil in a non stick skillet over medium high heat. Cook onion and garlic for 1 minute. Turn heat up to high, add lamb/beef and cook, breaking it up as you go, until you no longer see red. Add reserved spices and salt, then cook for a further 1 minute. Add tomato paste and cook for 1 minute. Stir in water, cook for 1 minute until it's juicy but not watery.
- Assemble – Top eggplant with beef/lamb. Sprinkle over coriander, dollop with yogurt and pine nuts. Finish with an extra drizzle of extra virgin olive oil, if desired!
Notes
- All spice – mixed spice
- Garlic powder – onion powder, or fresh garlic
- Ginger – more garlic
- Turmeric powder – saffron
- Cinnamon – more all spice
Make ahead – Roast the eggplant and meat filling. Fully cool both, uncovered, then put into containers in the fridge. Re-warm both using method of choice (juice up the meat with a splash of water if needed) then assemble!
Leftovers will keep for 3 days in the fridge. Not convinced cooked eggplant will freeze well but the meat will be fine for 3 months!
Nutrition per serving, using lean beef – 2 eggplant halves (i.e. one whole eggplant) per serving. This is a satisfying meal even by itself!Nutrition
Originally published in March 2016. Majority spruced up in 2023 with a better, more streamlined recipe with better flavour, sparkling new photos and a brand new recipe video!
Proof of eggplant fondness
Life of Dozer
Can’t even whiteboard recipe ideas without Mr D hovering around.

The post Easy Moroccan Stuffed Eggplant (beef or lamb) appeared first on RecipeTin Eats.
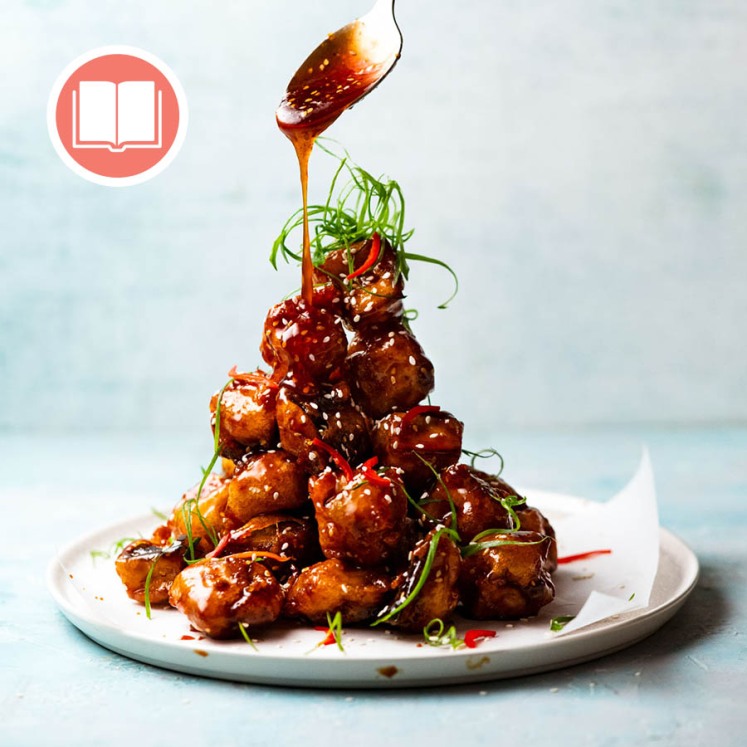
]]> Beautifully spiced Moroccan Lamb Meatballs served with a Mint Yoghurt Sauce. Stuff into pitas, pass them around at a party or pile over pilaf! This is such a great recipe for lamb mince. Lamb loves Middle Eastern spices! Juicy Lamb Meatballs with Moroccan flavours! These Moroccan Lamb Meatballs are inspired by a visit to the... Get the Recipe
The post Moroccan Lamb Meatballs appeared first on RecipeTin Eats.
]]>Beautifully spiced Moroccan Lamb Meatballs served with a Mint Yoghurt Sauce. Stuff into pitas, pass them around at a party or pile over pilaf! This is such a great recipe for lamb mince. Lamb loves Middle Eastern spices!
Juicy Lamb Meatballs with Moroccan flavours!
These Moroccan Lamb Meatballs are inspired by a visit to the Lakemba Night Markets (Sydney) during Ramadan, a holy month for Muslims which involves intensive prayer and fasting from dawn to dusk.
During this period, the main drag of Lakemba transforms at night with food stalls lining the pavements and is a popular place to enjoy iftar, a communal feast to break the fast.

If you love Middle Eastern food, you’ll be in street food heaven. A vibrant, lively mood, the smell of charcoal, the sizzle of BBQ’s, and the most amazing smell of spices that Middle Eastern food wafts through the street!
One of the (ahem – many!) things I’ve enjoyed from these street stalls are spiced lamb meatballs stuffed into pita pockets. So I’ve created my own version using the spice mix from my Middle Eastern Lamb Koftas recipe. Lamb is a protein made for heady Middle Eastern spice flavourings! It pairs so well, and the smell when they’re cooking are outrageous!

What you need for Moroccan lamb meatballs
It’s all about the spice mix. And you’ll be delighted to see they’re all pantry staples – there’s a good chance you’ve got them all!
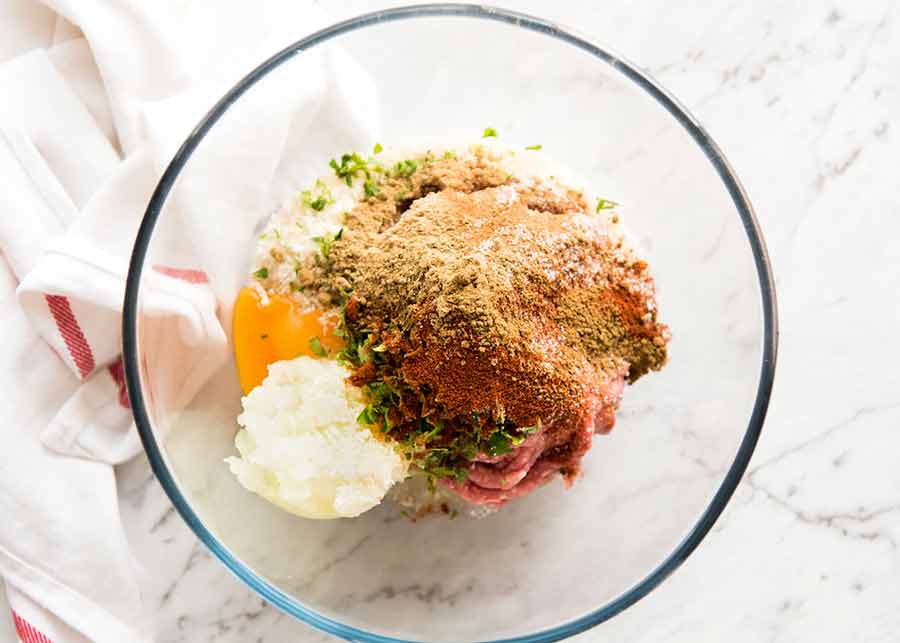
Lamb mince (ground lamb) – Lamb is a favourite in Middle Eastern cuisine! However, these meatballs would also be terrific made with beef, chicken or turkey.
Onion – A key flavour base in most of my savoury dishes! My secret for extra tasty, extra soft meatballs is to grate the onion over the breadcrumbs so it soaks up the juices. It softens the panko which makes the meatballs juicier and more tender.
Plus, if you use diced onion you’d need to cook it separately beforehand. When it’s grated, there’s no need!
Panko breadcrumbs – Adds bulk and absorbs moisture so the mixture isn’t too wet to form meatballs. Panko breadcrumbs are easy to find these days in the Asian and breadcrumb aisle of grocery stores. Ordinary breadcrumbs (smaller and finer, like sand) can also be used but the meatballs will not be quite as tender.
Egg – For keeping the meatballs together. World’s best food glue!
Garlic – Very rare to find savoury dishes on my website that don’t involve garlic!
Spices – Classic Middle Eastern mix. Cumin, coriander, paprika (any, I like smoked), cinnamon (Middle Eastern secret ingredient!), cayenne pepper (spiciness – feel free to increase or omit).
Coriander/cilantro – For a hint of freshness and for visual purposes too. Really worth using, though it can be substituted with parsley.
For the pita pockets
Here’s what you need to make stuffed pita bread pockets:
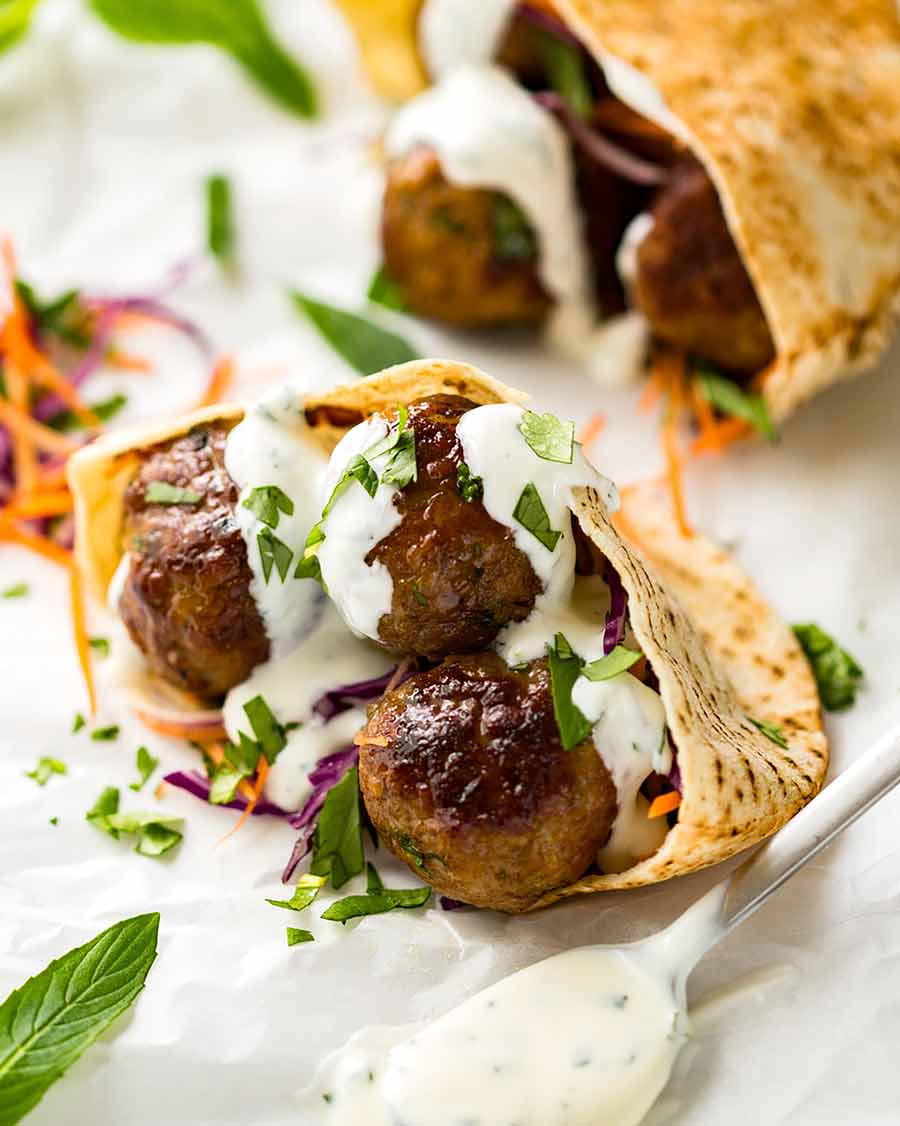
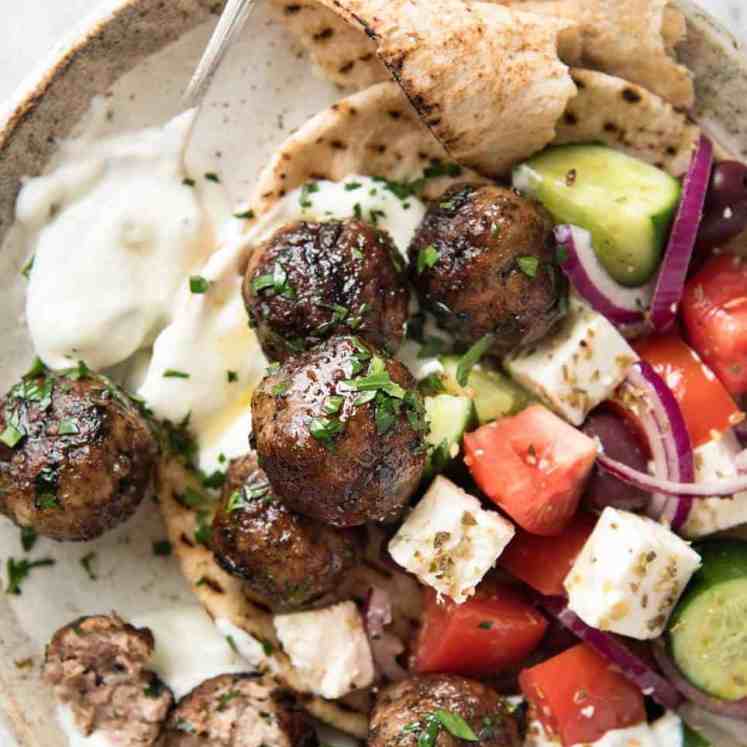
Pita bread or small Lebanese bread – Anything that can be cut then pried open to stuff. Most of the photos in the post are the slightly thicker “bready” pita pockets. However, small Lebanese bread will work too – pictured below. You’ll fit 3 meatballs in each half.
Flatbreads would be great too. Stuff and roll!
Leafy greens – Fresh lettuce, tomato and red onion – For stuffing. There’s no need for dressing, just plain is fine. Plenty of flavour and juices from the meatballs, plus the mint sauce!
Dressed leafy greens – Shredded purple cabbage, carrot, mint salad pictured in the pita pocket below. This is like a Middle Eastern style slaw and pairs beautifully with the Moroccan spicing in these meatballs, as well as adding a lovely splash of colour!
How to make Moroccan meatballs
1. The mint sauce
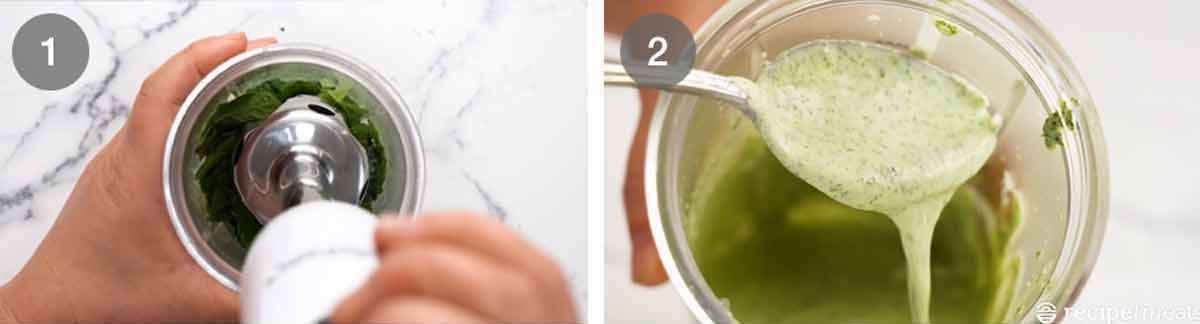
Blitz the fresh mint, lemon and salt with just 1/4 cup of yogurt. Then stir the remaining 1/2 cup of yogurt. Why 2 steps? Because blitzing breaks yogurt and makes it thin and watery. To avoid this, blitz a bit first, then stir in the remaining yogurt.
Mint sauce thickness – The above photo shows the consistency of the mint sauce. Thin enough to drizzle but thick enough to cling! Keep it in the fridge until required.
2. Make the meatballs
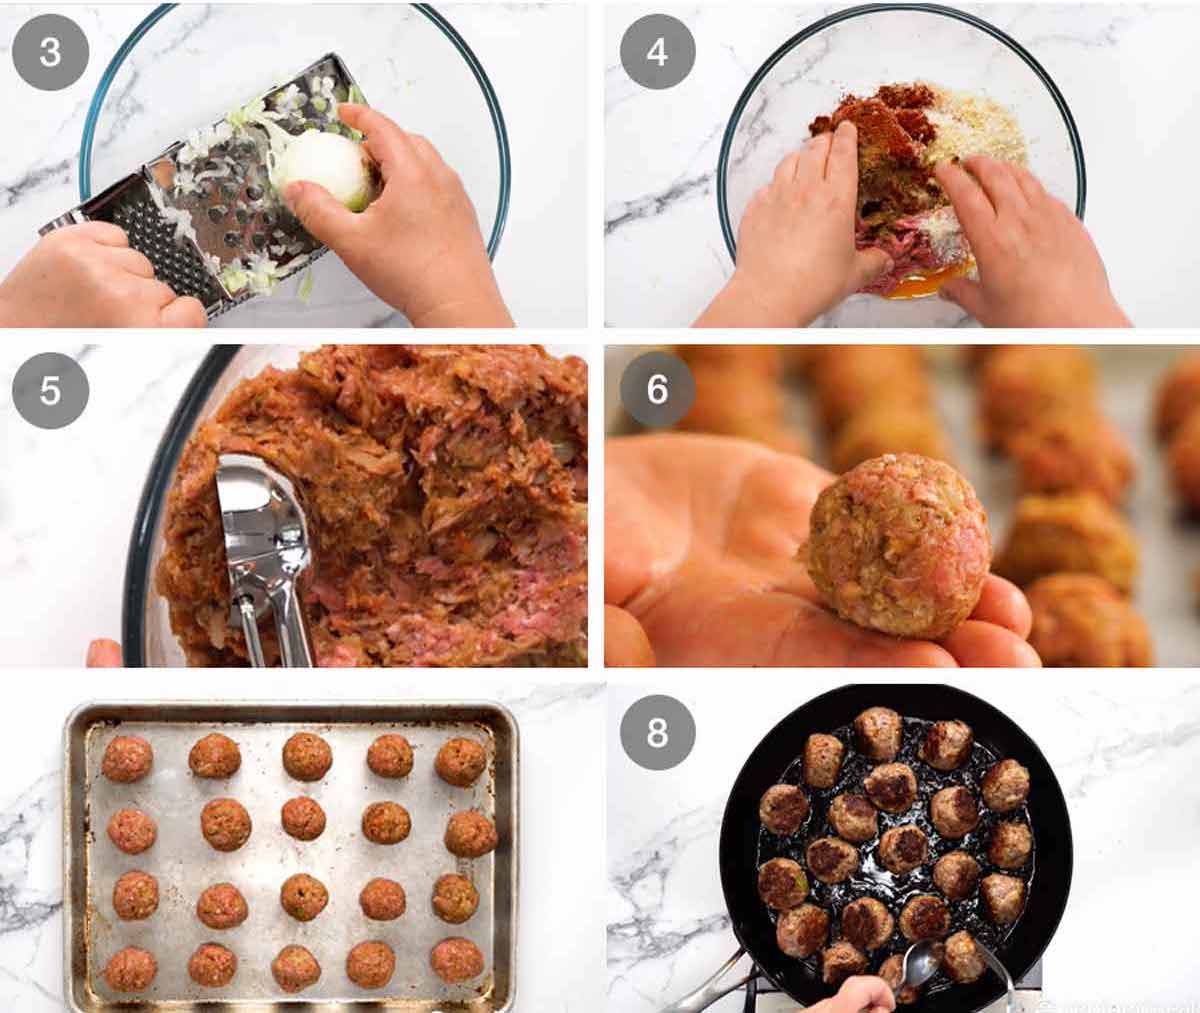
Grate the onion into a bowl using a standard box grater. Why grate? Because the strands are fine enough so the onion doesn’t need to be cooked separately before mixing into the meat. Also, the onion juices mix throughout which adds extra flavour. Win, win, win!
Mix – Put all the remaining meatball ingredients in a bowl and mix well with your hands.
Portion – I use a cookie scoop to portion the mixture into 20 to 22 meatballs.
Roll the mixture into rounds with your hands.
Tip to keep meatballs rounds – Refrigerate the meatballs for an hour to firm up the mixture before cooking. This will help them stay more round as you cook on the stove.
Pan fry for 8 minutes, rotating to brown all over. These days, I use a spoon and fork to turn the meatballs rather than tongs. I find it easier and also it helps maintain the round shape of the meatballs.
Baking option – The recipe also includes a baking option. I do prefer pan frying over baking because you can get better colour on the outside without overcooking the inside. However, for lamb meatballs, baking works better than other proteins because it’s a fattier meat.
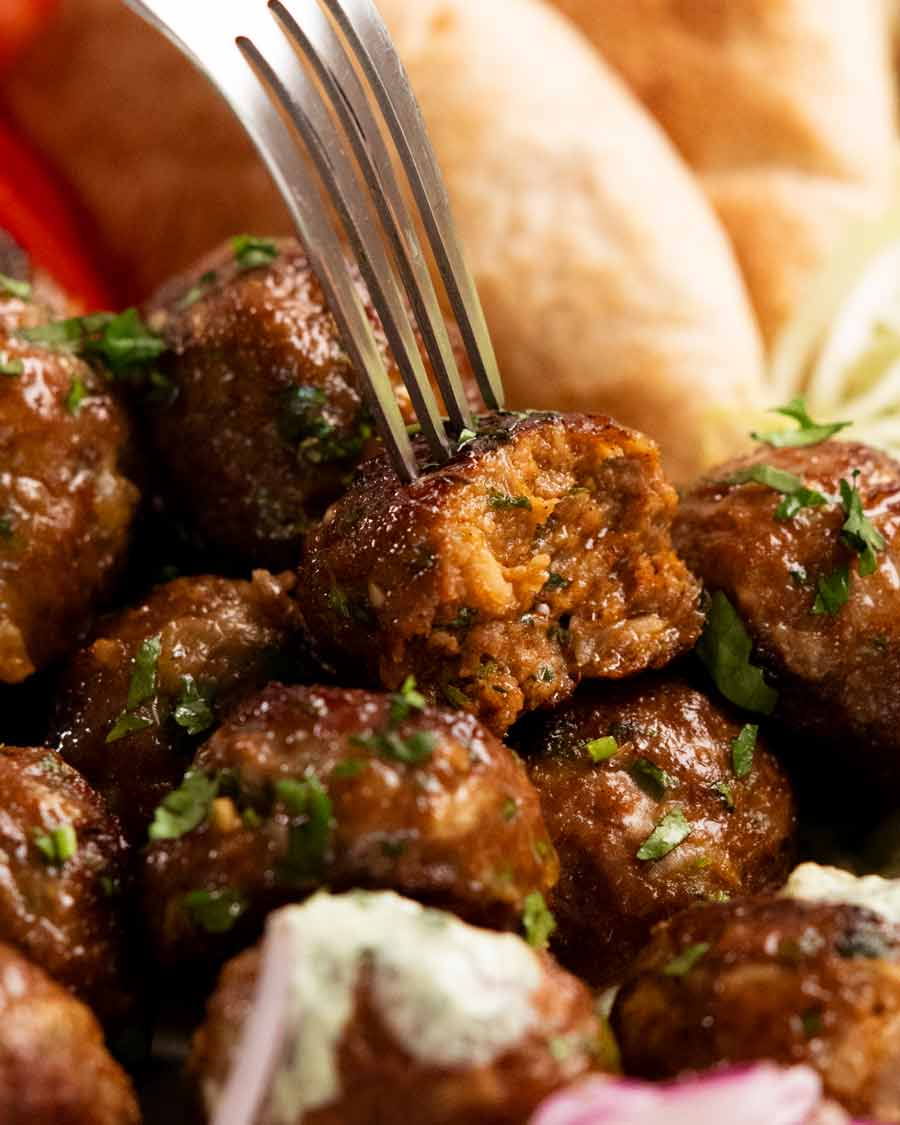
Once the meatballs are cooked, transfer onto a plate and they’re ready to serve!

Proof of juicy insides:
How to serve these Moroccan meatballs
Stuffed in pita pockets, as pictured throughout the post, with fresh lettuce, tomato and onion, drizzled with the mint sauce. Or piled high over a beautiful fruit and nut pilaf, or the golden Jewelled Rice Pilaf that I shared recently.
Or – make salad bowls! I can see them served on the side of a Pearl Couscous Salad, or toss through a Middle Eastern Chickpea salad. Like a meatball salad. YES.
So many possibilities. Share other ideas below! – Nagi xx
Watch how to make it

Moroccan Lamb Meatballs
Ingredients
- 1 1/2 tbsp olive oil (for cooking)
Meatballs:
- 500 g / 1 lb lamb mince (ground lamb) (Note 1)
- 1 small onion , grated using box grater (~1/2 cup, including juices, Note 2)
- 1/2 cup panko breadcrumbs (sub ordinary)
- 1 egg
- 2 cloves garlic, crushed
- 1/4 cup coriander/cilantro leaves , finely chopped
- 1 1/2 tsp EACH cumin, coriander, paprika (any, but I like smoked paprika)
- 1/2 tsp EACH cinnamon, cayenne pepper (add more for spicy)
- 1 tsp cooking/kosher salt
- 1/4 tsp black pepper
Minted Yoghurt Sauce (Note 3):
- 3/4 cup plain yoghurt (I use Greek)
- 1/2 cup (tightly packed) mint leaves
- 2 tsp lemon juice
- 1/4 tsp cooking/kosher salt
To Serve as pockets:
- 4 pita pockets , Lebanese or pita bread
- 5 cups shredded lettuce (iceberg, cost/romaine)
- 2 tomatoes , halved, thinly sliced
- 1 red onion , halved, finely sliced
- OR Shredded Red Cabbage, Carrot and Mint Salad (instead of lettuce, tomato and onion)
- Extra coriander/cilantro leaves, finely chopped (optional)
Instructions
- Mint yogurt sauce – Set aside 1/2 cup yogurt. Place all other ingredients in a jug that fits the head of a stick blender. Blitz until it turns green – it will be runny. Stir in reserved yogurt (this thickens it again). Refrigerate until required.
- Meatballs – Place all Meatball ingredients in a bowl. Mix well with your hands. Measure out 1 heaped tablespoon, then roll into balls. Repeat with remaining mixture – should have 20 – 24 meatballs.
- Cook – Heat oil in a large non stick pan over medium heat. Add half the meatballs and cook, turning to brown all over, for 8 minutes, or until cooked through. Transfer to plate. (Oven option – Note 4)
- Serving – Cut pita pockets in half, warm for 10 seconds in the microwave, then pry it open. Stuff with lettuce, tomato, onion, then meatballs (I do 2 per half pocket). Drizzle with Mint Yogurt Sauce and fresh coriander.
Notes
Nutrition
Originally published July 2017. Updated in April 2022 with a much better video – because I love these meatballs so much! The spicing was also improved slightly.
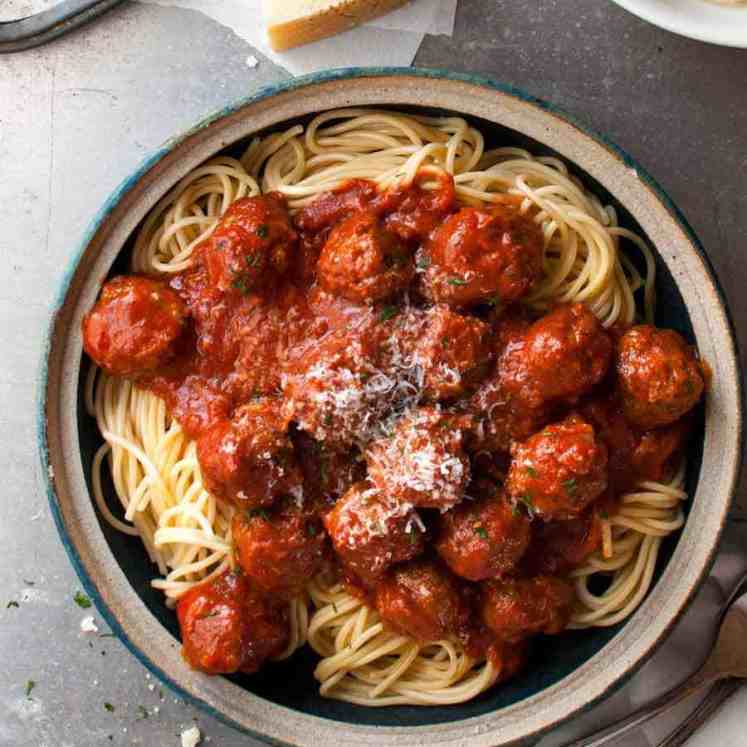
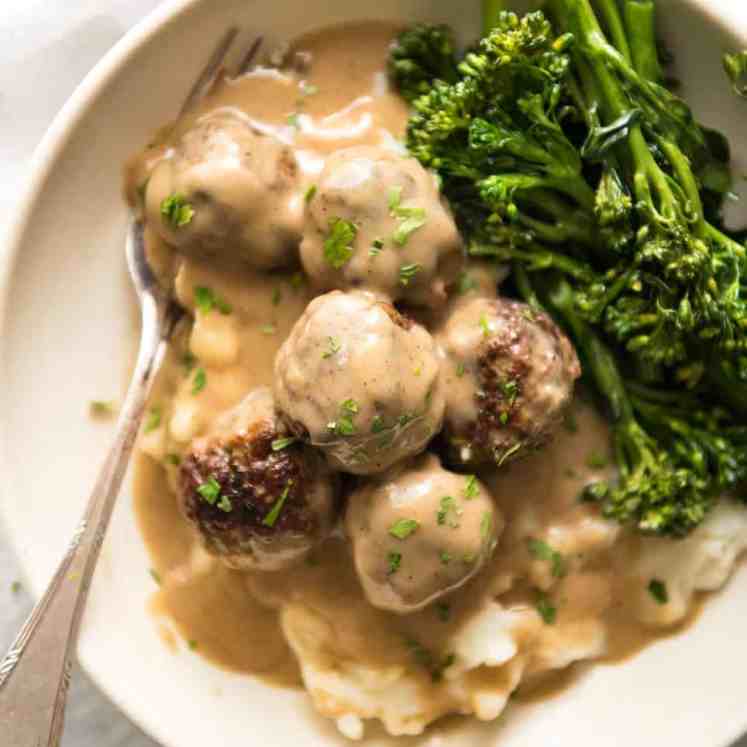
I Get A Round: More Meatball Recipes


Life of Dozer
It still fits! (See Life of Dozer photo below for context….)

And from the original publication date in 2017:
All that mocking of the photo of him in his hoodie. I ask you – does he look unhappy? Humph! He looks perfectly comfortable to me! 😂 #MockingDozerIsFun

The post Moroccan Lamb Meatballs appeared first on RecipeTin Eats.
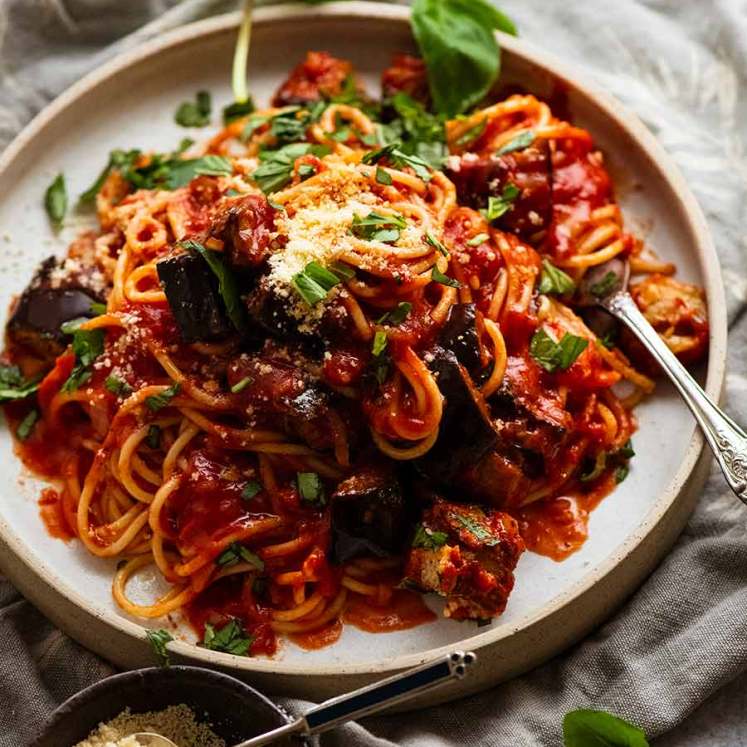
]]> Tuna pasta is such a great dinner to make when you don’t have much in the cupboard. For canned tuna recipe cynics out there – it’s time to take a leap of faith! This is seriously tasty, very economical and super fast – it comes together in 15 minutes flat, from start to finish. Yes... Get the Recipe
The post The most amazing canned tuna pasta appeared first on RecipeTin Eats.
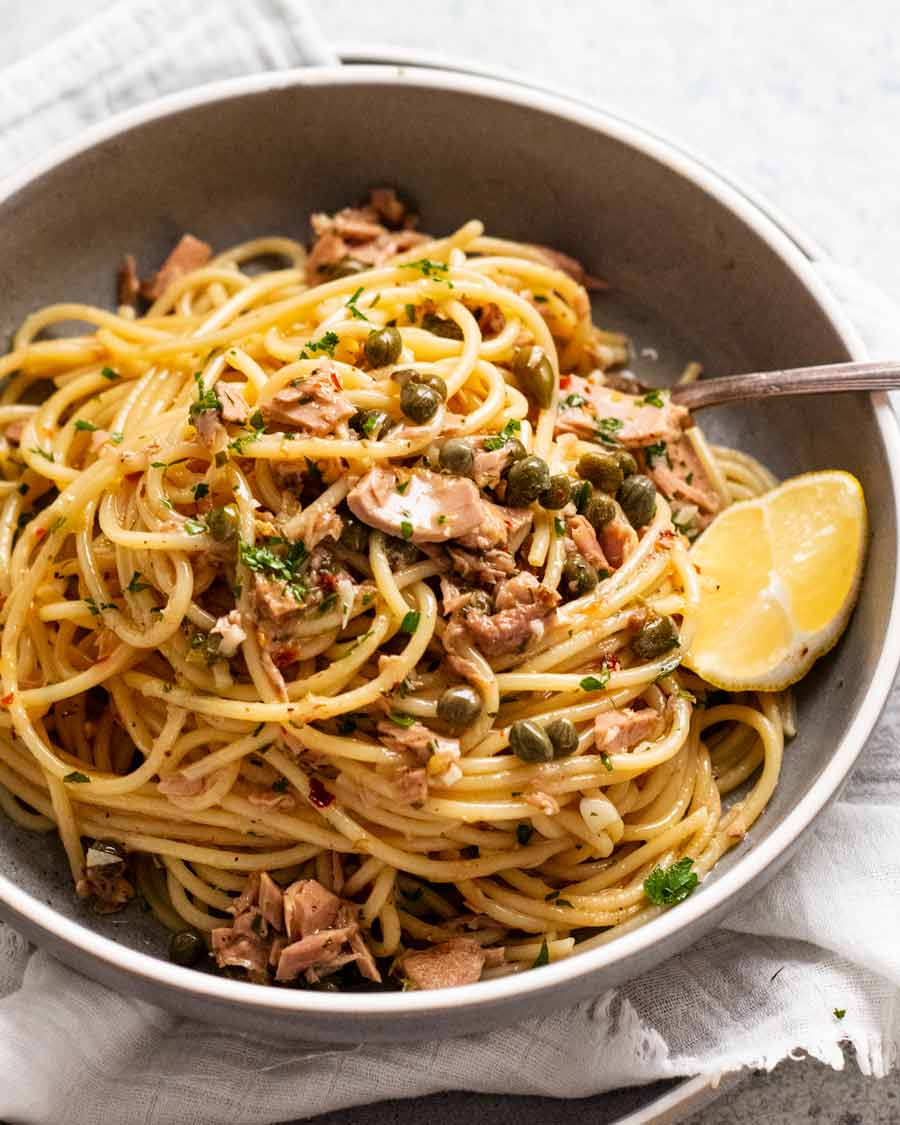
]]>Tuna pasta is such a great dinner to make when you don’t have much in the cupboard. For canned tuna recipe cynics out there – it’s time to take a leap of faith! This is seriously tasty, very economical and super fast – it comes together in 15 minutes flat, from start to finish.
Yes – canned tuna CAN be delicious!
I feel like the words “tasty meal” and “canned tuna” aren’t usually in the same sentence. Bad memories of poor cash strapped university days and crash diets, hastily thrown together tuna and rice, bland tuna salads, mayo-laden tuna sandwiches.
But you can make canned tuna delicious!!! Just a little bit of thought, a bit of imagination, a smidge of effort and a lot of anticipation for a hot, tasty meal as your reward.
Today’s reward in question? Tuna pasta. A spritz of lemon, a sprinkle of capers, and using the oil from the tuna can. You never knew a canned tuna pasta could be so delicious!!!
Ingredients in canned tuna pasta
No capers? Chop pickles instead. No lemon? Add a dash of vinegar. No anchovies? Still worth making! We get a really good (free) flavour boost by using the oil from the cans of tuna. Anchovies just makes it that little bit more special!
Garlic missing from the photo – oops!
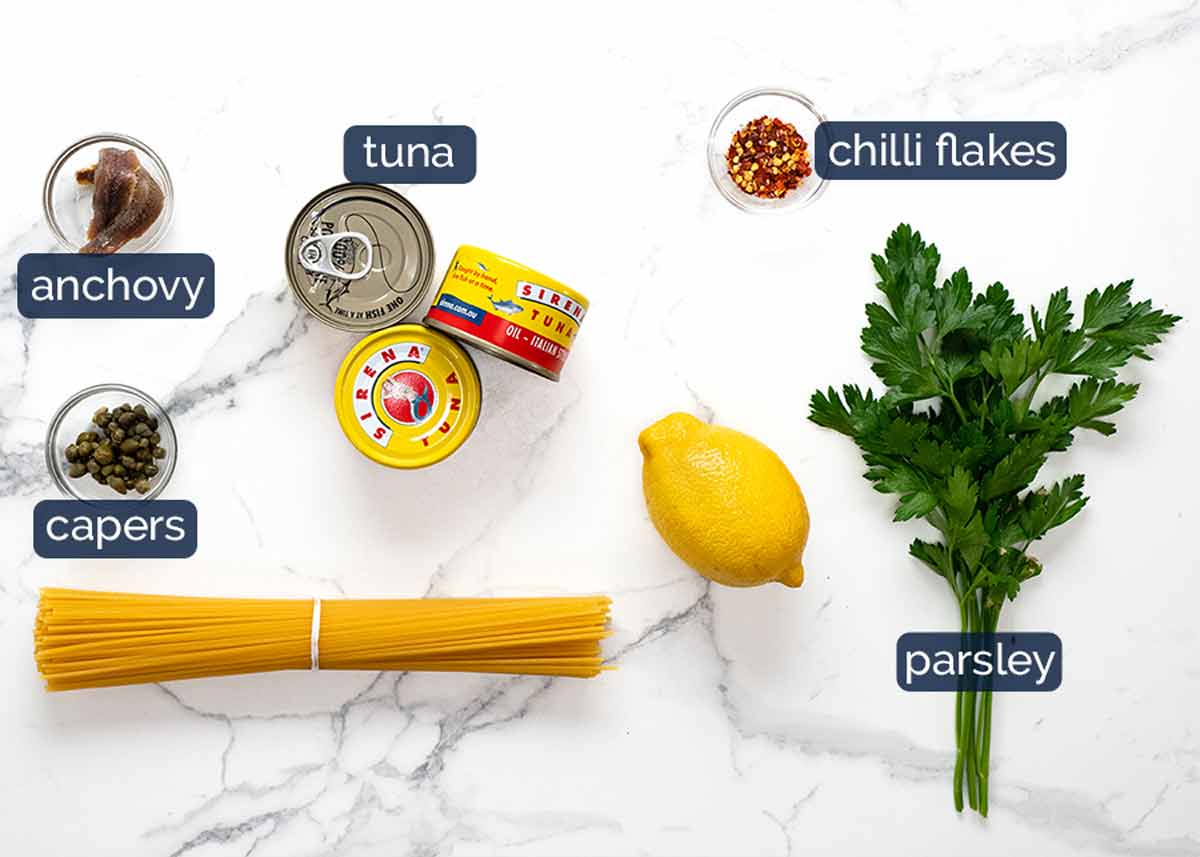
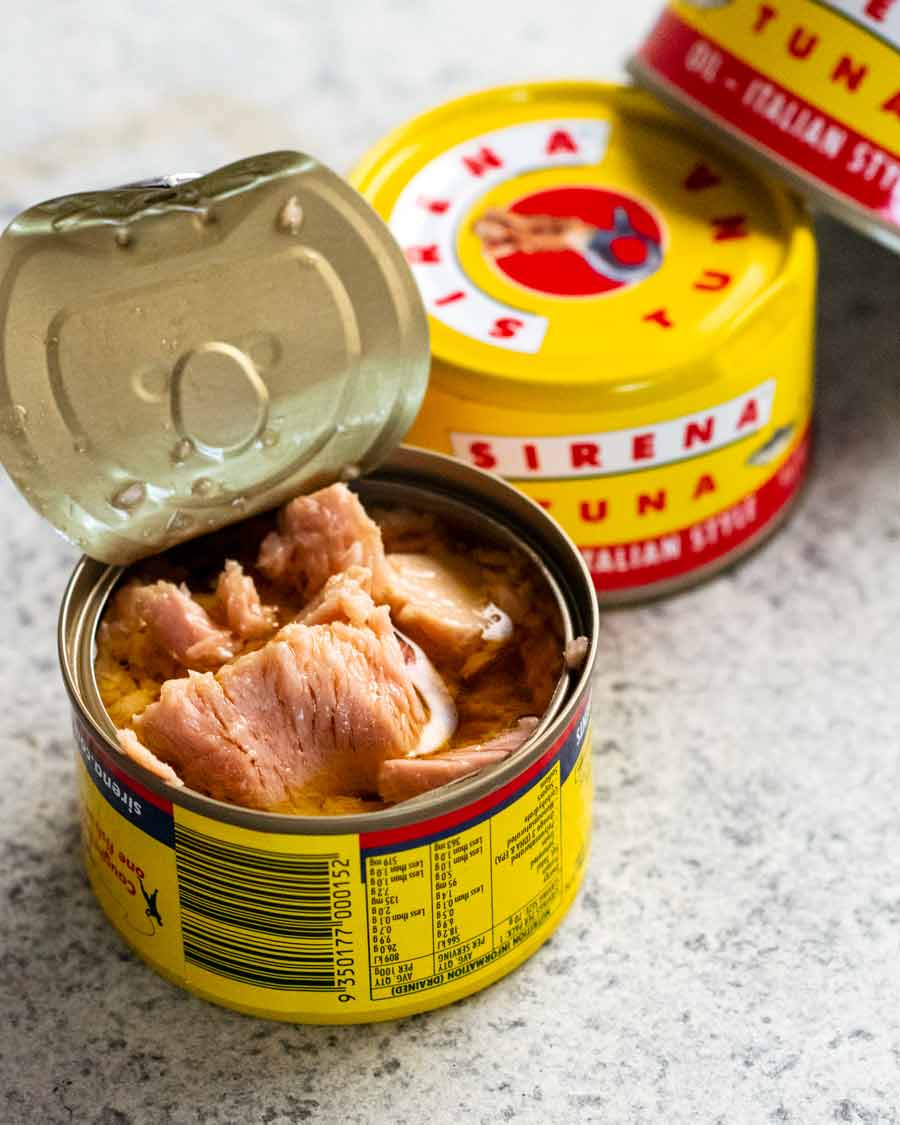
Canned tuna – Tuna in oil is the go here! We use the oil from the can of tuna for the sauce to sauté the garlic until golden. No tuna in oil? It’s ok! Just use olive oil instead and tip the liquid from the can of tuna into the sauce.
TIP – Not all canned tuna is created equal. Premium canned tuna in a good fruity olive oil will set you back more than a generic home brand in tasteless canola oil. But also, premium canned tuna piled on crusty bread with a drizzle of the oil from the can is pure joy. I hope you try it one day.
Anchovies – Anchovies make everything taste better! Finely minced then sautéed in oil so they dissolve and lose the fishiness, just leaving great savouriness into the dish. I always have a jar in the fridge. Always! Anchovy paste – use 1 teaspoon.
Capers – For a pop of fresh tang! I like to use baby capers. If you only have large ones, give them a rough chop. No capers? Chop pickles instead!
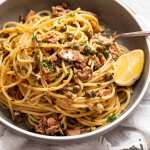
Lemon – Juice for sour and zest for lemon flavour. It really does lift the dish so I hope you have it! Lemon is a staple ingredient I always have on hand. But if you don’t, this dish is still worth making. Add a dash of vinegar instead.
Chilli flakes / red pepper flakes – For a hum of warmth. This isn’t a spicy pasta. Substitute with finely chopped fresh chilli or a smidge of chilli paste or sauce (add this at the end). Or leave it out for no spiciness at all.
Parsley – For freshness. Not critical.
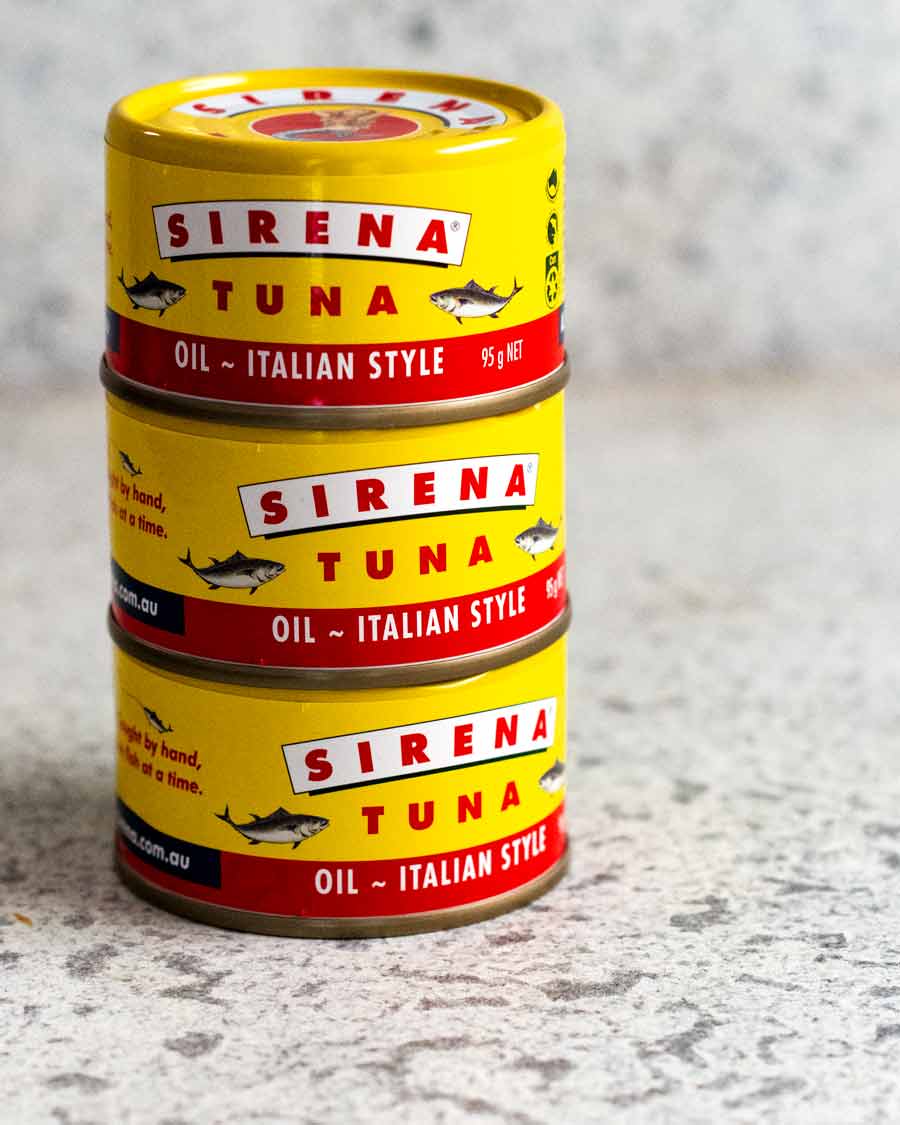
Pictured below is the tuna I’ve used, a mid-range one sold at supermarkets in Australia. I use 3 x 95g/3.5oz small cans which I feel is the right amount of protein for a pasta which serves 2 people. However, the recipe can take more or less tuna so don’t get too hung up on exact tuna quantity!
How to make canned tuna pasta
Get the pasta cooking then start preparing the ingredients for the sauce. That’s how you’ll get this on the table in 15 minutes flat, from start to finish!
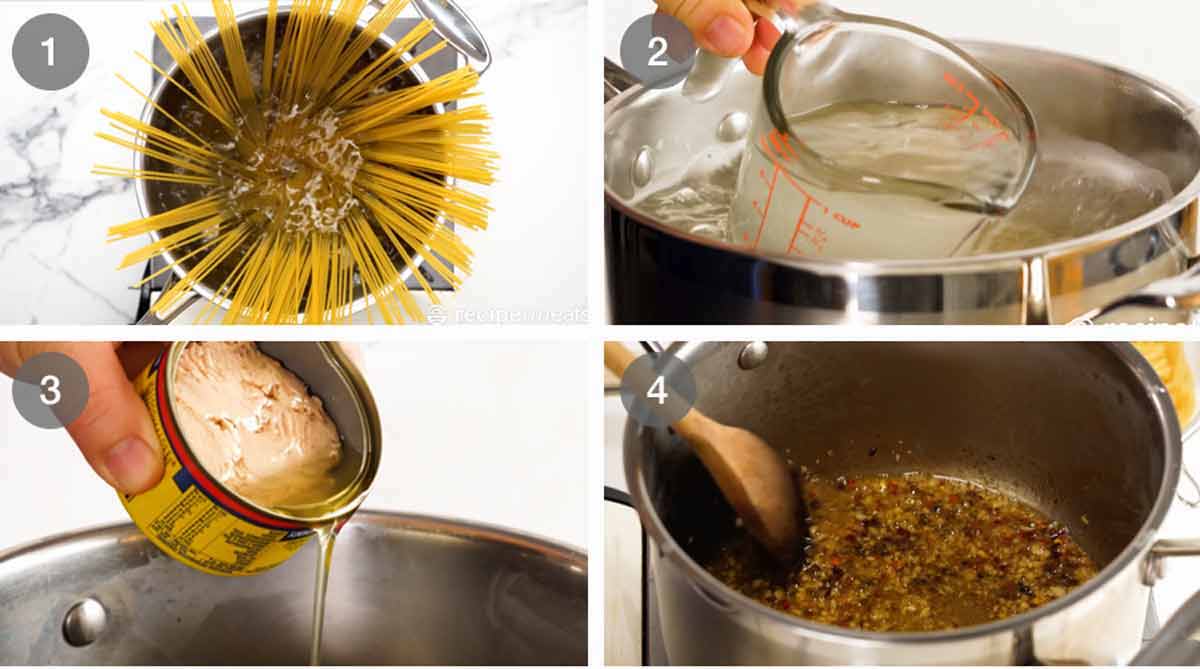
Cook the pasta in salted water per packet directions minus 1 minute. The pasta will be slightly under al dente (ie underdone) but that’s ok. The pasta will finish cooking with the sauce, during which time it will absorb the tasty flavours of the sauce!
Reserve pasta cooking water – Just before draining, scoop out 1 cup of cooking water then drain the pasta. Why? Because we will be using this to make the sauce for the pasta. The starch in the pasta cooking water will react with the oil in the sauce to make it thicken so it clings to the pasta strands instead of remaining as a watery sauce at the bottom of the pan.
Tuna oil – Pour the oil from the tuna can(s) into the same pot and heat over medium heat.
Sauté garlic, anchovies and chilli flakes for 1 minute.
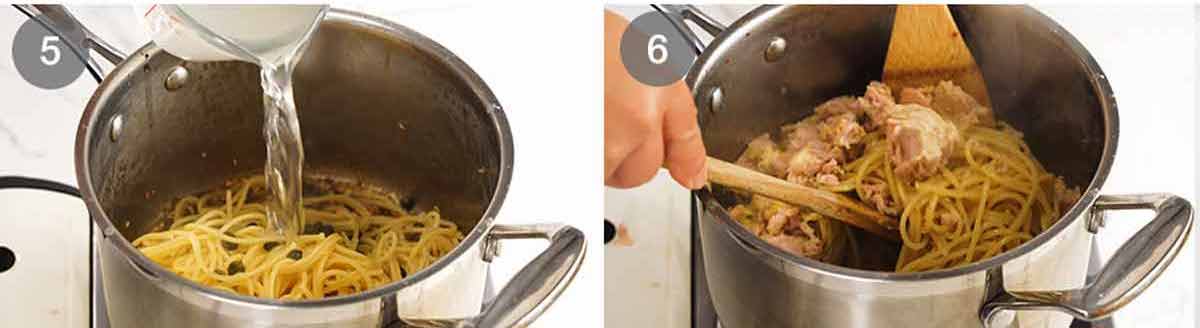
Pasta and water – Add the pasta, capers and 1/3 cup of reserved pasta water. Toss using 2 spatulas for 2 minutes. During this step, the oil and the starchy pasta cooking water will thicken into a sauce that clings to the pasta. Also during this step the pasta will finish cooking from just under al dente to al dente. If the pasta is still too firm for your taste, add more of the pasta cooking water and keep cooking the pasta.
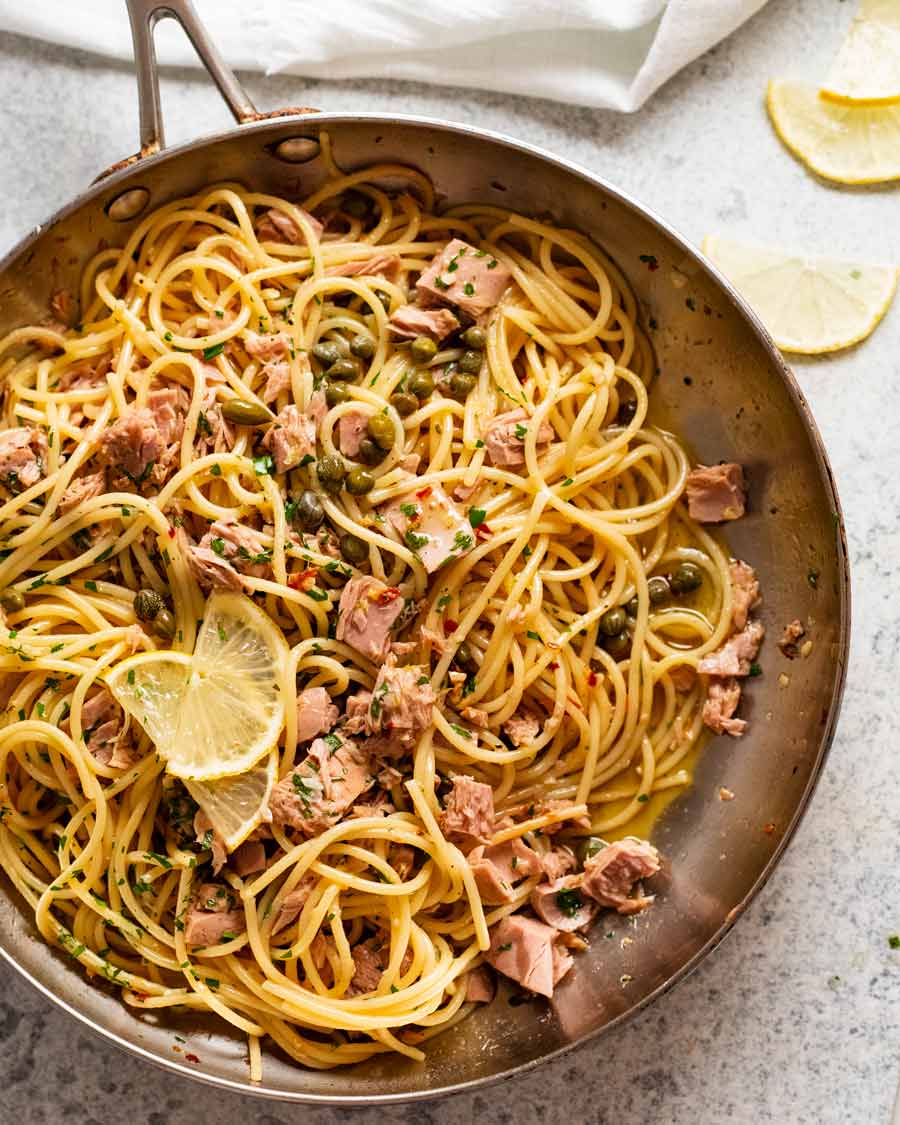
Add tuna – Turn off the heat. Add tuna, parsley, lemon zest, juice, salt and pepper. Toss gently so the tuna stays in chunks and doesn’t crumble into tiny little bits.
Then serve immediately!
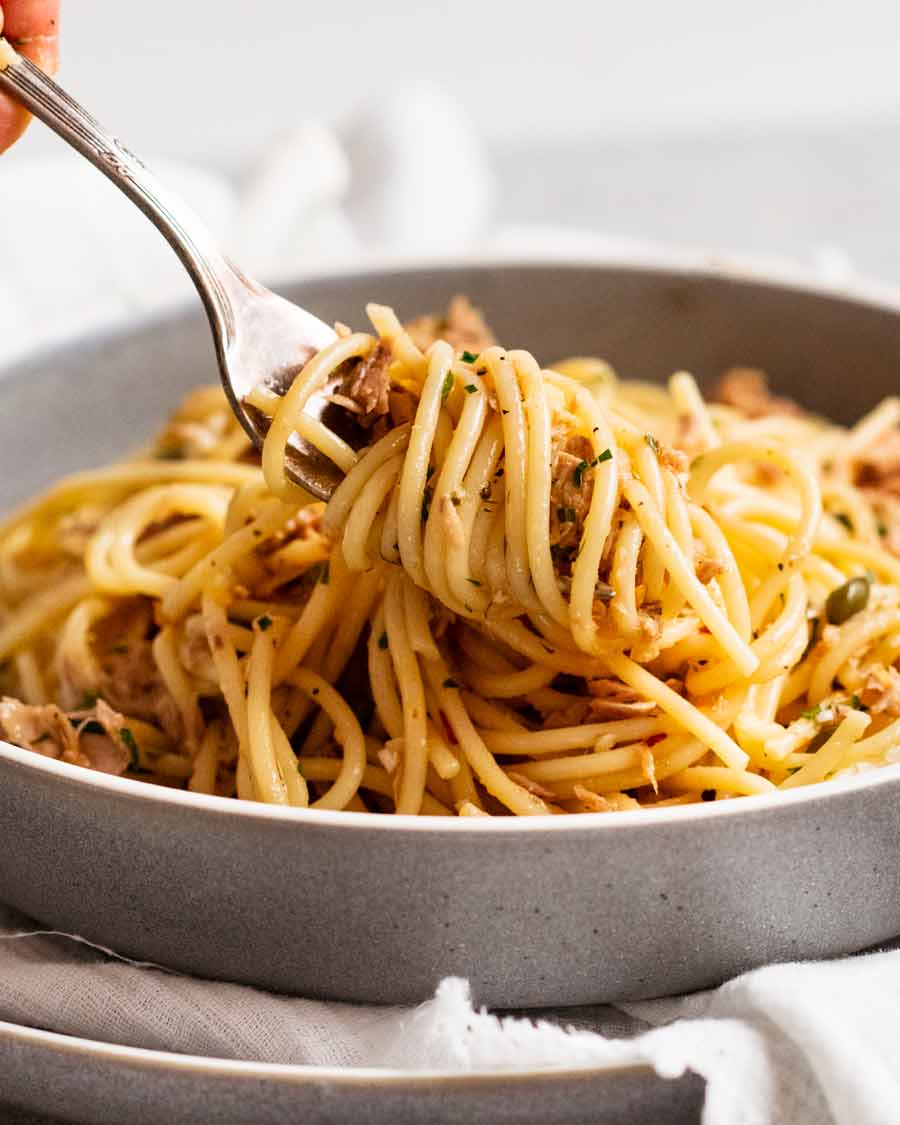
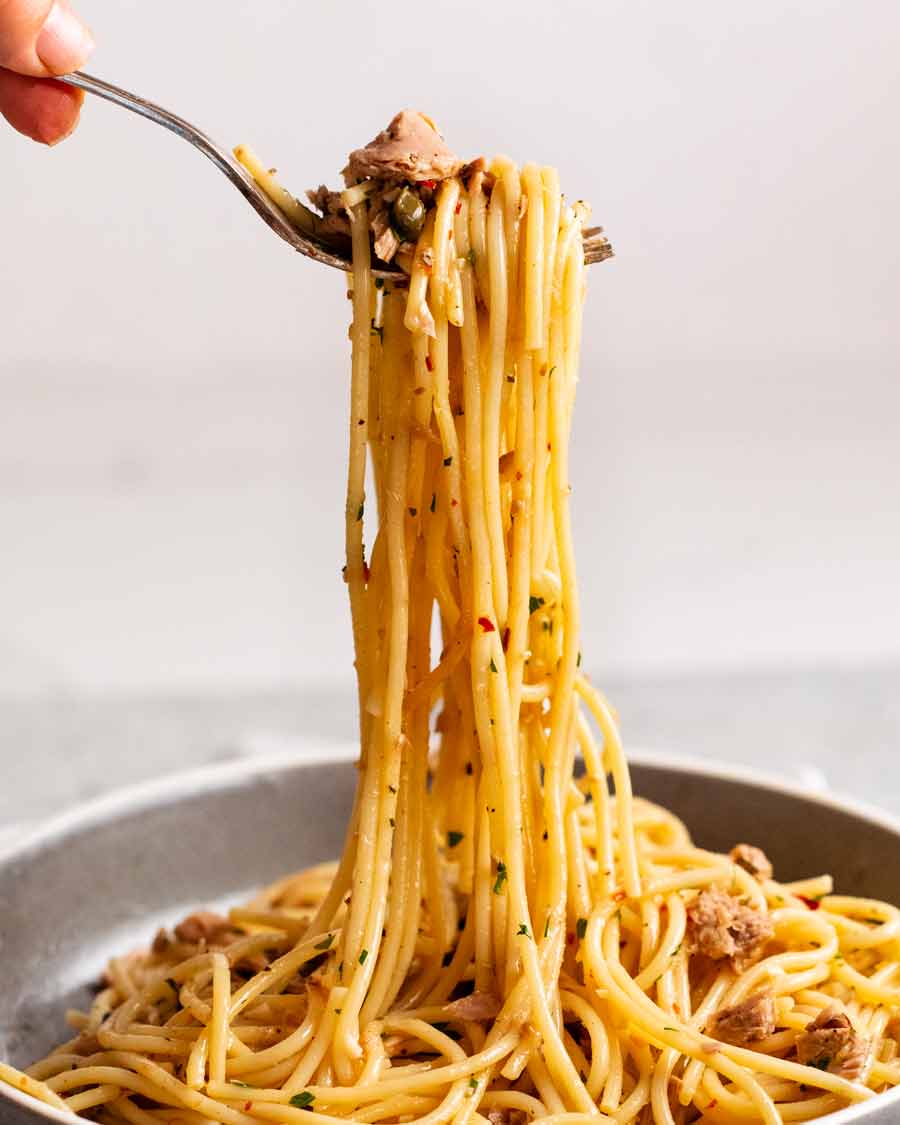
As with all pastas, this is at its prime freshly made, right off the stove, when the pasta is hot and slippery with sauce! If it’s sitting around for a while and the pasta cools down and dries out, it can be easily rejuvenated with a splash of the reserved pasta cooking water and a toss on the stove for 30 seconds or so, to reheat the pasta and make it slick with sauce again.
To make it a complete meal, don’t hesitate to throw in a couple of handfuls of rocket/arugula or baby spinach at the end. Else, serve it with a simple garden salad or whatever leafy greens / steam vegetables you’ve got tossed with an everyday salad dressing.
Enjoy! – Nagi x
Watch how to make it
The most amazing canned tuna pasta!
Ingredients
- 200g / 7oz spaghetti , or other thin long pasta
- 1 tbsp cooking salt , for cooking pasta
Tuna sauce:
- 285g/ 10 oz (approx) canned tuna in oil , drained, oil reserved (I use 3 x 95g/3.5oz cans, Note 1)
- 2 clove garlic , finely minced
- 2 anchovy fillets , minced (Note 2)
- 1/2 tsp chilli flakes / red pepper flakes (can skip, Note 3)
- 2 tsp baby capers (or finely chopped pickles)
- 1 tbsp parsley , finely chopped (ok to skip)
- 1 tsp lemon zest
- 2 tbsp lemon juice (sub 1 tbsp apple cider or sherry vinegar)
- 1/4 tsp cooking/kosher salt
- 1/4 tsp black pepper
Instructions
- Cook pasta – Bring 3 litres / 3 quarts of water to the boil with the 1 tablespoon of salt. Cook pasta per the packet time minus 1 minute. Just before draining, scoop out ~1 cup pasta cooking water, then drain the pasta.
- Sauté aromatics – In the same pot, heat the reserved oil from the tuna cans over medium heat. Add the garlic, anchovies and chilli flakes. Cook and stir for 1 minute.
- Toss pasta – Add the pasta, capers and 1/3 cup of reserved pasta water. Toss using 2 spatulas for 2 minutes.
- Add tuna – Turn off the heat. Add tuna, parsley, lemon zest, juice, salt and pepper. Toss gently to mix through – try to keep some tuna chunks.
- Serve immediately!
Notes
Nutrition
Got canned tuna? Dinner’s half done!

Life of Dozer
At my local coffee shop, Zubi in Newport (Sydney Northern Beaches). Best coffee in my area – I searched wide and far!!

The post The most amazing canned tuna pasta appeared first on RecipeTin Eats.
]]>