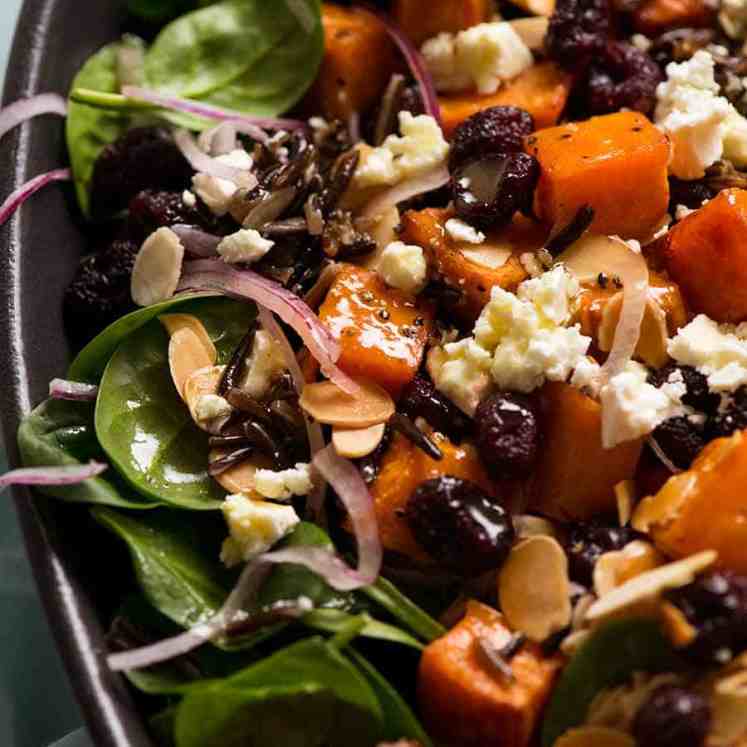
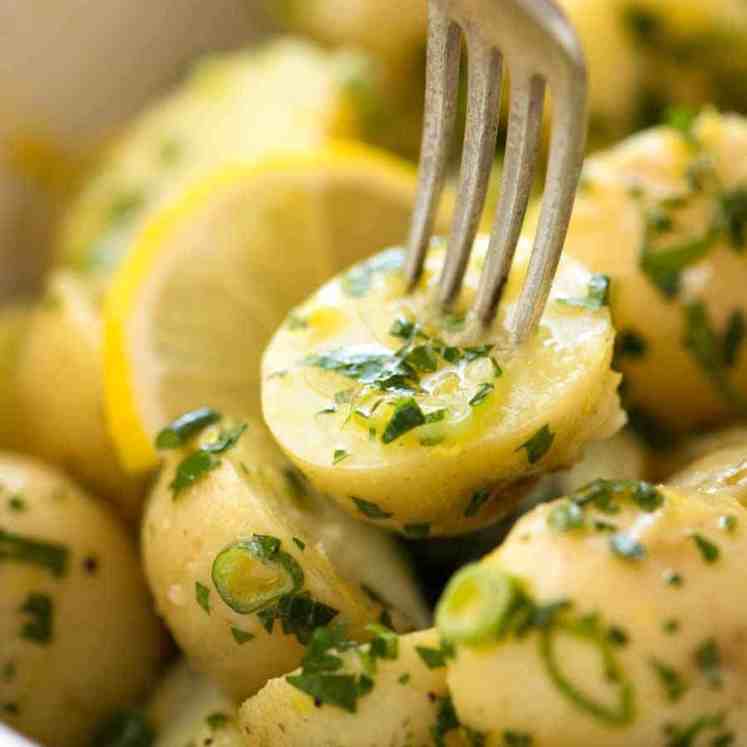
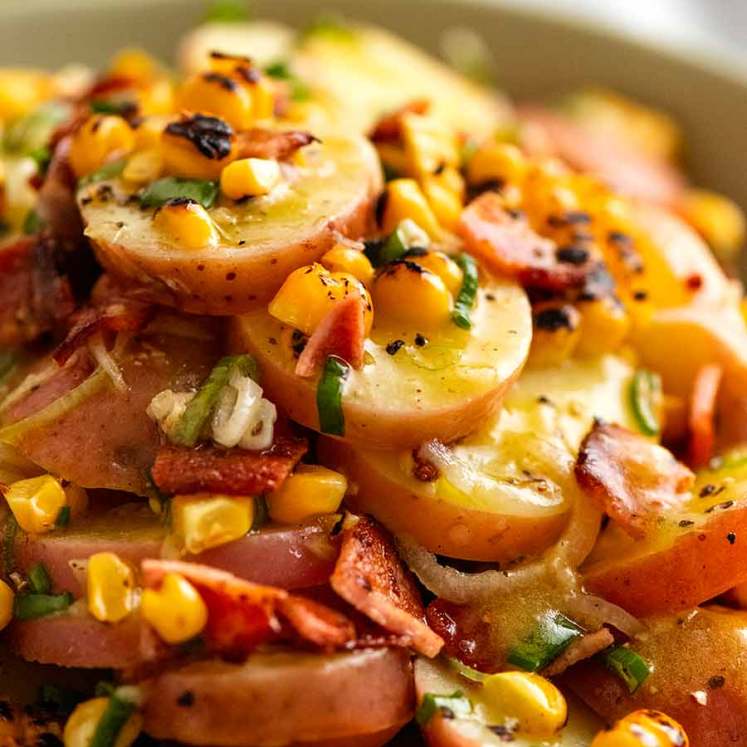
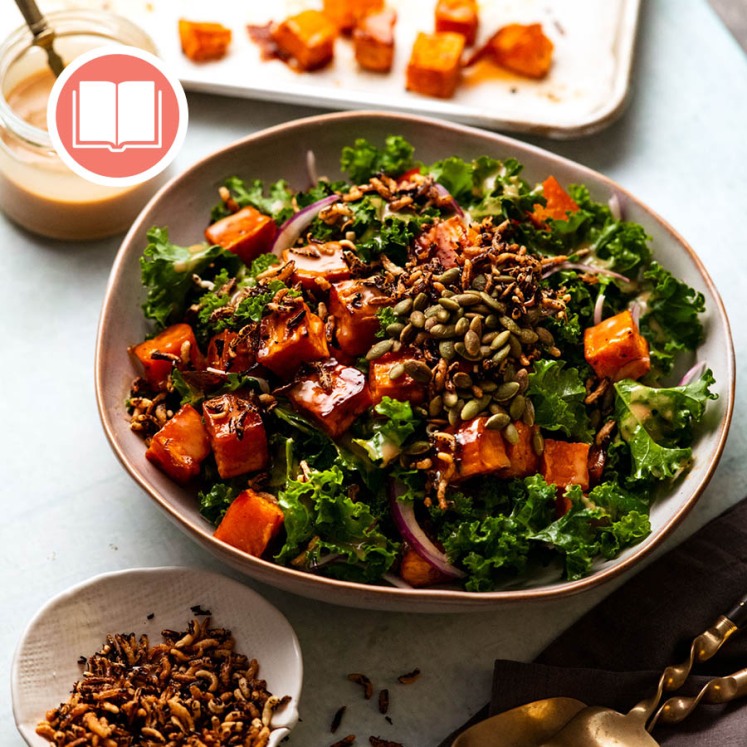
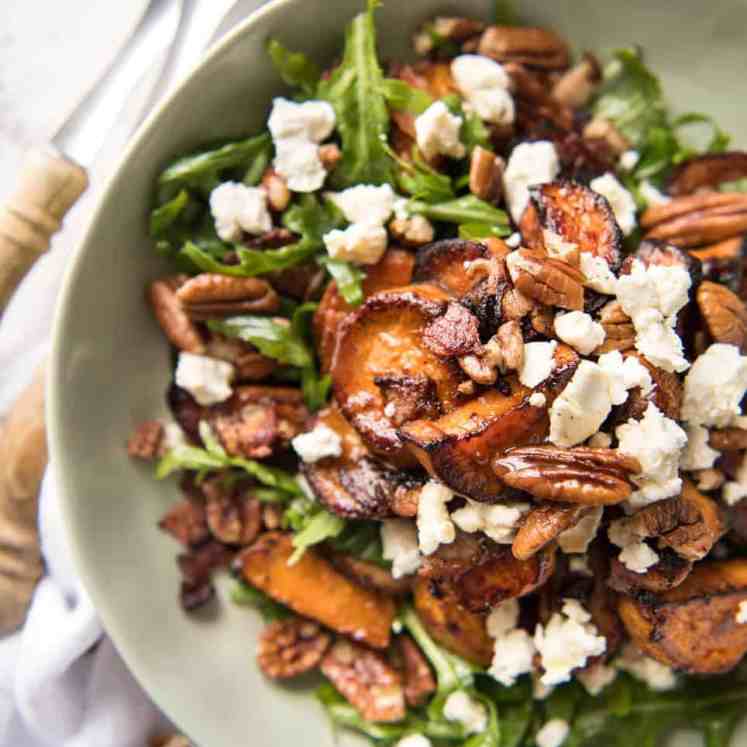
 The best potato salad is made by dousing hot potatoes with French Dressing so they take in the flavour before tossing in a creamy dressing. Complete with essential add-ins: bacon, cucumber and celery. Every bite is perfection! Prefer no mayo? Try German Potato Salad, Red Potato Salad with Charred Corn, Lemon Potato Salad and Wickedly... Get the Recipe
The post The Best Potato Salad appeared first on RecipeTin Eats.
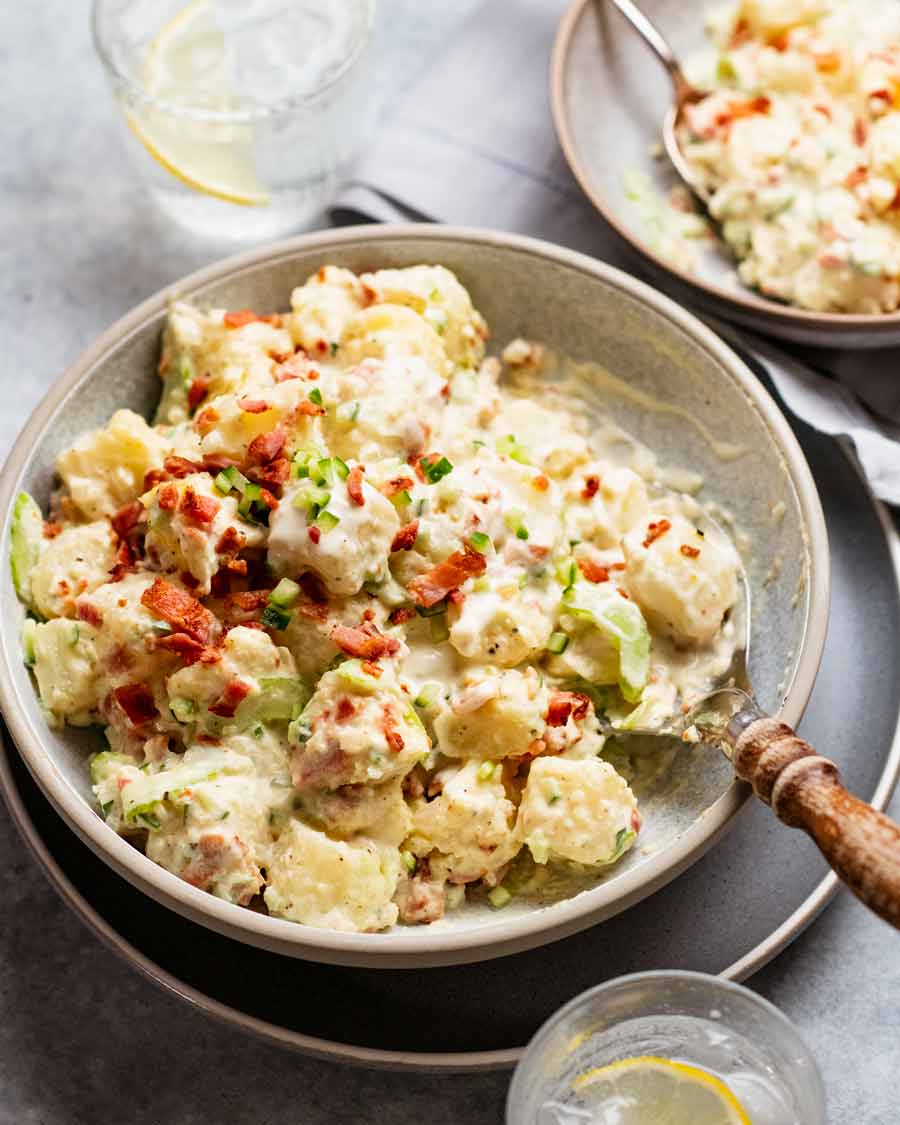
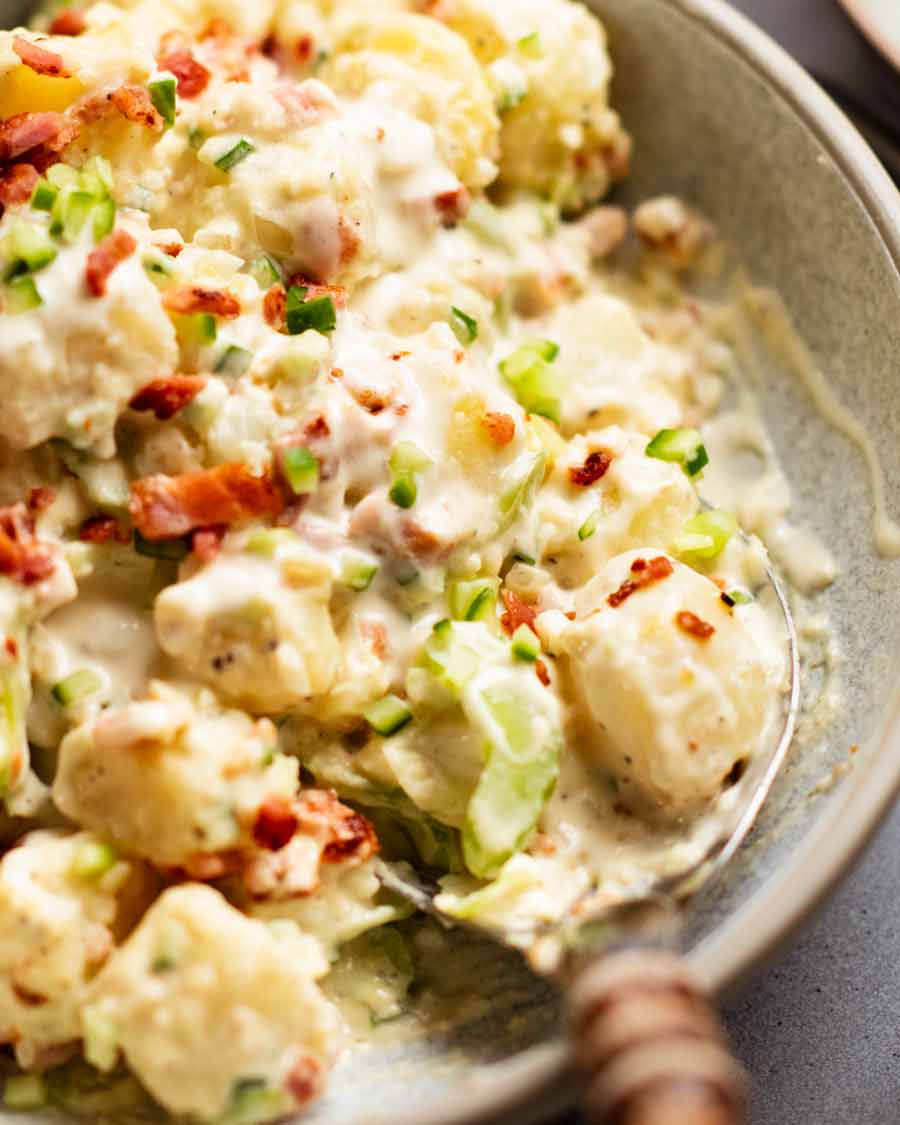
]]>The best potato salad is made by dousing hot potatoes with French Dressing so they take in the flavour before tossing in a creamy dressing. Complete with essential add-ins: bacon, cucumber and celery. Every bite is perfection!
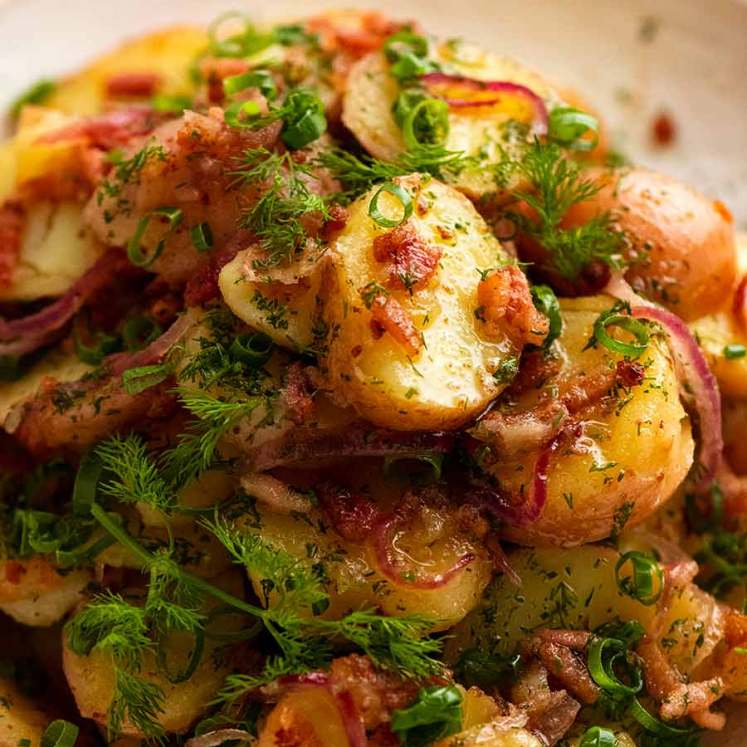
Prefer no mayo? Try German Potato Salad, Red Potato Salad with Charred Corn, Lemon Potato Salad and Wickedly Delish Sweet Potato Salad.
A Potato Salad you’ll make again and again…
This is a potato salad recipe given to me by the mother of a friend. To respect her privacy, let’s call her Mrs B.
The very first time I heard how Mrs B makes her potato salad, I instantly knew that this was one that would stand out from the crowd of thousands – millions – of potato salad recipes “out there” in the world wide web.
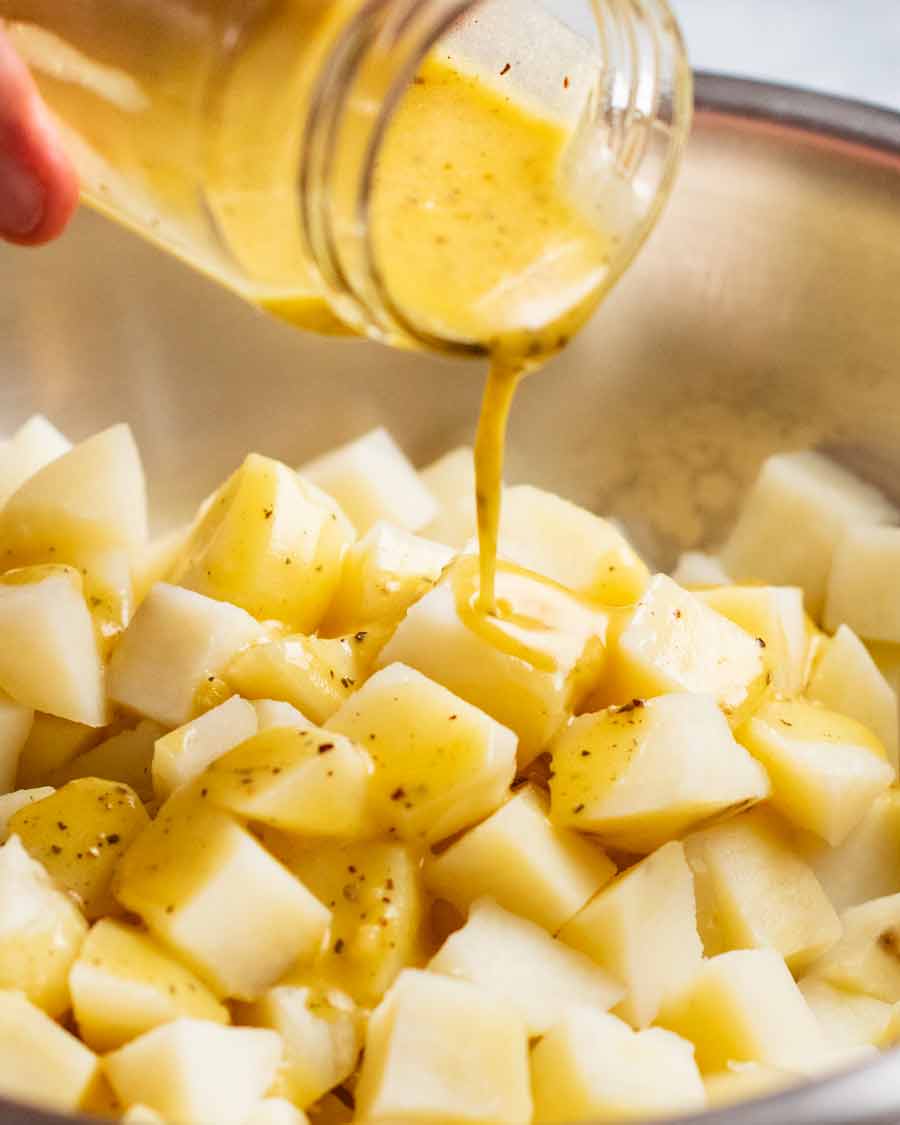
The thing that makes it so special is pouring French Salad Dressing over the hot boiled potatoes. By dressing while hot, they absorb the French Salad Dressing flavour rather than just coating them. Which means, flavour inside the potatoes not just on the outside.
Combined with the creamy sour cream-mayonnaise dressing, salty bacon, and fresh bursts of celery, cucumber and onion, every mouthful is the perfect bite!

Plenty of dressing….but not overly greasy
The other thing I really like about this potato salad is the dressing. While I love a creamy dressing, I find using only mayonnaise too greasy. But I also don’t want to skimp on dressing. There’s nothing worse than a dry potato salad!
The solution: break up the richness of mayonnaise by combining with sour cream. I use a 50/50 ratio.
The addition of tang and hint of zing from a dab of Horseradish Cream also helps to cut through the richness. It’s optional but adds an extra little something-something to it.
And don’t forget, all this mingles together with the French Dressing the potatoes are soaked in!
After a creamy no-mayo version? Try this Creamy Yogurt Potato Salad Dressing – it’s terrific!

Ingredients for the Best Potato Salad
Here’s what you need to make the best potato salad on the block!
The potatoes and add-ins
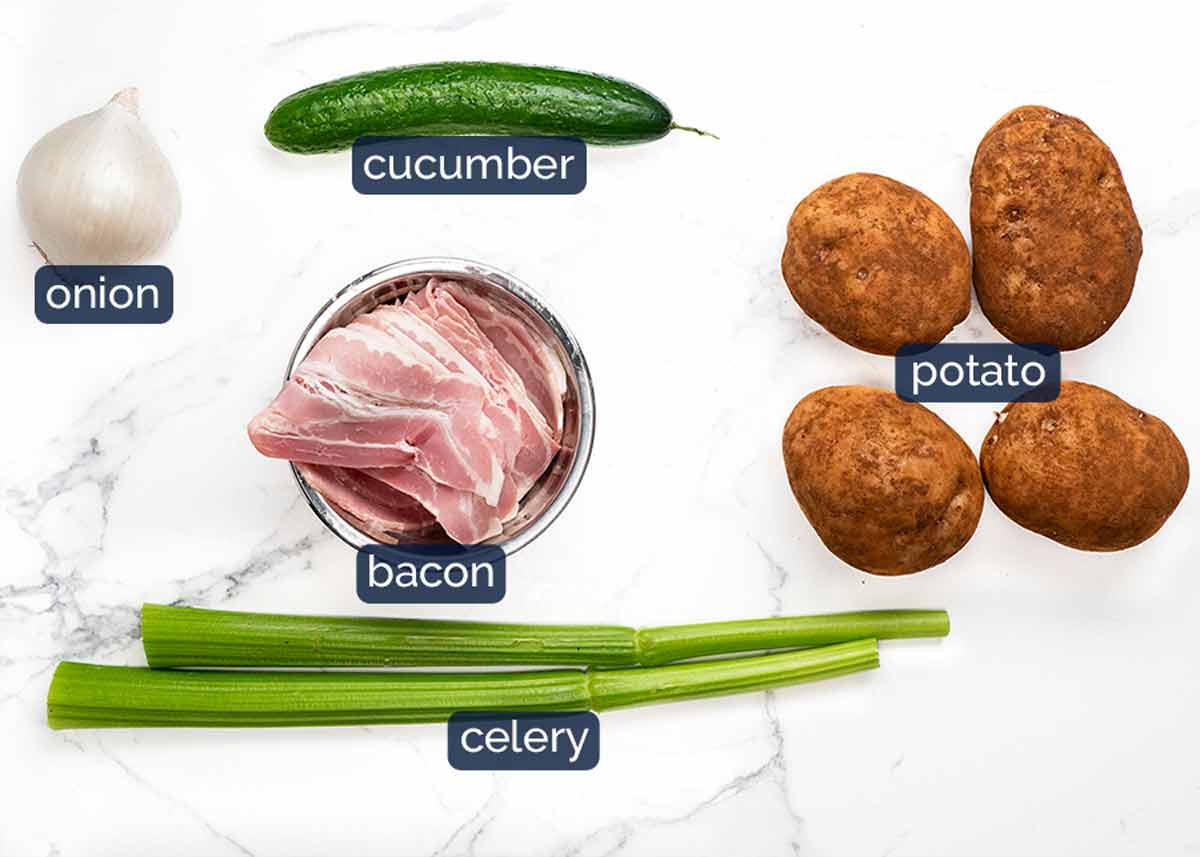
Potatoes – Potatoes vary widely in texture when cooked. For potato salad, I like to use starchy (floury) and all-rounder potatoes which become soft and fluffy when cooked and are a sponge to absorb the French dressing. The edges of the potato cubes mash up a bit when tossed with the dressing (nobody wants sharp-edged cubes in their potato salad!) and the surface becomes a little ragged so the creamy dressing clings to every surface
Starchy/all-rounder potato types:
– Australia: Sebago (dirt-brushed common potatoes), Coliban (white skin potatoes common at supermarkets)
– US: Russet, Idaho and Yukon gold
– UK: Maris Piper, King Edward, and RussetWaxy potatoes, on the other hand, do not absorb flavour nearly as well and have a firmer texture when cooked. While the potato cubes will hold their shape more perfectly when cooked with sharp cut edges, the surface is slippery so the dressing doesn’t adhere to it as well.
Celery and cucumber – Welcome freshness! The celery is sliced finely so you get soft crunch but it becomes floppy rather than stiff sprigs sticking out. And the cucumber is finely diced rather than the typical slicing so you get great soft juicy little crunchy pops. Love!
Raw onion (finely minced) – This cuts through the creaminess of the dressing and adds great subtle fresh flavour into the whole salad. The fact that it’s finely minced rather than just chopped or sliced helps – better dispersion throughout the whole salad plus you get the juiciness too. It kind of takes the place of garlic which I put in “everything” but is a little harsh in this particular potato salad.
Bacon – Essential for a classic potato salad!
Dressing 1: The French Dressing
This is the dressing the hot potatoes soak up! The original recipe shared with me by Mrs B used store bought French Dressing which is an option. However, I just make my own – here’s all you need:

White wine vinegar – The classic vinegar used for French dressing but can be substituted with apple cider vinegar, sherry or champagne vinegar (last resort: plain white vinegar).
Olive oil is the oil of choice. The better the quality, the better the flavour!
Dijon mustard – For flavour and thickening.
Water – Missing from the photo!
 I use just 1 tablespoon of water to stretch out the dressing, rather than more oil (simply for health reasons).
Garlic – flavour!
Sugar – Just a touch, which takes the edge off the tang a bit too.
Dressing 2: The creamy dressing!
As noted right up front, I like my potato salad nice and creamy but I find just using mayonnaise is overly heavy. So I use a 50/50 sour cream/mayo combination.
(Reminder – mayo free version here!)
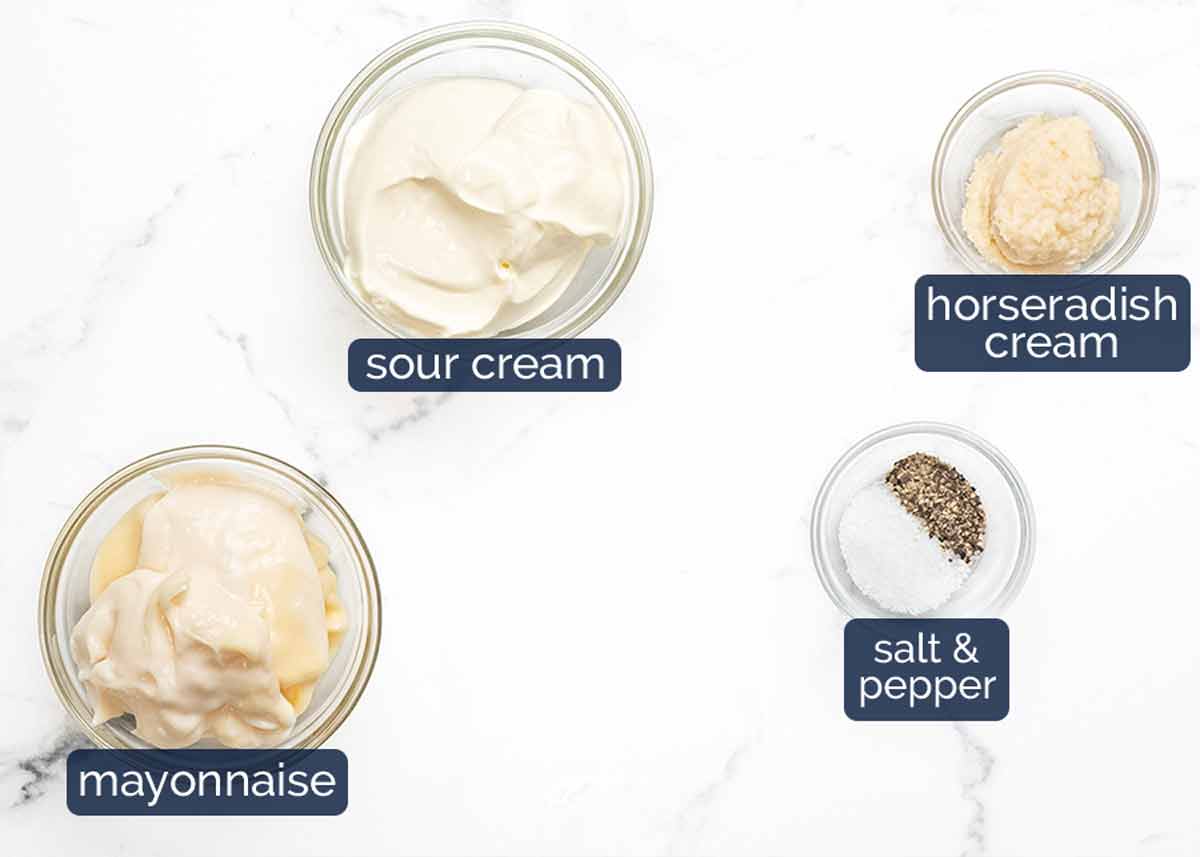
Mayonnaise – Whole egg mayo is best as it is creamier and less tangy than ordinary mayonnaise. Readily available these days in grocery stores (it will say “whole egg mayo” on the label).
Sour cream – Full fat please! Yogurt can be used as a substitute but sour cream does have a creamier mouthfeel.
Horseradish cream – This is pickled fresh horseradish which has a zingy spiciness like wasabi. Because it’s pickled, it is vinegary. So this adds both a hint of spicy warmth and tang to the dressing.
If you’re lucky enough to have fresh horseradish, use half the amount and add a couple of teaspoons of vinegar.
How to make potato salad
IMPORTANT! Creamy potato salads really are better made with starchy potatoes for texture and flavour, but you really need to take care not to overcook else they will crumble too much when tossing. Waxy potatoes would be easier to use because they hold their shape….but the eating part is not as good! I’ve done a lot of potato salad eating in my time to arrive at this conclusion.
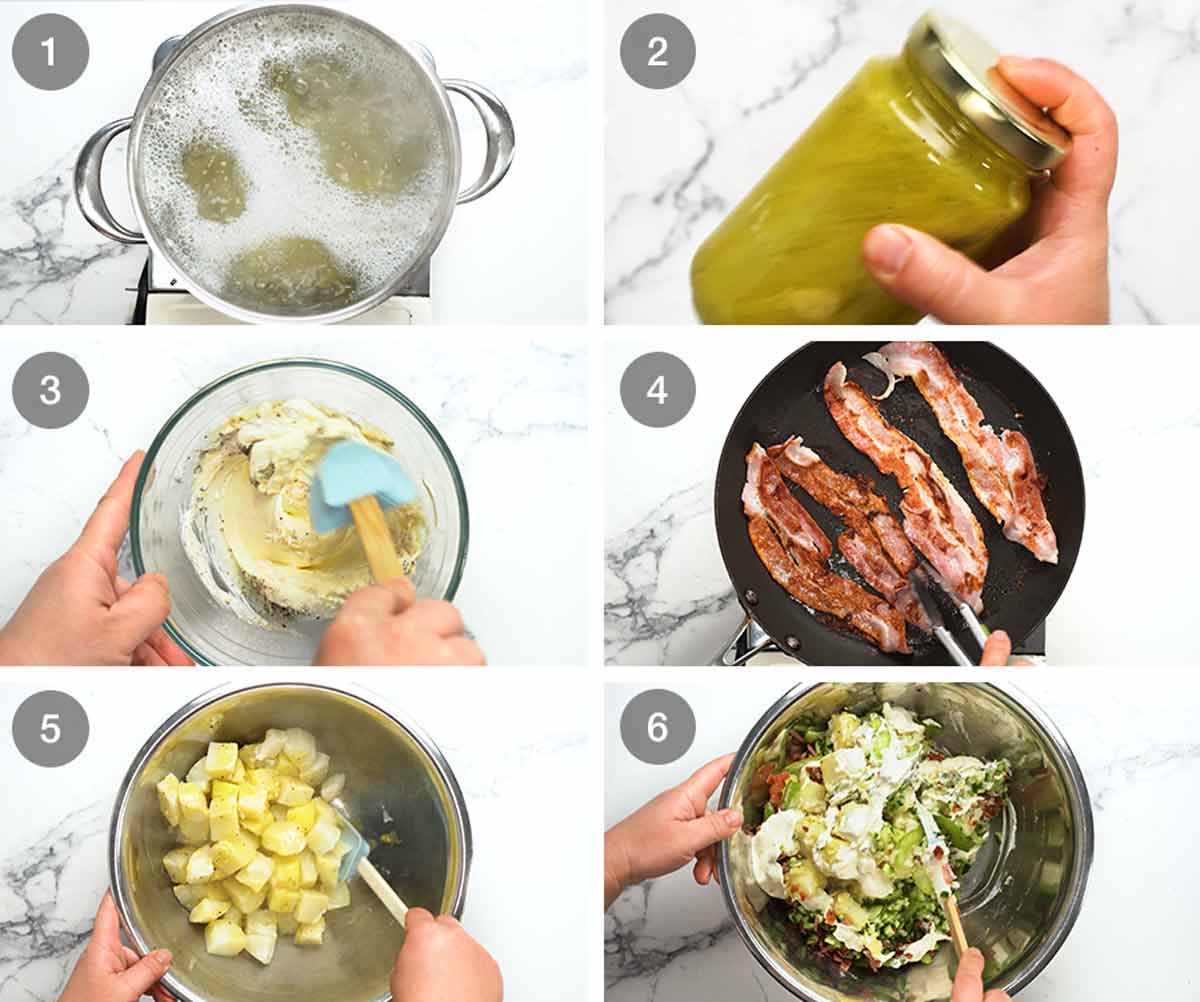
Start in cold water – Cook cut potatoes starting in cold water. Never start potatoes in boiling water else they will cook too much on the outside before the inside cooks and crumble when tossed!
Check frequently – Once the water comes up to the boil, start checking at 4 minutes and every 30 seconds thereafter. As soon as you can pierce a potato with almost no resistance, drain immediately. They will continue cooking with the residual heat.
French Dressing – Shake French Dressing ingredients in a jar until combined.
Creamy Dressing – Mix the ingredients in a bowl until smooth.
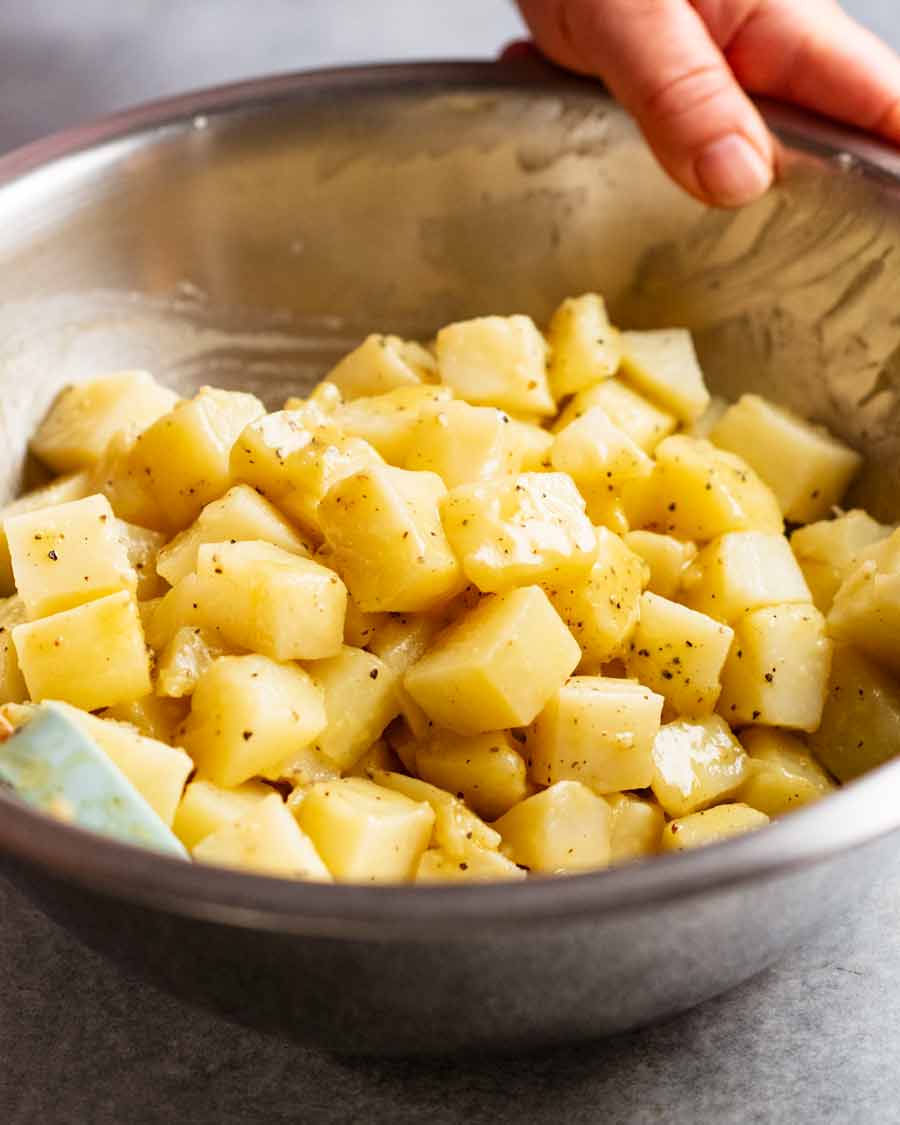
Soak hot potatoes – Gently transfer the potatoes in a bowl and pour over the French Dressing. Toss very gently using a rubber spatula. Minimum tosses just to coat, then set aside for at least 2 hours for the potatoes to cool and absorb the dressing. We are essentially marinating the potatoes here. You know this is going to be good!
The cooled potatoes are also less fragile less susceptible to breaking when we mix with the remaining ingredients.
Add-ins – Add the cucumber, celery, onion, most of the bacon and all the creamy dressing. Toss gently until mixed through. If time permits, set aside for a few hours or better yet overnight, to let the flavours meld together. But honestly, even if you serve it straight away, it will still be the best potato salad of your life!
Proof of excellence
This potato salad will last 4 to 5 days in the fridge, and it just gets better with time. Make it once, and it will be a staple at all gatherings for years to come. I have never strayed from this recipe since the moment I tried it!
And as final proof of how great this potato salad is, even my mother who is a die-hard Japanese Potato Salad devotee couldn’t stop eating this. That’s just about the highest praise you can get.
Thank you Mrs B! – Nagi x
Watch how to make it

The best Potato Salad
Ingredients
Potato Salad
- 1 kg / 2 lb potatoes peeled and cut into 2cm/ 3/4" cubes (Aus – Sebago, Colban; US – Russet, Idaho Yukon; UK – Maris Piper, King Edward) (Note 1)
- 2 tsp cooking / kosher salt , for cooking potatoes
- 250g / 8oz streaky bacon
- 1/2 cup French Dressing – homemade (below) or store bought (Note 2)
- 3/4 cup cucumber, finely diced (1 x 15cm/6" cucumber, cut lengthwise and remove watery seeds first)
- 1 cups celery, finely sliced diagonally (~ 2 ribs)
- 1/4 cup white onion, finely minced , ~ 1/2 onion (Note 3)
Potato Salad Dressing
- 1/3 cup mayonnaise , preferably whole-egg
- 1/3 cup sour cream , full fat (sub yogurt)
- 1 tbsp horseradish cream (or horseradish relish) (Note 4)
- 1/2 tsp cooking / kosher salt
- 1/4 tsp black pepper
French Dressing (essential! Note 2)
- 1 tbsp dijon mustard
- 2 tbsp white wine vinegar (sub apple cider vinegar)
- 1/4 cup extra virgin olive oil
- 1 tbsp water (for volume, rather than more oil)
- 1/2 tsp white sugar
- 1/2 garlic clove , finely grated or minced
- 1/2 tsp salt
- 1/4 tsp black pepper
Instructions
- French Dressing – Shake ingredients in a jar until well combined.
- Cook potatoes (CAREFUL! Note 5) – Put potatoes and 2 teaspoon salt in a large pot of cold water. Turn the stove on. Once the water is simmering, cook for 4 minutes or until the potatoes are JUST cooked (still bit firm in the middle) – they will keep cooking with residual heat. Drain immediately (gently!).
- Douse hot potatoes! Carefully transfer potatoes into a large bowl and pour over French Dressing. Gently toss to coat then set aside for 2 hours so potatoes absorb the dressing and cool (less fragile).
- Crispy bacon – Lay half the bacon in a cold non-stick pan. Turn onto medium high and cook until golden (the fat will melt as the pan warms up so it cooks in its own fat). Turn and cook the other side until golden. Drain paper towels, repeat with remaining bacon. Once cool and crisp, chop into small pieces.
- Creamy Dressing – Mix ingredients in a bowl until combined.
- Toss – Add creamy dressing, celery, cucumber, onion, and most of the bacon. Toss gently to combine.
- Serving – Serve garnished with remaining bacon. If time permits, I recommend setting aside for a few hours, or even better, overnight, to give the flavours a chance to meld. But still amazing served straight away! Always serve at room temperature, not fridge cold.
Notes
Nutrition
Originally published August 2014. This is such a staple recipe in my life, I had to re-publish it with a video, sparkling new photos and of course add a Life of Dozer section!!
The potato salad family
Summer salads I love


Life of Dozer
I was at the Good Food & Wine Show in Sydney on the weekend! JB and I were doing a cooking show on stage and book signings/meet ‘n greets.
The Fun Police (council) wouldn’t let Dozer into a food show. So I took the next best thing – a life size cardboard cut out. We’re getting a lot of mileage out of 2D Dozer! 😂


The post The Best Potato Salad appeared first on RecipeTin Eats.
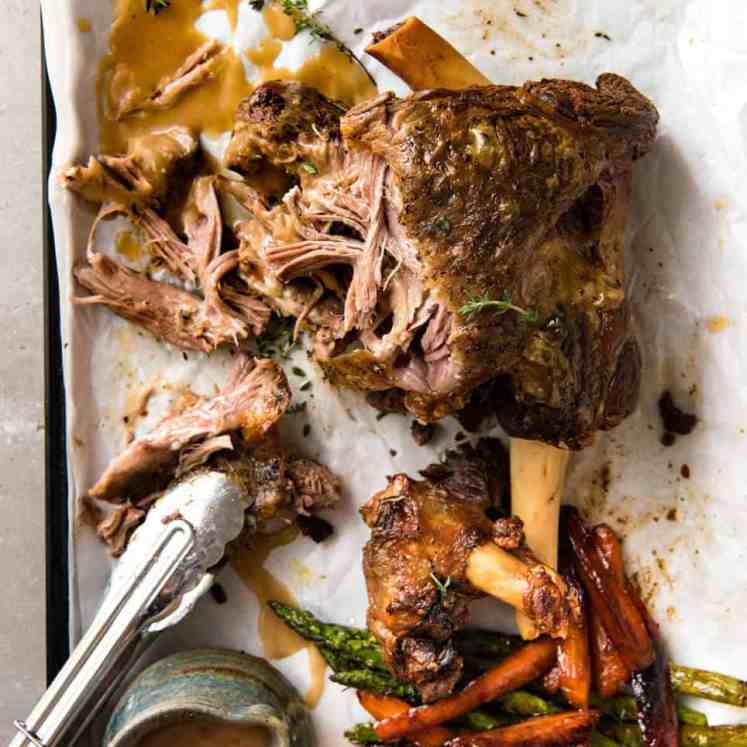
]]>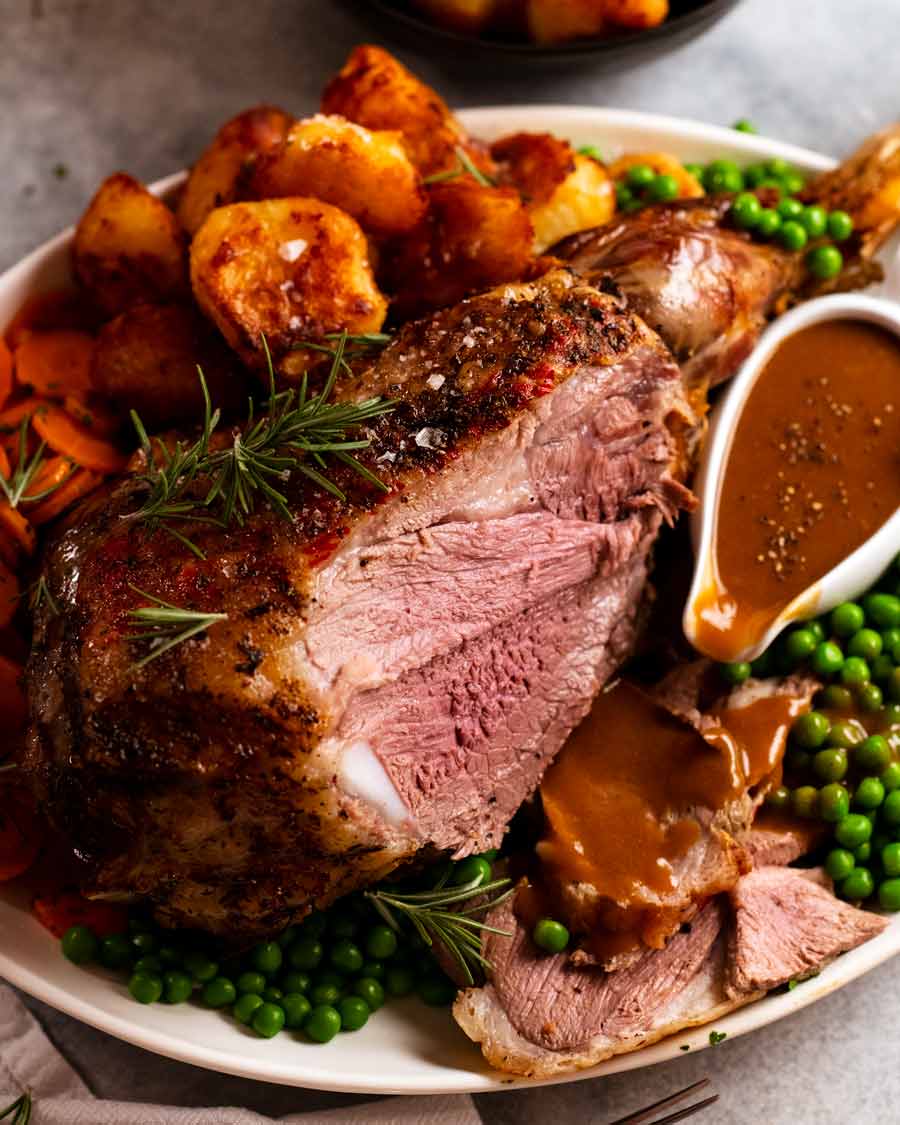 I love a good roast lamb (proof). Here’s my classic recipe for lamb leg, rubbed with garlic and rosemary, served with gravy, peas, carrots and crispy roast potatoes (duck fat or classic). I hope you love it as much as I do! The only thing you need to know for perfect roast lamb leg I... Get the Recipe
The post Roast Lamb Leg with Gravy appeared first on RecipeTin Eats.
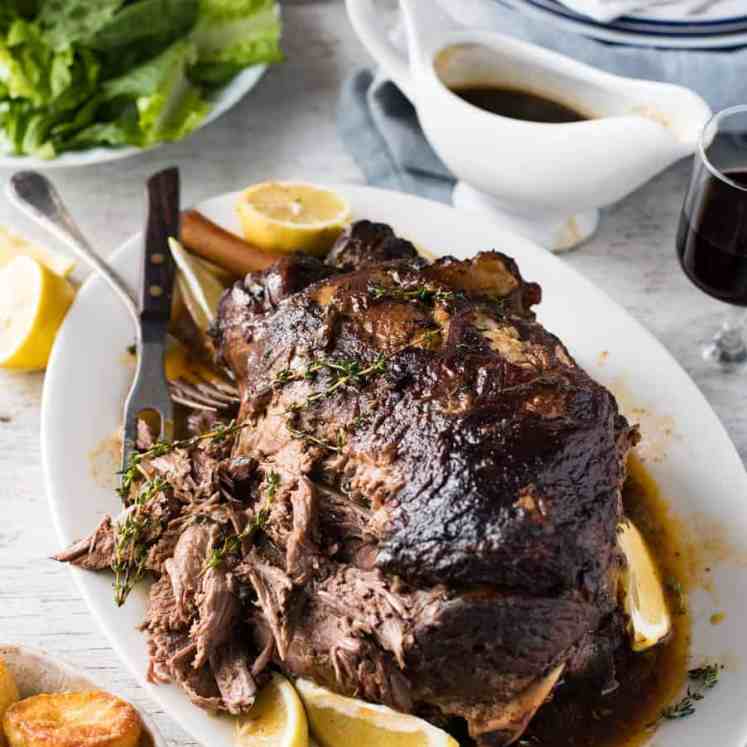
]]>I love a good roast lamb (proof). Here’s my classic recipe for lamb leg, rubbed with garlic and rosemary, served with gravy, peas, carrots and crispy roast potatoes (duck fat or classic). I hope you love it as much as I do!
The only thing you need to know for perfect roast lamb leg
I have a lot to say about roasting any kind of meat. Especially Australia’s favourite roast – the great lamb leg. But there’s really only one thing you need to know to make perfect roast lamb leg, every single time:
GET A MEAT THERMOMETER!!
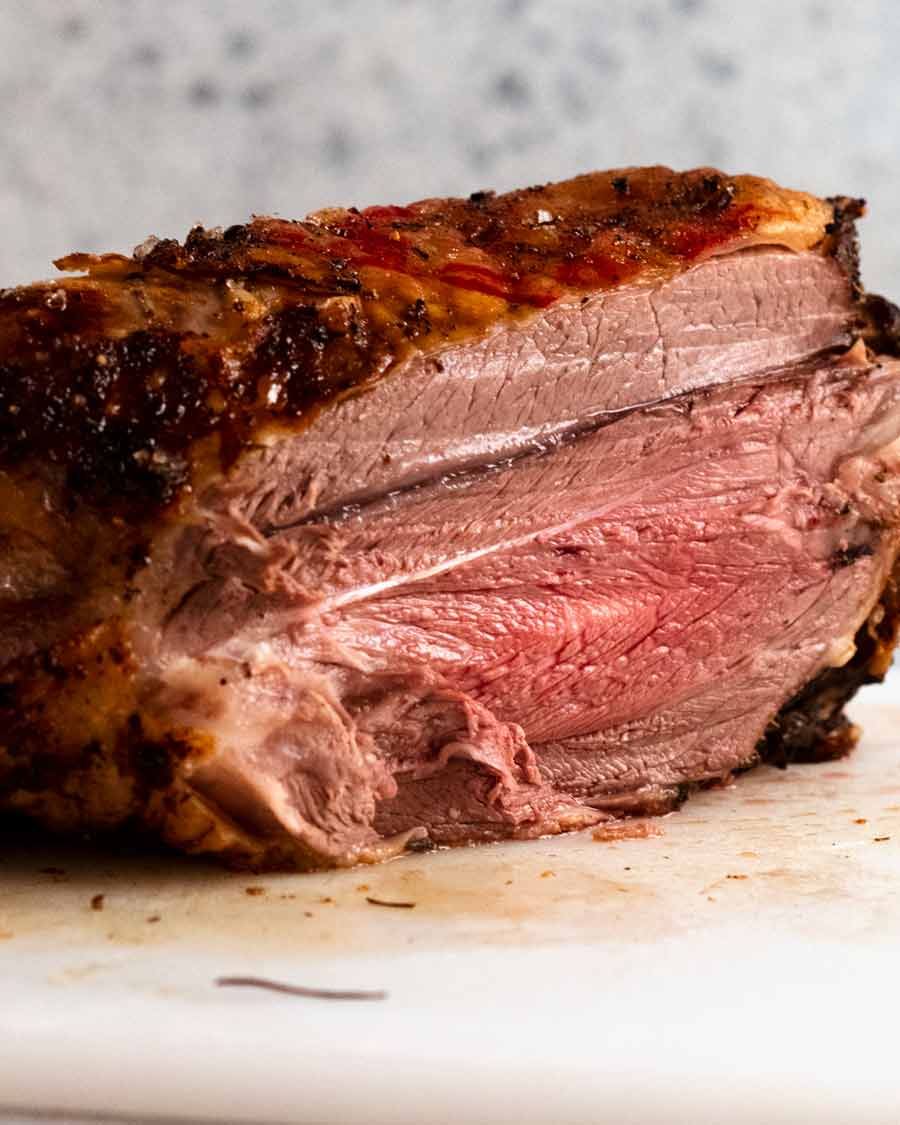
It’s the only way you can take the guesswork out of cooking lamb leg so it’s perfect blushing pink and ridiculously juicy inside. Because – and here’s something Aussies don’t like to talk about – lamb leg is actually very lean so if it’s not pink, it’s dry. Full stop, end of story!
My meat thermometer – For most of my adult life, I was using a $5 thermometer I got on Ebay which never failed me. A few years ago I finally decided it was time to invest in a real one so I got a Thermapen which is pretty well regarded as the best (my thoughts here). Even if you can’t invest in a Thermapen – it’s the 21st century, and even cheap tech isn’t so bad. Invest in a $5 meat thermometer. That’s a lot cheaper than a wasted, overcooked lamb leg!

OK, I do have a few more “how to make the perfect roast lamb leg” tips!
Garlic rosemary rub – classic lamb flavours.
Start on high to get the colour going then lower heat.
Roast on a bed of garlic (or onion).
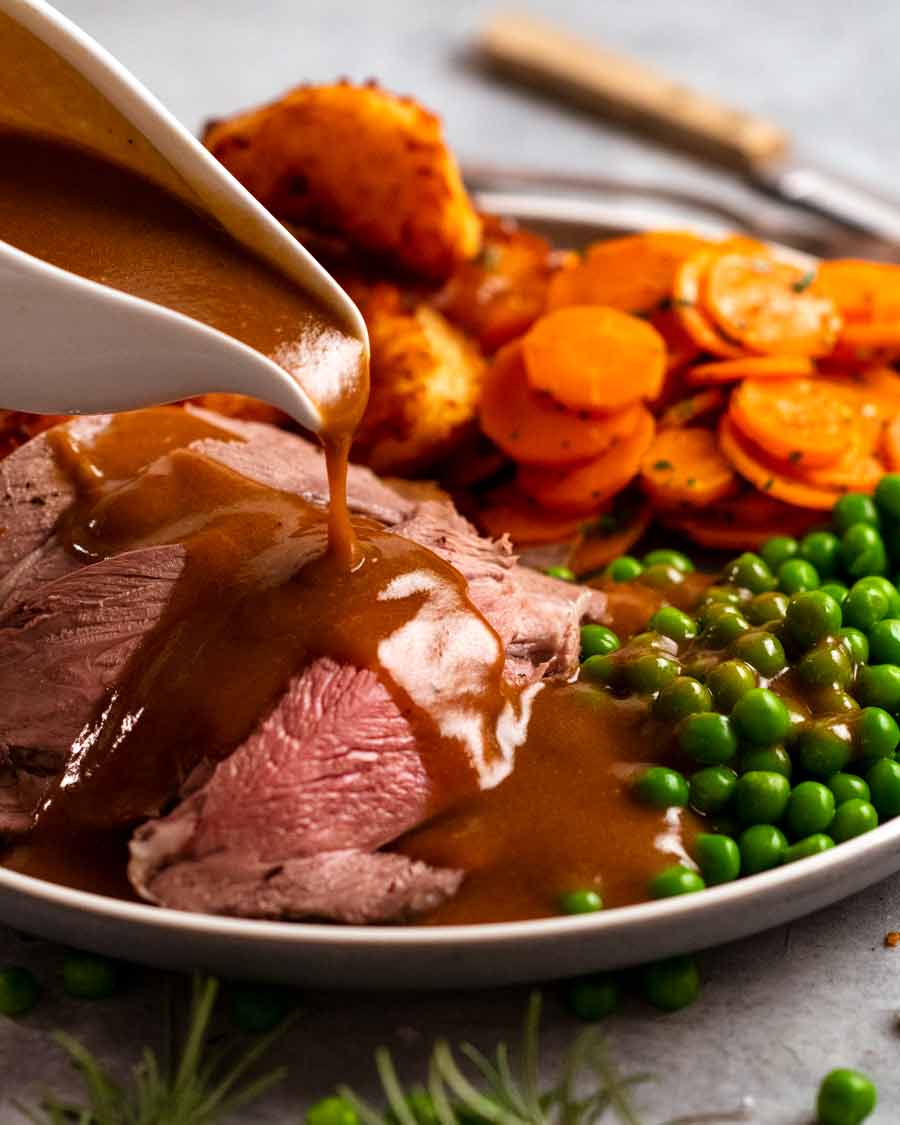
Make the gravy using the pan drippings. Roast lamb gravy is better than every other cut of meat – beef, chicken, pork, none of them compare!

What you need for roast lamb leg
Starting with the hero ingredient – the lamb leg! Get the best you can afford – yes, meat is like wine, the more you pay, the better the quality. Quality of life of the animal also comes into play there.
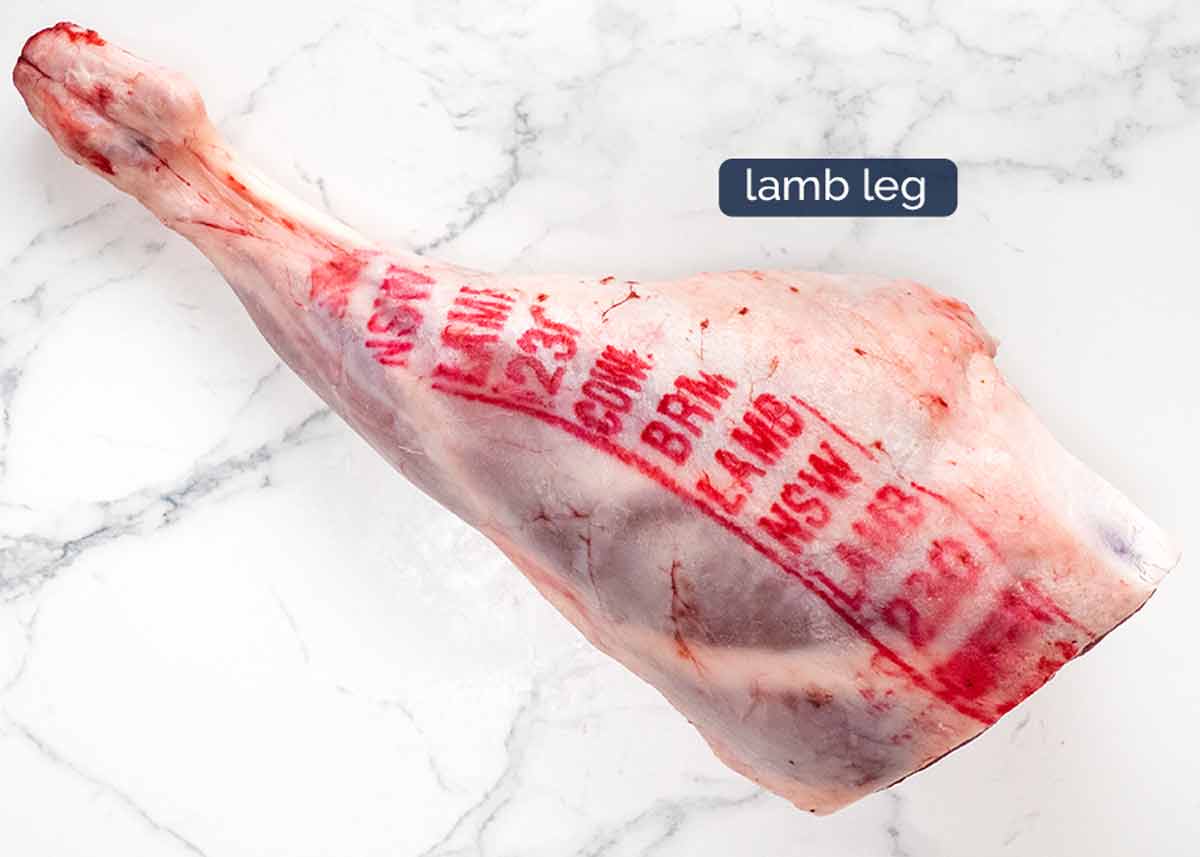
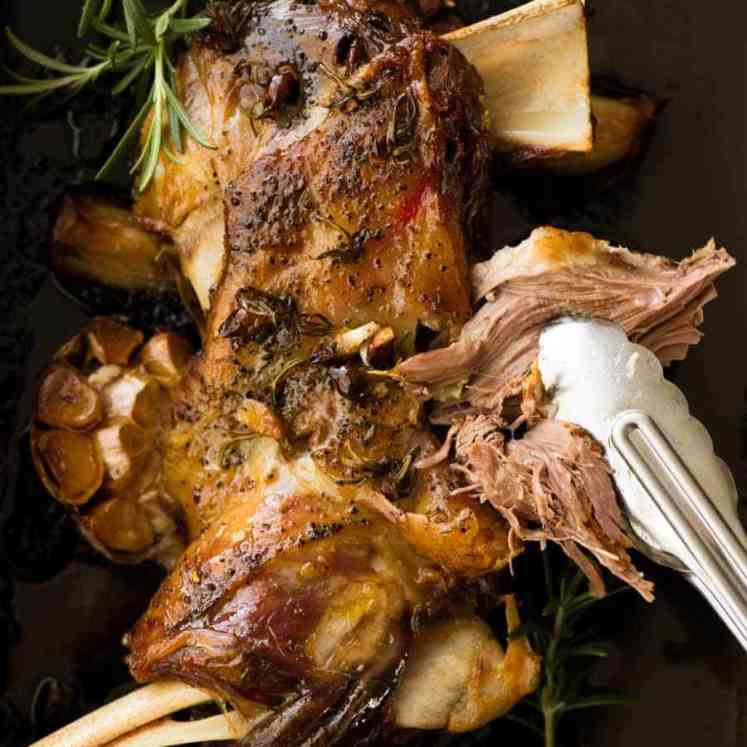
All that red ink you see is perfectly safe to eat and actually, you only see it on better quality lamb. You don’t typically see it on supermarket lamb.
Cut bone – Some (most?) butchers and almost all supermarkets sell lamb leg with the shank (bone) cut. Either fully cut off or partially cut so it folds. This is simply for practical reasons – shelf storage and packing space. For grandness, I like the bone in tact. But it doesn’t matter ,it’s purely a visual decision!
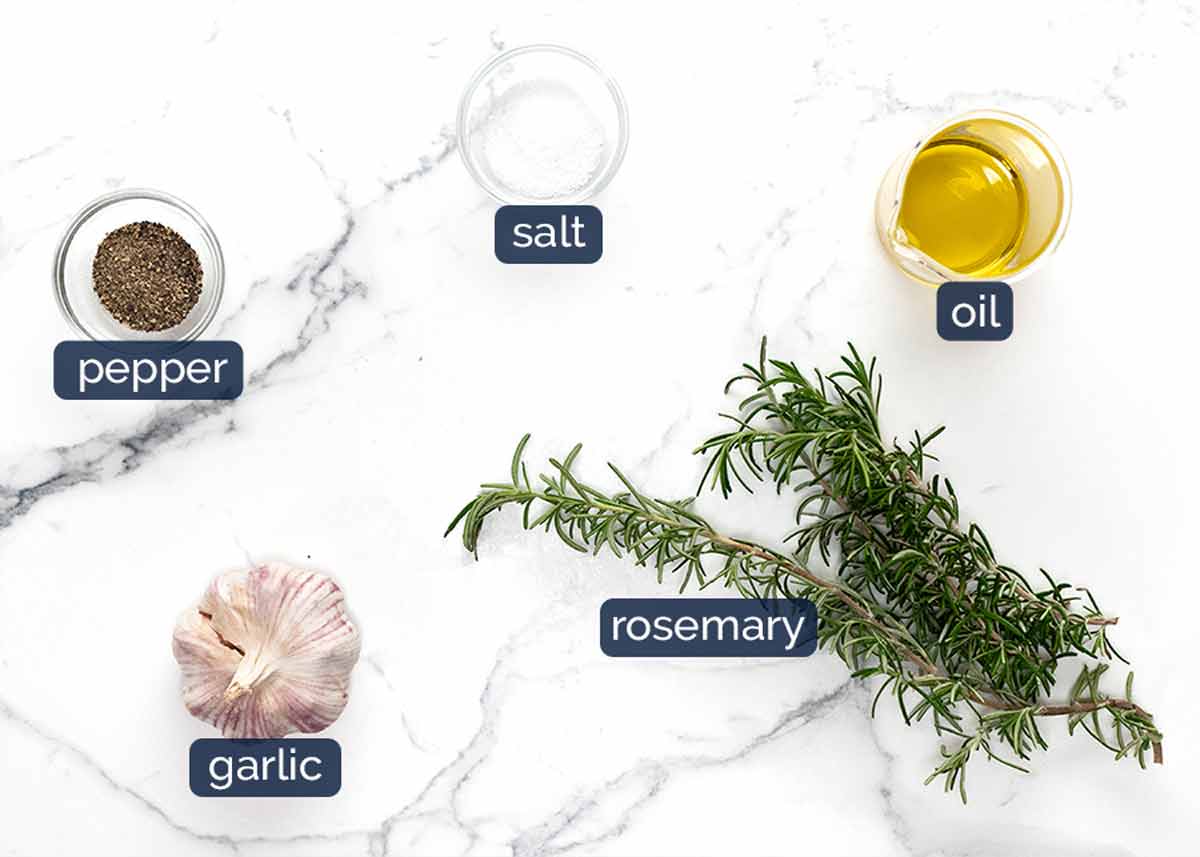
Rub for roast lamb leg
Here’s what you need for the rub: rosemary, garlic, olive oil, salt and pepper. Use fresh rosemary – dried is not the same!
Roast lamb gravy
All you need for gravy is flour for thickening and beef stock/broth for the liquid. You shouldn’t need extra salt for the gravy. I find the salt on the lamb that ends up in the pan drippings plus the salt in the beef stock is enough. But taste and add more if you want!
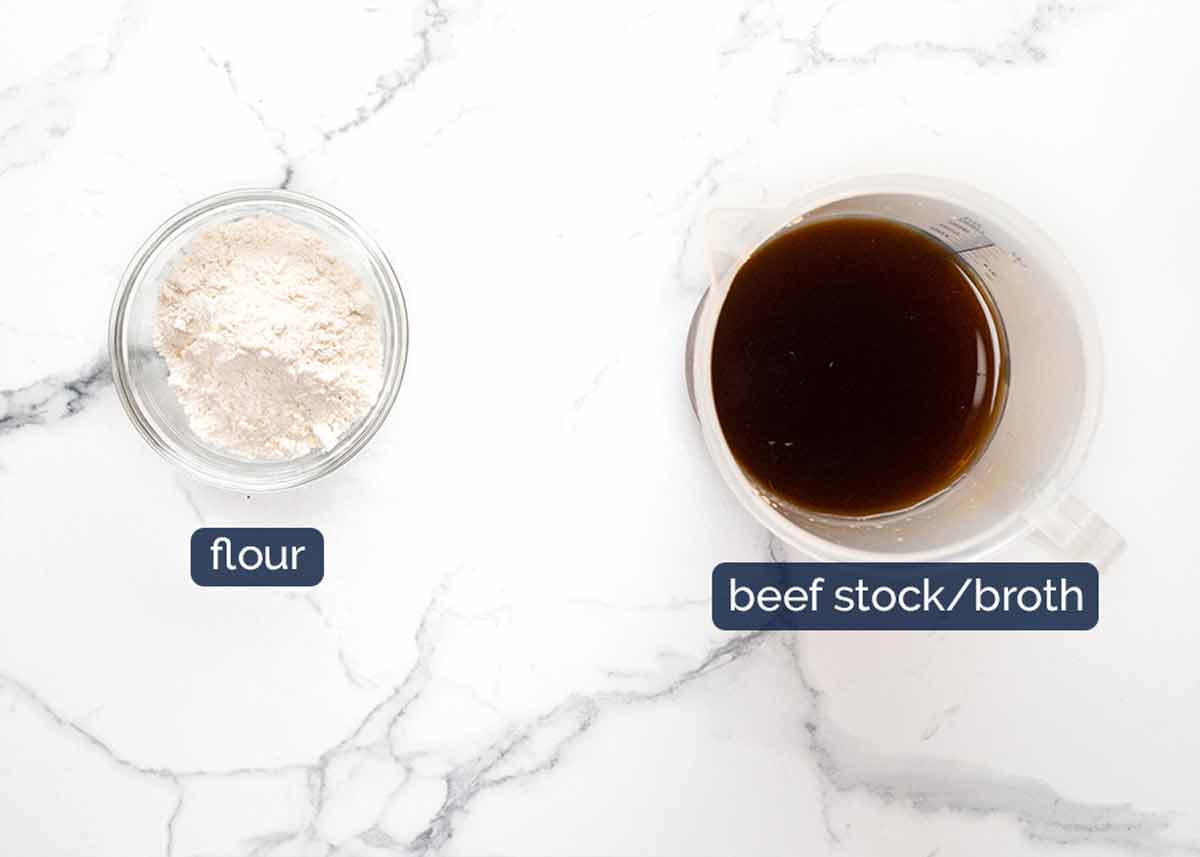
Why beef rather than lamb stock? Well, there’s a reason lamb stock is not typically sold at grocery stores! It’s just very…lamby. Beef has a cleaner flavour. It doesn’t make the gravy taste beefy at all because there is so much lamb flavour from the drippings.
Why not chicken stock? It works fine but the gravy colour is paler. I like my gravy for roast lamb leg to be a really deep brown colour!
How to make roast lamb leg
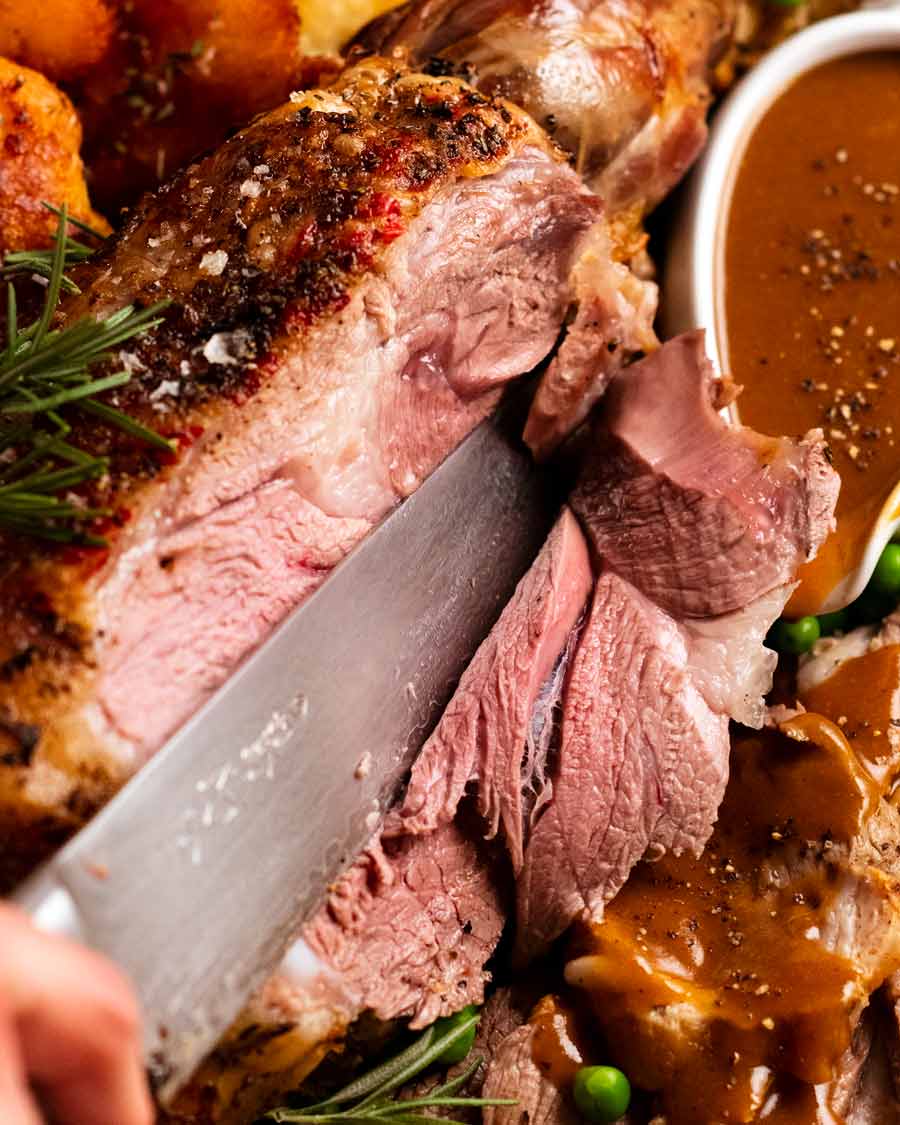
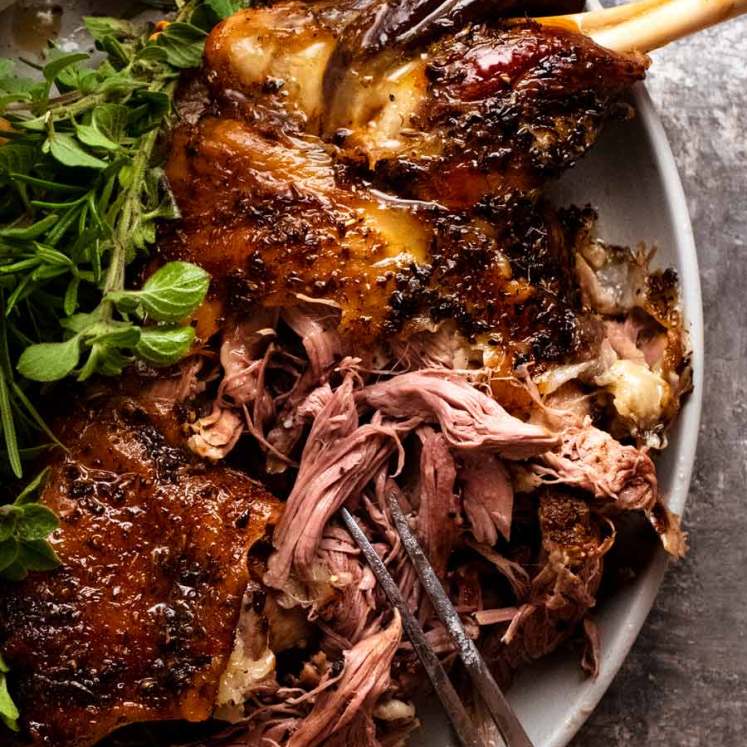
Rub with rosemary and garlic, roast in a hot oven to get the colour going then continue at a lower temperature for 1 hour or until the internal temperature is 53°C/127°F (for blushing pink perfection). Rest for 20 minutes before carving. It will still be very warm even after 1 hour – enough time to make duck fat potatoes!
The lamb leg pictured is a 2.75 kg lamb leg which is about the average size you get from good butchers. Supermarket lamb legs tend to be a little larger from slightly older animals which makes the meat a little less tender and a little stronger “lamby” flavour. Albeit, as you’d expect, cheaper than from butchers.
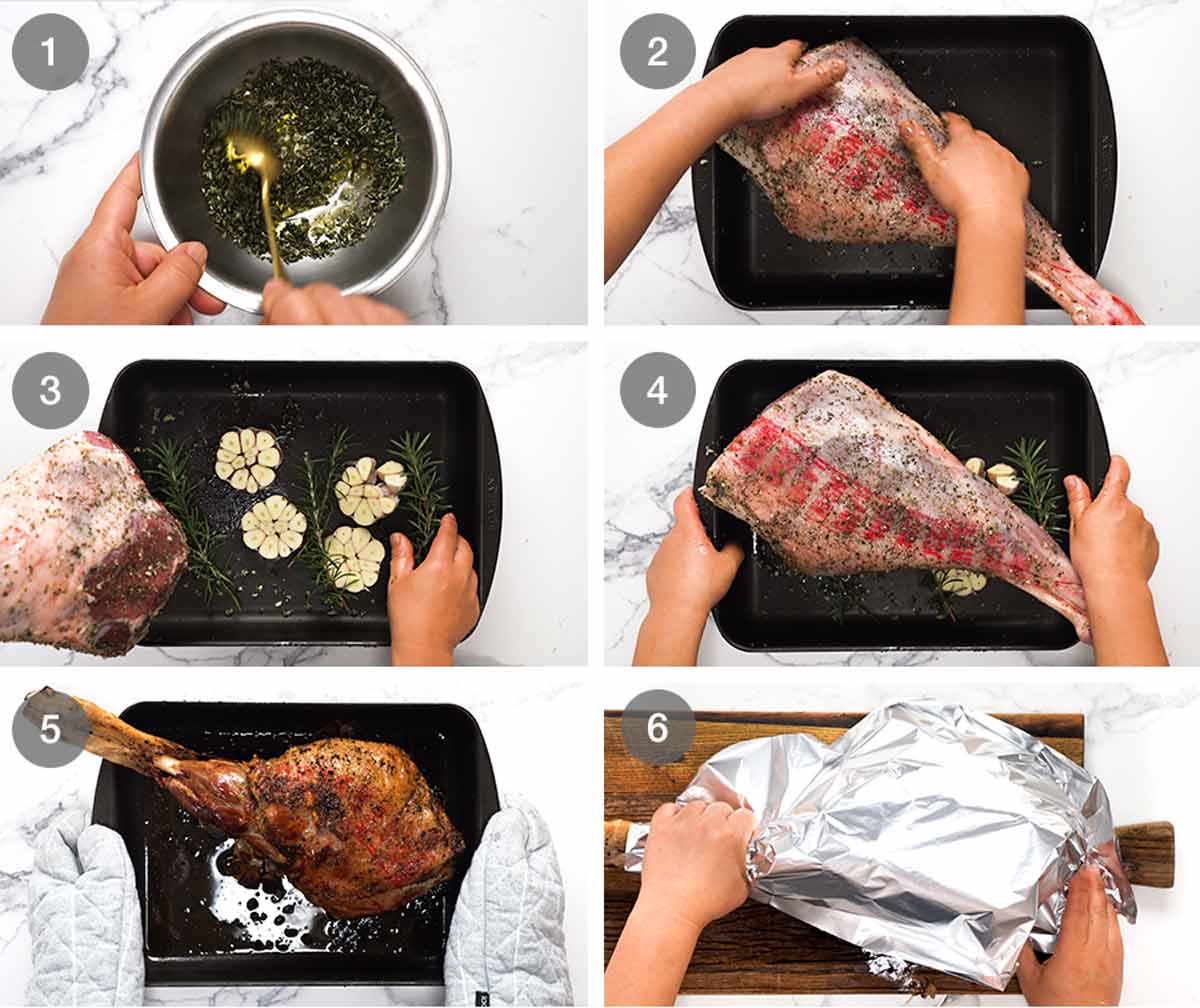
Make rub – Mix oil, garlic and rosemary in a bowl.
Rub then sprinkle – Slather the rub all over the lamb, then sprinkle the salt and pepper all over. It’s better to do it this way for more even dispersion of salt – if you put it in the oil, it doesn’t spread quite as evenly because it pools in the bottom of the bowl.
I do this rubbing step in the roasting pan – why dirty a cutting board??
Garlic bed – Place cut garlic and rosemary under the lamb.
Hot oven 20 minutes – Roast for 20 minutes in a hot 240°C/475°F (220°C fan) oven. This will get the colour going on the lamb. It’s tempting to go longer to get even more colour on it but I find if you go beyond 20 minutes you end up with too much overcooked meat “ring” on the outer edges of the lamb.
1 hour lower oven – Reduce heat to 200°C / 400°F (180°C fan) and roast for a further 1 hour or until the internal temperature of the lamb is 53°C/127°F for blushing pink perfection.
Check the internal temperature at the 45 minute mark. Never rely on a recipe cook time for roast meat, use your thermometer! So many variables can affect the exact roasting time, from oven strength to pan heat distribution, the shape of the lamb leg and how cold the meat is right in the middle.
See below for more information on lamb doneness and different size lambs.
Rest 20 minutes – Rest the lamb for 20 minutes before carving. During this resting stage, the lamb finishes cooking and the internal temperature will rise to 62°C/144°F which is perfect medium rare for lamb.
Also during resting, the lamb juices get re-absorbed by the meat fibres so when you cut into the meat, the juices remain in the meat and eventually end up in your mouth. If you do not rest the meat then the meat juices leak out everywhere when you start carving the lamb.
Internal temperature of roast lamb leg
No credible restaurant would ever serve lamb leg at anything over than medium rare! But I do know some people like their lamb done a little more, so here are the internal temperatures for lamb leg at different levels of doneness.
Take the lamb out when it hits the “temperature out of oven”. After resting for 20 minutes it will rise to your target level of doneness.
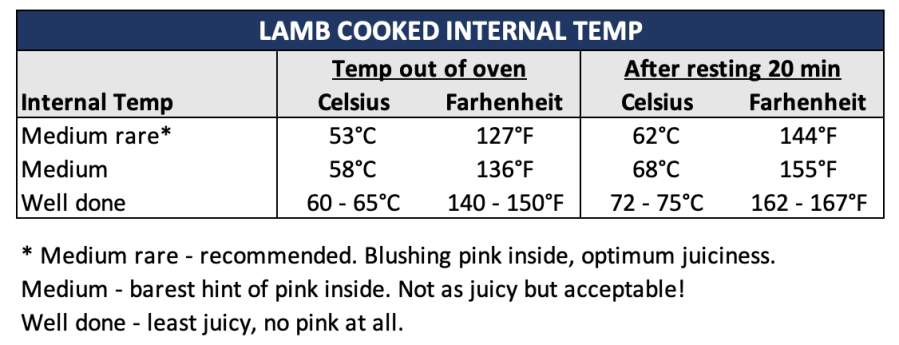
TIP: Take the lamb out early!!!
This is one of the most common mistakes people make when roasting lamb. If you want medium rare lamb and you take the lamb leg out of the oven when it hits 62°C/144°F (which is the medium rare target temperature), it will rise to 73°C/163°F once rested which is well done – no hint of pink at all! This occurs because the lamb continues to cook after you take it out of the oven due to residual heat. It’s called carry-over cooking.
So if you want medium rare, perfectly pink lamb leg, you need to take it out of the oven once the internal temperature reaches 53°C/127°F. At this temperature, the lamb is rare.
But when you rest the lamb for 20 minutes, it will continue to cook and the internal temperature will rise by 9°C/17°F to 62°C/144°F. This temperature is medium rare, the optimum doneness for lamb leg so it’s beautifully juicy. Any more and the lamb meat is drier than ideal, because lamb leg is a lean meat.
How to make gravy for roast lamb leg
Gravy for lamb leg is made using the pan drippings after roasting the lamb. “Drippings” simply refers to the fat and meat juices left in the roasting pan after roasting the meat and it’s our express, free path to a killer gravy.

Heat drippings & cook flour – Once you take the lamb out of the roasting pan, put it straight on the stove to heat the fat. Add flour and stir it for 1 minute to cook it off – it will kind of be like a paste.
Pour in the beef stock, stirring as you go to help dissolve the flour.
Smush the garlic with a potato masher or even a smooth to help release the beautiful caramelised garlic flesh into the gravy.
Strain – Then just simmer for a few minutes until the gravy thickens to your taste then strain into a bowl, pressing the gravy liquid out of the garlic heads. Then pour into a jug to serve!
And that, my friends, is everything you need to know to be the king (or queen) of roast lamb leg from this day forth. The precision by which you roast your lamb to blushing pink perfection will be admired. Your gravy will be whispered about in your circles – the flavour!!! It’s incredible!
Just smile sedately, sit back and bask in the praise. There is no need to reveal your recipe source. 😎
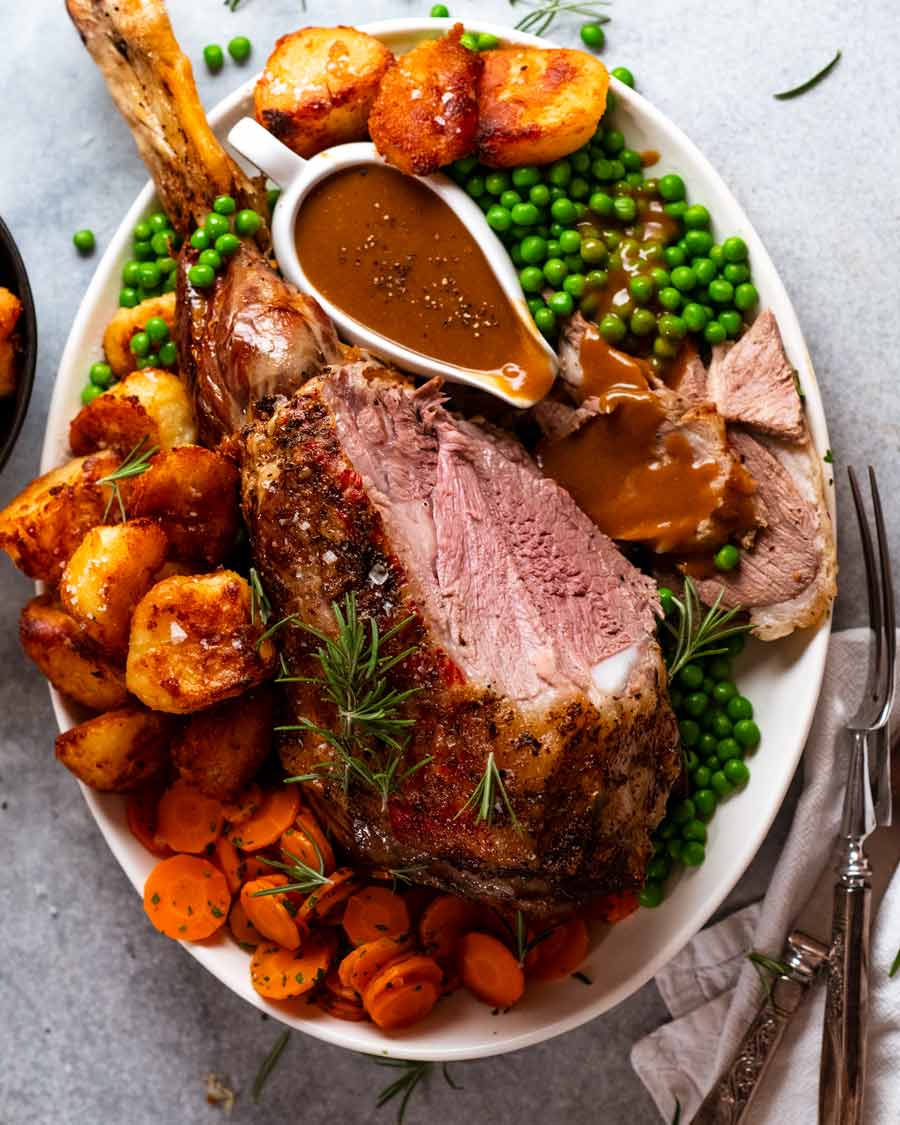
The lamb leg in this post is pictured with duck fat potatoes (the best crispy potatoes in the world!) with peas and steamed carrots tossed with a little butter and parsley. If you don’t have duck fat, make my classic crunchy roast potatoes instead. They are still way crunchier than your usual way of making them.
Go forth and enjoy your new lamb-alicious world! If you’ve got your own lamb leg secrets, sharing in the comments below – readers love hearing what you have to say. – Nagi x
Watch how to make it
Roast Lamb Leg with Gravy
Ingredients
- 2.75 – 3 kg / 5.5 – 6 lb lamb leg , bone-in (Note 1)
- 1 1/2 tsp cooking salt
- 1/2 tsp black pepper
Rub
- 1 1/2 tbsp fresh rosemary leaves , finely chopped
- 3 garlic cloves , finely minced
- 2 tbsp olive oil
Base
- 2 whole heads of garlic , halved horizontally (Note 2)
- Few sprigs rosemary (optional)
Gravy
- 4 tbsp flour , plain/all purpose
- 2 1/2 cups beef broth / stock , low sodium (Note 3)
Instructions
- Take lamb out of fridge at least 1 hour before roasting. (Note 4)
- Preheat oven to 240°C/475°F (220°C fan) with oven shelf in the middle.
- Rub – Mix rosemary, garlic and olive oil.
- Prepare lamb – Place lamb leg in a roasting pan. Coat with the rub using your hands, the sprinkle with the salt and pepper. Place garlic and rosemary sprigs underneath the lamb, garlic cut face up.
- Roast lamb leg for 20 minutes. Turn the oven down to 200°C/400°F (180°C fan) and roast for a further 1 hour or until the internal temperature reaches 53°C/127°F for medium rare (Note 5 other doneness). Check first at 45 minutes – everyone's oven is different!
- Rest – Remove lamb from oven. Transfer lamb to plate, loosely cover with foil and rest for 20 minutes to 1 hour (it will still be warm enough for serving!). The internal temperature will rise to 62°C/144°F (medium rare). Make gravy while lamb is resting – below.
- Serve lamb with gravy, duck fat or classic crunchy roast potatoes, peas and steamed carrots tossed with butter and parsley.
Gravy for roast lamb leg
- Drippings in pan – Discard rosemary sprigs. You should have around 4 – 5 tbsp of fat (drippings). If less, add butter. If much more, discard a bit.
- Add flour – Place roasting pan on stove over medium heat. When the fat starts to bubble, then add flour. Mix flour in and cook for 1 minute.
- Stock – Pour in half the beef stock and mix to dissolve sludge in, then add remaining beef stock and mix.
- Garlic squidging – Use a potato masher (if you're really keen like me) to mush the garlic to squeeze out the flavour (also helps flour caught in garlic to dissolve).
- Taste – Check salt and pepper (I don't add more).
- Thicken – Simmer for a couple of minutes, stirring, until it starts to thicken. Take it off the stove BEFORE the gravy is the thickness you want because it will keep thickening.
- Strain into a bowl, mushing garlic to squeeze all the liquid out. Then pour into gravy jug and serve with lamb!
Notes
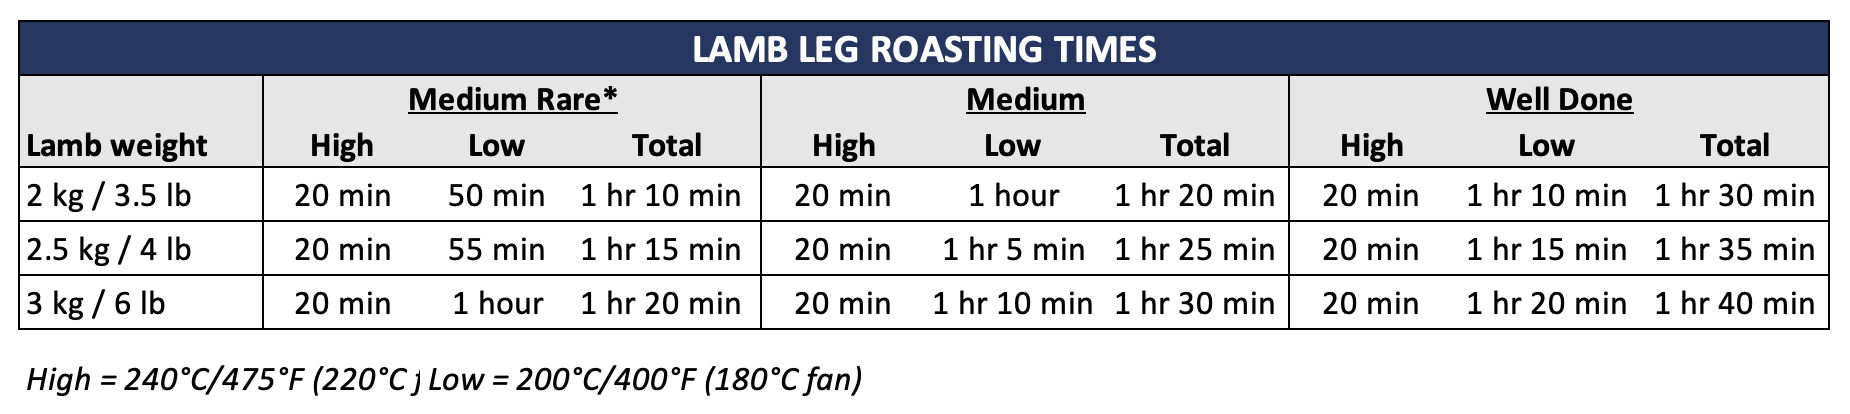 1. Lamb leg – Recipe is based on a whole lamb leg. See roasting time table above for different lamb sizes. Sometimes the bone sticking out is removed, sometimes it is partially cut so it folds inwards. It doesn’t matter either way, but just ensure the bone inside the meat is not removed. (If it is, you have a butterflied lamb leg – use this recipe instead).
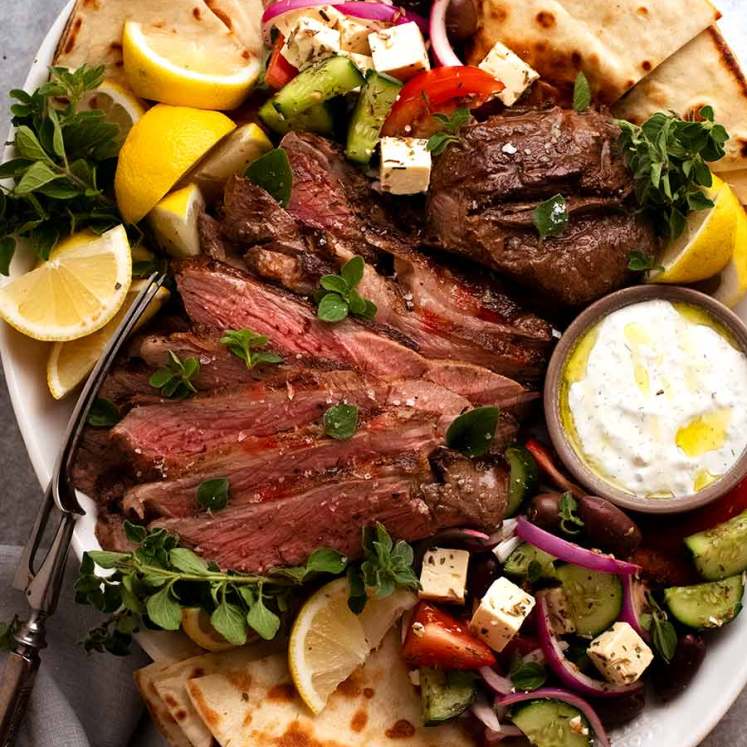
Boneless lamb – I love making Greek butterflied lamb leg. If yours is rolled and tied, you could make this recipe but the meat is not quite as juicy because it’s been cut to remove the bone so there’s more escape roots for meat juices! If you can, unroll the lamb to do the rub then roll it back up and tie again (excellent flavour infusion!). Also, cook time likely a bit shorter. I’d do the 20 minute high temp blast, lower oven then check at 40 minute mark.
2. Garlic base – Elevates the lamb slightly so it cooks more evenly and allows the fat to drip over the garlic so the flavour infuses into the drippings that then forms the base of the gravy. Place garlic cut side up so the flavour infuses into the flesh of the lamb.
It is not garlicky at all because when garlic roasts, it becomes sweet and caramelised. It is my big secret for making a killer gravy for roast lamb! You can use 1 onion, quarters (skin on) instead of or in addition to garlic.
3. Gravy for lamb is best made with beef stock/broth because it has a deeper flavour and makes the gravy a beautiful dark brown colour. Store bought is fine, though homemade makes it ultra restaurant-worthy! If you cannot consume beef for religious or health reasons, then chicken broth can be substituted.
4. De-chilling lamb will make it cook more evenly. Cold lamb leg = overcooked on the outside by the time the inside is cooked.
5. Internal temperature of cooked lamb leg:
1. Lamb leg – Recipe is based on a whole lamb leg. See roasting time table above for different lamb sizes. Sometimes the bone sticking out is removed, sometimes it is partially cut so it folds inwards. It doesn’t matter either way, but just ensure the bone inside the meat is not removed. (If it is, you have a butterflied lamb leg – use this recipe instead).
Boneless lamb – I love making Greek butterflied lamb leg. If yours is rolled and tied, you could make this recipe but the meat is not quite as juicy because it’s been cut to remove the bone so there’s more escape roots for meat juices! If you can, unroll the lamb to do the rub then roll it back up and tie again (excellent flavour infusion!). Also, cook time likely a bit shorter. I’d do the 20 minute high temp blast, lower oven then check at 40 minute mark.
2. Garlic base – Elevates the lamb slightly so it cooks more evenly and allows the fat to drip over the garlic so the flavour infuses into the drippings that then forms the base of the gravy. Place garlic cut side up so the flavour infuses into the flesh of the lamb.
It is not garlicky at all because when garlic roasts, it becomes sweet and caramelised. It is my big secret for making a killer gravy for roast lamb! You can use 1 onion, quarters (skin on) instead of or in addition to garlic.
3. Gravy for lamb is best made with beef stock/broth because it has a deeper flavour and makes the gravy a beautiful dark brown colour. Store bought is fine, though homemade makes it ultra restaurant-worthy! If you cannot consume beef for religious or health reasons, then chicken broth can be substituted.
4. De-chilling lamb will make it cook more evenly. Cold lamb leg = overcooked on the outside by the time the inside is cooked.
5. Internal temperature of cooked lamb leg: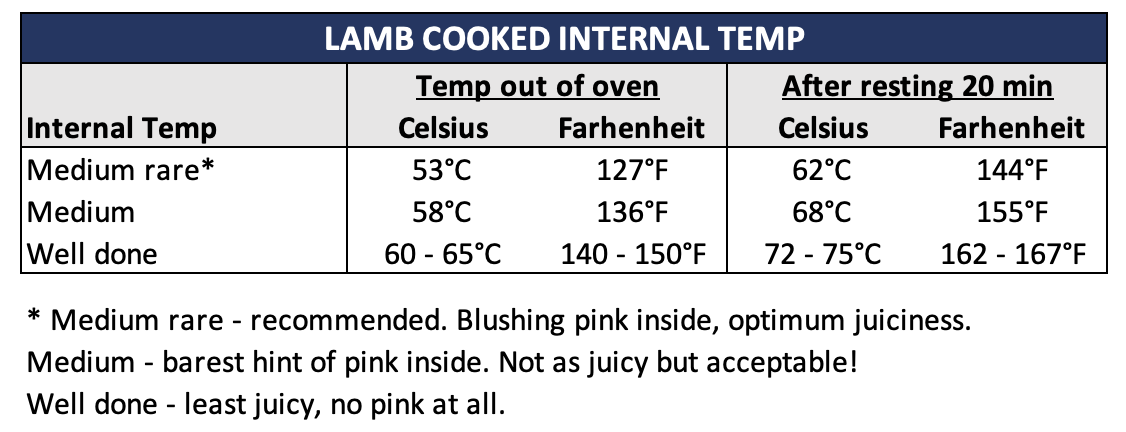 I highly recommend getting a meat thermometer for accuracy – only guaranteed way to get juicy lamb every time!
6. Holding – The lamb leg will stay warm for up to 1 hour, enough time to make duck fat or classic crunchy roast potatoes! The inside of the lamb is still warm even after 3 hours.
7. Servings: A 2.5 kg/5 lb lamb serves 6 very generously and 8 comfortably. After taking into account the bone (500g/1lb) and meat juices lost during roasting, you should end up with around 1.7kg meat after cooking which is around 280g for 6 people (generous!) or 200g for 8 people. If you slice lamb thinly it will go further!
8. Nutrition per serving, assuming 8 servings and that all the gravy is consumed.
I highly recommend getting a meat thermometer for accuracy – only guaranteed way to get juicy lamb every time!
6. Holding – The lamb leg will stay warm for up to 1 hour, enough time to make duck fat or classic crunchy roast potatoes! The inside of the lamb is still warm even after 3 hours.
7. Servings: A 2.5 kg/5 lb lamb serves 6 very generously and 8 comfortably. After taking into account the bone (500g/1lb) and meat juices lost during roasting, you should end up with around 1.7kg meat after cooking which is around 280g for 6 people (generous!) or 200g for 8 people. If you slice lamb thinly it will go further!
8. Nutrition per serving, assuming 8 servings and that all the gravy is consumed.Nutrition
Originally published October 2016. I have been very neglectful not updating one of my favourite recipes with sparkling new photos and a recipe video!
I told you – I LOVE roast lamb! See?
Life of Dozer
Original photo from when I first published this recipe in 2016 still holds true, so no need to update:
DOZER. Don’t breathe your stinky dog breath over my friends while they eat!

The post Roast Lamb Leg with Gravy appeared first on RecipeTin Eats.
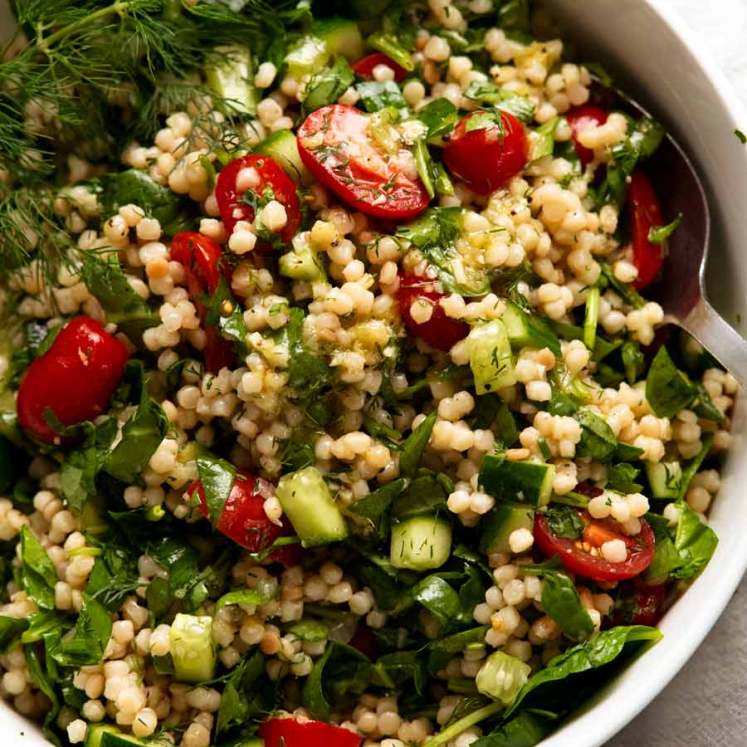
]]> This is a great quick recipe that’s got everything you need for a complete dinner, all cooked in one pot. Plenty of vegetables, with risoni/orzo and chicken. Tastes like risotto – loaded with tasty lemon-garlic Greek flavours! One-pot Greek chicken risoni Patience has never been my greatest virtue, so I shared many personal favourite recipes... Get the Recipe
The post One-pot Greek chicken risoni (orzo) appeared first on RecipeTin Eats.
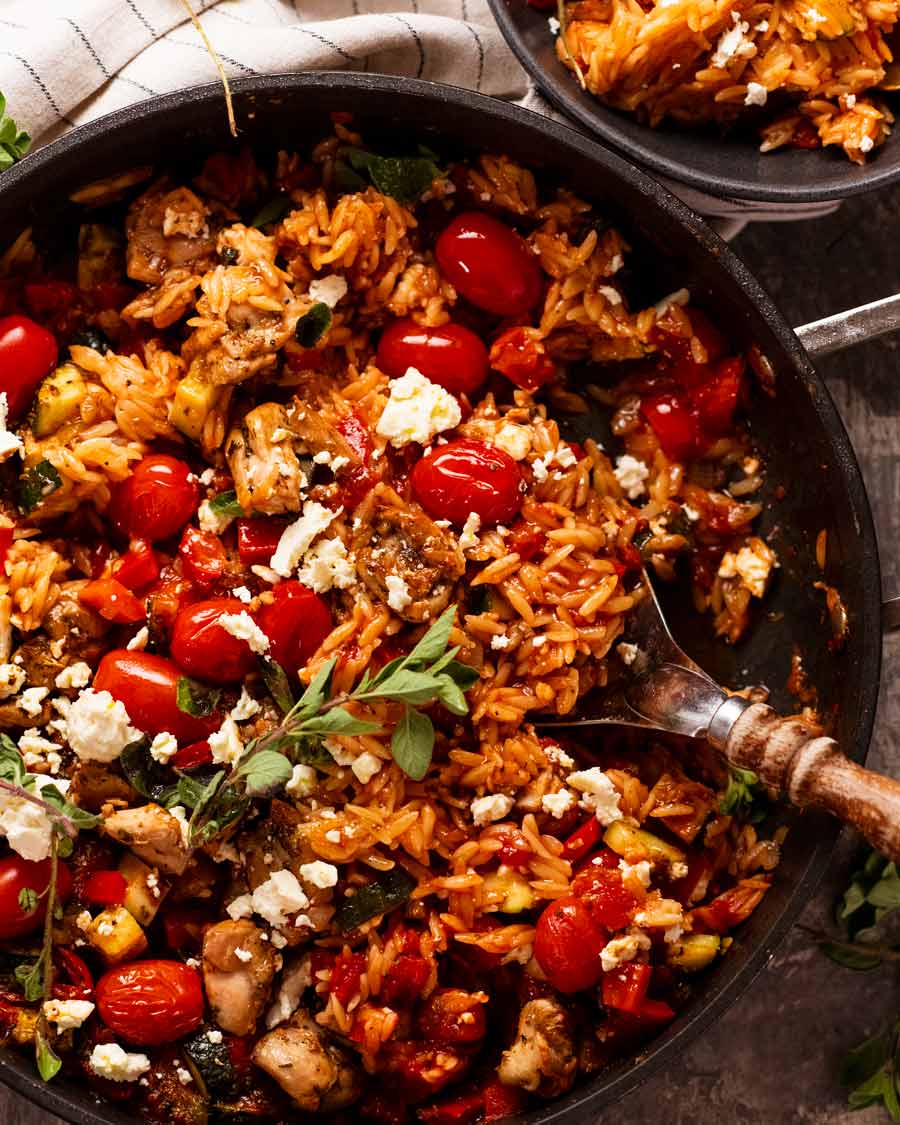
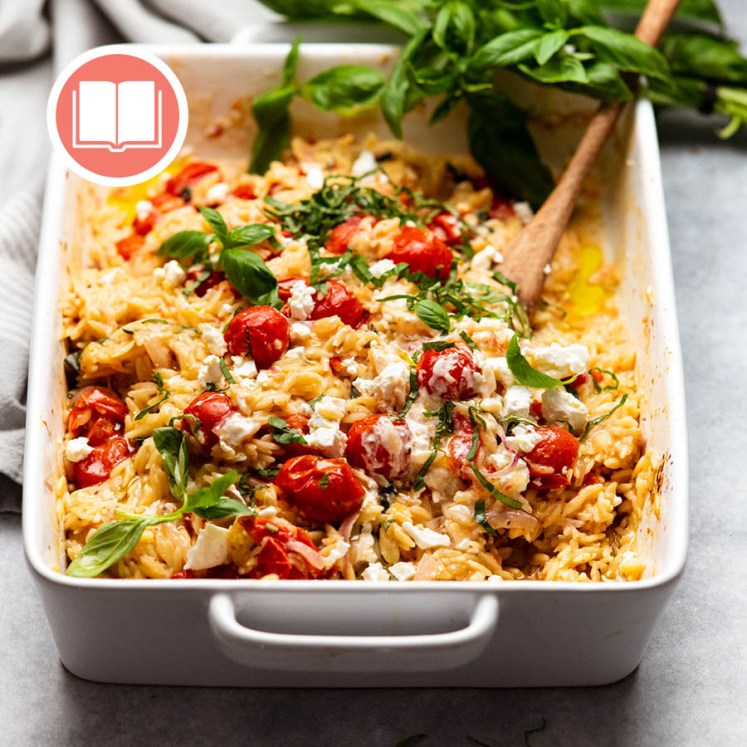
]]>This is a great quick recipe that’s got everything you need for a complete dinner, all cooked in one pot. Plenty of vegetables, with risoni/orzo and chicken. Tastes like risotto – loaded with tasty lemon-garlic Greek flavours!
One-pot Greek chicken risoni
Patience has never been my greatest virtue, so I shared many personal favourite recipes back in the early days when I first started this website in 2014. Every now and then, I like to revisit these older recipes and bring them to the forefront with sparkling new photos (that are in focus, wow!) and recipe videos where the chicken doesn’t have a weird green-ish/yellow tinge.
I have no embarrassment about my photos and videos from the early days because it reminds me how far I’ve come. But I do think it’s nice to spruce up these old recipes for your viewing pleasure – and hopefully convince you to try them. Like today’s new-old recipe: Greek chicken risoni! Complete dinner made in one pot, nice and quick to make, loaded with tasty Greek flavours.

What you need
Here’s what you need to make this Greek risoni recipe.
1. The risoni / orzo
Risoni is actually a pasta that is shaped like long grains of rice. Also known as “orzo”, find it in the pasta aisle. It costs around the same as spaghetti etc.
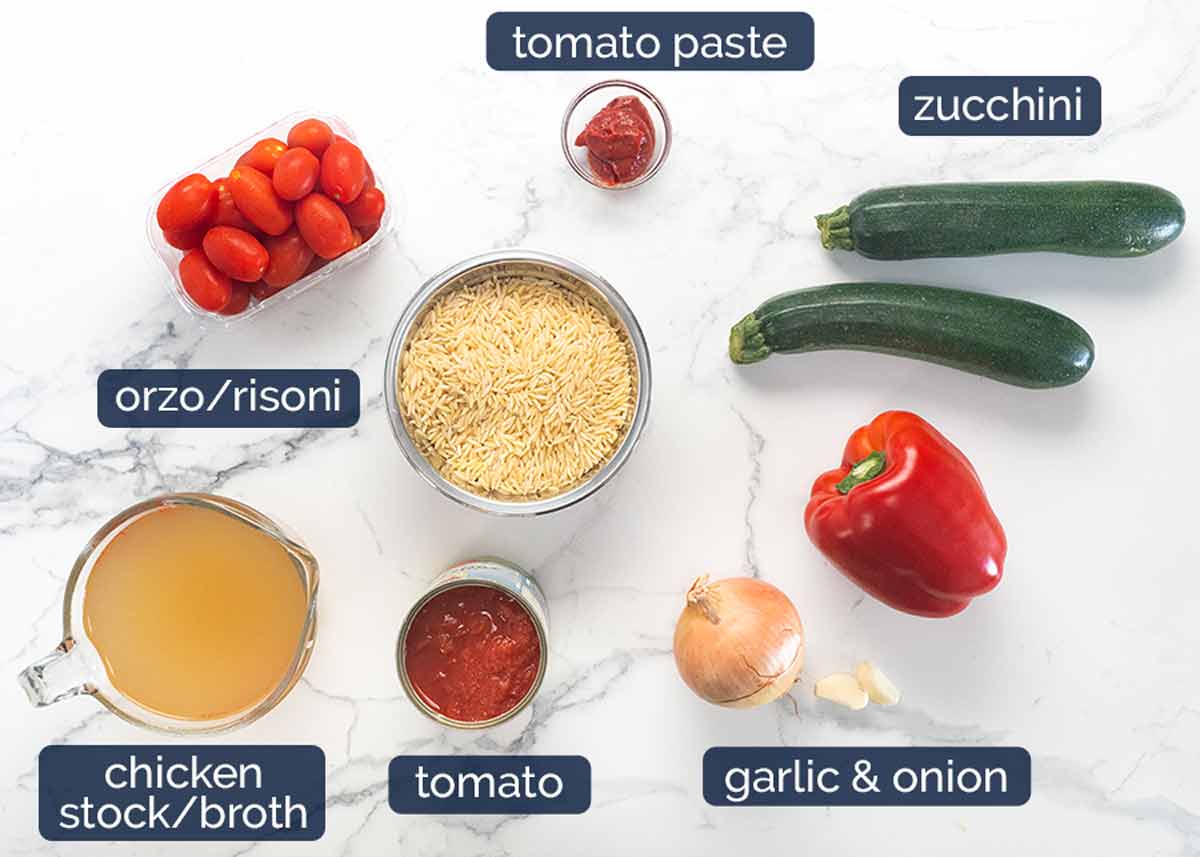
Risoni / orzo – See notes above the photo.
Chicken stock / broth and canned tomato – These are the liquids used to cook the risoni. Better than water because the risoni absorbs the flavour as it cooks!
Tomato paste – This adds a little boost of tomato flavour to the sauce, as well as thickening the sauce slightly so you end up with that really lovely oozy texture in the finished dish. Not the end of the world if you don’t have it.
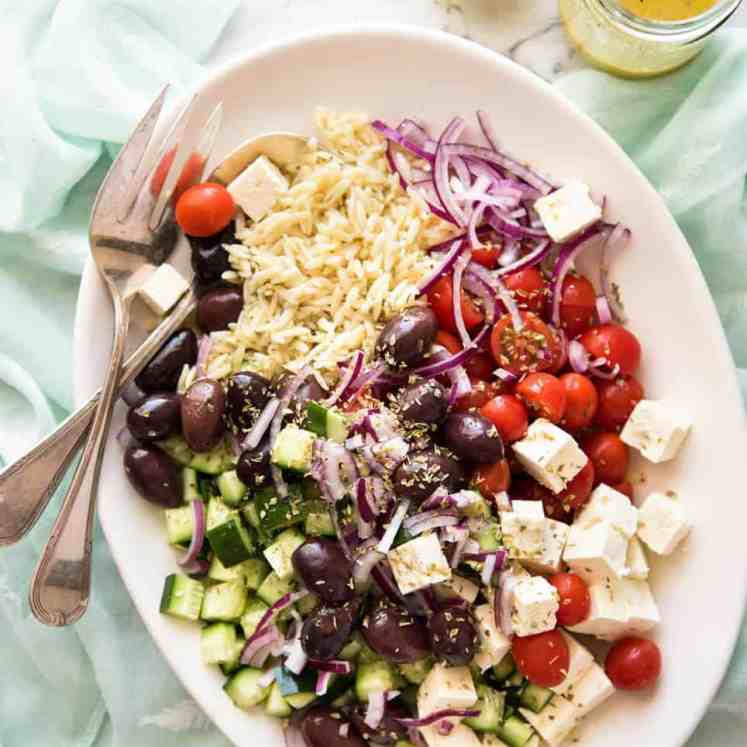
Vegetables – I use zucchini / courgette and capsicum / bell pepper. Feel free to substitute with other sauté-able vegetables (carrot, beans, peas, fennel, corn, celery, frozen veg mix).
Also, if someone could arrange for the global standardisation of food words, that would be super helpful. Thanks! 😂
Onion and garlic – Flavour base aromatics.
Cherry tomatoes or grape tomatoes – I like to scatter across the surface before popping the dish in the oven. Love the juicy pops of tomato that burst in your mouth!
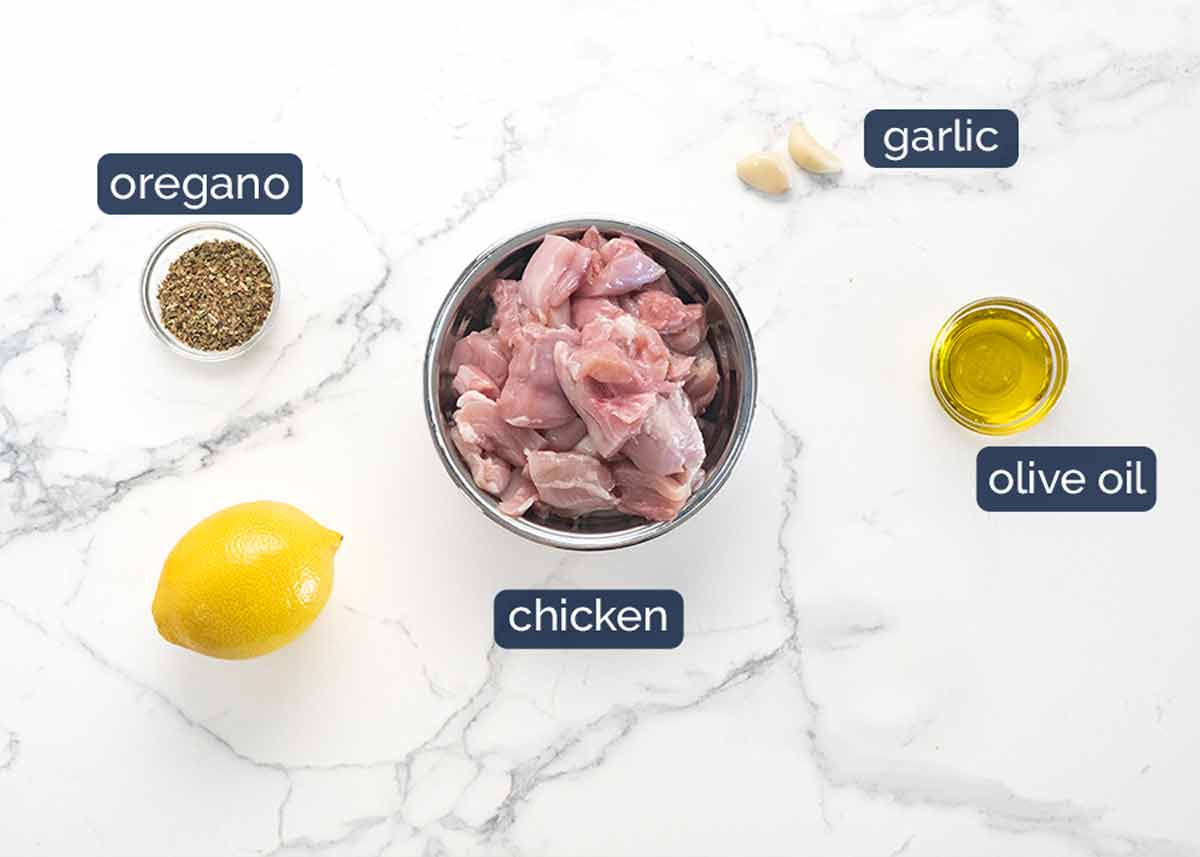
2. Lemon garlic chicken
A brief marinade of the chicken with classic Greek flavours makes the chicken that much tastier! Here’s what you need:
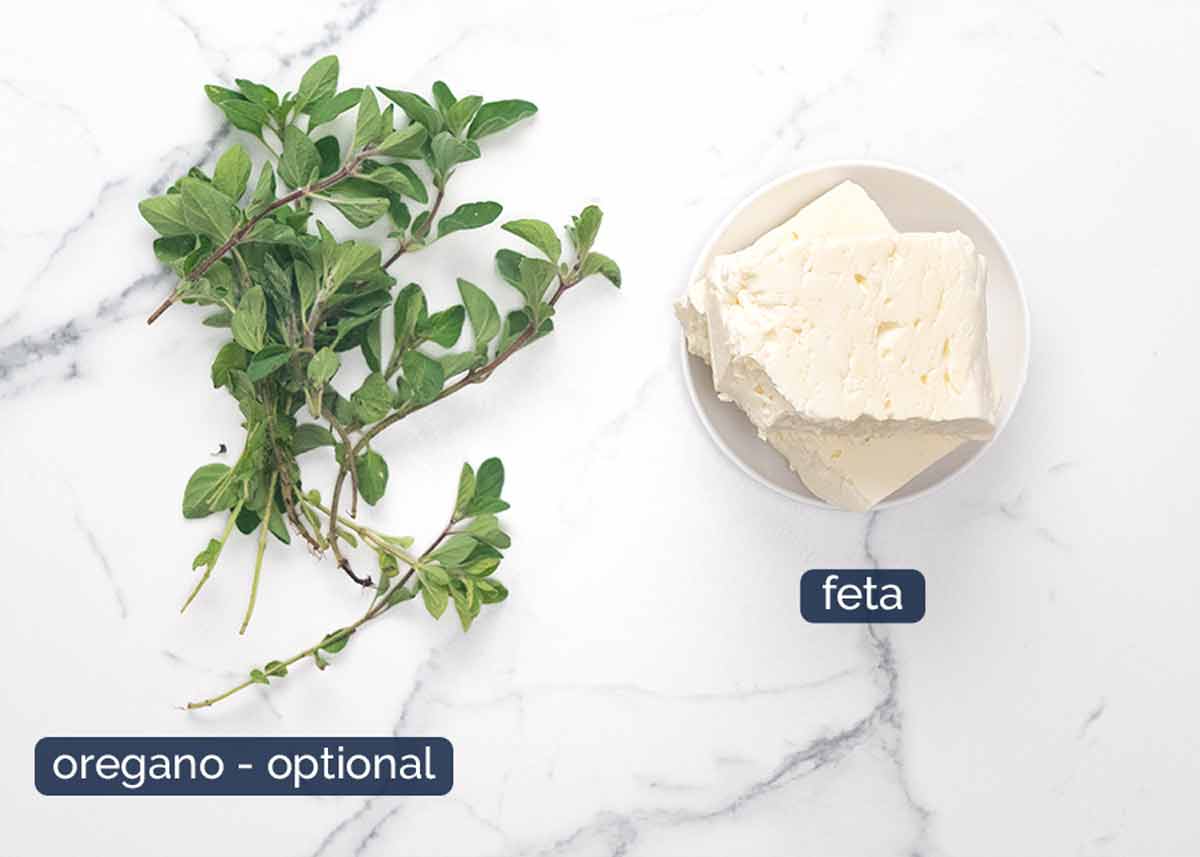
3. Garnishes (semi-optional)
I say it’s “semi-optional” because while you can skip the fresh oregano, the feta is highly, highly recommended!
How to make one-pot Greek chicken risoni
This recipe starts on the stove and is finished in the oven. I like this technique because it’s safer/easier – no need to stir – and the surface gets caramelised which means extra flavour. Anyone who’s made the fan-favourite One Pot Greek Chicken with Lemon Rice will know this method works well!
Marinade chicken in the lemon, olive oil, garlic and oregano. Just 20 minutes adds decent flavour into the chicken flesh.
If you’re pressed for time, you can skip the marinade, there’s plenty of flavour in the overall dish and the chicken will absorb flavour as it braises with the risoni. If you want to get ahead, you can marinade the chicken overnight – or even freeze the chicken in the marinade. So many options!
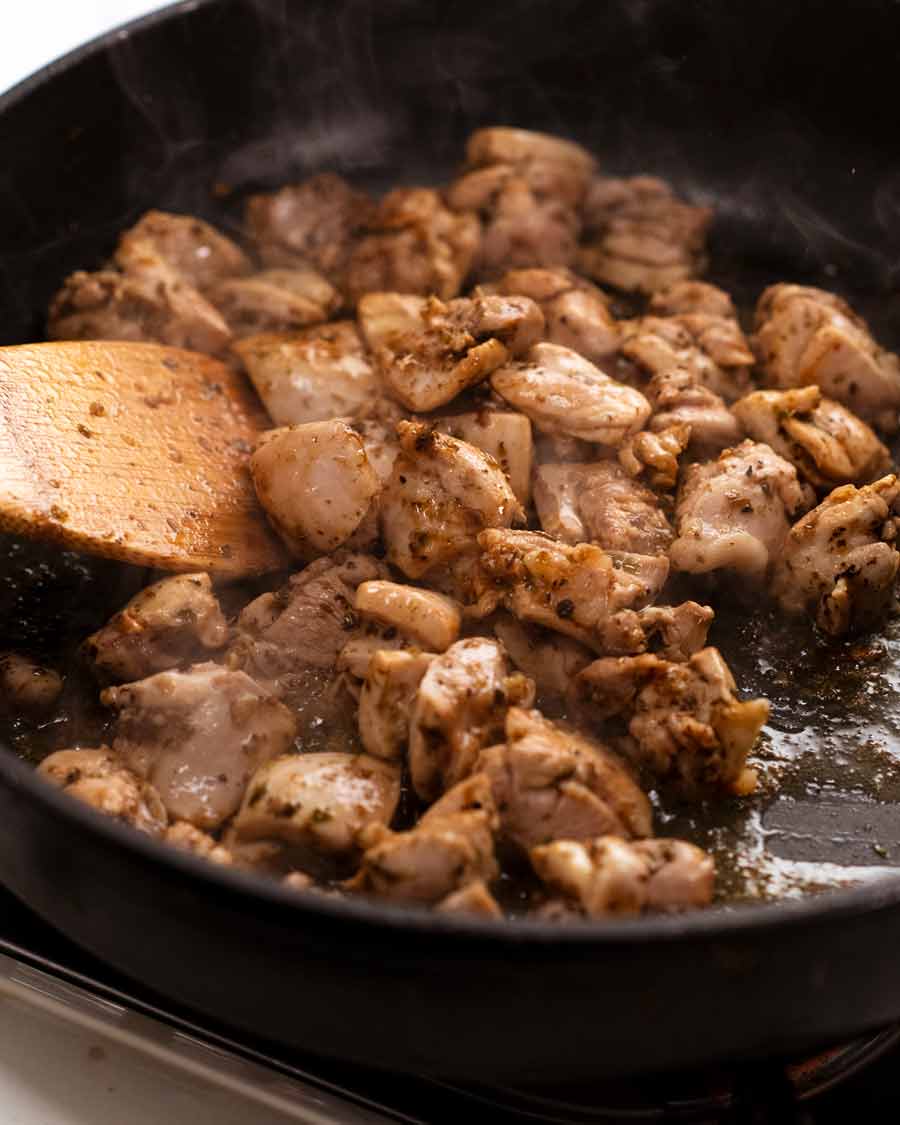
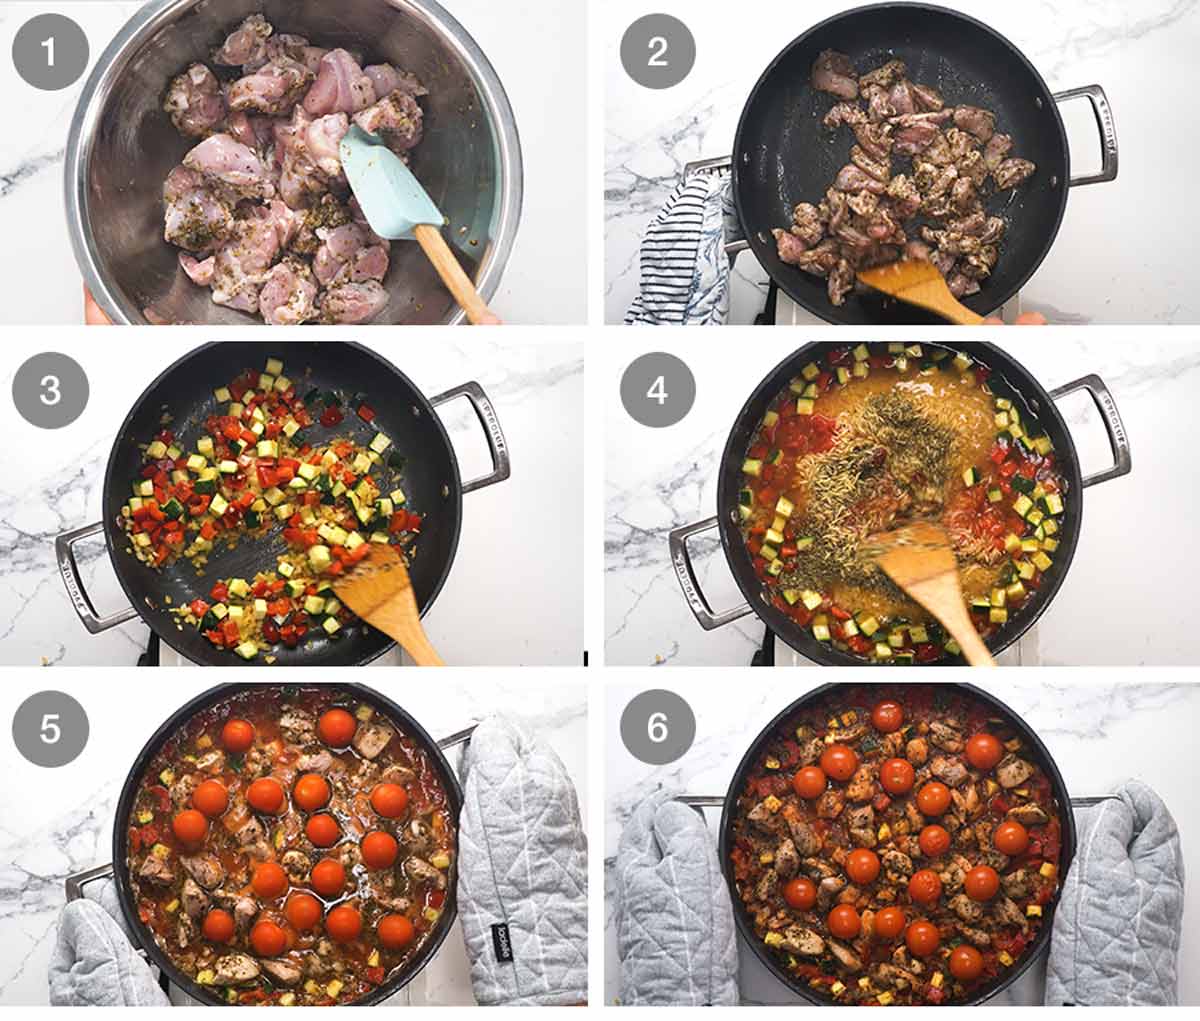
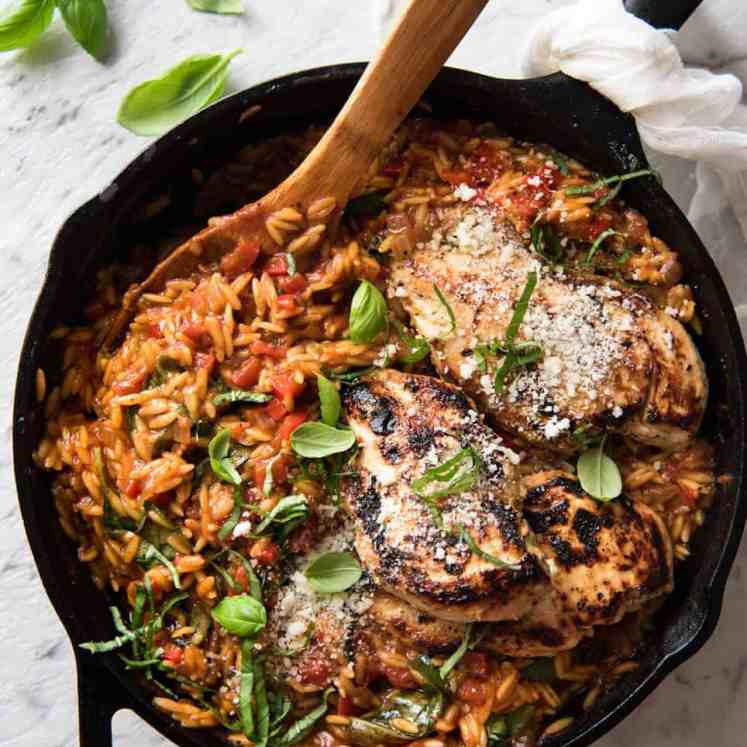
Brown chicken – Use a large ovenproof skillet / frying pan, or large pot. The one I’m using is a 30cm / 12″ non-stick frying pan.
Cook the chicken, just to seal the outside and lightly brown it. It will only take about 2 to 3 minutes. Don’t cook the chicken all the way through as it will finish cooking with the risoni.
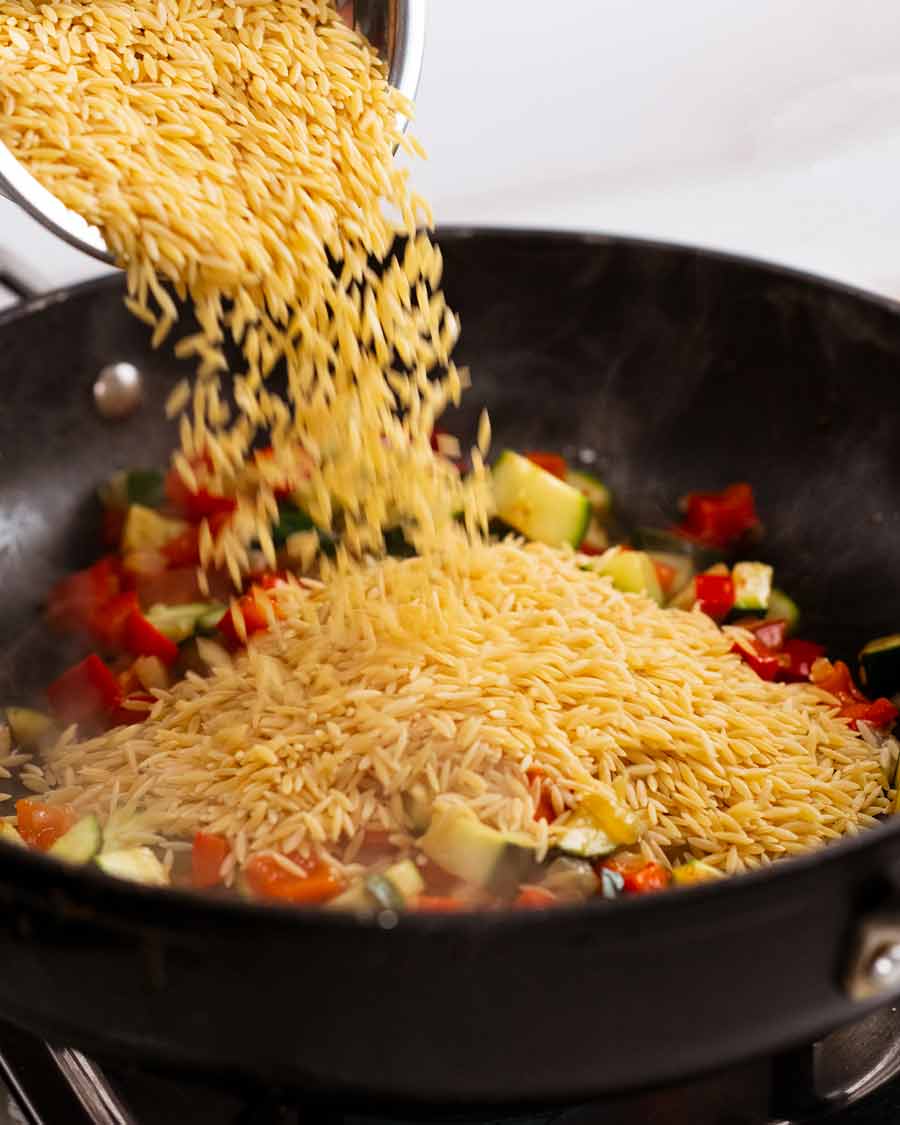
Sauté aromatics and vegetables – Once the chicken is browned, remove it from the pan. Then sauté the garlic and onion, followed by the zucchini and capsicum.
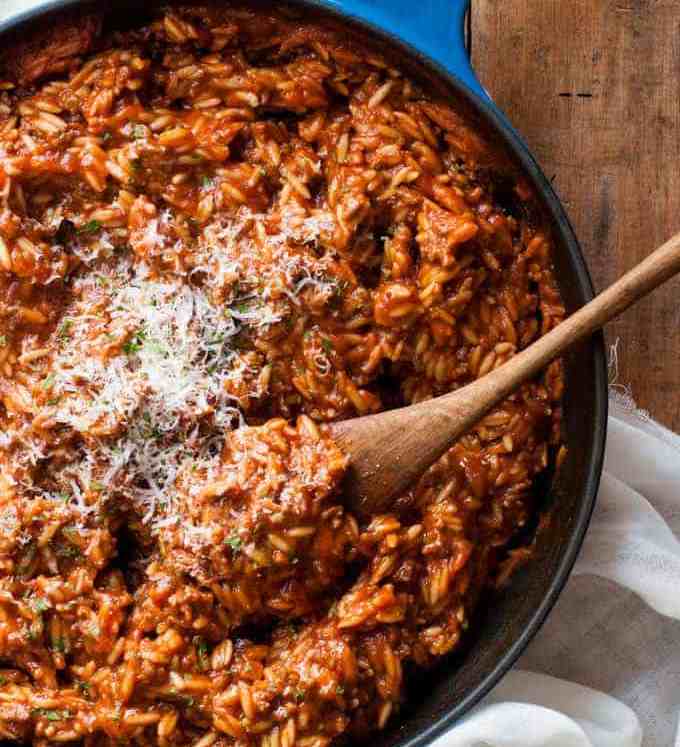
Add everything else – Add the risoni and stir to coat in the tasty flavours. Then add everything else – canned tomato, tomato paste, chicken stock, salt and pepper – and stir to combine.
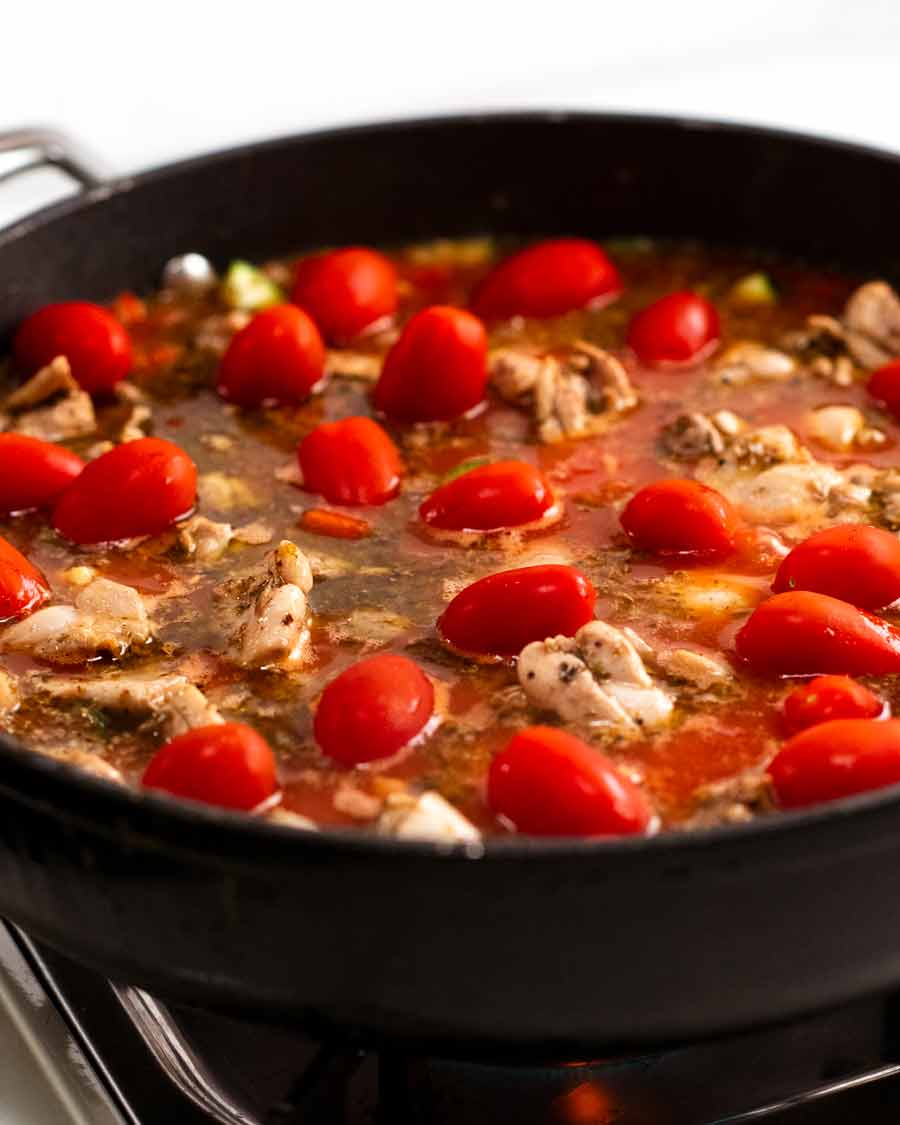
Top with chicken and cherry tomatoes but don’t stir them in.
Oven 15 minutes – As soon as the liquid starts to bubble, transfer the pan to the oven (no lid) and cook for 15 minutes or until the risoni is tender.
Garnish and serve – Remove the pan from the oven. There should still be small pools of liquid on the surface. This is what we want – the dish should be oozy and saucy, not dry and stodgy!
Drizzle the dish with lemon juice, crumble over the not-optional-feta then sprinkle with the optional-fresh-oregano. Then serve!
LOOK how juicy and irresistibly oozy it looks. It’s calling your name!
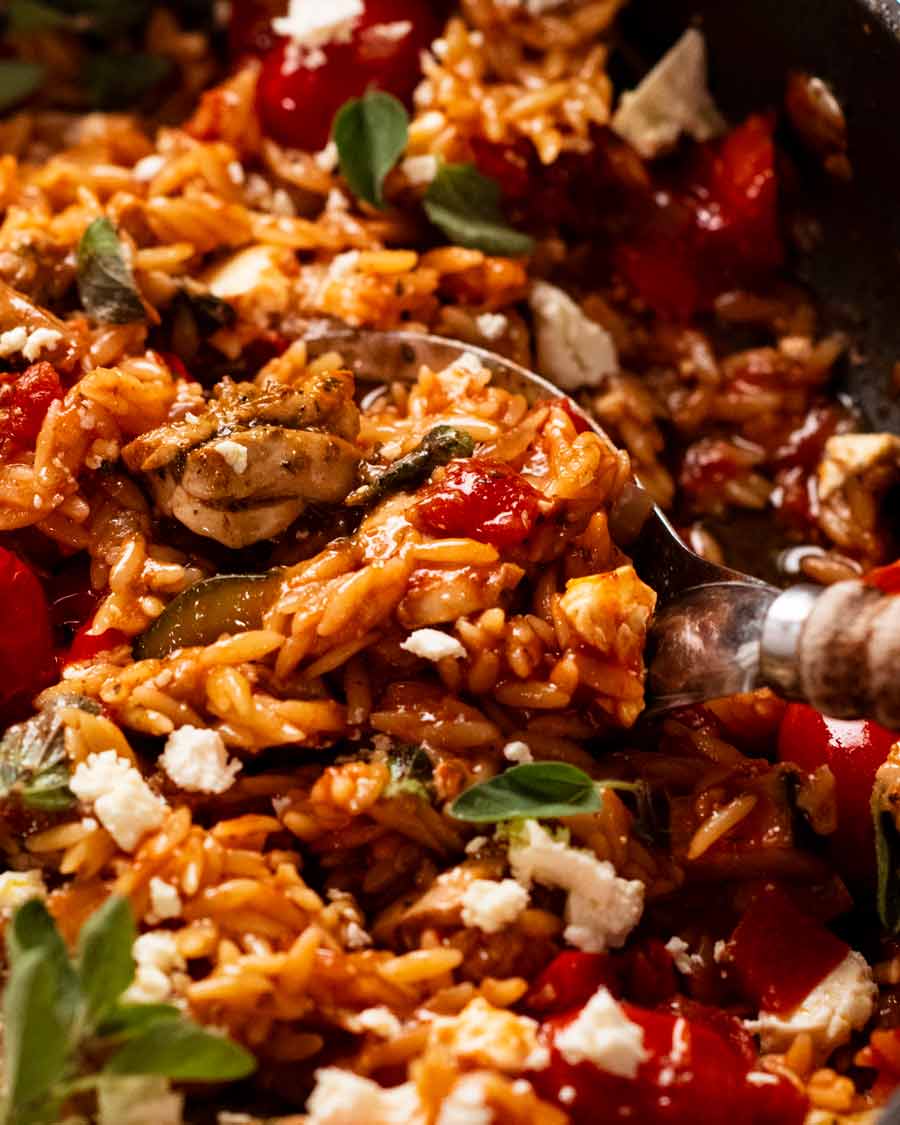
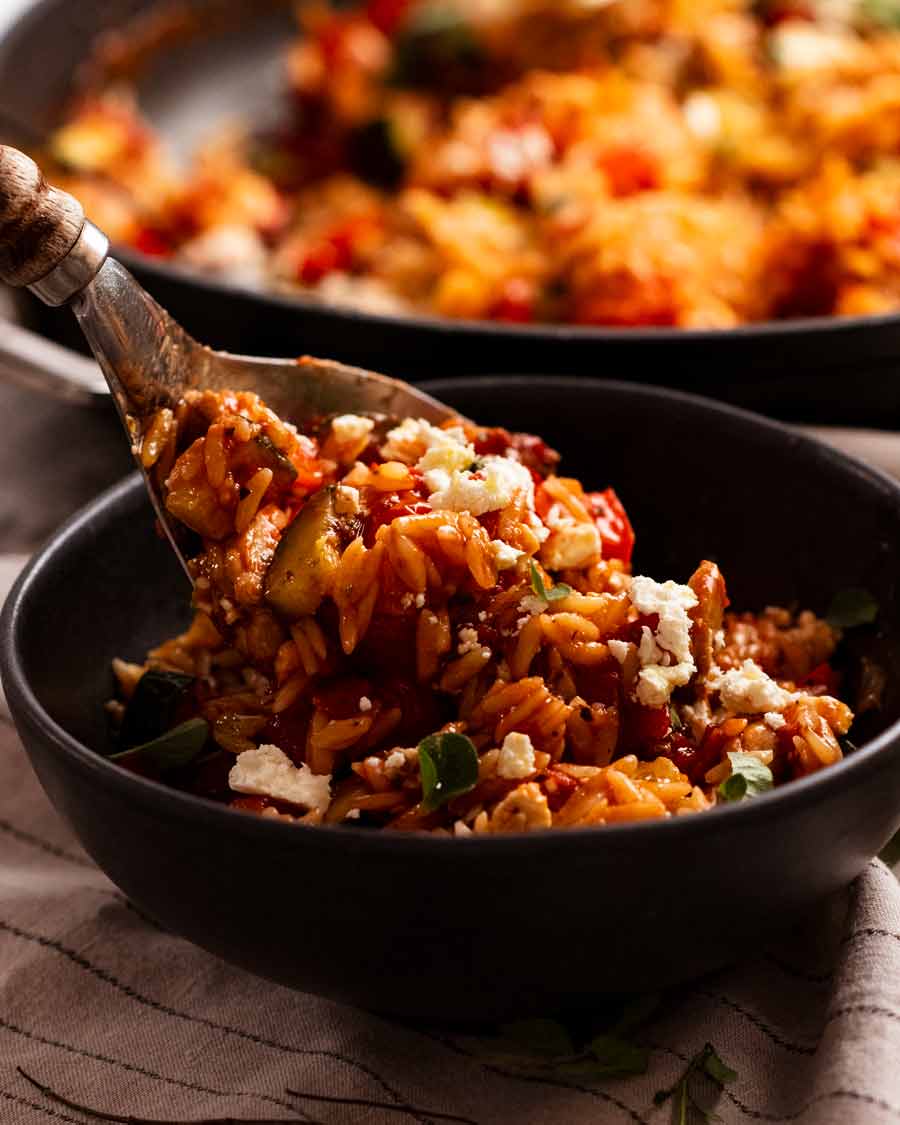
Spoon into bowls, and marvel how it looks just like your favourite risotto. Except, well, you know. You haven’t been slaving over a hot stove for 40 minutes, ladling in stock and stirring, stirring, stirring.
Leftovers, should there be any, will keep for 3 days but won’t be as oozy as pictured because the pasta will absorb the liquid. A little splash of water before you microwave goes a long way to salvage it, as does a fresh sprinkle of feta and spritz of lemon juice (I find lemon juice flavour fades with time).
Hope these sparkling new photos and in-focus-video convinces you to make this!! – Nagi x
PS The Ingredients list in the recipe below looks deceptively long. But actually, there are quite a few double ups because of the way I write the recipe. So don’t be put off! 
Watch how to make it
One Pot Chicken Risoni
Ingredients
Lemon Garlic Chicken
- 1 lb / 500g chicken thighs , boneless skinless (or breast), cut into 2 cm / 1" pieces
- 2 garlic cloves , finely minced
- 1 tbsp dried oregano
- 1 tbsp olive oil
- 1/2 tbsp lemon juice
- 1 tsp lemon zest
- 1/2 tsp each salt and pepper
Orzo/Risoni
- 2 tbsp olive oil
- 2 garlic cloves , minced
- 1 small onion , finely chopped
- 2 zucchini (medium, or 1 large) , cut into 1cm / 1/3" cubes (Note 1)
- 1 red bell pepper/capsicum , cut into 1cm / 1/3" cubes (Note 1)
- 1 tbsp dried oregano
- 2 1/2 cups chicken broth/stock , low sodium
- 14 oz / 400g canned crushed tomatoes
- 1 tbsp tomato paste
- 1 1/2 cups orzo/risoni (Note 2)
- 1 1/2 cups cherry tomatoes (1 Australian punnet)
- 1 tsp cooking salt (kosher salt)
- 1/2 tsp black pepper
Garnish (semi-optional)
- 2 tbsp lemon juice , drizzling at end
- 1/2 cup (100g) Greek feta cheese , crumbled (not optional)
- Fresh oregano leaves (optional)
Instructions
- Marinade chicken – Combine Marinated Chicken ingredients in a bowl and set aside for marinate for 20 minutes. (Skip if in hurry, can also do overnight)
- Preheat oven to 180°C/350°F (160°C fan).
- Brown chicken (raw inside) – Heat 1 tablespoon olive oil in a a large oven proof skillet or pot over high heat (Note 3). Cook chicken until lightly browned but still pink inside. Remove from skillet.
- Sauté vegetables – Add 1 tbsp olive oil, garlic and onion. Saute for 1 minute, then add zucchini and bell peppers/capsicum. Cook for 2 minutes.
- Add everything else – Add risoni, oregano, chicken broth, tomato, tomato paste, salt and pepper.
- Scatter chicken and cherry tomatoes across the surface (don't stir in).
- Bake 15 minutes – Once the liquid comes to a simmer, transfer to the oven (no lid) and bake for 15 minutes (or until risoni is just cooked, tender but still firm). There may be liquid on the surface still – that's good!
- Drizzle with lemon – Remove from oven, drizzle with lemon juice. Garnish with feta and fresh oregano leaves, if desired, then serve.
Notes
The liquid evaporates quite quickly while serving. It was slightly wetter when I took it out of the oven.
4. Leftovers will keep for 3 days in the fridge though it won’t be as oozy as the risoni absorbs the sauce. Resurrect with a splash of water, and microwave.
Nutrition assuming 5 servings.Nutrition
Originally published January 2016. Spruced up with brand new photos and recipe video in February 2021 with minor recipe improvements (mainly process and writing). But most importantly, Life of Dozer section has been added!
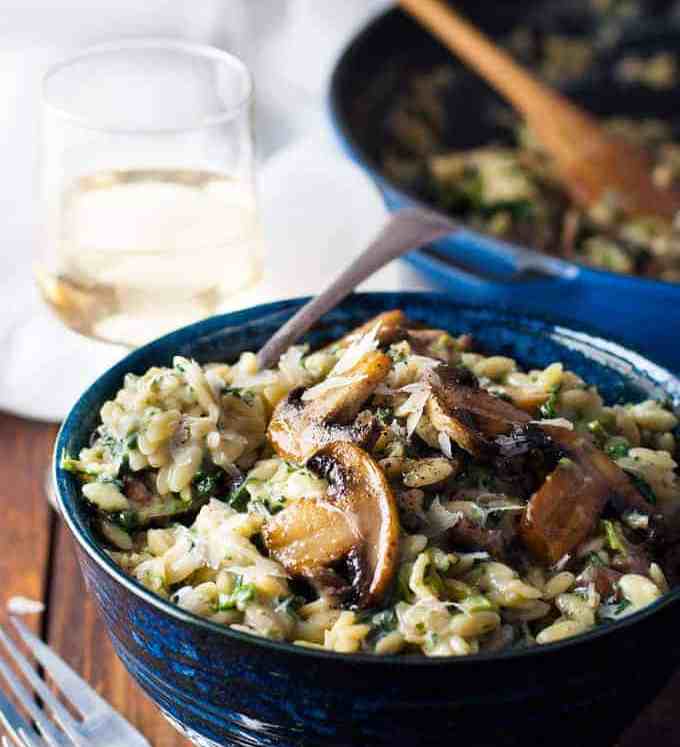
More risoni / orzo recipes
I do love risoni! So quick to cook, tastes like risotto.


Life of Dozer
NO, he’s not being adorable, cuddling up to me. He’s trying to get to my toast on the other side.

The post One-pot Greek chicken risoni (orzo) appeared first on RecipeTin Eats.
]]> No false promises here – these are seriously crispy Baked Buffalo Wings that are made entirely in the oven! Using a now-world-famous Cooks’ Illustrated technique, the skin is so shatteringly crispy it’s hard to believe they aren’t fried. Don’t believe me? I don’t blame you! See and hear it for yourself in the recipe video……... Get the Recipe
The post Baked Buffalo Wings – ULTRA CRISPY!! appeared first on RecipeTin Eats.
]]>No false promises here – these are seriously crispy Baked Buffalo Wings that are made entirely in the oven! Using a now-world-famous Cooks’ Illustrated technique, the skin is so shatteringly crispy it’s hard to believe they aren’t fried.
Don’t believe me? I don’t blame you! See and hear it for yourself in the recipe video……
Super Crispy BAKED Buffalo Wings!
The great thing about the internet is that there are loads of options for any recipe your heart desires.
The bad thing about the internet is sifting through all those Google search results to find a recipe that actually works as promised and is exactly what you are after.
So here is what I promise you: If you love perfectly seasoned crispy buffalo wings, tossed in a classic spicy, buttery Buffalo Sauce with a tinge of sweetness, and you prefer to avoid the mess and calories of deep frying, this is The One.
These aren’t just “quite crispy but still not like they’ve been deep fried”. These wings are seriously crispy. Read hundreds of testimonials from people who have tried it!

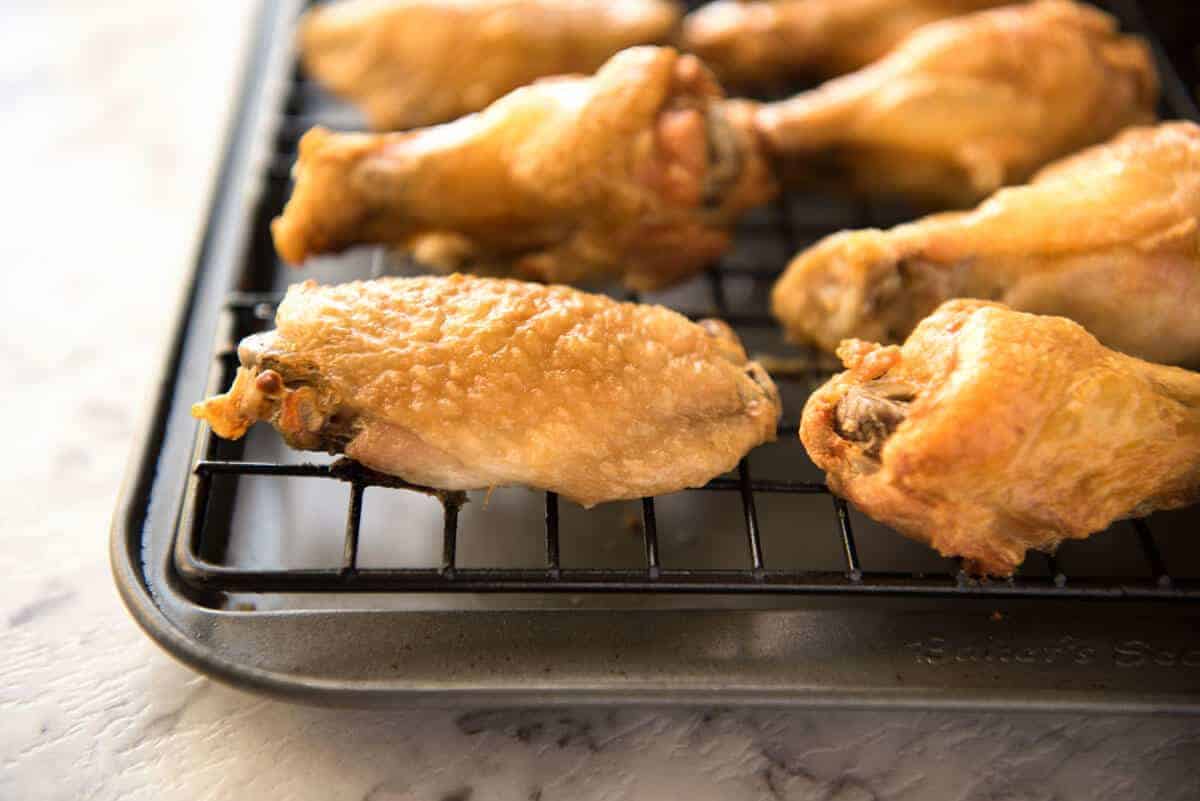
You can’t see how crispy the skin is when I’ve smothered them in that glorious Buffalo Sauce so here’s a photo of them plain, straight out of the oven. And if you have 90 seconds, watch the recipe video below the recipe so you can hear how crispy they are!
The recipe is ridiculously simple, and it’s a genius discovery by the amazing folk over at Cook’s Illustrated who used science to figure out how to make truly crispy wings in the oven.
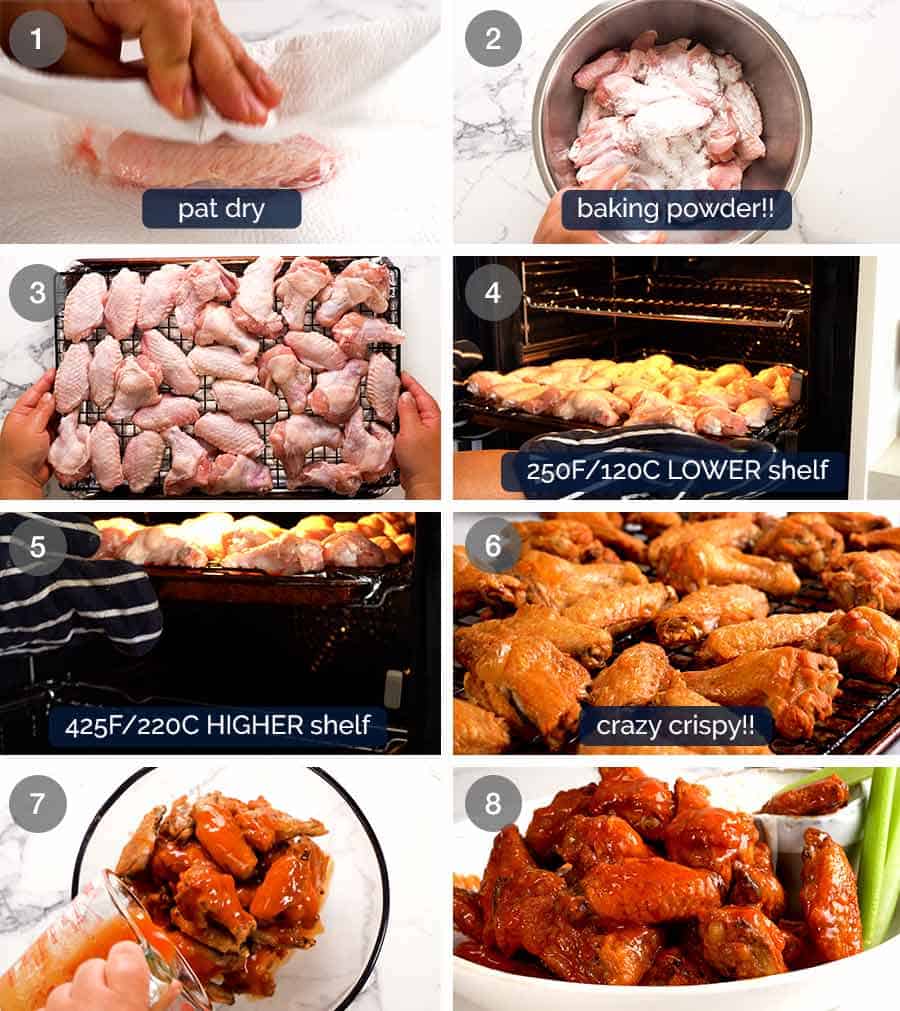
How to make Ultra Crispy Buffalo Wings in the Oven
The 2 unique steps in this recipe that make all the difference are:
1. baking powder (secret ingredient!) – tossing the wings in baking powder which draws moisture to the surface of the skin and helps make it crispy. Rest assured you can’t taste the baking powder at all; and
2. bake on low then high – usually, the fat under the skin is part of the reason why baked wings don’t get really crispy. In this recipe, we start at a low temp first which melts the fat under the skin, then we crank up the oven which makes the skin super crispy!
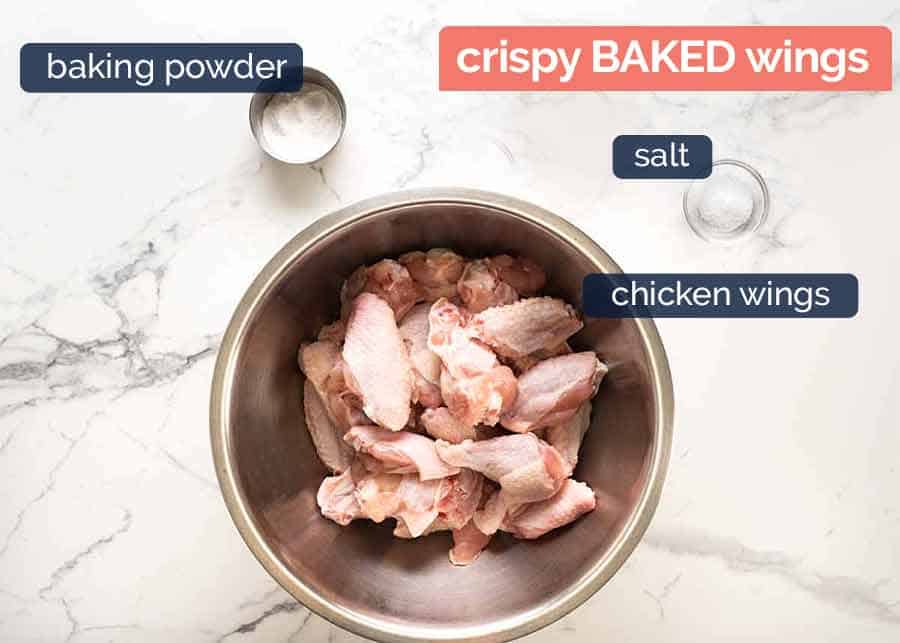
What you need for Crispy Baked Buffalo Wings
And here’s a visual for what you need.
1. The crispy baked wings
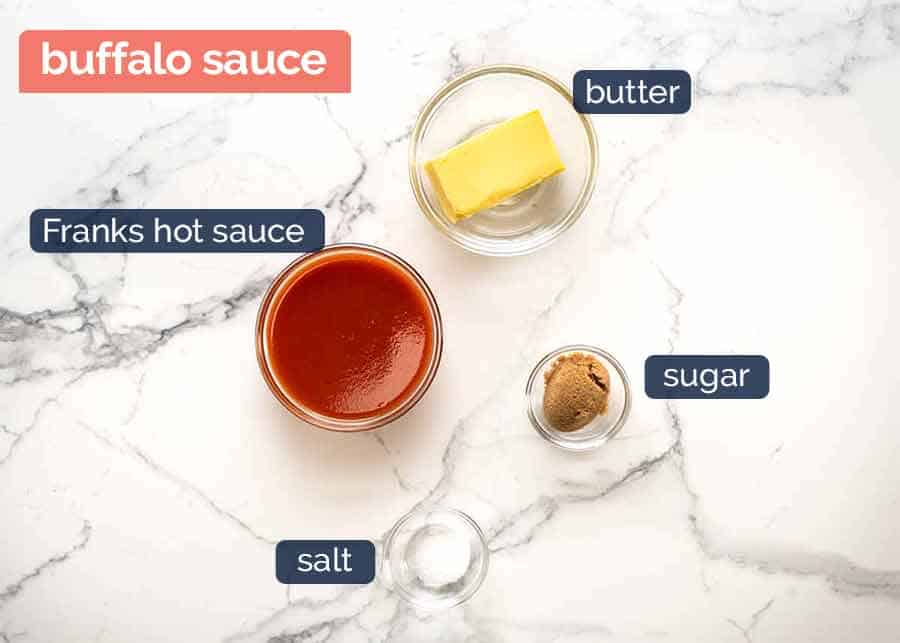
2. The Buffalo Sauce
That perfect combination of spiciness from Franks hot sauce, buttery goodness and and hint of sweet.

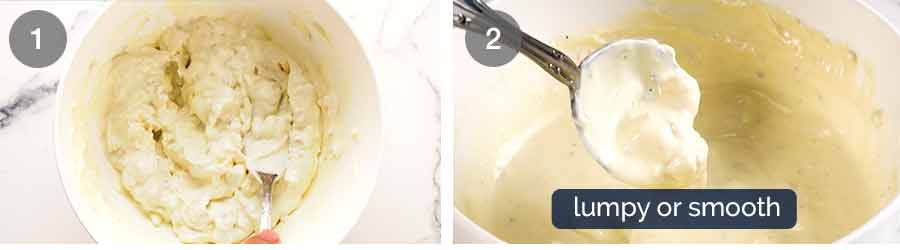
3. Blue Cheese Dip
I know some people aren’t a fan of blue cheese dip – but I’m all in!! In fact, I love blue cheese dip so much, I like to keep mine a bit lumpy so I get little pops of blue cheese. But usually, restaurants serve it completely smooth. Go with what rocks your boat!
Celery?? YES!
Crispy wings + spicy, buttery Buffalo Sauce + earthy, creamy blue cheese dip + fresh, crunchy celery = MAGICAL COMBINATION
I don’t know who discovered it, but they deserve a Nobel Prize. I remember the first time I tried it, I squinted at the celery sticks and thought, “who would bother with them?”. But they work! It’s like the perfect way to reboot your taste buds in between each wing!!

You’ll make a total mess of yourself eating them. It’s just not possible to eat wings elegantly. You’ll get Buffalo Sauce smeared all around your mouth. You’re doing well if your shirt stays clean.
But that’s all part of the Buffalo Wings experience, right?? The dramatic clatter as you toss the naked bones into a bowl. Smack you lips. Suck each finger clean.
Dive in for another.
YES PLEASE. – Nagi x
Crispy Baked Buffalo Wings
Watch how to make it
PUMP UP THE VOLUME so you can hear how crispy they are!!

Truly Crispy Oven Baked Buffalo Wings
Ingredients
Crispy Baked Wings
- 4 lb / 2kg chicken wings, wingettes & drumettes (Note 1)
- 5 teaspoons baking powder (NOT baking soda / bi-carb soda) (Note 2)
- 3/4 teaspoons kosher salt / cooking salt (not table salt, too fine)
Sauce
- 4 tbsp (60g) unsalted butter, melted
- 1/2 cup Frank’s Original Red Hot Sauce (Note 3)
- 1 tbsp brown sugar
- 1/4 tsp kosher salt / cooking salt
Blue Cheese Dip
- 1/2 cup crumbled blue cheese, softened (I use gorgonzola)
- 1/2 cup sour cream
- 1/4 cup mayonnaise , preferably whole-egg
- 1 clove small garlic , minced
- 1 – 3 tbsp milk
- 2 tbsp lemon juice
- 1/2 tsp kosher salt / cooking salt
- Black pepper
To Serve
- Celery sticks
- Lots of beer!
Instructions
Crispy Baked Wings
- Dry overnight (optional) – If you plan ahead, lay the wings on a rack on a rimmed baking tray and let them dry uncovered in the fridge overnight. Alternatively, pat them dry with paper towels.
- Preheat the oven to 250°F/120°C (all oven types). Put one oven shelf in the lower quarter of the oven and one in the top quarter.
- Line the tray with foil. Put a rack on the tray then spray the rack with oil.
- Toss wings – Place the wings in a large bowl. Sprinkle over baking powder and salt. Use hands to toss well (or shake in ziplock bag) to coat wings evenly.
- Bake 30 minutes on low temp – Place the wings skin side up on the rack (ok if snug, they shrink). Bake on the lower shelf in the oven for 30 minutes.
- Bake 40 minutes on high – Move the tray up to the higher shelf and turn the oven up to 425°F / 220°C (all oven types). Bake for a further 40 to 50 minutes, rotating the tray halfway through. The wings do not need to be turned over. They are ready when dark golden brown and the skin is very crispy.
- Toss in sauce – Transfer the wings into a large bowl. Pour over sauce and toss to coat. (Alternatively, serve wings plain with Buffalo Sauce for dipping).
- Serve immediately with Blue Cheese Dip (for both wings and celery sticks dunking)!
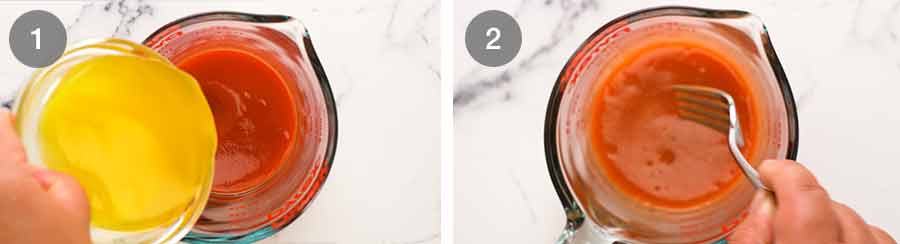
Buffalo Sauce
- Whisk together the Sauce ingredients until the sugar is melted. Keep warm or reheat just prior to using.
Blue Cheese Dip
- Mash the blue cheese with sour cream until smooth (or to your taste).
- Add remaining ingredients and mix well until combined, using milk to get it to the consistency you want. Store in the fridge until required. Remove from the fridge 15 minutes before serving.
Notes
* Salt – only a small amount is required, it’s a phenomenon I can’t explain but this small amount perfectly seasons 2kg/4lb of wings using this baking method.
* These shrink when baked because the fat under the skin renders out (melts) which is how these become super crisp. So they can be snug on the rack.
* They are JUICY not dry, despite the long cook time. This is because the first bake at the lower temp barely cooks them, it only melts the fat.
* These bake to a golden brown, not a deep golden brown. You will know they are done because the skin will be lovely and crispy. 5. Source: The recipe for the wings is from Cook’s Illustrated “Meats Book” cookbook. The sauce recipe is my own. 6. To reheat: Allow wings (not tossed in sauce) to cool, then cover and refrigerate. The skin will wrinkle and soften. Preheat oven to 200°C/390°F. Spread wings out on tray, skin side up, and bake for 5 to 8 minutes or until the skin puffs up so the wrinkles smooth out and becomes crisp again. Works 100% perfectly! 7. Make Ahead: These stay crispy for as long as the wings are warm, so around 20 – 30 minutes. The skin stays crispy for around 10 – 15 minutes after tossing in the sauce, then after that they start to soften but not go soggy, up to around 30 minutes. If you reheat after tossing in sauce, they go soggy. 8. Comprehensive FAQ is available in the original Truly Crispy Oven Baked Wings. 9. Nutrition for just plain crispy wings (419 cal) and including the hot sauce (476 cal), both assuming 8 servings. Note that the wings have been adjusted to reflect the amount of fat that is rendered out (I measured the fat I poured off the tray
). Nutrition
Originally posted June 2015. Republished February 2020 with improved video and photos, then updated with tidy ups in 2023. NO CHANGE TO RECIPE. I wouldn’t dare – it’s perfect as is!
Life of Dozer
This is what a Food Coma looks like.

The post Baked Buffalo Wings – ULTRA CRISPY!! appeared first on RecipeTin Eats.
]]>