 This is an empanada sauce created especially for serving with the homemade empanadas I shared today. Loosely based on a traditional Colombian sauce called hogao, it has a wickedly good smokey flavour from char-roasting tomatoes in the oven. Use leftovers as a dip! I’m a firm believer than empanadas should be so great, you want... Get the Recipe
The post Empanada sauce appeared first on RecipeTin Eats.
]]>This is an empanada sauce created especially for serving with the homemade empanadas I shared today. Loosely based on a traditional Colombian sauce called hogao, it has a wickedly good smokey flavour from char-roasting tomatoes in the oven. Use leftovers as a dip!

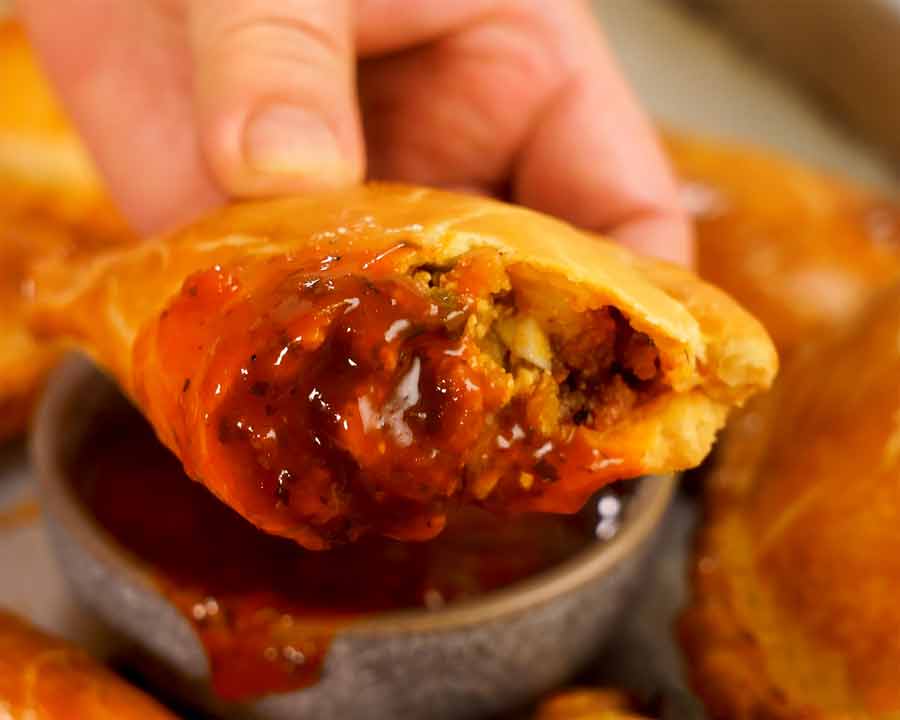
I’m a firm believer than empanadas should be so great, you want to grab them straight out of the oven and eat them plain. Make the beef empanadas – and you will! Hot and crispy on the outside, juicy and flavourful on the inside, it’s everything an empanada should be!
But it is nice to have something wet to dip empanadas into because the reality is that there is only so juicy you can make the empanada filling without compromising the crispiness of the base. Empanadas are not like, say, Aussie meat pies which have molten gravy fillings.
While the beef empanada recipe includes various simple sauce options, this empanada sauce was created especially and is by far the best!

Ingredients in empanada sauce
This empanada sauce is based on a traditional Colombian sauce called hogao and is made with tomato that’s roasted until charred for beautiful smoky flavour.
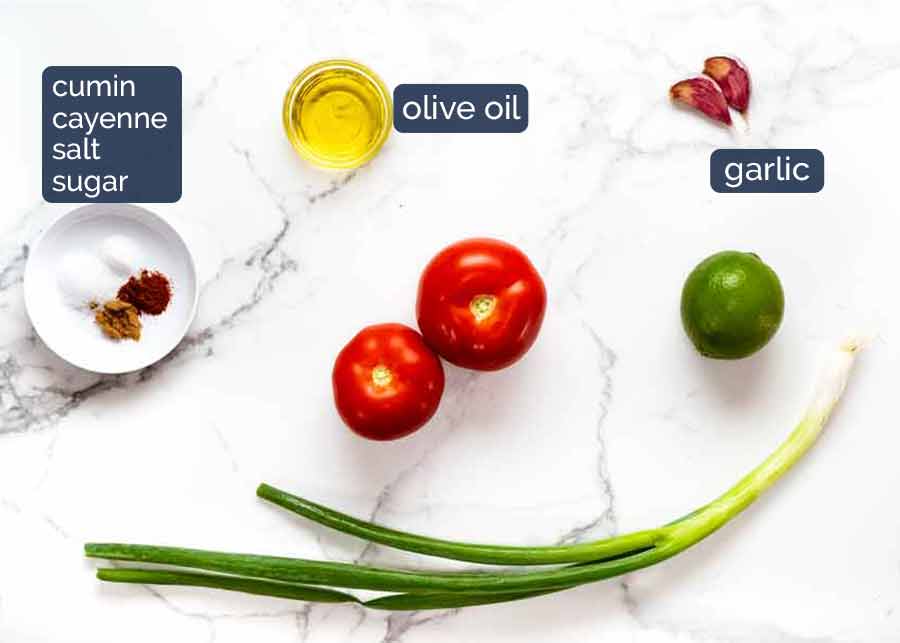
Tomatoes – 2 medium ones, about 125g/4oz each.
Garlic cloves – Peel the skin off but keep them whole.
Spices – cumin for flavour and cayenne pepper for a warm buzz.
Sugar – just a tiny amount, to balance the flavour
Lime juice – for freshness/sour. Substitute with lemon or a vinegar (it’s only a small amount so substitutions are flexible)
Green onion – for a bit of freshness and nice bits of green in the sauce
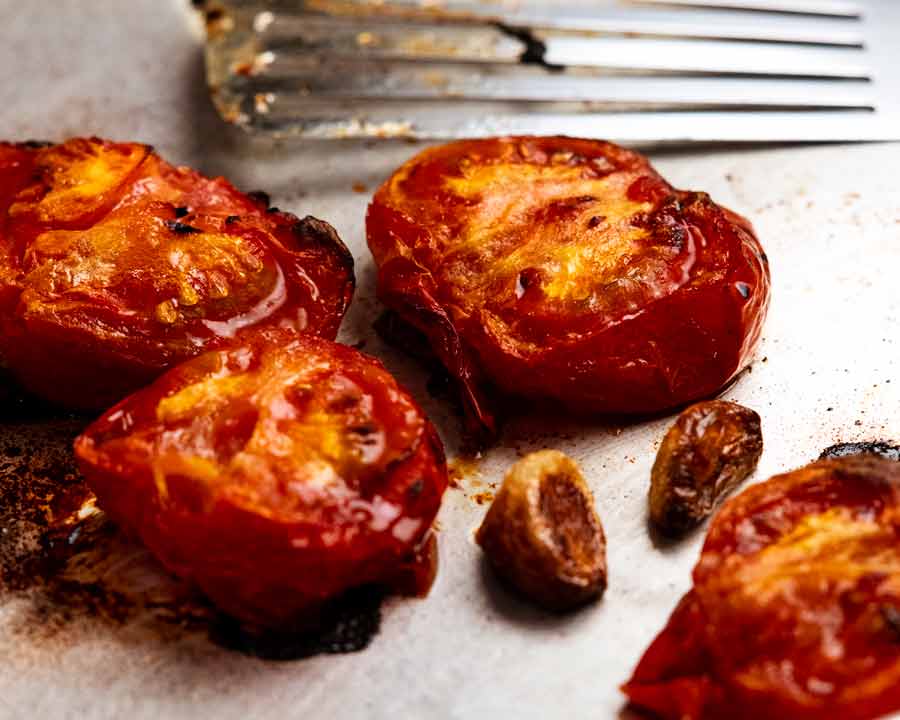
How to make Empanada sauce
Two simple steps:
Roast the tomato and garlic until you get nice charred edges which gives the sauce its special smokey flavour; then
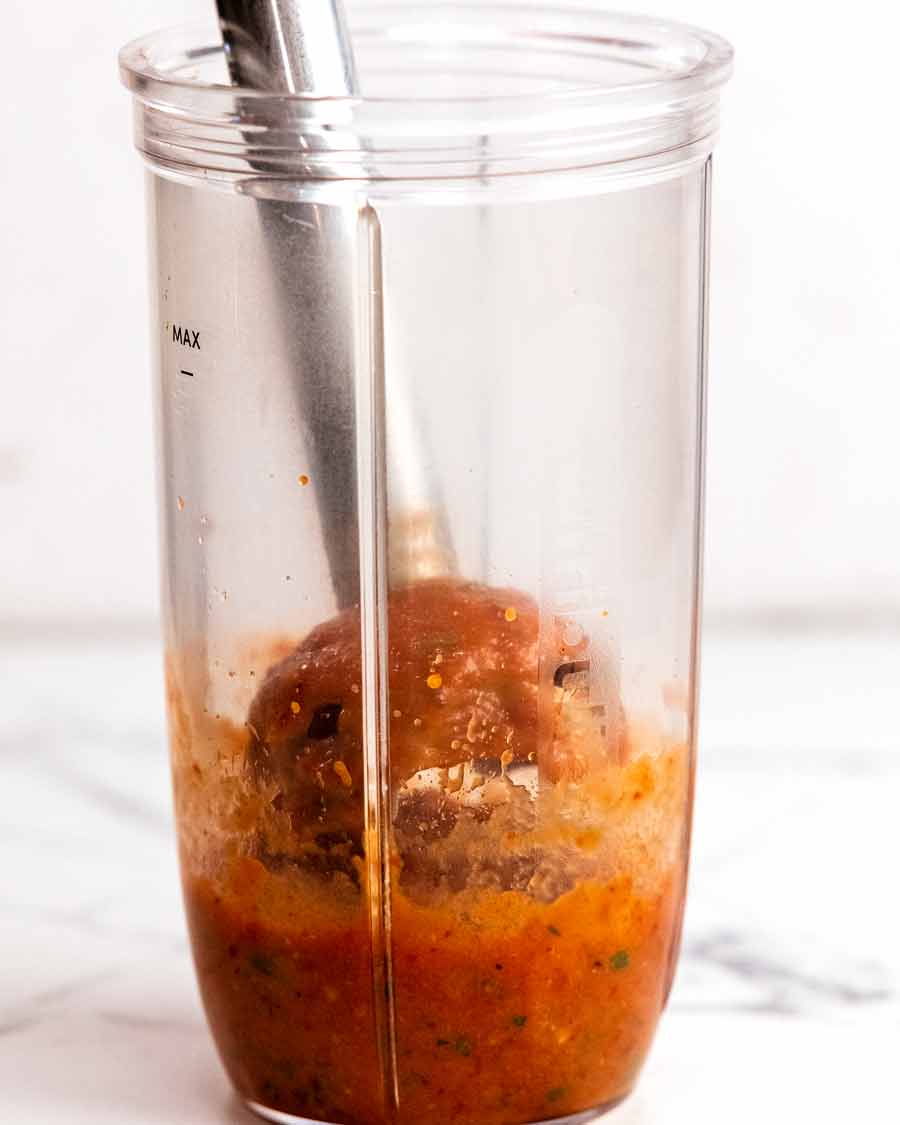
Blitz!

Serve with fresh, homemade empanadas.
Weep with joy.
No recipe video for this one because it’s an extra recipe for the beef empanadas and relatively straight forward. Though I can never resist if there’s demand, so leave your request below if you’d like a recipe video! – Nagi x

Empanada dipping sauce
Ingredients
- 2 medium tomatoes (125g/4oz each), cut in half and core cut out
- 2 garlic cloves , kept whole, peeled
- 1 tbsp extra virgin olive oil
- 1/8 tsp ground cumin
- 1/8 tsp ground cayenne or pure chilli (not US chili powder mix)
- 1/8 tsp white sugar
- 1/4 tsp cooking/kosher salt
- 1 1/2 tsp lime juice (sub lemon or vinegar)
- 2 tbsp sliced green onion
Serving
Instructions
- Preheat the oven to 220°C/425°F (200°C fan).
- Roast tomato 20 min – Toss the tomatoes and garlic with the olive oil in a bowl. Place the tomatoes on the tray, cut side up, then roast for 20 minutes.
- Roast garlic 15 min – Add garlic to the tray and roast for another 15 minutes until the edges of the tomato are browned. Remove from oven and cool on tray.
- Blitz – Transfer to a container that just fits the head of a stick blender. Add all remaining ingredients except the green onion. Blitz until smooth – about 5 seconds. Add the green onion and blitz until it's finely chopped.
- Serve with empanadas – or corn chips, vegetable sticks, bread!
Notes
Nutrition
Life of Dozer
He doesn’t realise this sauce comes with beefy empanadas. You snooze, you lose Dozer!

The post Empanada sauce appeared first on RecipeTin Eats.
]]> This Creamy Feta Dip will save you on all those days you need something fast but fabulous to take to gatherings! I love that it’s also low budget and can be made in advance. The dip toppings really make this, so don’t skip them! Serve with lightly toasted bread or pita, else for a healthy... Get the Recipe
The post Creamy Feta Dip – quick, easy, thrifty appeared first on RecipeTin Eats.
]]>This Creamy Feta Dip will save you on all those days you need something fast but fabulous to take to gatherings! I love that it’s also low budget and can be made in advance. The dip toppings really make this, so don’t skip them!
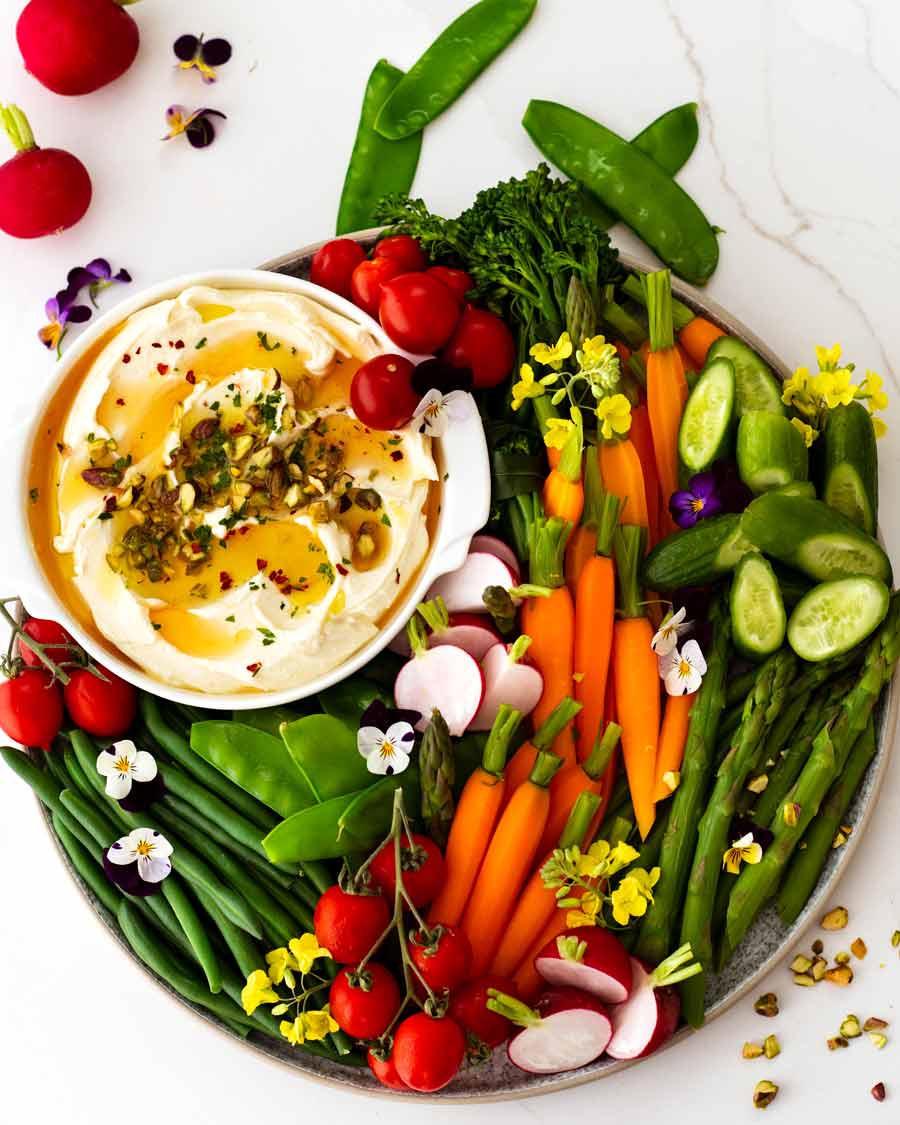
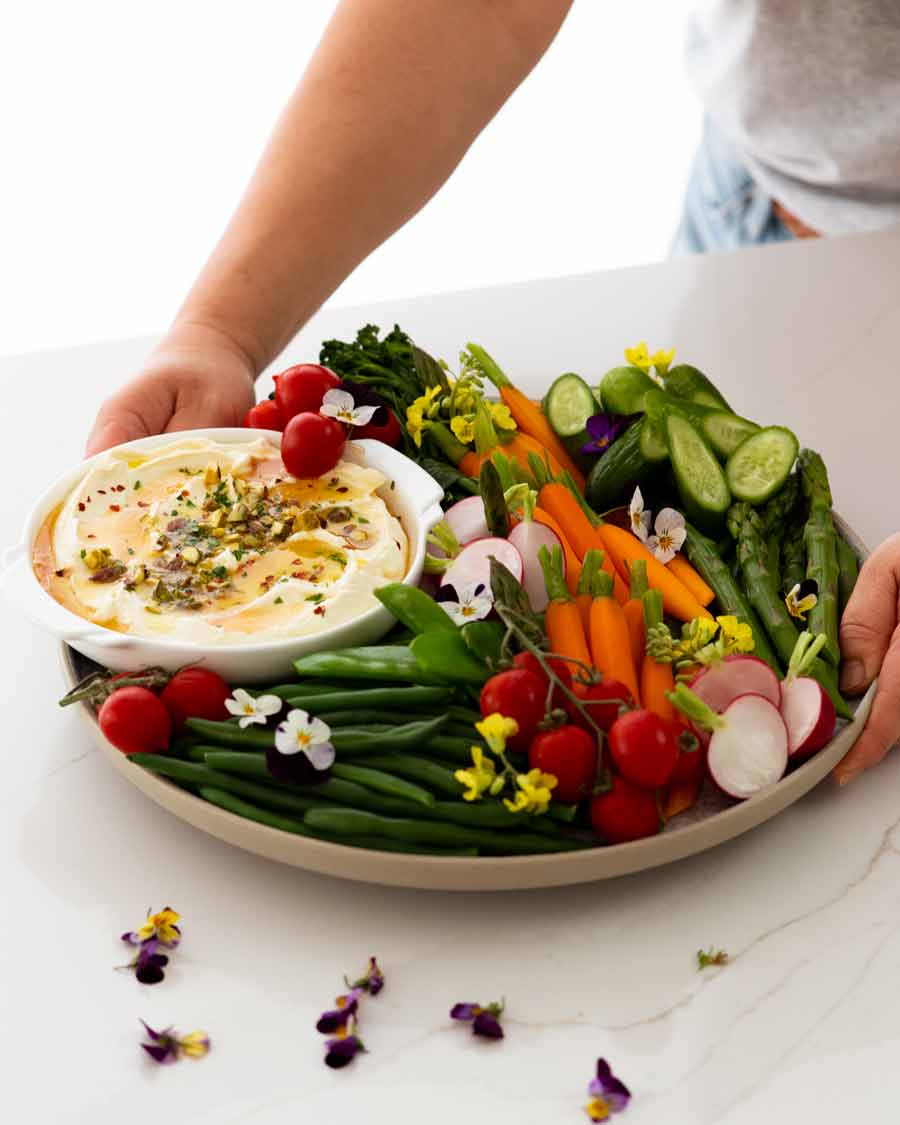
Serve with lightly toasted bread or pita, else for a healthy and colourful take, with crisp raw vegetables (aka crudités).
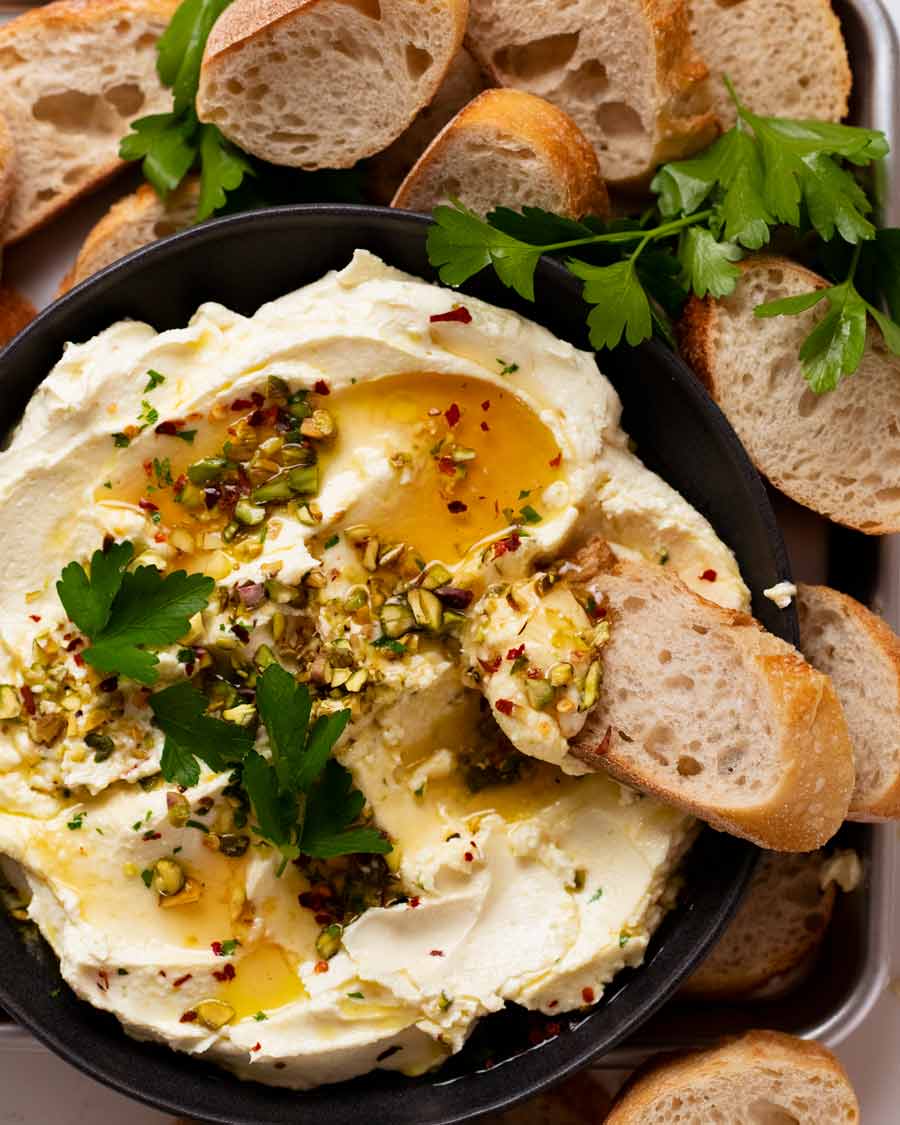
Creamy Feta Dip
If you’re ever in need of something quick but homemade to break out at a gathering, this Creamy Feta Dip will save the day. All you do is blend feta, cream cheese, a smidge of garlic, lemon zest and olive oil in a food processor, then spread it on a plate and sprinkle/drizzle with toppings.
It all just takes a lazy 30 seconds. How easy is that??
No food processor? No worries! Just use a stick blender instead.
What you need
Here’s what you need to make this Feta Dip.
1. The dip itself
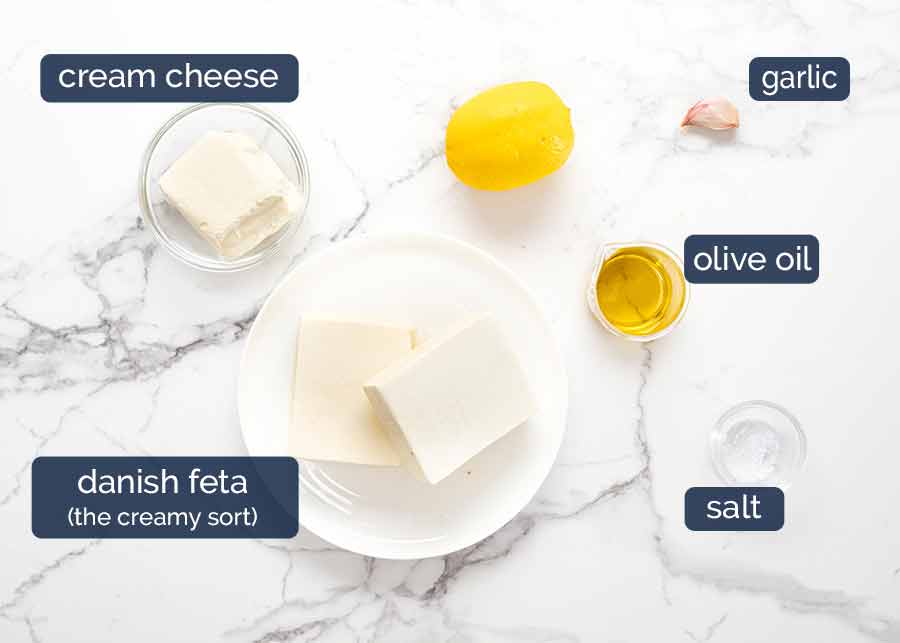
Danish feta – The type of feta I’m using today is called “Danish feta” here in Australia (also called “Danish white”). It is different to the well-known traditional Greek feta because it has a creamy rather than crumbly texture. This is what makes it ideal to use for making this feta dip because it’s comes out ultra smooth with very little blitzing!
Crumbly Greek feta works fine and is probably more authentic to use if you’re aiming for a traditional Greek mezze dip. But just be aware that the dip will end up with faint graininess to it no matter how long you blitz for. The only way to remove it is to pass it through a fine mesh strainer. Honestly, so much easier just to use Danish feta!
Cream cheese and olive oil – These add a bit of extra fat for smoothness and richness to the dip. I find that using feta alone is a little too briney and sharp, for my taste.
Garlic – Just a little bit, 1/4 teaspoon, as the flavour of raw garlic in this is actually quite harsh! I thought left overnight it would soften and meld with the other flavours better but it didn’t. So I hold back quite a lot on the garlic in this recipe!
I use a garlic press – quick and easy. If you don’t have one, you can grate the garlic using a microplane or “smear” finely minced garlic to make a paste using the side of a knife. If making a paste, reduce to 1/8 teaspoon (as paste is more intense than using a garlic press).
Lemon zest – Adds a bit of bright lemon flavour. It’s optional, but I really do think it adds a little something.
Salt – You’d think the salt in the feta would be enough, wouldn’t you? And perhaps for some it is, but I think it needs a touch more. Just add this in at the end so you can adjust to taste.
2. Toppings
Here are the toppings I’ve chosen. This dip is a blank canvas for experimenting with toppings, though! I’ve offered some other suggestions below.
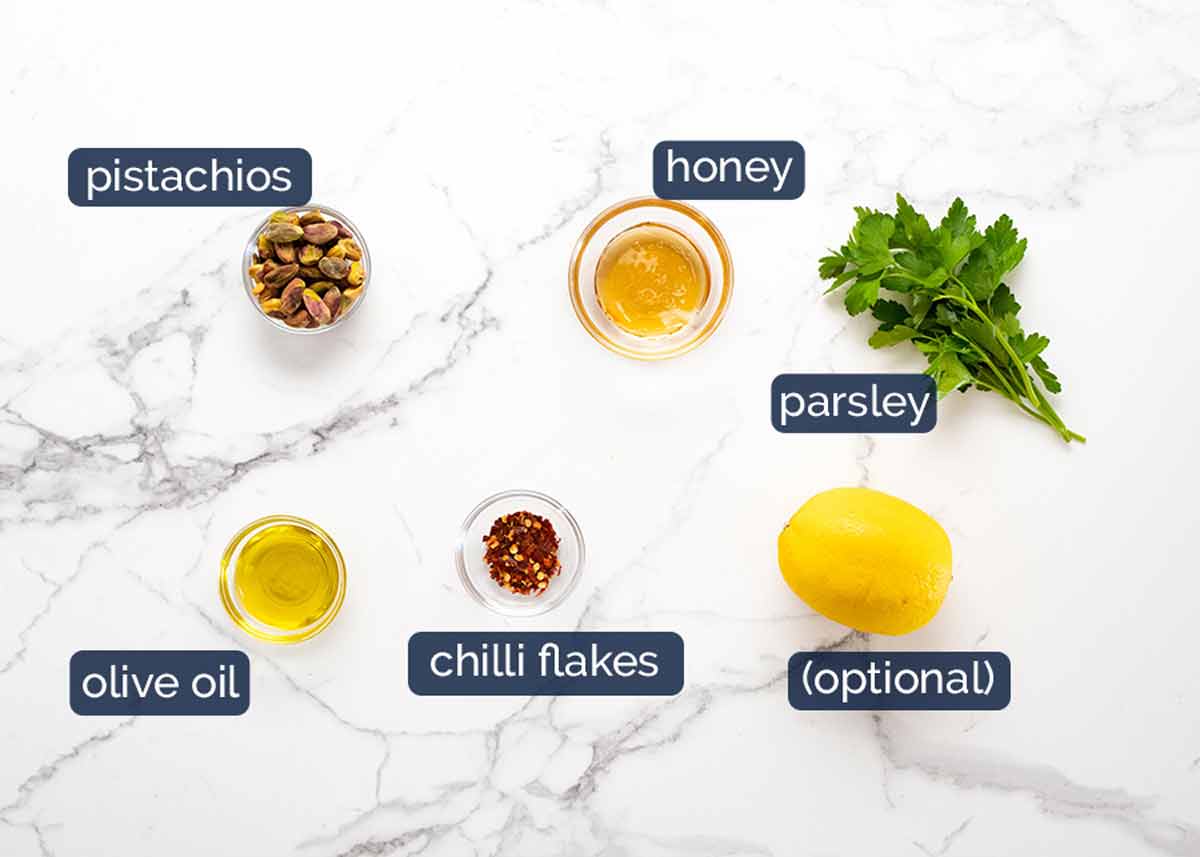
Honey – The hero topping! The combination of sweet honey with salty cheese is a classic cheeseboard flavour pairing so it comes as no surprise that it works extremely well with Feta Dip too. Don’t hold back on the honey! Trust me. Alternative: Maple syrup
Olive oil – For extra richness, and also for visuals. Beautiful puddles of golden olive oil dappling the white dip surface just looks so appealing.
Pistachios or other nuts of choice. I love pistachios for flavour and for their lovely green colour. Almonds, walnuts, macadamia and hazelnuts would also work well.
Chilli flakes / red pepper flakes – Just a pinch, for a hint of warmth!
Lemon zest – Optional, for an additional final sprinkle of fresh lemon. If I’m long on lemons, I’ll add it. But more often than not these days, I seem to have fruit bowls filled with white zest-less lemons!
Parsley – Honestly, I just add a pinch of a bit of extra green colour. Consider it entirely optional! For flavour, coriander/cilantro or mint would be fabulous, roughly torn and scattered over.
More topping options
There are few dips in this world with so many topping possibilities! Some suggestions: maple syrup, other nuts and seeds (almonds, walnuts, hazelnuts, pecans, macadamia, pepitas, sunflower seeds), dried fruit (cranberries, sour cherries, apricots), olives, sun dried tomatoes, artichokes or other pickled things, cilantro/coriander.
How to make feta dip
This is a hard one….. you’re sure you’re ready for it??? Dump and blitz! 😉

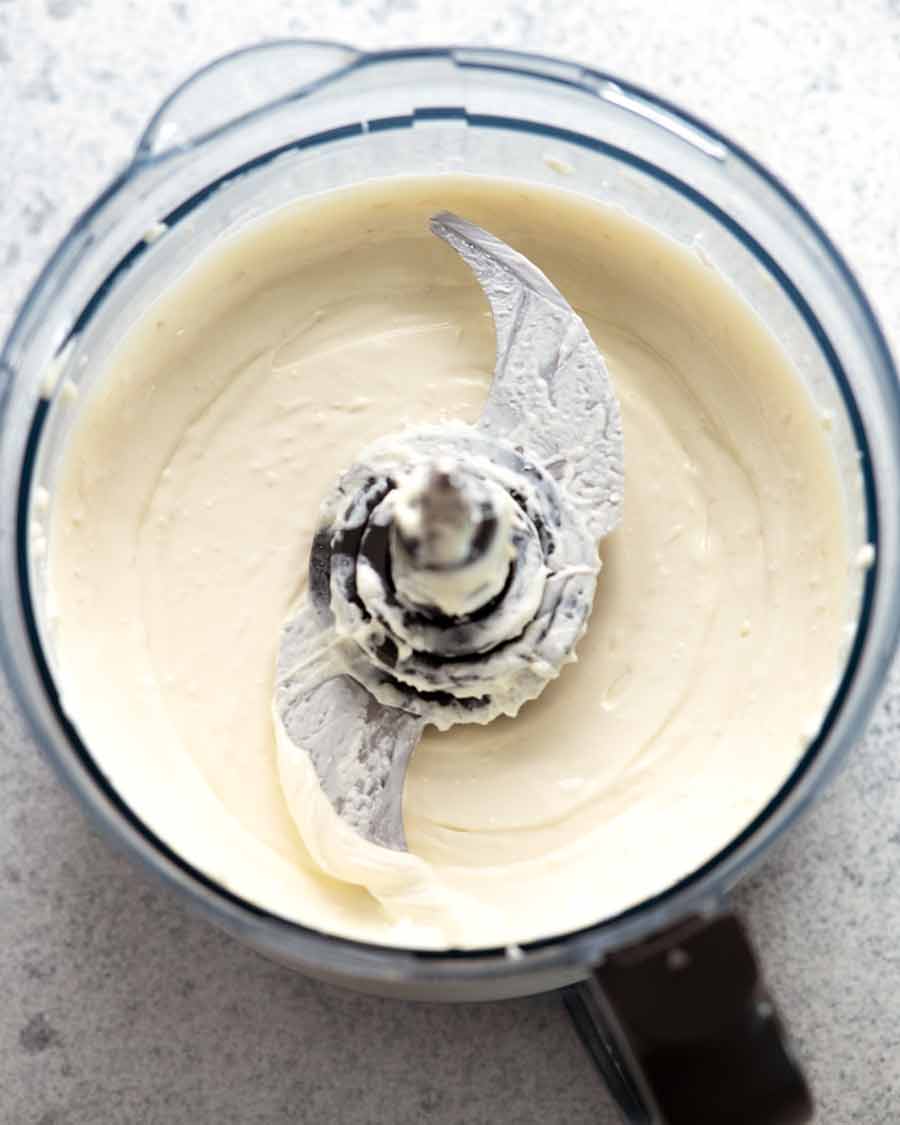
Blitz – Put everything except the oil in a food processor and blitz until smooth, scraping down the sides once or twice. It will take 10 to 20 seconds if you’re using creamy Danish feta, as the recipe calls for. It can take a few minutes if you’re using crumbly Greek feta.
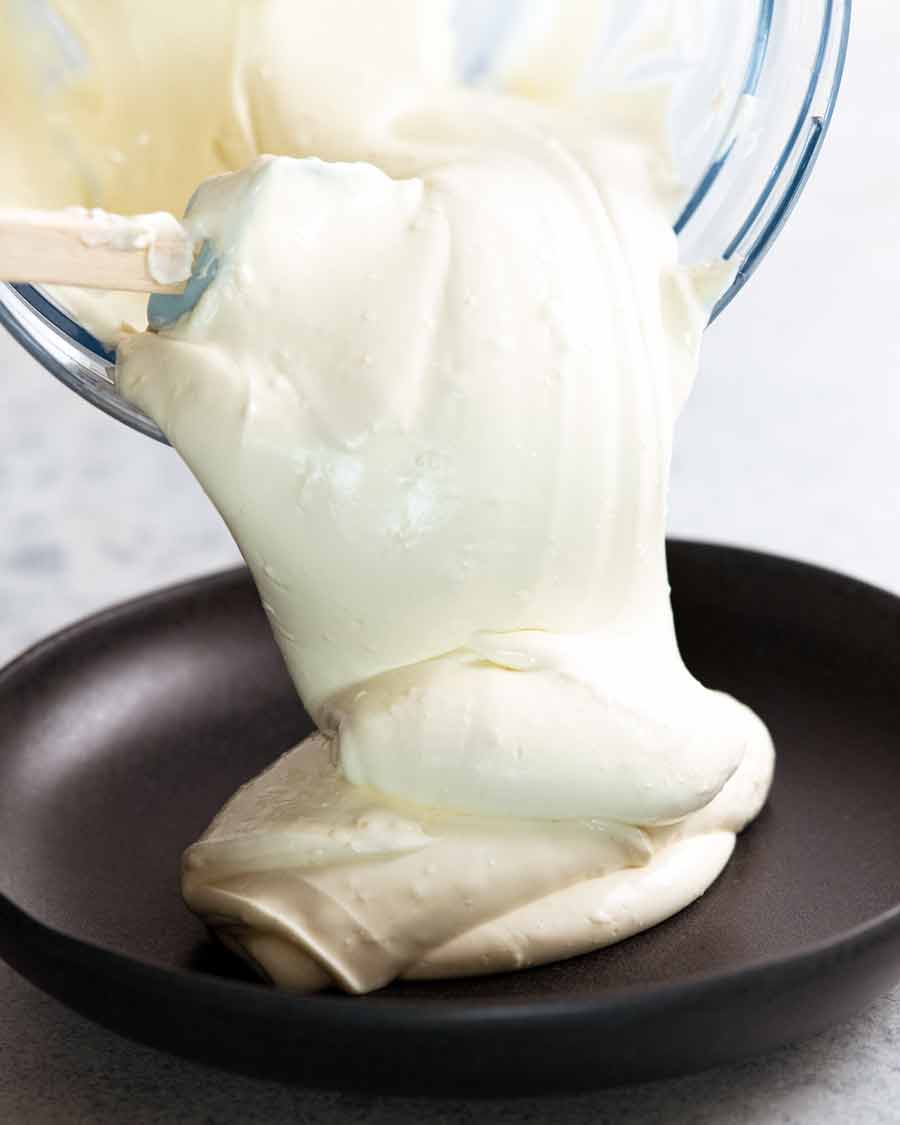
Olive oil – With the motor running, slowly pour the oil in through the feeder, then blitz for a further 10 seconds on high until it comes together into a smooth creamy dip.
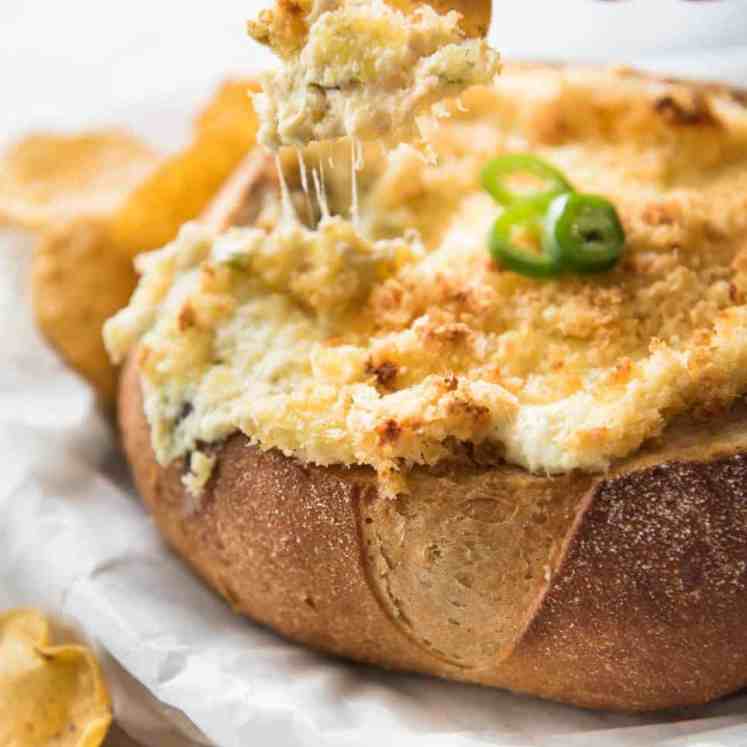
Spread in shallow bowl – Scrape out and spread the dip in a very shallow bowled plate or a normal plate so it’s around 1.5 cm thick (0.6″). We want a good amount of surface area here so every scoop has a nice ratio of toppings to dip!
Dents & swirls – Make big dents/swirls across the surface of the dip using the back of a dessert spoon. No need to channel your Picasso within, once it’s covered in toppings no one can tell if you’ve created art or a total random mess with your swirls (latter for me!). We just want nice big dents for pools of honey and olive oil to settle in.
Toppings – Drizzle and sprinkle with toppings. Then that’s it! You’re done. Ready for dunking and scooping!

What to serve with Creamy Feta Dip
My favourite thing to serve the dip with is thick slices of baguette warmed in the oven. I don’t even toast it until golden, I just pop the bread in the oven to warm it up. Other carb options include:
Lebanese bread, cut into wedges – an excellent low-cost option (and fast to do, just stack and cut with a knife)
Pita or other flatbreads cut into pieces
Ritz or other crackers of choice
Then of course, if you prefer to bring on a riot of attractively bright colour while enticing people to eat their greens, you could assemble a big raw / par-cooked vegetable platter for the Feta Dip. That’s crudités, for the posh among you. Me, I will always call them veggie sticks! – Nagi x
PS. I know I’ve pitched this as a excellent express party food. But everybody knows it’s just as perfect for lazy Sunday afternoons, with just you, the sun, a book and a glass of your favourite wine in hand.
Watch how to make it

Creamy Feta Dip
Ingredients
Creamy Feta Dip:
- 400g / 10 oz Danish feta , at room temp (ie. the creamy sort, not crumbly Greek sort, Note 1)
- 125g/ 4 oz cream cheese , at room temp, full fat (Note 2)
- 1/4 tsp garlic , crushed using garlic press (Note 3)
- 1 1/2 tsp lemon zest , optional
- 1/4 tsp cooking/kosher salt
- 3 tbsp extra virgin olive oil
Toppings (Note 4 for subs):
- 3 tbsp honey
- 1 tbsp extra virgin olive oil
- 2 tbsp pistachios , roughly chopped
- 1/2 tsp parsley , finely minced
- Pinch of chilli / red pepper flakes , optional
- Sprinkle of lemon zest , optional
Dipping options – choose:
- Thick slices of bread , warmed
- Lebanese , pita or flat bread wedges
- Crackers
- Veggie sticks (ie crudités)
Instructions
- Feta Dip: Place all ingredients except the oil in a food processor. Blitz on high for 10 seconds or until pretty smooth, scraping down the sides once. (You could also use a stick blender, but a stand mixer will not work)
- Olive oil: With the motor running, slowly pour the olive oil through the feeder then blitz until the dip is smooth and creamy, scraping down the sides as needed.
- Spread on a shallow bowl-plate / regular plate so it's around 1.5cm / 0.6" thick. Use the back of a spoon to create swirls for the honey and oil to pool in.
- Drizzle over the honey and olive oil. Sprinkle with pistachios, parsley, chilli and lemon. Serve immediately with dippers of choice!
Notes
Nutrition
Life of Dozer
A typical day in Life of Dozer these days – mornings vs evening:
MORNING

EVENING! Book talk at a cocktail party event at Dymocks bookstore in Sydney city on Wednesday 26th October as part of my cookbook tour. More details coming including the menu of food we made!

The post Creamy Feta Dip – quick, easy, thrifty appeared first on RecipeTin Eats.
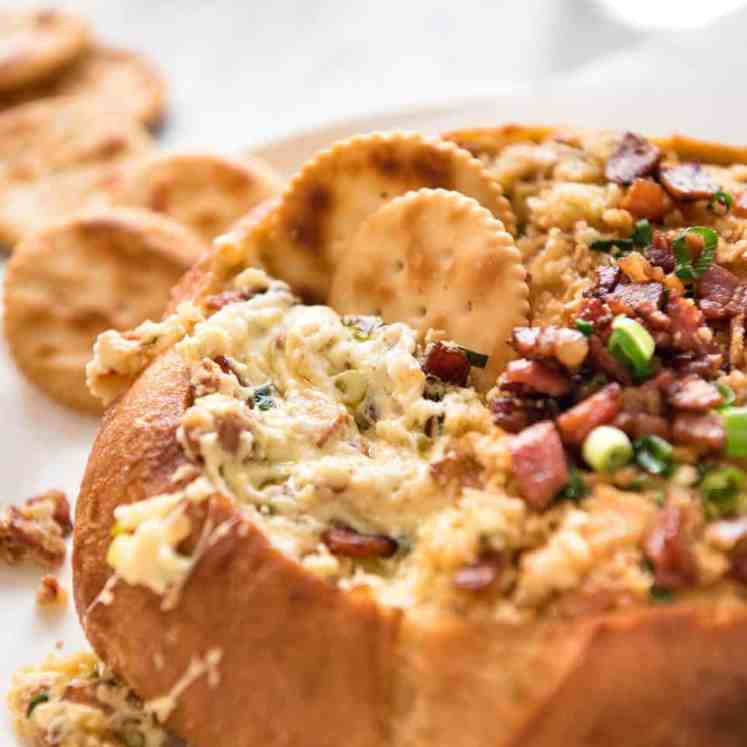
]]> This is my friend Heather’s recipe for Hot Buffalo Chicken Dip. Born and raised in the Southern United States, she really knows her food – this is ridiculously addictive, can’t-stop-scoffing-it good! Hot Buffalo Chicken Dip It will come as no surprise to you that this hot, creamy, cheesy, shredded chicken dip first came into my... Get the Recipe
The post Heather’s Hot Buffalo Chicken Dip appeared first on RecipeTin Eats.
]]>This is my friend Heather’s recipe for Hot Buffalo Chicken Dip. Born and raised in the Southern United States, she really knows her food – this is ridiculously addictive, can’t-stop-scoffing-it good!
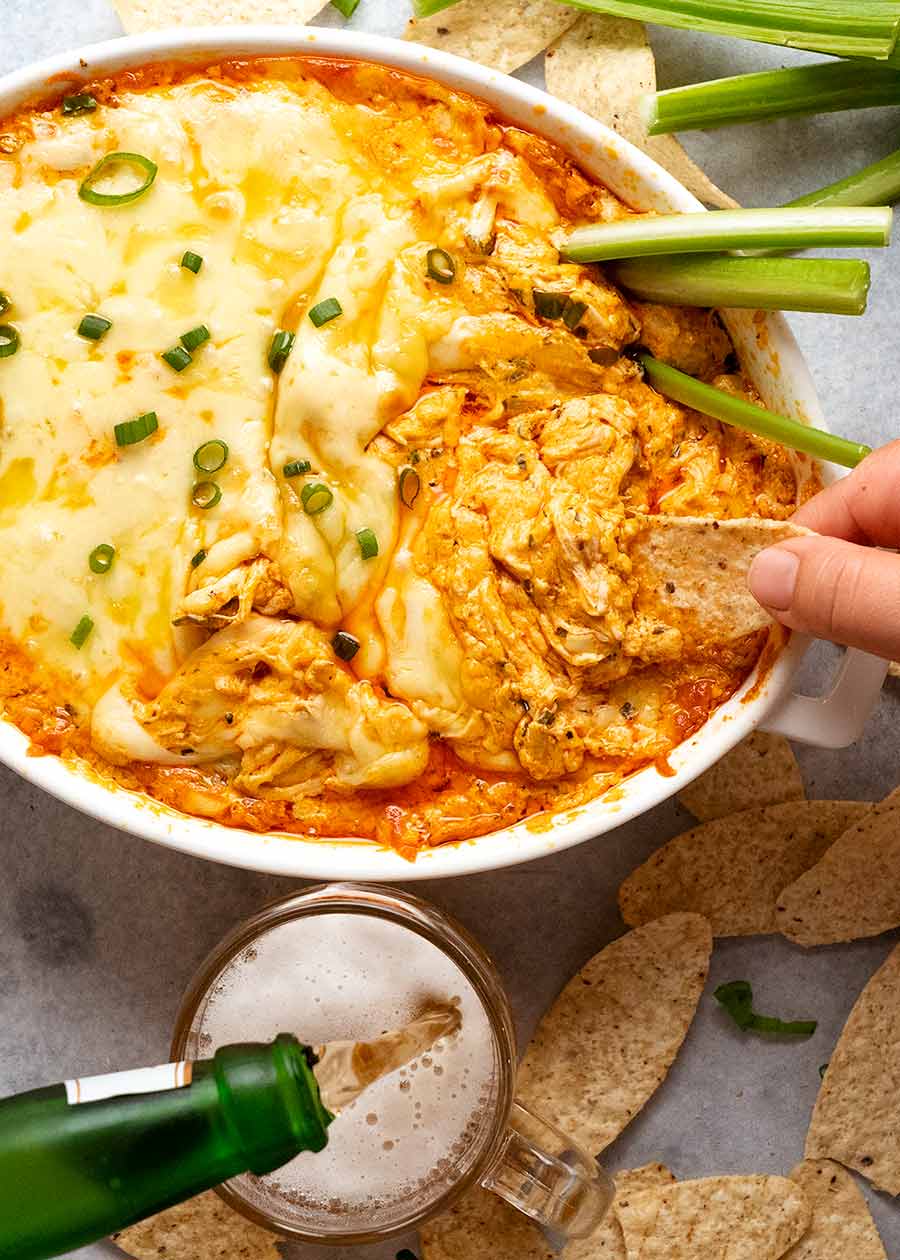
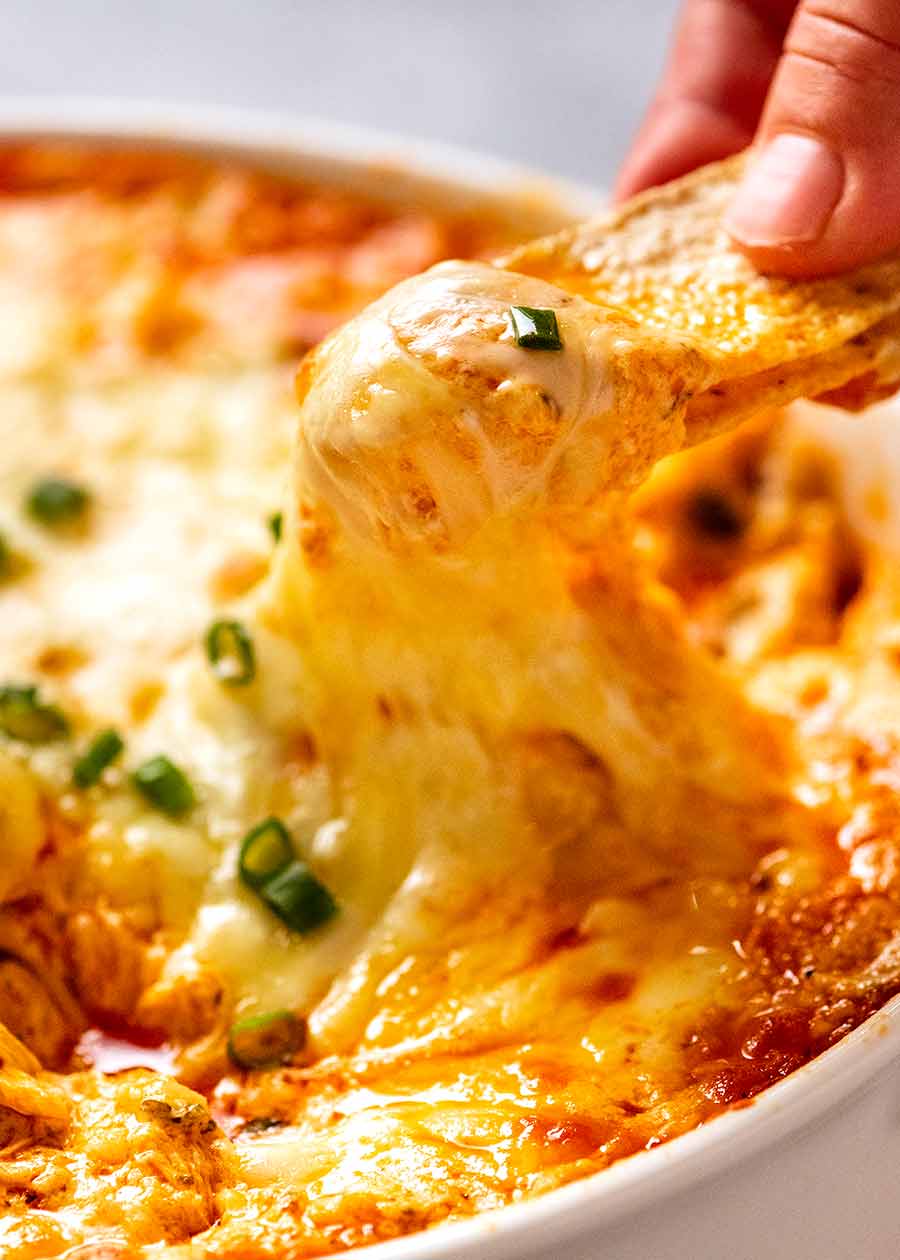
Hot Buffalo Chicken Dip
It will come as no surprise to you that this hot, creamy, cheesy, shredded chicken dip first came into my life during my time in the States.
It will also come as no surprise to regular readers that it was love at first bite. While initially, the idea of chicken in a dip sounded kinda wrong, let me tell you that there is nothing wrong about how it tastes.
Everything about it is 100% right.
Hot. Creamy. Cheesy. Meaty.
Did I say hot? Hot – as in bubbling hot, out of the oven. And hot – as in Buffalo Chicken Wings spicy hot.
It’s obscenely addictive. I may even have to call it – it’s my favourite hot dip. Big call, yep I know!!
What you need for Heather’s Hot Buffalo Chicken Dip
You’ll find simple recipes “out there” calling for far fewer ingredients, or shortcuts like packet ranch dressing powder.
This version is made using a homemade ranch dressing so it calls for more ingredients. But for that small investment of effort, you will be rewarded with the BEST this dip can be!!
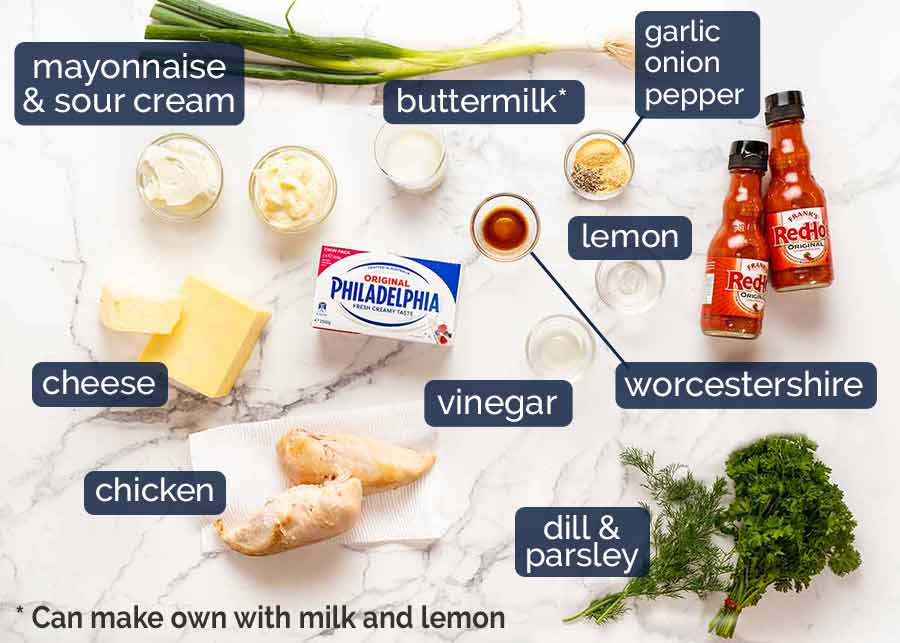
Frank’s Hot Sauce – The traditional hot sauce for Buffalo Wings, widely available these days in Australia. Spicy and vinegary, we need one whole cup – which sounds like a lot, I know. But if we’re making a Buffalo Chicken Dip, let’s make it actually taste like the famous hot wing sauce!! Otherwise, it’s just another creamy dip.
 Also … Did you ever notice that Frank’s Hot Sauce bizarrely never gets too spicy, no matter how much you use? 🤔
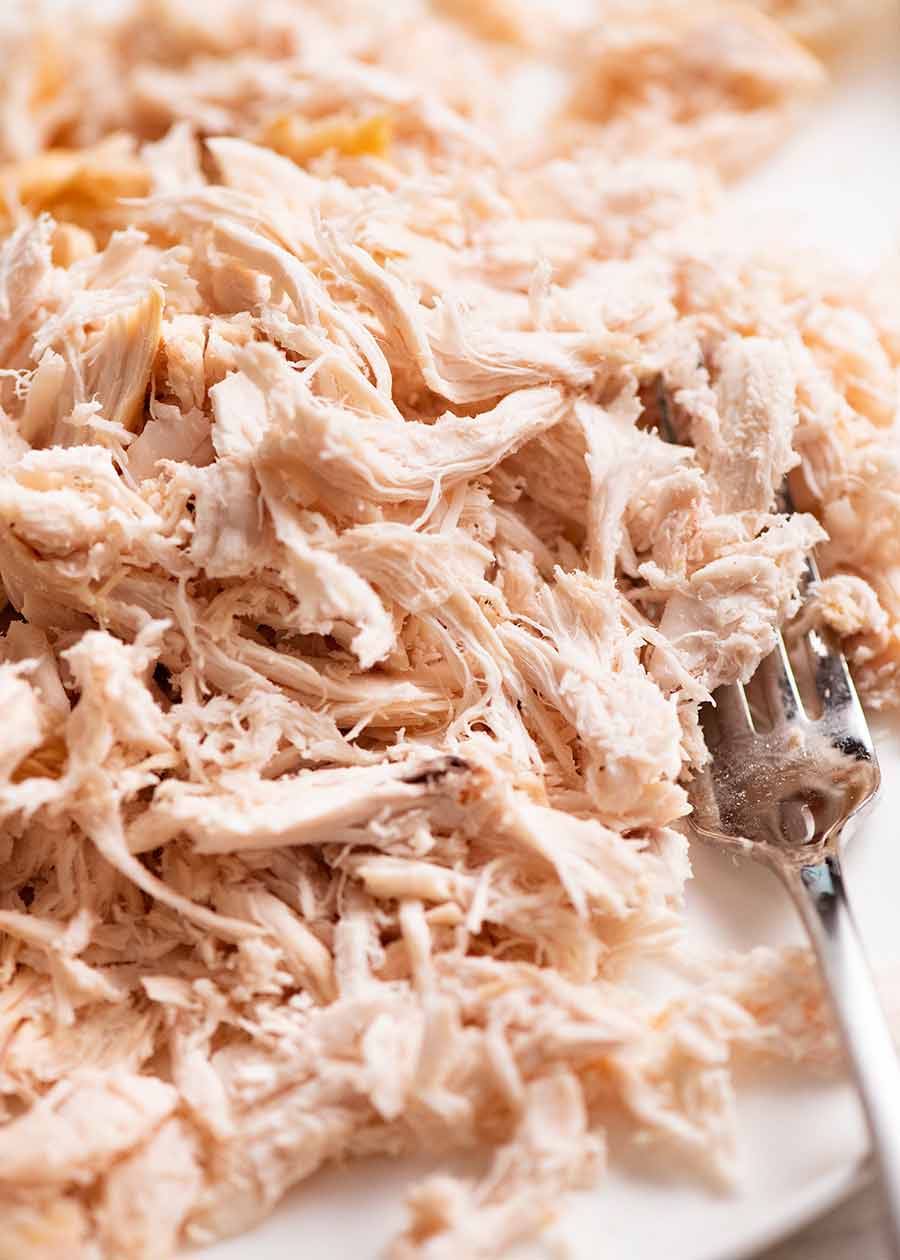
Shredded chicken – Keep life easy by using a store-bought cooked chicken, with the added bonus of the seasoned meat making the dip even tastier. To cook your own chicken breast, use this Foolproof Poached Chicken recipe to ensure the chicken is ultra-juicy. Nobody wants dry, stringy chicken in their dip!
Cream cheese – The dip base. Philadelphia all the way for me, there is no substitute (and they aren’t paying me to say that!);
Mayonnaise – Adds flavour and richness to the dip. For best results, use whole egg mayo (Hellmans and S&W are my preferred brands);
Sour cream – This loosens the mixture to make it more scoop-able, creamy and lightens the mixture (as opposed to using more mayonnaise which makes it ultra rich);
Buttermilk – An essential ingredient in ranch dressing, and similar to the sour cream it loosens the dip mixture. Simple sub: mix milk with a bit of lemon, leave for 5 minutes to let it curdle = homemade buttermilk! Full direction in recipe notes;
Parsley and dill – Using fresh herbs found in ranch dressing is one of the things that makes this dip so good, rather than using a packet Ranch mix;
Onion and garlic powder – Also classic Ranch Dressing flavourings;
Vinegar and lemon juice – Just a touch of each, to up the tang ever so slightly. It is not the end of the world if you just double up on one or the other
;Worcestershire sauce – Everybody’s favourite all-rounder savoury sauce that I can never spell without the aide of spell check;
Cheese – Rarely does a dip leave my kitchen without some form of cheese in it! Colby and cheddar are ideal here, but you can opt for whatever meltable cheese you have; and
Green onion – For an oniony hit and garnish.
How to make Hot Buffalo Chicken Dip
This version has a few more steps than the quick and easy “dump ‘n mix” recipes. But the end result is better. Far better!
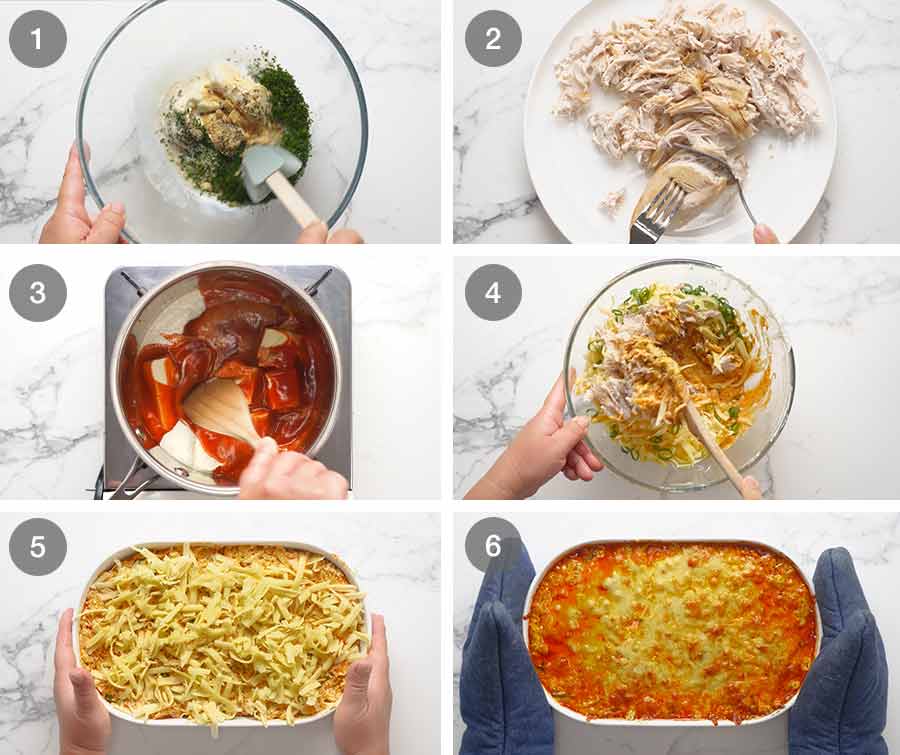
Homemade ranch dressing – Mix together the mayonnaise, sour cream, buttermilk, parsley, dill, vinegar, lemon, Worcestershire, onion powder and garlic powder in a bowl. Set it aside for 10 minutes to let the flavours develop. This is the homemade ranch dressing which forms the flavour base of the dip – so much tastier than using a packet of store-bought powder!
Shred chicken – Either buy a chicken already cooked, or poach it yourself. Shred it pretty finely so it melds nicely with the creamy dip, rather than having chunks or cubes of chicken;
Melty dip base – Combine the homemade ranch with cream cheese and hot sauce in a saucepan. Let the cream cheese melt and mix until smooth;
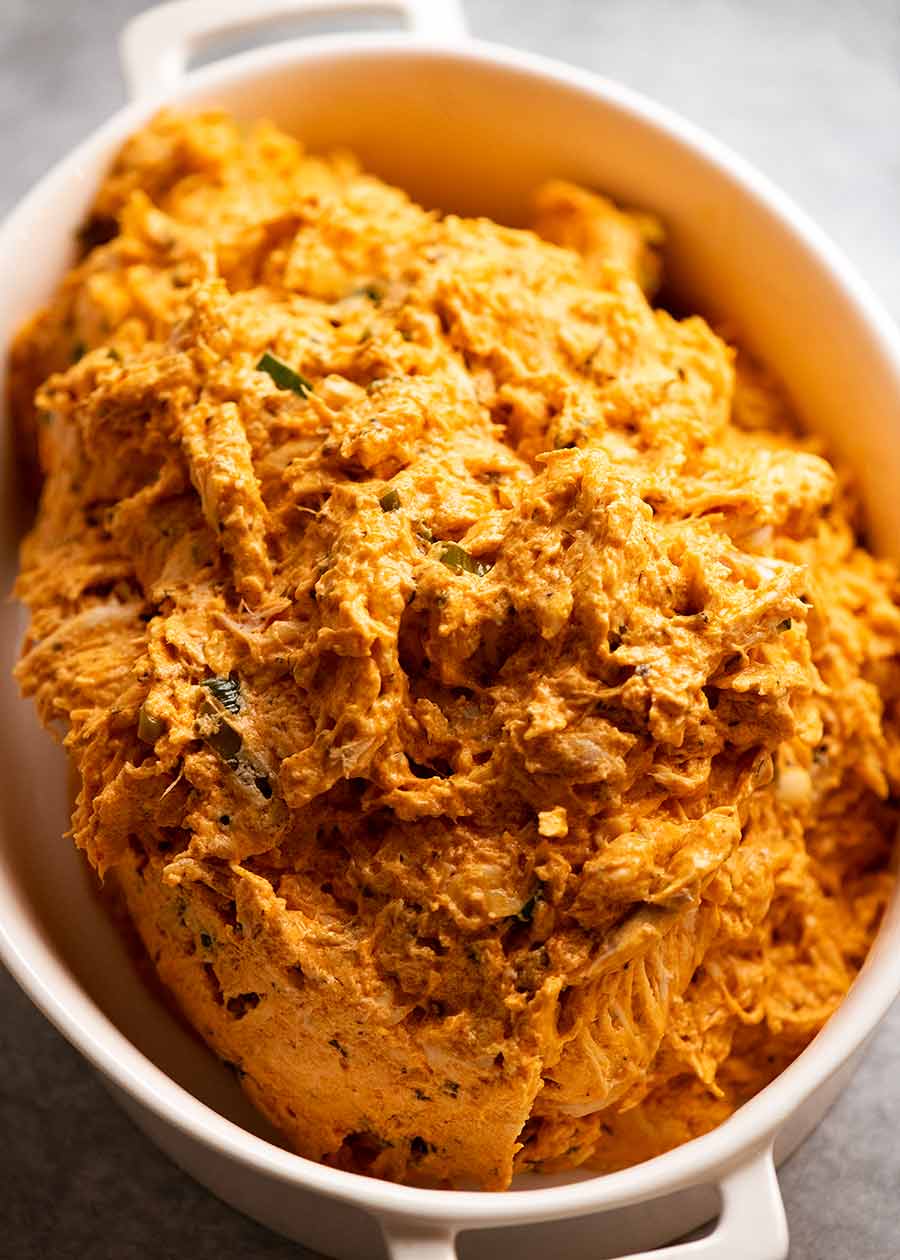
Mix with remaining ingredients – Pour the melty dip base into a bowl then add the chicken, cheeses and green onion, and finally give it a good stir;
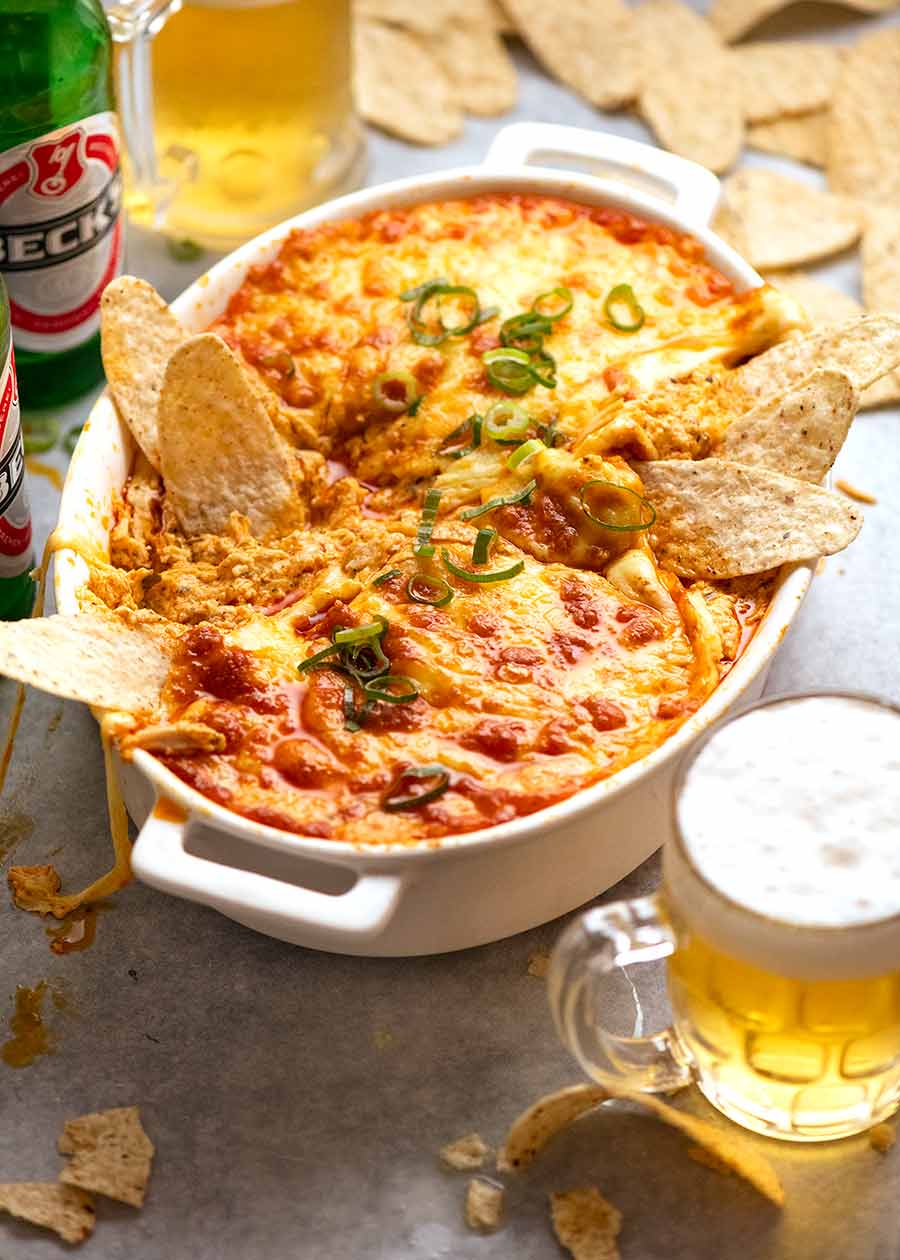
Transfer to baking dish then top with cheese;
Bake for 20 minutes until the cheese is melted and the edges are bubbling. Ready to be devoured!

Note: Once you start digging in, you will notice that the dip looks somewhat split. That’s just the way it is, and really it looks rather striking seeing the streaks of red oil swirled throughout the creamy dip – rivers of hot, creamy-cheesy, spicy lava!
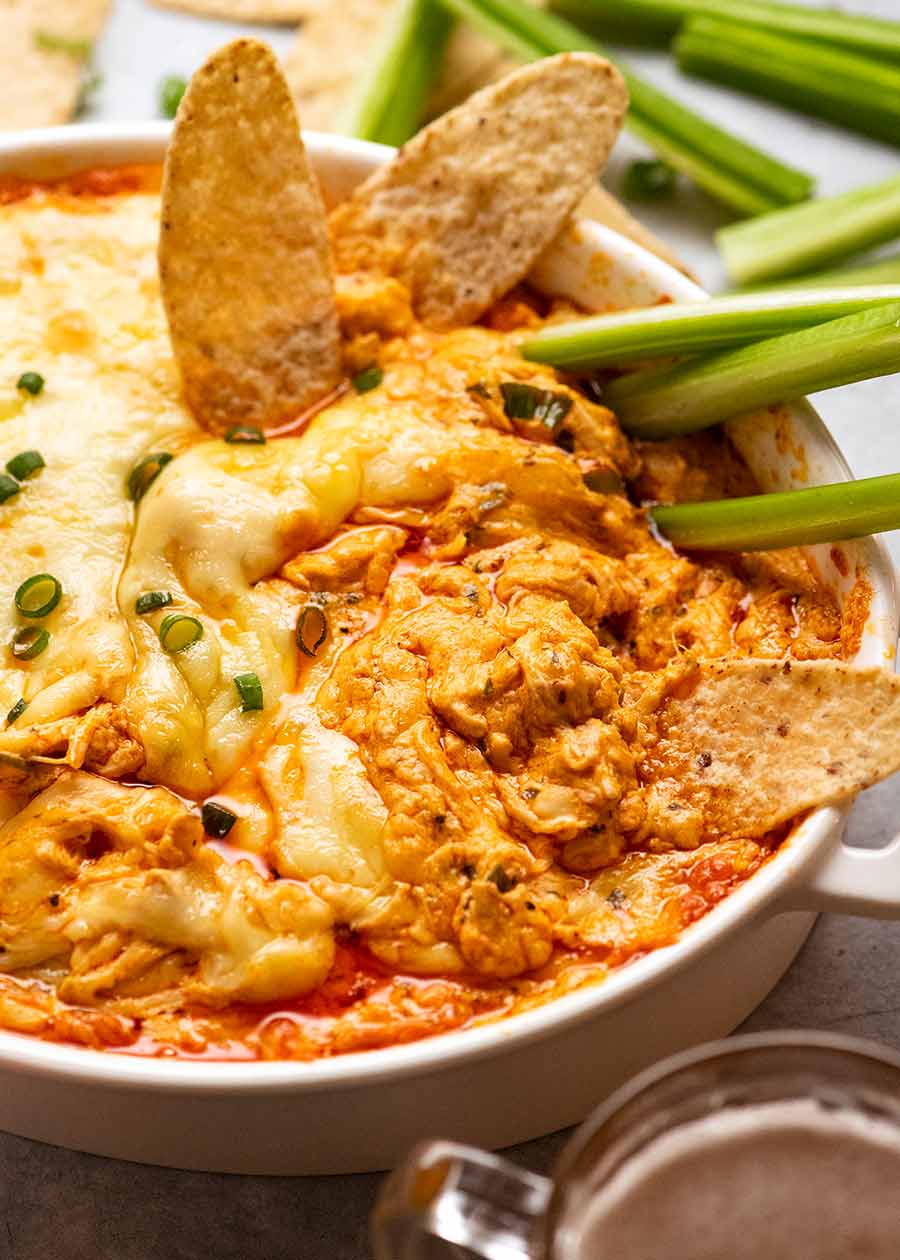
What to serve with Hot Buffalo Chicken Dip
Corn chips, potato crisps, toasted bread, crostini, Jatz/Ritz, or even (gasp-shock-horror!) vegetable sticks. Celery is certainly on-theme, being a traditional accompaniment alongside Buffalo Wings.
And as for leftovers? Slather generously onto hot rolls. Devour and weep. It’s quite possibly the best chicken sandwich ever. – Nagi x
PS. In case you’re thinking boozy good times for your gathering, try one of these cocktails.
Watch how to make it

Heather’s Hot Buffalo Chicken Dip
Ingredients
Homemade Ranch:
- 1/3 cup mayonnaise , whole egg (Hellman’s and S&W recommended) (Note 1)
- 1/3 cup sour cream , full fat
- 1/3 cup buttermilk (Note 2)
- 2 1/2 tbsp parsley , preferably curly, very finely minced (sub flatleaf parsley)
- 2 tsp fresh dill , finely minced
- 1/2 tsp apple cider vinegar (or more lemon)
- 1/2 tsp lemon juice (or more cider vinegar)
- 1/2 tsp worcestershire sauce
- 1/2 tsp onion powder
- 1 tsp garlic powder
Buffalo Chicken Dip:
- 1 cup Frank’s Red Hot sauce (Note 3)
- 3 cups shredded cooked chicken breast (Note 4)
- 250g/ 8oz cream cheese , cut into 8 cubes
- 2 1/2 cups colby cheese , shredded yourself (Note 5)
- 1 1/4 cups cheddar cheese , shredded yourself (Note 5)
- 1 tsp ground black pepper
- 1/2 cup green onion , finely sliced
Garnish & serving:
- Extra green onion
- Corn chips, crackers, crostini, vegetable sticks (especially celery – very on-theme!)
Instructions
- Preheat oven to 180°C/350°F.
- Make ranch dressing base: Combine mayonnaise, sour cream, buttermilk, parsley, dill, vinegar, lemon, Worcestershire, onion powder and garlic powder in a bowl. Set aside for 10 minutes to let the flavours develop.
- Simmer on stove: Transfer the ranch dressing to a saucepan over medium low heat. Add cream cheese, hot sauce and pepper. Stir until cream cheese melts and the mixture is combined and smooth.
- Mix: Transfer the hot cream mixture in a large bowl. Add chicken, ¾ of the cheese (reserve rest for top) and green onion. Mix well until fully combined.
- Transfer into a 6 cup / 1.5L casserole dish, top with remaining cheese.
- Bake 20 minutes until bubbly and golden. For more brown spots, flick the broiler/grill on for the last few minutes.
- Garnish with reserved green onion. Devour recklessly with corn chips, crackers or if you're feeling a bit virtuous, perhaps some vegetable sticks …
Notes
Nutrition
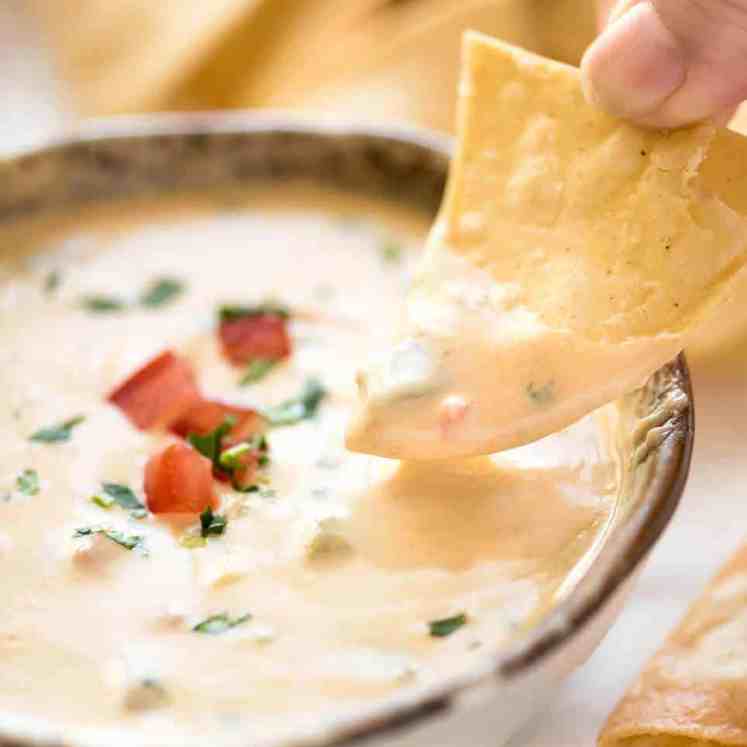
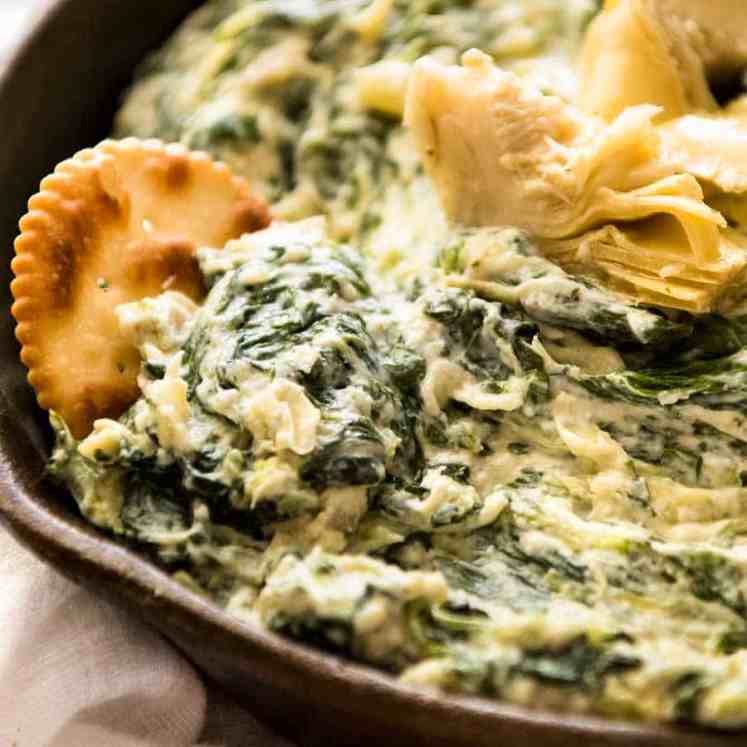
More hot bubbly dips
For fellow Dip Monsters.


Life of Dozer
Currently getting work done on the lower garden to create my dream of having a (mini!) orchard, herbs and veg patch.
Dozer spends a LOT of time down there with the landscape gardener, Stevie from The Courtyard Sydney Landscape Design. Something to do with pats, scraps and lots of dirt to roll around in.

The post Heather’s Hot Buffalo Chicken Dip appeared first on RecipeTin Eats.
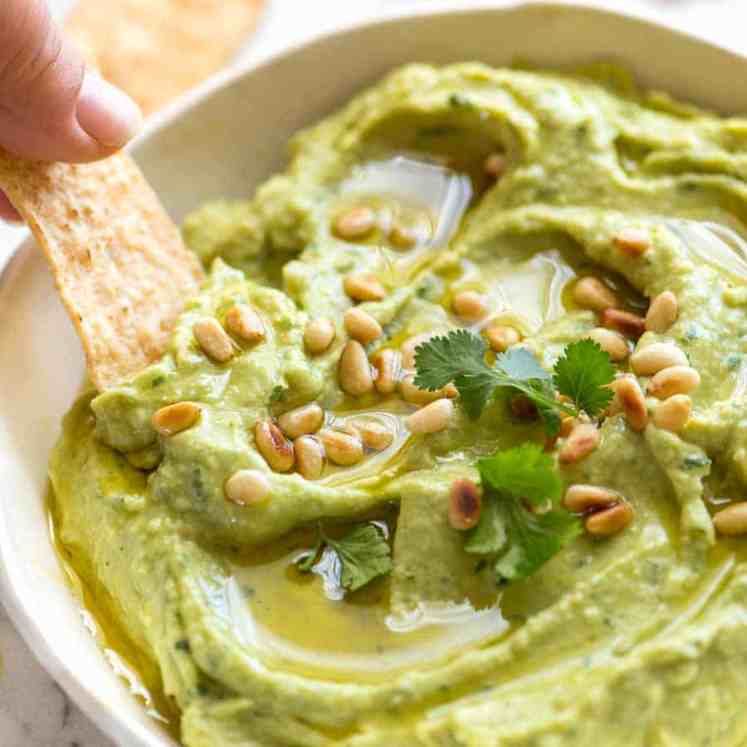
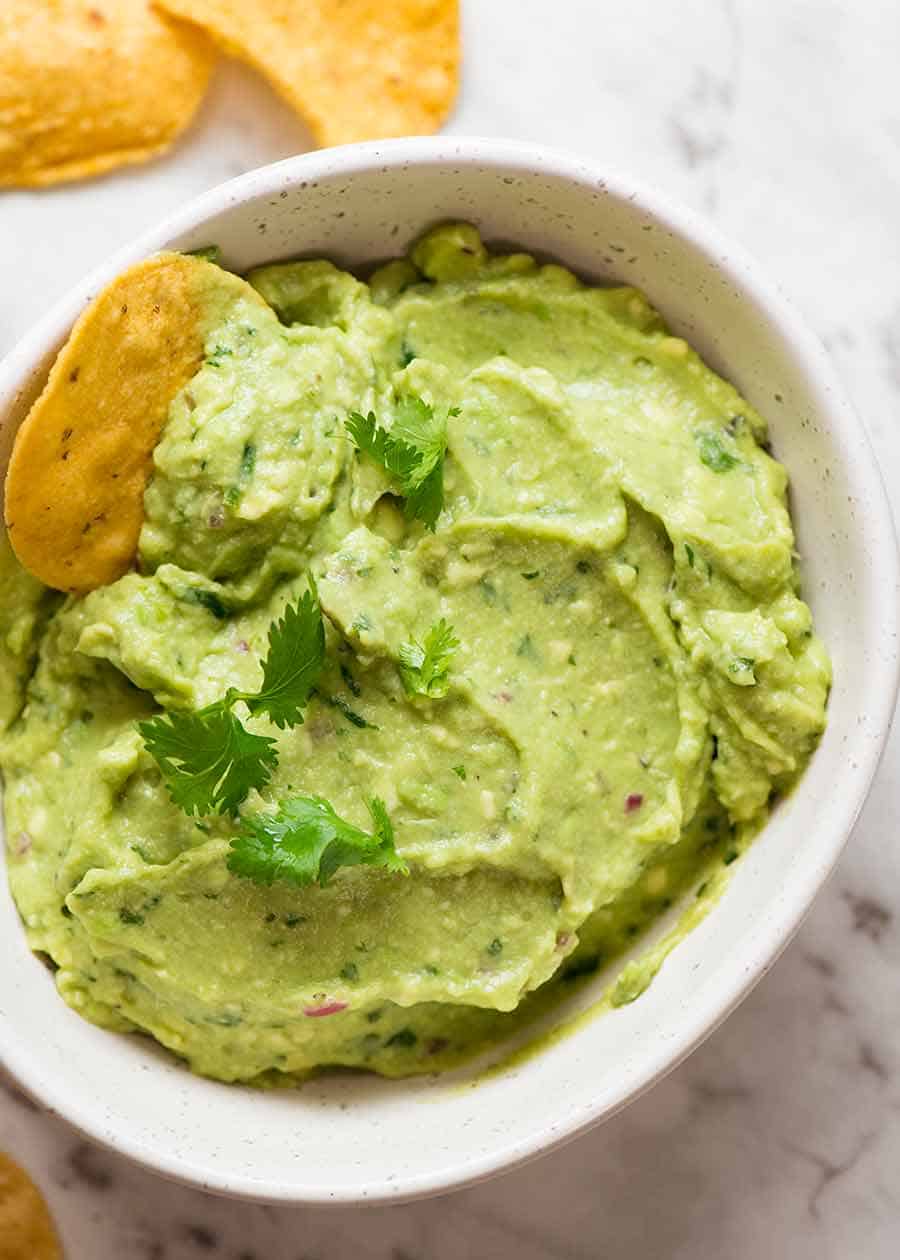
]]> The secret to the best guacamole recipe? Starting with a paste made with coriander/cilantro, chilli and onion. It’s the traditional Mexican way. First timers can never pick why it tastes so good, they just know it is waaaay better than the usual! Plus, I’m sharing a secret for how to stop guacamole from going brown... Get the Recipe
The post Guacamole appeared first on RecipeTin Eats.
]]>The secret to the best guacamole recipe? Starting with a paste made with coriander/cilantro, chilli and onion. It’s the traditional Mexican way. First timers can never pick why it tastes so good, they just know it is waaaay better than the usual!
Plus, I’m sharing a secret for how to stop guacamole from going brown – it lasts two whole days in the fridge and stays the perfect green colour!
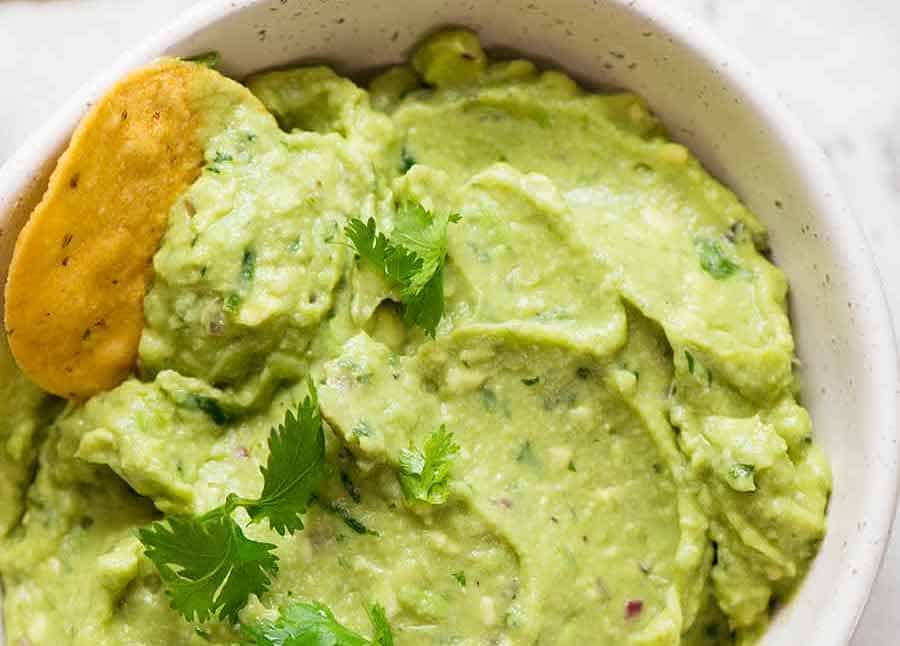
A really great Guacamole recipe
Anyone who has visited Mexico or been to an authentic Mexican restaurant will agree that there is guacamole…then there are really good guacamoles.
For most of my life, I was making it like much of the world: mashing up avocado, stirring through jalapeño, coriander/cilantro, lime juice and salt. Throw in some diced tomato if I felt like it and sometimes even some sour cream.
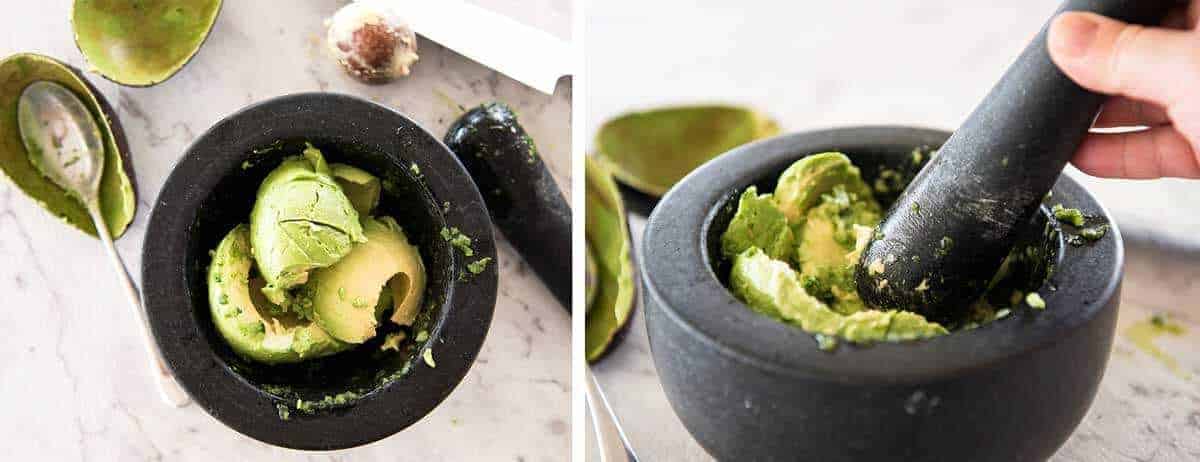
But after visiting Mexico, watching it actually be made, I discovered the secret to a truly great traditional guacamole:
Start by making a paste with garlic, onion and jalapeño or Serrano chilli.
It won’t taste oniony, it just gives it an extra flavour edge that mixes all the way through the guacamole. Because of this, mashing is key here. Nobody wants chunks of raw onion in their guac!
No mortar and pestle? No worries – just use a fork!

How to make a traditional guacamole
Firstly, make the guacamole flavour base by making a paste using onion, coriander/cilantro, jalapeño or serrano chillies and salt. Grind it up in a mortar and pestle (in Mexico, it is called a molcajete) or on a cutting board using a fork. And this simple paste is the foundation of a guacamole that will have your friends begging you for the recipe.
After that, it’s as simple as mashing in the avocado and stirring in lime juice to taste!
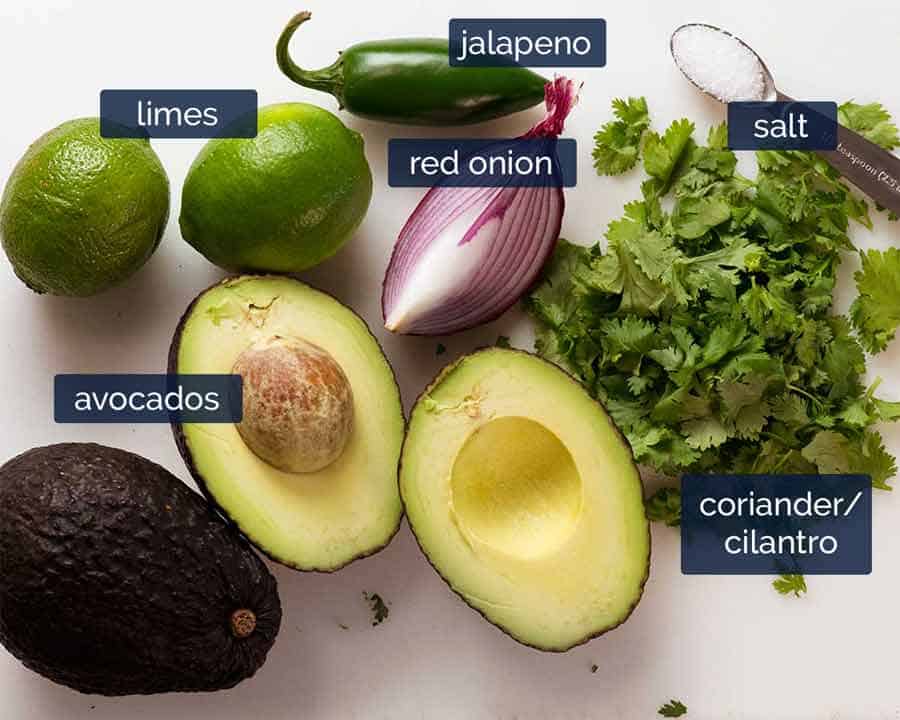
What goes in Guacamole
Here’s all you need for traditional guacamole: ripe avocados, coriander/cilantro, red onions, jalapeño or Serrano chilli, lime and salt.
Avoid unnecessary fillers such as sour cream and cream cheese. They only dilute flavour.
Popular optional extras include: garlic, tomato, cumin powder. Tomato is not that common in Mexico – I only saw it in touristy areas.
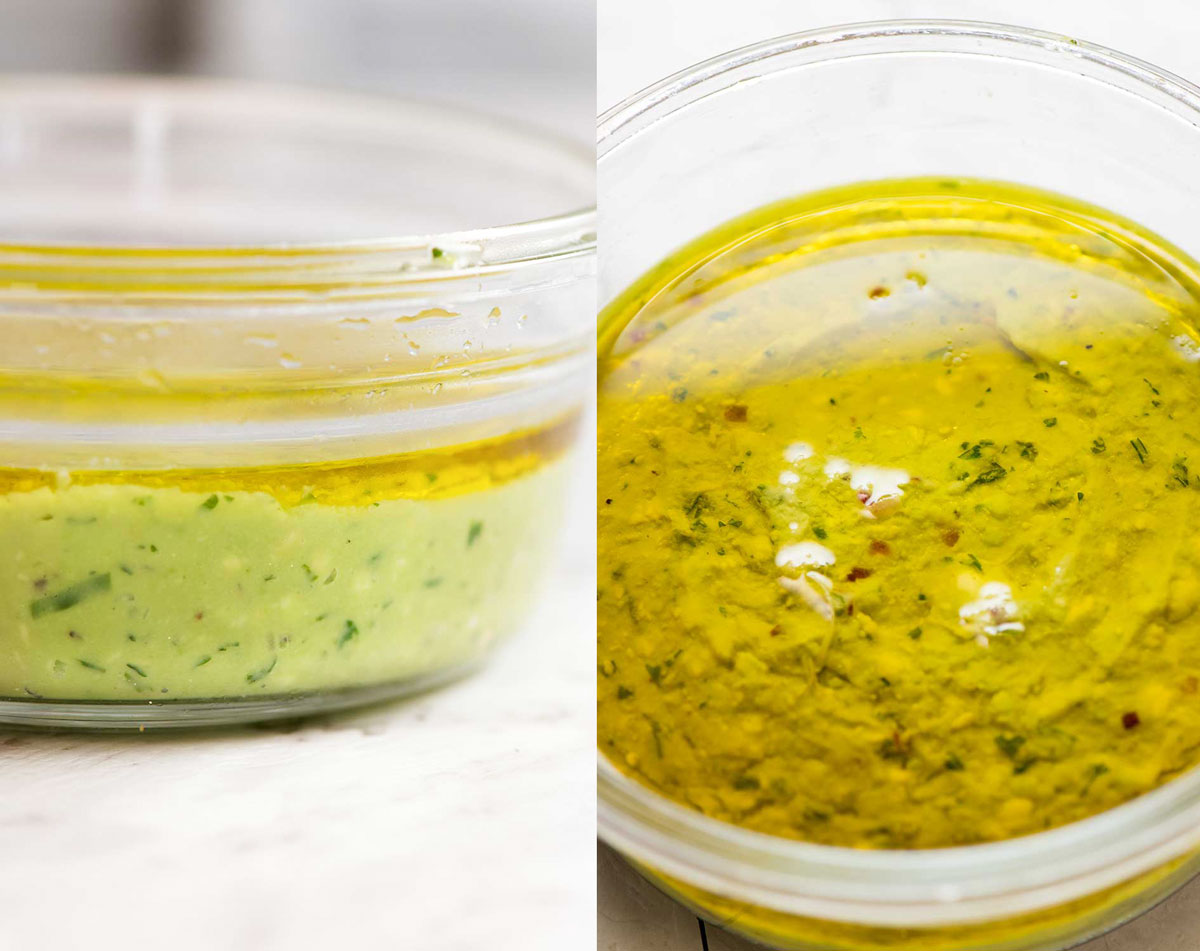
How to stop guacamole from going brown
Avocado goes brown when it is in contact with air. So to stop it from browning, do as follows: pour into airtight container. Bang to remove air bubbles, smooth surface. Cover with a thin layer of olive oil or warm water. Avocado is so dense, it will not absorb it. Stays green for 2 whole days in the fridge!!
To serve, pour off liquid, give it a good stir. Add a fresh spritz of lime if needed then serve!
Game changer tip learnt from Claire at Sprinkles & Sprouts!
Flavour variations
There are plenty of flavour variation options. Don’t let anyone tell you what you should or shouldn’t put in your guac – make it the way you want! Here are some suggestions:
Garlic – add a small clove when mashing the onion;
Cumin – add a small pinch or two, just a hint of extra flavour;
Tomato – stir through diced tomato and stir through. (To chop the tomato, halve and remove watery centre then chop, see my Bruschetta video if you want a quick tutorial)
Coriander / cilantro substitute – use chives instead! It’s terrific!
Avocado Hummus – For all those times when you can’t decide whether to make hummus or guacamole, OR when avocado is extortionately expensive!!
Chunky or smooth – I like mine on the chunky side usually but it depends on who I’m serving. To be honest, smoother looks better when serving at a gathering. But for day to day purposes, I make it lumpier
In Mexico, it’s served on the chunkier side.Sour cream and cream cheese – these are a no go zone for me because they dilute the flavour of the avocado. I’d rather make Avocado Hummus! But if it’s what you like, feel free to stir it in!
Is avocado good for you?
YES – in moderation! Avocado are packed full of vitamins, minerals, fiber and healthy fats! One of the few natural produce that contains a substantial amount of monounsaturated fatty acids which are good fats known to lower cholesterol and promote heart health.
With almost 20 vitamins and minerals, their potential health benefits include improving digestion, good for your heart, lower cholesterol, decrease risk of depression, and protection against cancer.
Avocado is also good for weight loss because it’s high in fibre and (good!) fats which will keep you feeling full for longer. You’re far better off loading up a salad with avocado than cheese, or smushing avocado on your morning toast than peanut butter! But because they are 77% fat, they do need to be eaten in moderation.
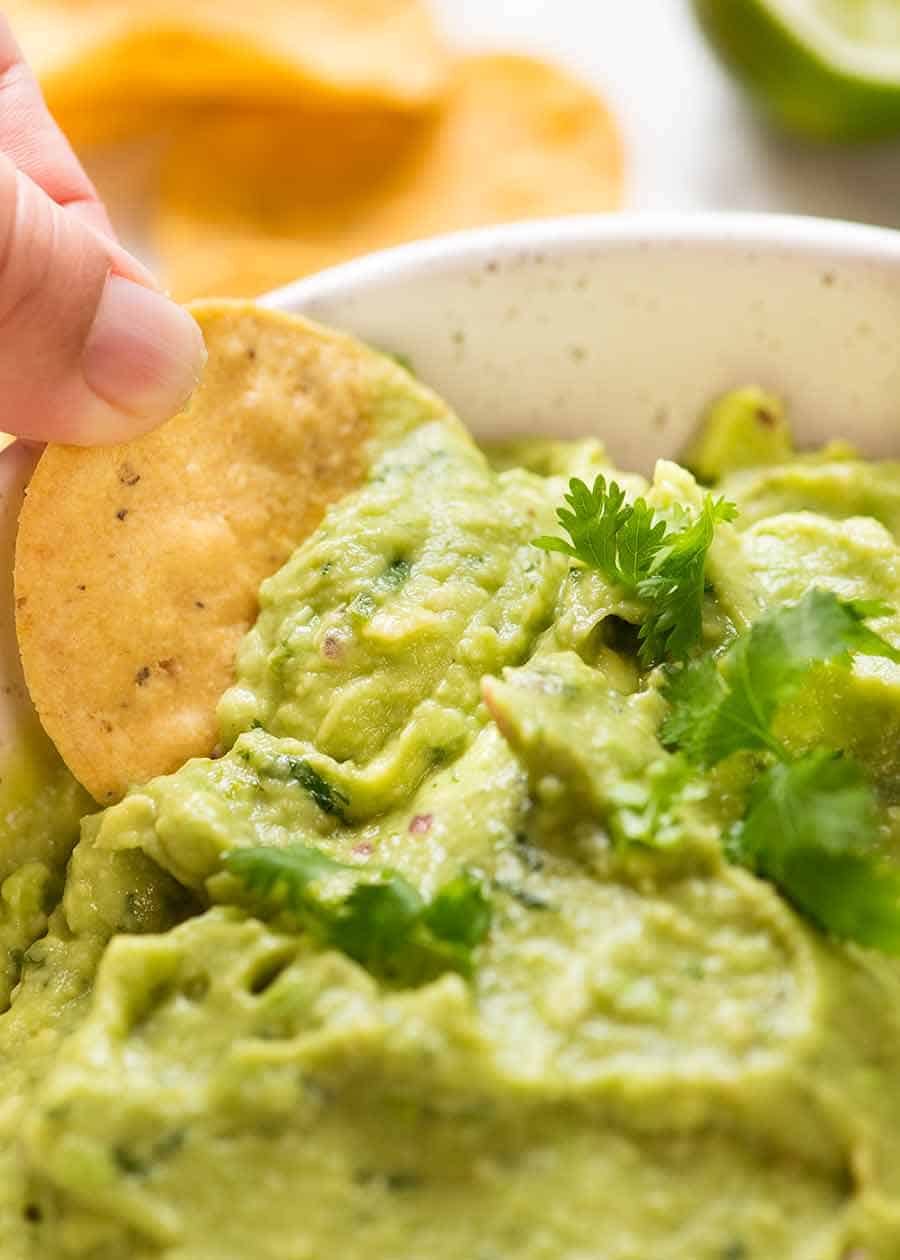
What to eat Guacamole with – other than corn chips!
A big platter of corn chips with a bowl of guacamole is certainly the most classic! Actually, in Mexico, the traditional way is to serve with crispy deep fried tortilla cut into corn chips shapes.
Anything suitable dunking works with Guacamole. Vegetable sticks, crackers, torn up pieces of Lebanese bread or other types of flatbread.
It’s also a firm favourite to serve alongside most Mexican dishes – as a dip or dollop for burritos, enchiladas, tacos, nachos, fajitas!
I really hope you do try this traditional recipe. It adds an extra element of “wow” to your guacamole but won’t taste oniony. No one can ever put their finger on why it taste so good, they just know it does! – Nagi x
Guacamole recipe
Watch how to make it
Guacamole recipe video:
Guacamole
Ingredients
- 2 tbsp finely chopped white onion (or red, brown or yellow)
- 1 tbsp finely chopped jalapeno or serrano chilli (or other chilli of choice) (adjust to taste)
- 1/2 tsp salt , plus more to taste
- 1/4 cup roughly chopped coriander/cilantro leaves
- 2 medium avocados (or 1 very large one) (Note 1)
- Lime juice , to taste (I use 1/4 – 1/2 lime)
- Optional: 1 ripe tomato , peeled, deseeded and chopped
Instructions
- Place the onion, jalapeño, salt and half the coriander on a cutting board and use a fork to mash until juicy. OR do this in a mortar and pestle – grind into a paste.
- Scrape into a bowl, add avocado and remaining coriander, and mash to desired consistency.
- Do a taste test then adjust to your taste: salt, lime juice for sour, more chilli for spiciness.
- If using tomatoes, stir through.
- Serve with corn chips!
Notes
PREPARING AHEAD: What I do is make batches of the paste and have the coriander and lime chopped and ready to go. Then just before serving, I cut the avocados and make the guacamole – it’s very quick and there are always people willing to pitch in! 3. Coriander/cilantro: In the video, I ground up all the coriander into the paste rather than stirring half in later. It doesn’t make a huge difference to flavour, it’s up to you which way you prefer. 4. Source: Recipe originally adapted from a recipe by Thomasina Miers but since updated to a recipe from a cookbook I purchased in Oaxaca, Mexico, called “Truly Mexican” by Roberto Santibanez. My current bible for Mexican cooking.
Both use the same technique of an onion paste, but called for slightly different quantities and I prefer the Truly Mexican version.
5. Nutrition per servings.Nutrition
Recipe originally published 2014, updated for housekeeping matters December 2016 and 2020. No change to recipe – I wouldn’t dare!
Life of Dozer
Trying to get him into the spirit of New Years’ Eve! (Err….and yes, if you are looking closely you might notice the sparkly confetti is actually in the shape of Christmas trees. It’s all I have!)

Oi! Dozer! Where’s your party spirit??!!!

The post Guacamole appeared first on RecipeTin Eats.
]]>