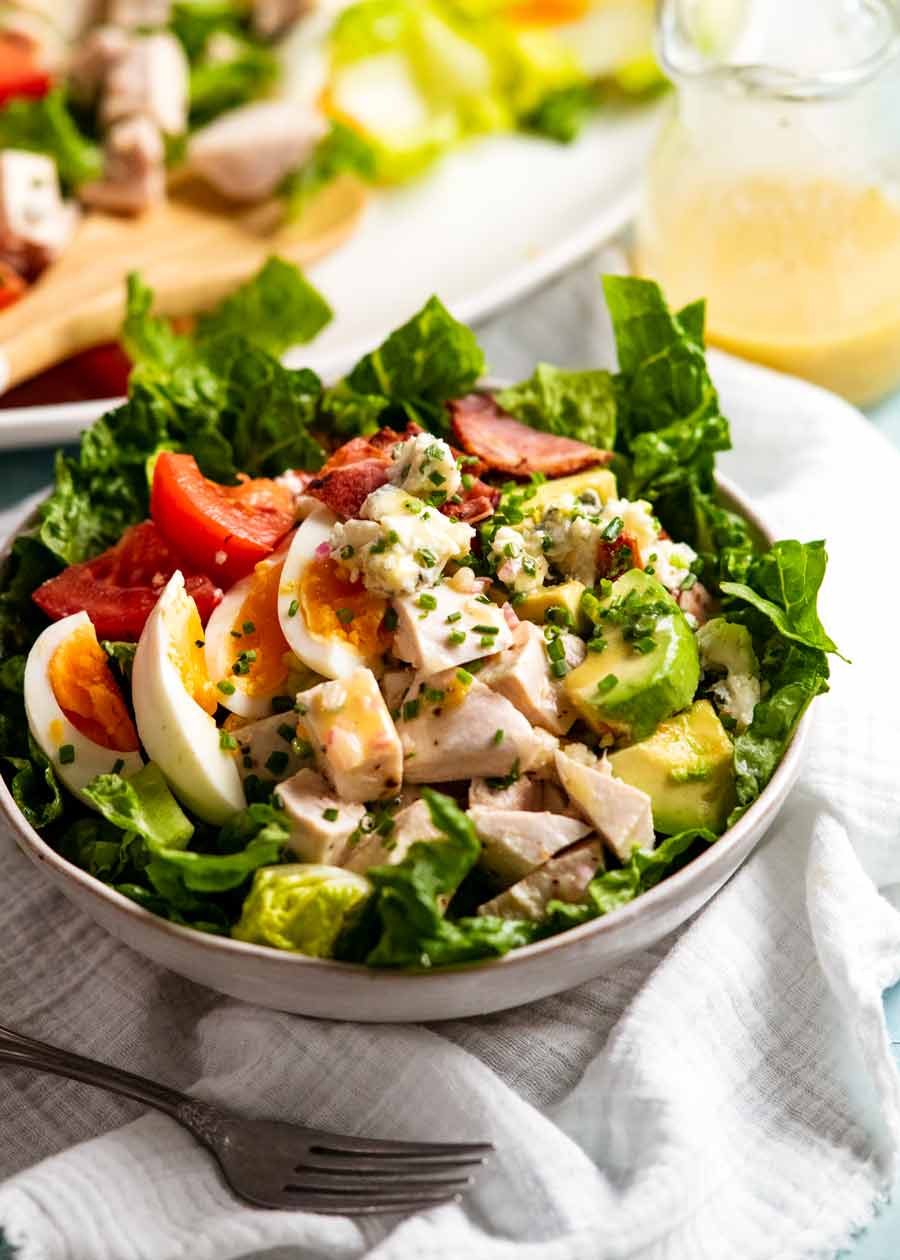
 The mighty Cobb Salad has arrived! All the essential players present – juicy bites of chicken, crispy lettuce, chunks of tomato, creamy avocado, salty bacon and creamy blue cheese, arranged in the signature rows. Served with a homemade Cobb Salad dressing. Salad was never so delicious! Cobb Salad I feel like I’ve done endless iterations... Get the Recipe
The post The mighty Cobb Salad appeared first on RecipeTin Eats.
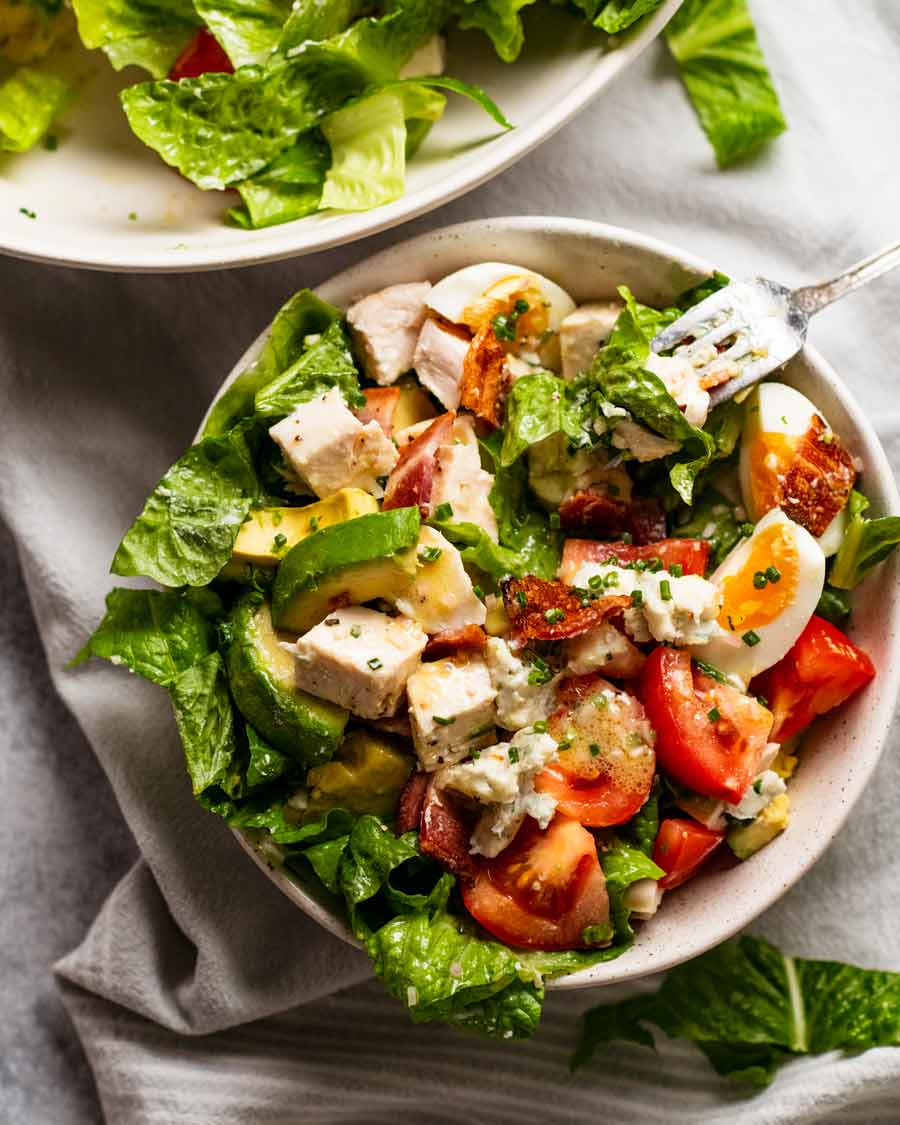
]]>The mighty Cobb Salad has arrived! All the essential players present – juicy bites of chicken, crispy lettuce, chunks of tomato, creamy avocado, salty bacon and creamy blue cheese, arranged in the signature rows. Served with a homemade Cobb Salad dressing. Salad was never so delicious!
Cobb Salad
I feel like I’ve done endless iterations of chicken salad, from Chinese to Vietnamese, Mexican to Thai, not to mention all the various non-Asian ones from the Avocado Ranch pasta one to Lemon Chicken to that one I copied from a trendy San Francisco bistro (<- This was is super good!).
So I was a little surprised that I hadn’t done what is probably the most classic of all chicken salads – the great Cobb Salad! Though actually, it was traditionally made with turkey rather than chicken. But these days chicken is more common, especially for homemade versions.
Though there are various tales about the origins of Cobb Salad, one thing everybody agrees on is that the ingredients should be presented in neat rows on a large bed of lettuce. The presence of blue cheese is also essential – otherwise, it’s just another chicken salad! 
Cobb Salad Dressing – sharper than most
Another thing worth mentioning is that Cobb Salad Dressing is a little sharper than standard dressings, with a 50/50 oil to vinegar ratio compared to the usual 1 part vinegar to 3 or 4 parts oil. The slightly tangier dressing works really well here because it offsets the richness of the blue cheese, with the added benefit of lower calories!

Ingredients in Cobb Salad
Feel free to cut the vegetables as you wish. Some like them more chunky, to give the salad a sense of heft. Others prefer them chopped into smaller pieces. It’s entirely up to you!
Cobb Salad Vegetables
Here are the vegetables in a classic Cobb Salad.
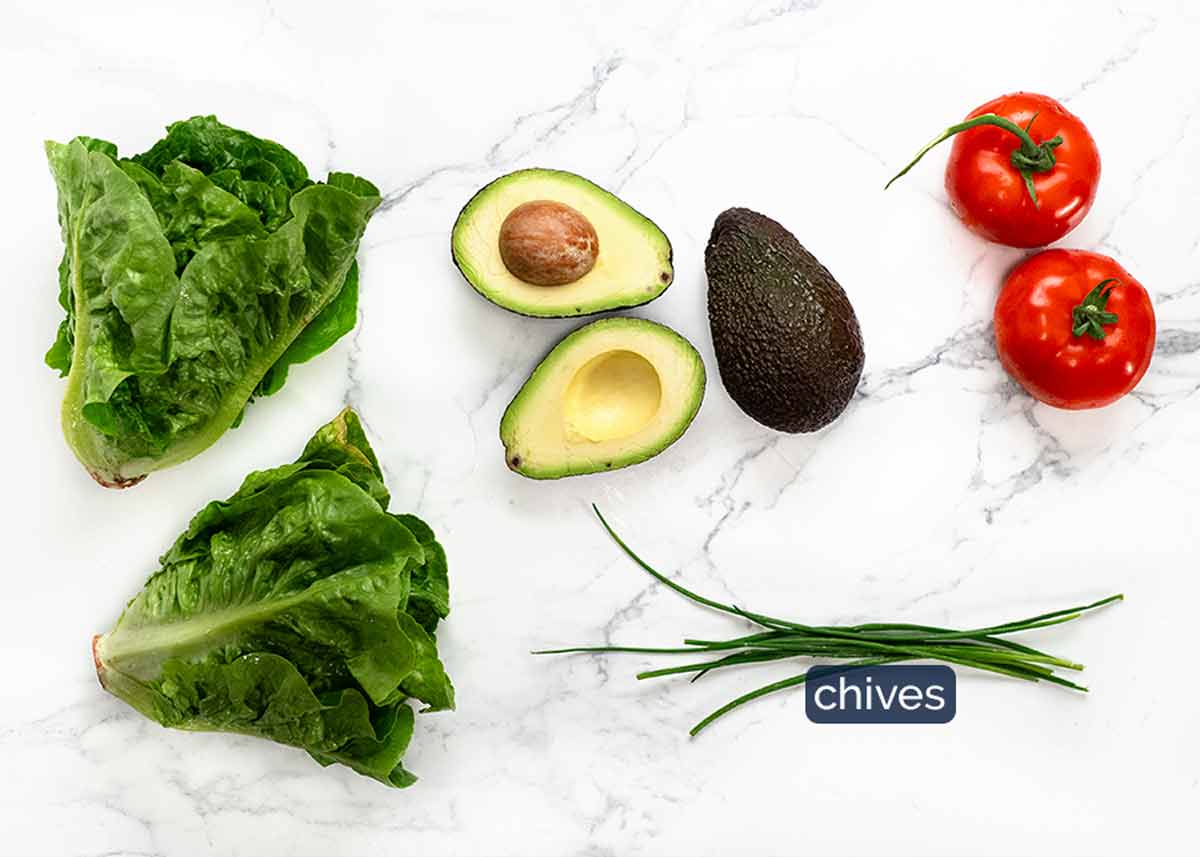
Cos / romaine lettuce – Either 1 large or 2 small ones (“hearts”), chopped into large bite size pieces. You want around 12 cups, lightly packed, slightly heaped. I know, it’s hard to measure! It’s flexible. The recipe has plenty of dressing!
Tomatoes – Either 2 large ones cut into chunks (I prefer this) or 250g/8oz cherry tomatoes, halved.
Avocados – Two medium avocados or one really large on.
Chives – This is an optional garnish. Finely chop then sprinkled on at the end.
Cobb Salad Proteins & Blue Cheese
Not a fan of blue cheese? You’re missing out! 😂
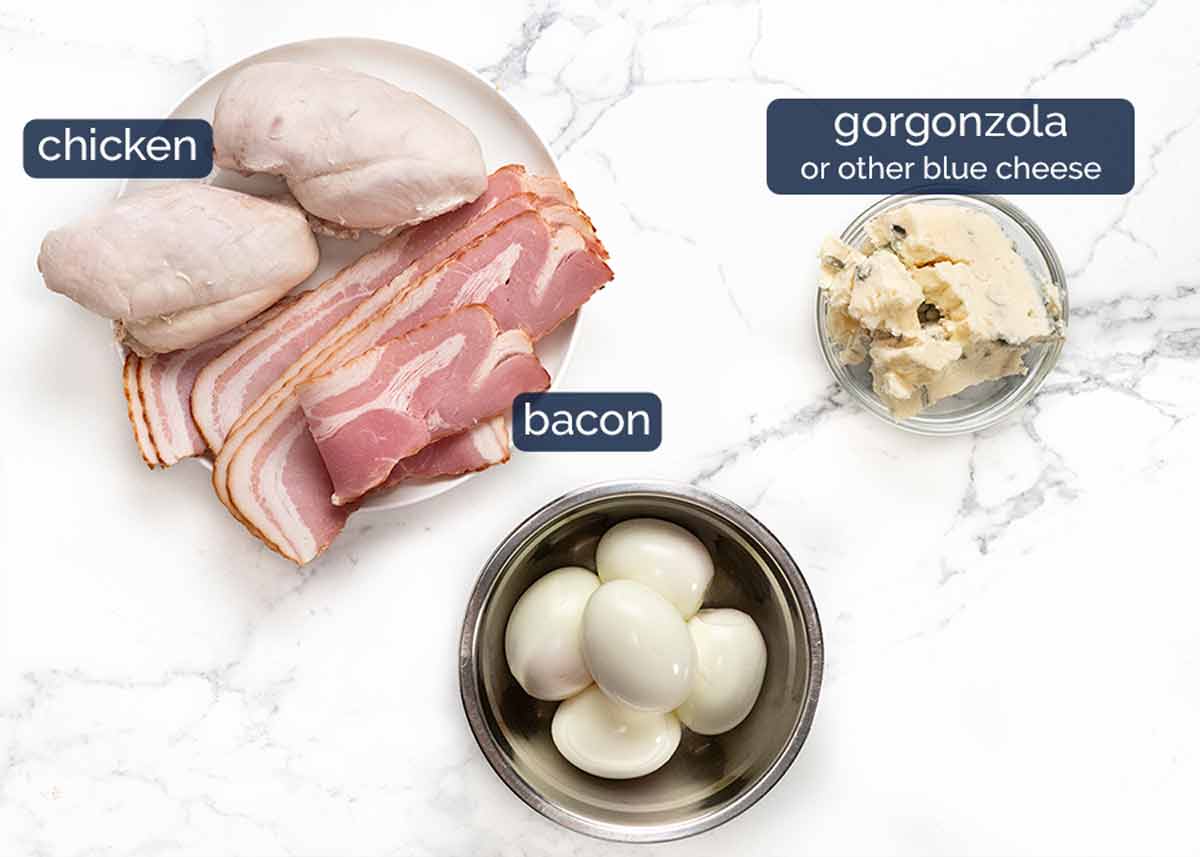
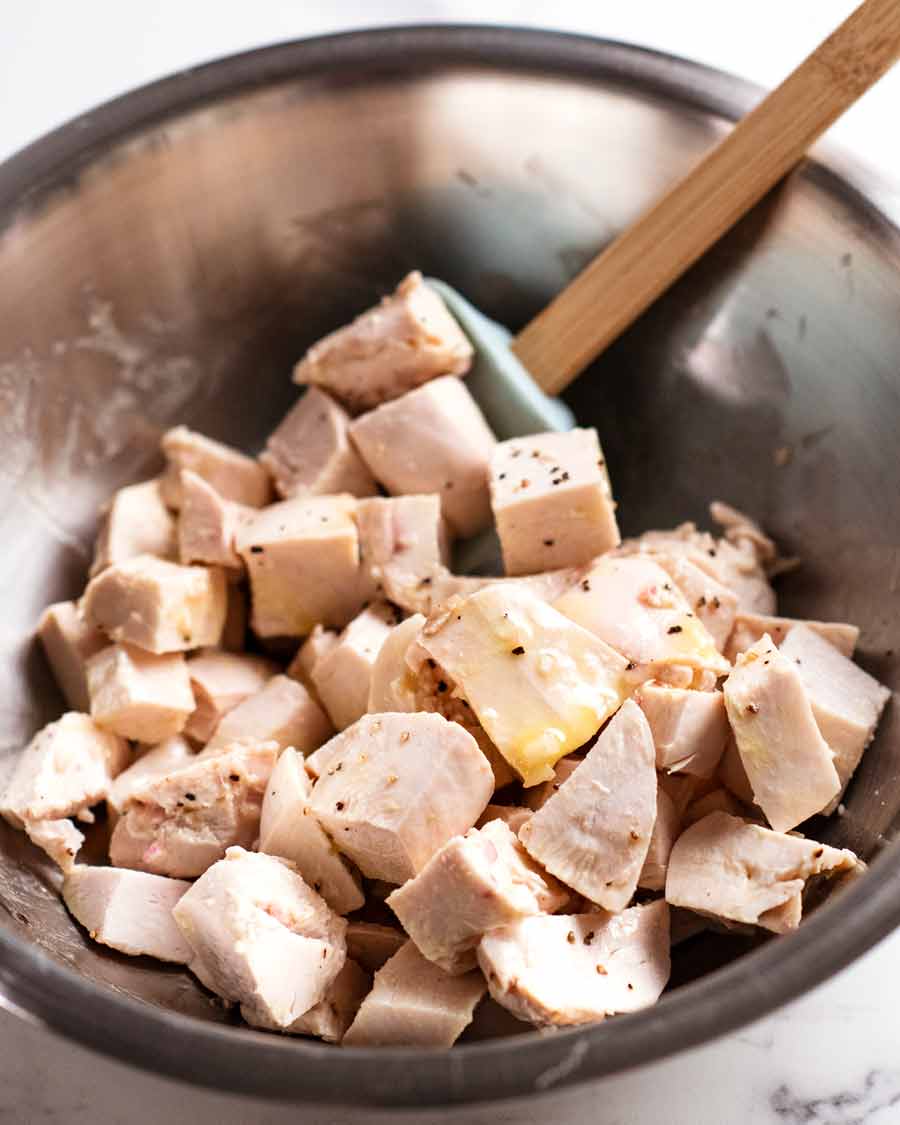
Chicken – You can either poach your own (you will love my foolproof entirely hands-off method) or use store bought roast chicken. Though not standard, I like to toss my cooked chicken in a little salt, pepper and dressing. Just – more flavour.
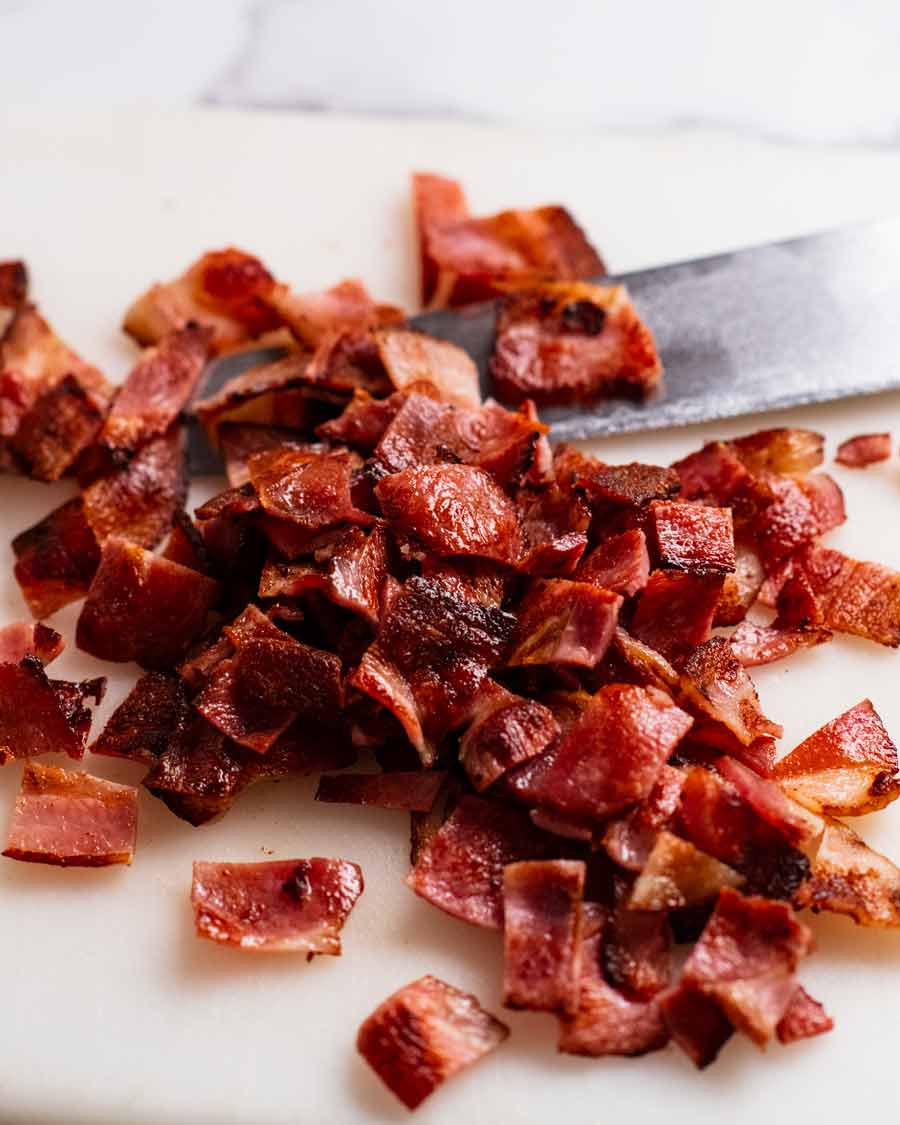
Bacon – These days I tend to cook the strips whole then chop afterwards because it’s less effort. So much easier to cut crispy bacon than raw, and less effort to cook strips than a pan full of lots of tiny pieces that keep popping in my face!
Blue cheese – There might not be full consensus on exactly what type of blue cheese is the classic to use in a Cobb Salad. But for me, there’s no question: creamy is better than crumbly/drier. Creamy blue cheese smears and gets on “everything”, and everything it touches is tastier!!
My favourite blue cheese for salads is gorgonzola. Gorgonzola Dolce is my preference for a creamier, rounder blue cheese flavour – this is the more common type of Gorgonzola. Though if you like your blue cheese really sharp, then go for Gorgonzola Picante!
New to blue cheese? Try Blue Castello. It’s probably the most mild out of all the blue cheese, plus it’s better value.
Boiled eggs – I like mine soft boiled so the yolks are slightly jammy but not runny. 9 minutes in boiling water – boil the water first, lower eggs in then set the timer! (Boiled egg directions here).
Cobb Salad Dressing ingredients
As noted above, Cobb Salad Dressing is tangier than typical vinaigrettes. To help with thickening (because less oil = thinner dressing), a touch of Dijon mustard is used.
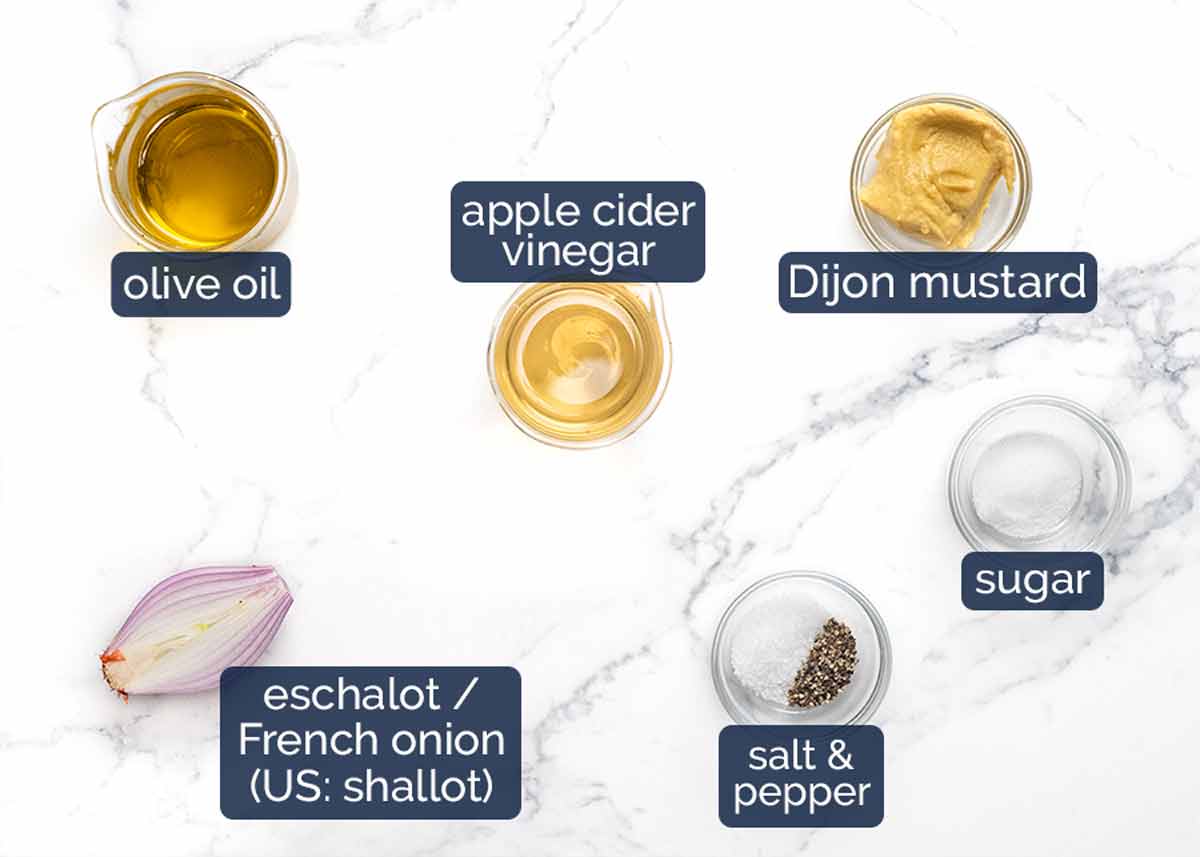
Extra virgin olive oil – Use the best you can afford! The better the olive oil, the tastier your dressings.
Apple cider vinegar – Good all rounder vinegar for dressings that’s not as sharp as white vinegar. Substitute with white wine or red wine vinegar.
Dijon mustard – Adds flavour as well as thickening the dressing which is particularly important here because this dressing uses less oil. So the dressing would be very watery without the dijon.
Eschallot (US: shallot) – The small onions which are finer than ordinary onions so the minced pieces blend into the dressing better, rather than having lots of big chunks. Also, the flavour is not as sharp as ordinary onions. This adds good value into the dressing so don’t skip it! Substitute with 1 tablespoon finely grated red onion.
Sugar – Just 1/2 a teaspoon takes a bit of the tangy edge off this dressing.
I’m using a classic Cobb Salad dressing today so there’s no garlic in it. But a finely grated garlic clove certainly wouldn’t go astray here!
How to make Cobb Salad
The presentation of Cobb Salad is one of its defining features. Traditionally, it’s served on a large platter with the ingredients artfully arranged in neat rows. I see no reason to stray from tradition when it looks so good!
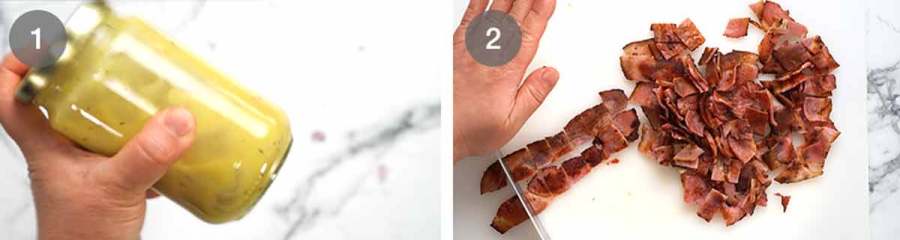
Dressing – Shake everything up in a jar. It really is a quick and easy way to properly mix dressings so they become thick and creamy as they should be.
Cook bacon strips until crisp then chop. (See comment in the ingredients section about my preference to cook first then chop later these days).
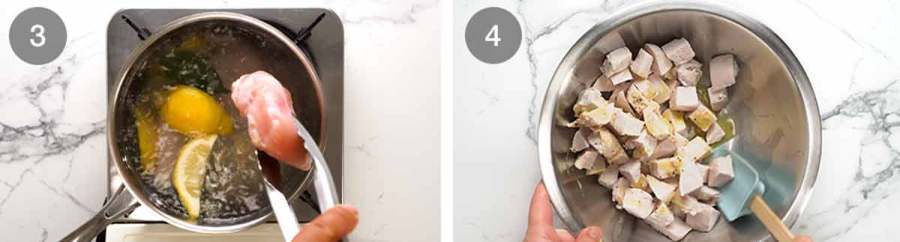
Poach chicken breast using my foolproof poached chicken recipe. (plonk in boiling water, turn stove off, leave 20 minutes. Works every-single-time, and the chicken is juicy!).
Chop & toss – Cool chicken, dice into 2cm / 0.8″ cubes. Toss with salt, pepper and a slosh of Dressing.
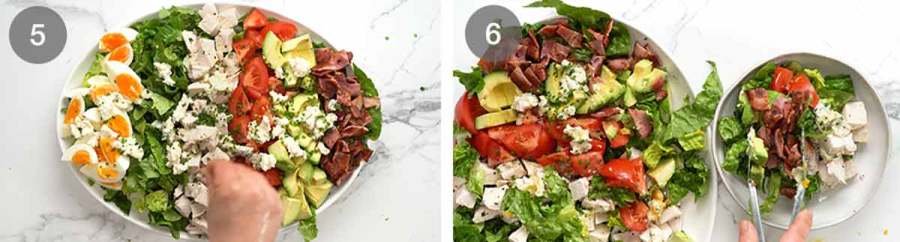
Assemble – Pile the lettuce onto a large platter or bowl. Arrange the following across the surface in neat rows: chicken, avocado, tomato, bacon, egg. Crumble blue cheese across the surface, then scatter with chives. Serve with dressing on the side.
To eat – Let everybody help themselves to the salad, and drizzle on Dressing. Then dive in!

A note on serving Cobb Salad
I serve Cobb Salad by laying out the un-dressed salad on a big platter, then pouring the dressing into a jug. Then I leave everyone to help themselves to the salad and pour over as much or as little Dressing as they wish.
I prefer doing it this way because otherwise you have to toss each vegetable separately in Dressing before laying them out in the signature rows. Which means you end up using quite a lot of dressing, plus the lettuce dressed first ends up a little wilted from the dressing if you spend a little too long fussing with the neat rows (YES I DO!🙈).
Not sure if this is the traditional way to serve Cobb Salad, but it works for me! – Nagi x
Watch how to make it
Cobb Salad
Love the presentation on a big platter with the ingredients in neat rows. Serve Dressing on the side for everyone to help themselves (better than tossing each item individually).Ingredients
Chicken:
- 400g/14 oz chicken breast (2 pieces)
- 1/4 tsp cooking/kosher salt
- 1/4 tsp black pepper
Cobb Salad:
- 200g/7oz streaky bacon strips
- 4 x 9 minute boiled eggs , quartered
- 12 cups cos / romaine lettuce (1 large head, 2 small), chopped (or other crispy lettuce)
- 2 large tomatoes , cut into 8 wedges then halved (or 250g/8oz cherry tomatoes halved)
- 2 avocados , cut into large pieces
- 200g/7oz gorgonzola dolce (my favourite) or roquefort (traditional), crumbled (or other blue cheese – Note 1)
- 2 tbsp chives , finely chopped
Dressing:
- 1 tbsp dijon mustard
- 5 tbsp extra virgin olive oil
- 5 tbsp apple cider vinegar (sub white wine or red wine vinegar)
- 3/4 tsp cooking/kosher salt
- 1/4 tsp black pepper
- 2 tbsp eschallot (US: shallot), very finely minced
- 1/2 tsp white sugar
Instructions
- Dressing: Shake ingredients in a jar.
- Flavour chicken: Poach chicken using this method (20 minute foolproof-guaranteed-juicy). Cool to room temperature then cut into 2cm / 0.75” cubes. Toss with salt, pepper and 2 tablespoons of Dressing. Set aside.
- Crisp bacon: Place bacon strips in a non-stick pan (not heated, no oil). Turn heat onto medium high – as the pan heats up, the fat will begin to melt. Cook for 2 minutes until golden, turn and cook the other side for 1 1/2 minutes until golden. Drain on paper towels. Once cool and crisp, chop into 1.5cm / 0.6" pieces.
- Assemble: Spread lettuce on a large platter. Arrange the ingredients on top in the Cobb Salad signature neat rows: egg, bacon, avocado, tomato and chicken. Crumble blue cheese across the top, sprinkle with chives. Pour dressing into a jug.
- Serving: Let everybody help themselves to the salad and Dressing!
Notes
I love using creamy gorgonzola because it smears on everything so it sort of becomes part of the dressing. Hence why the dressing is a little tangier than traditional vinaigrettes – you need it, to cut through the richness of blue cheese.
Blue cheese newbies – Suggest using a milder blue cheese like Blue Castello. Adamantly against blue cheese? Feta or goats cheese would be my picks, and suggest adding an extra tablespoon of oil into the dressing to make it a little less tangy.
Nutrition per serving. Shave off 60 calories by using turkey or lean bacon. And the blue cheese accounts for 130 calories. Totally makes it!!Nutrition
Life of Dozer
With all the good stuff in this salad, he can’t believe what he was offered.

The post The mighty Cobb Salad appeared first on RecipeTin Eats.
]]> I love this chickpea salad because it involves little more than opening jars, it keeps well for days and the chickpeas keep me full for longer. It’s like an antipasto platter, in the form of a protein-laden, good-for-you meal! Antipasto Chickpea Salad Professional food writers would probably describe chickpeas as a blank canvas for flavour.... Get the Recipe
The post Antipasto Chickpea Salad appeared first on RecipeTin Eats.
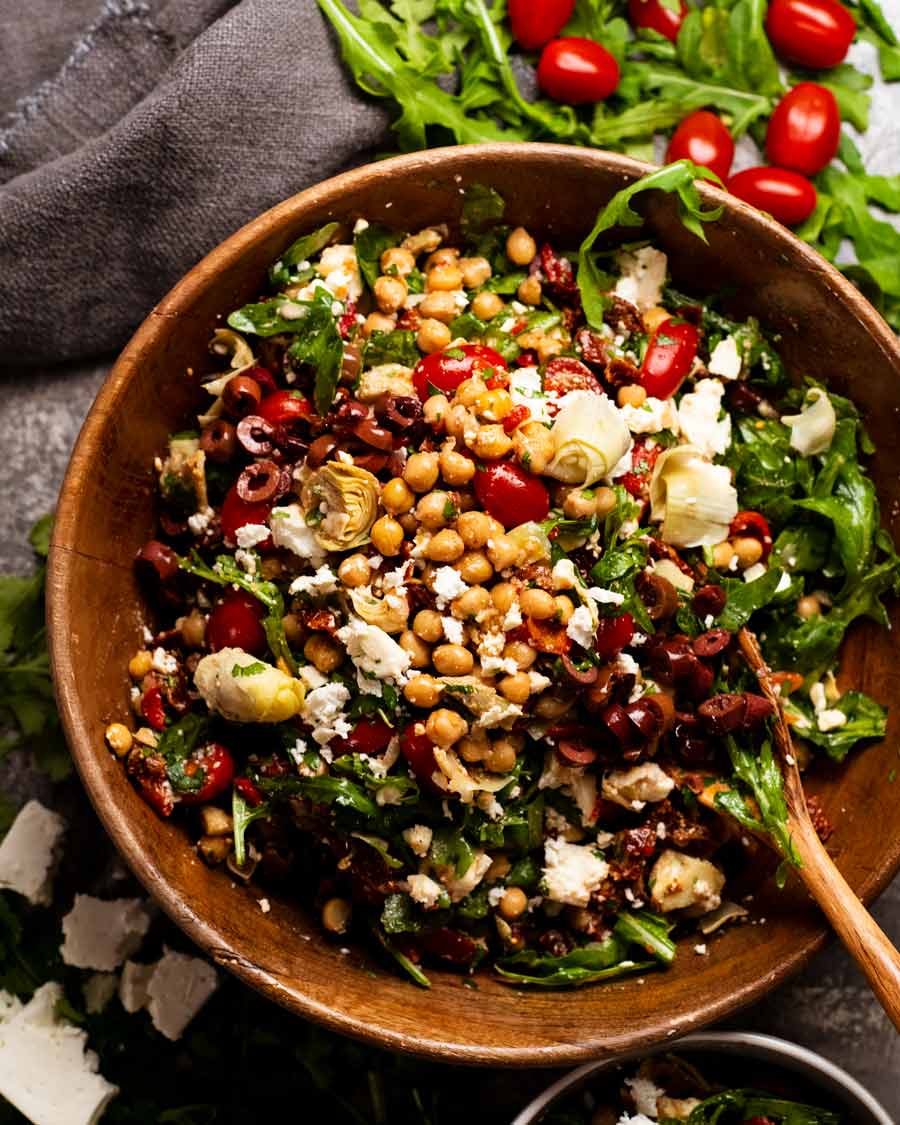
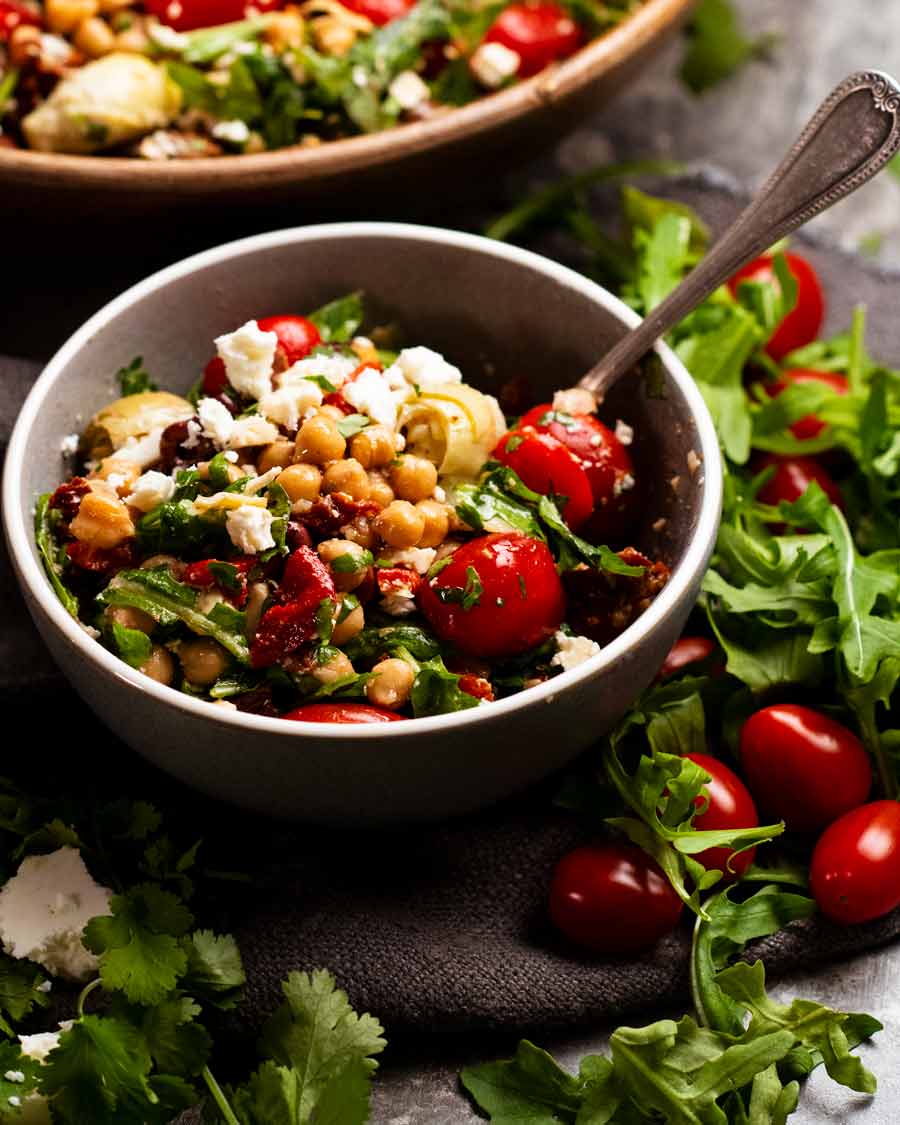
]]>I love this chickpea salad because it involves little more than opening jars, it keeps well for days and the chickpeas keep me full for longer. It’s like an antipasto platter, in the form of a protein-laden, good-for-you meal!
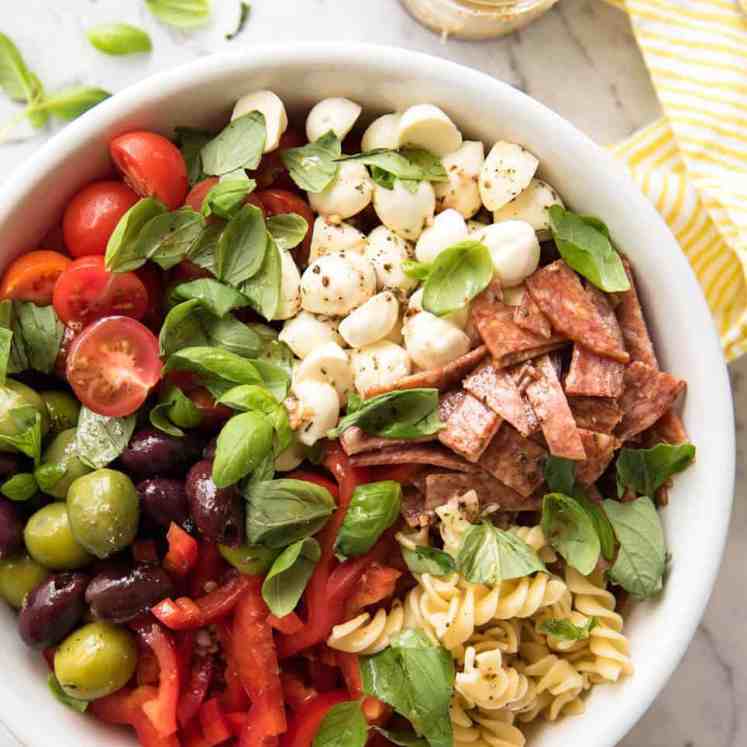
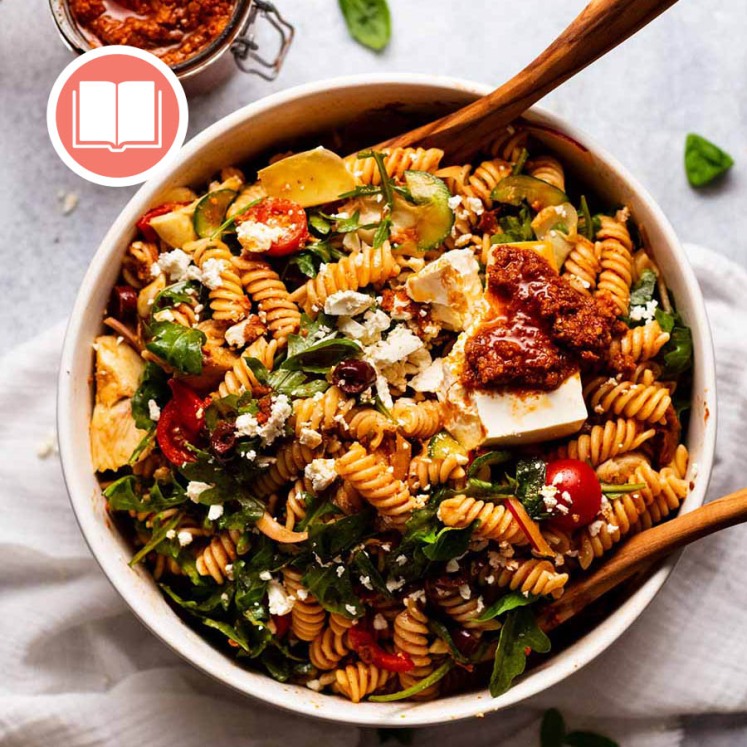
Antipasto Chickpea Salad
Professional food writers would probably describe chickpeas as a blank canvas for flavour. I’m not that eloquent. I’ll just say bluntly – I find chickpeas rather bland.
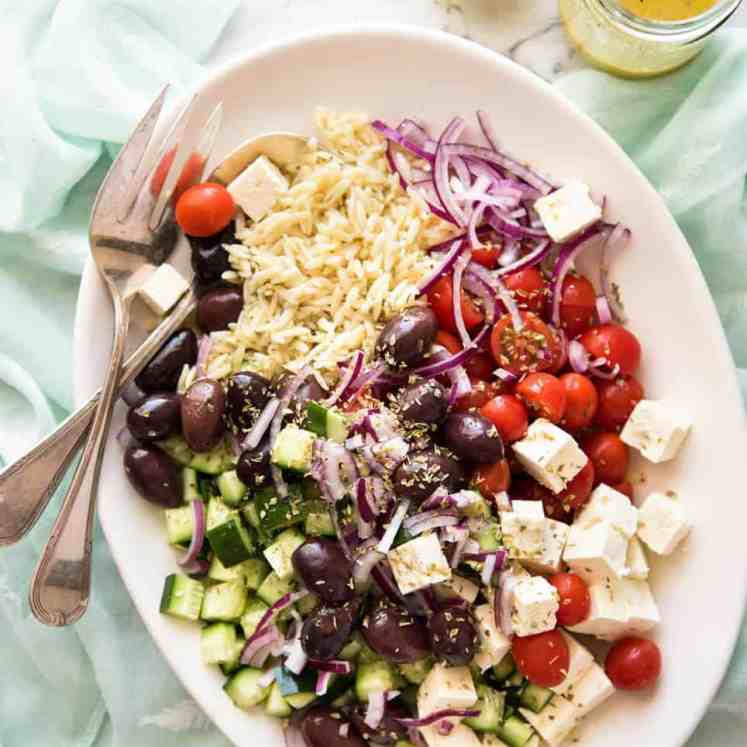
So when you see chickpeas in a recipe of mine, they are always with big, bold flavours. Think – Indian curries, chorizo stew, Moroccan tray bake, Brazilian stew, Greek Marinated Chickpea Salad.
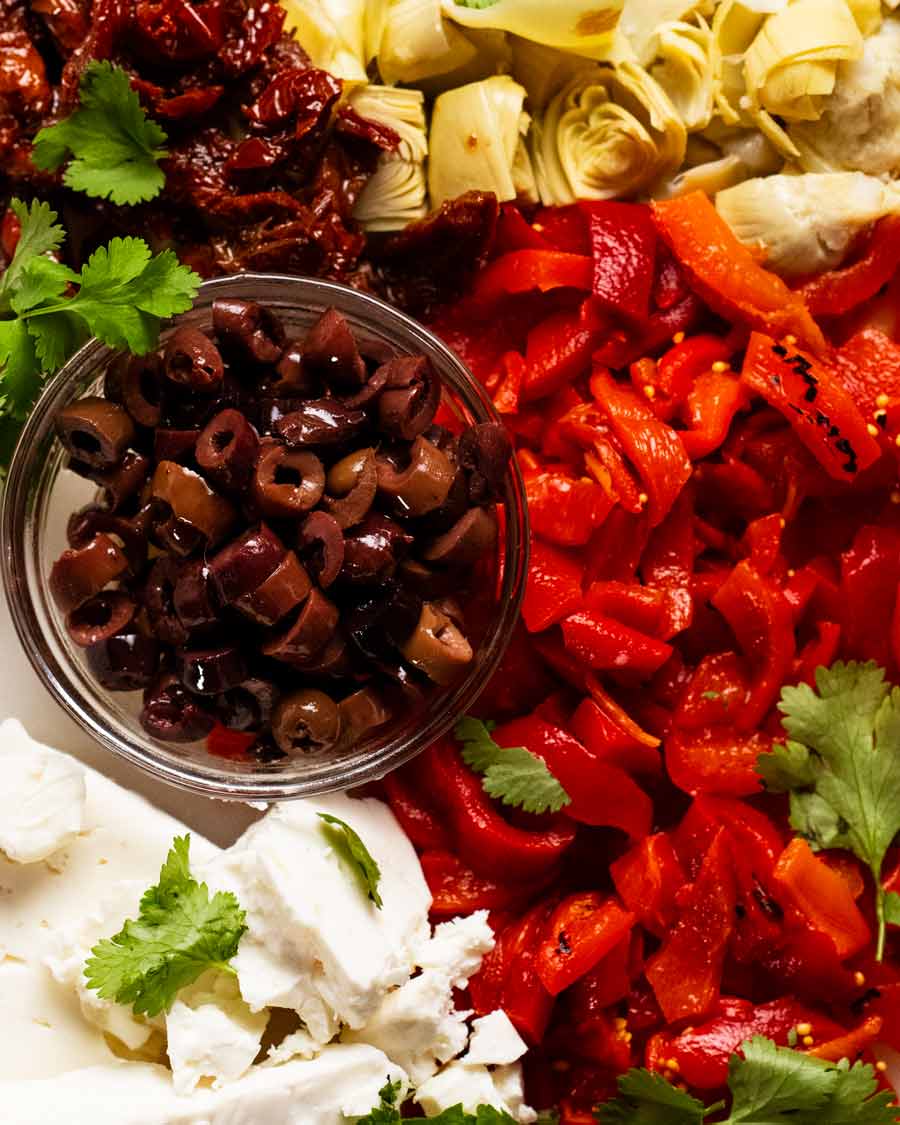
Today’s recipe is no exception. Take canned chickpeas and toss with lots of punchy flavoured antipasto things – sun-dried tomato, roasted red peppers, artichokes and feta – tossed in a dressing made using the oil from the jar of sun-dried tomato.
Boring chickpeas? Not in my world!!
Ingredients in Antipasto Chickpea Salad
OK! Let’s get cracking opening jars. 😂 Here’s what you need.
Add-ins
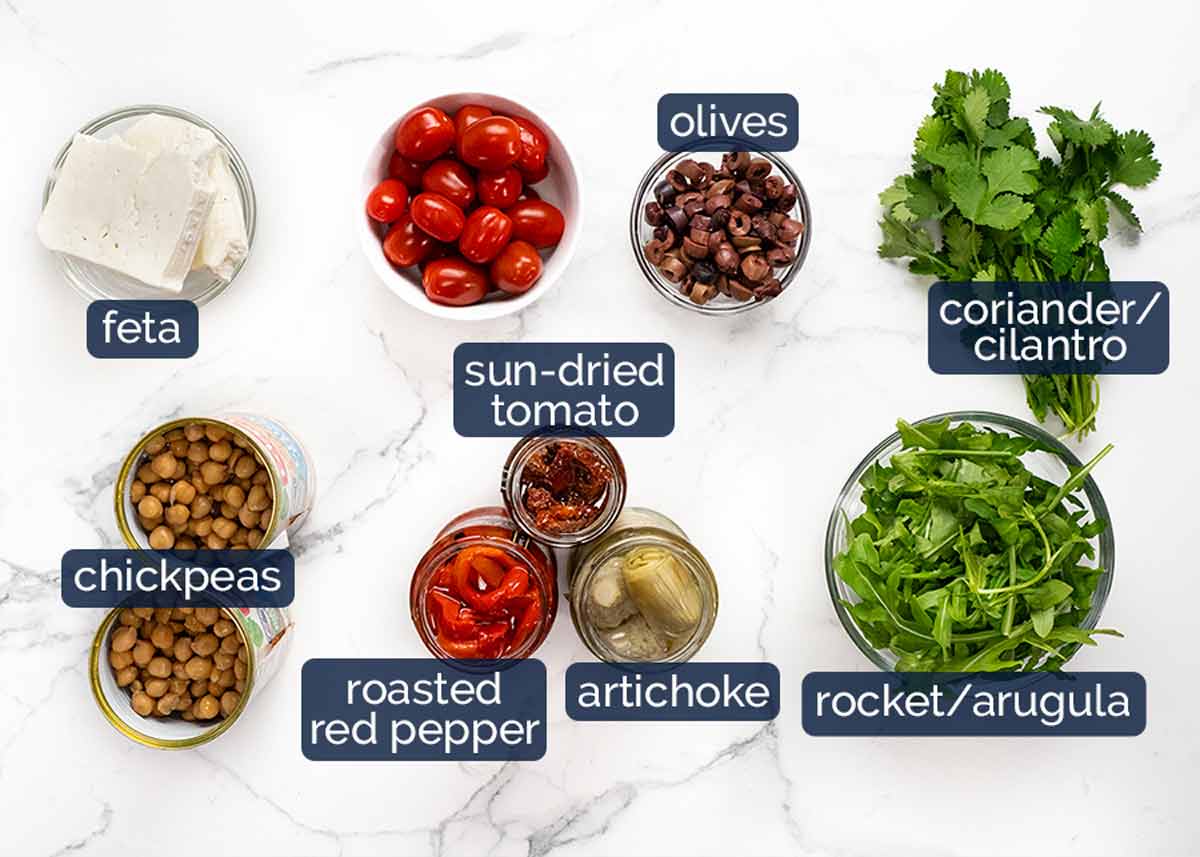
Canned chickpeas – I use canned for convenience but if you’d prefer using dried, you will need 1 1/2 cups dried chickpeas. 8 to 24 hours soak, 30 to 45 minute simmer.
Sun-dried tomato – Get the type in oil as we are using the oil from the jar to make the dressing!
Other antipasto things – Artichokes, roasted red peppers, olives. Feel free to switch out as you wish!
Baby rocket/arugula – Nice perky, slightly pepper leafy greens that works well with the bold flavours of the antipasto. Plus, it holds up better in salads than crisper leafy greens, like iceberg, when kept overnight.
Cherry tomatoes – Bursts of fresh juicy sweetness.
Danish feta, or Green feta – I like using Danish feta in this because it’s creamier and kind of goes smeary when tossed. But Greek feta works just as well from a flavour perspective.
Coriander/cilantro – Fresh herby goodness that works so well with the flavours in this salad!
Dressing

Sun-dried tomato oil – The oil reserved from the jar of sun-dried tomatoes. Free flavour!
Sherry vinegar – A slightly smoother vinegar with a little more layers of flavour. Substitute with champagne vinegar, white wine vinegar, red wine vinegar, or apple cider vinegar.
Garlic – Minced using a garlic press or finely grated using a microplane, so it melds into the dressing.
Coriander – For a hint of subtle, warm spicing.
Salt and pepper – Only 1/4 teaspoon of each, because the antipasto items are already salty.
How to make this chickpea salad
A lot of jar opening! 😂
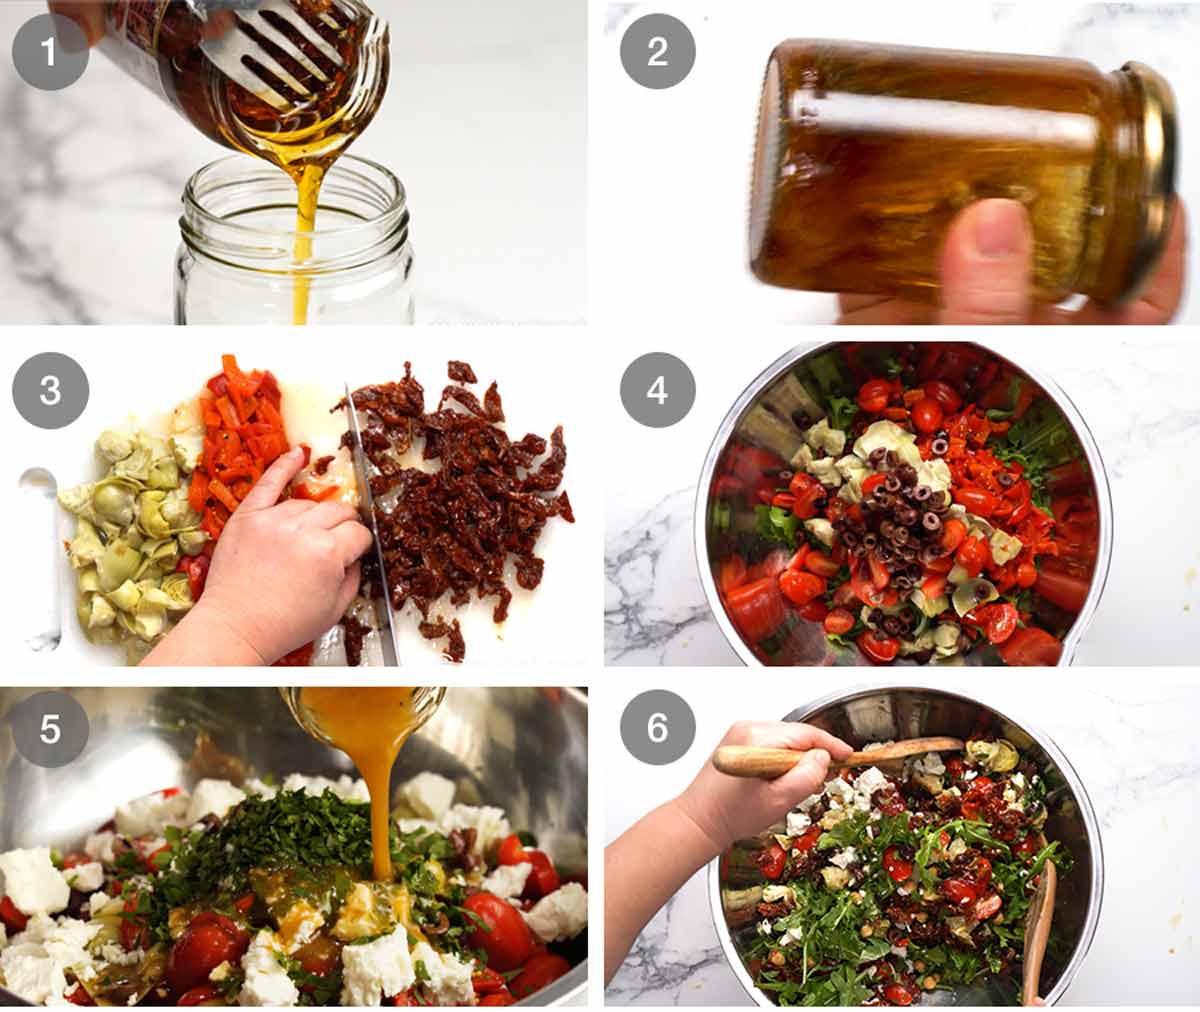
Strain 5 tablespoons of oil from the sun-dried tomatoes into a jar to make the dressing. Top up with extra virgin olive oil, if you’re short.
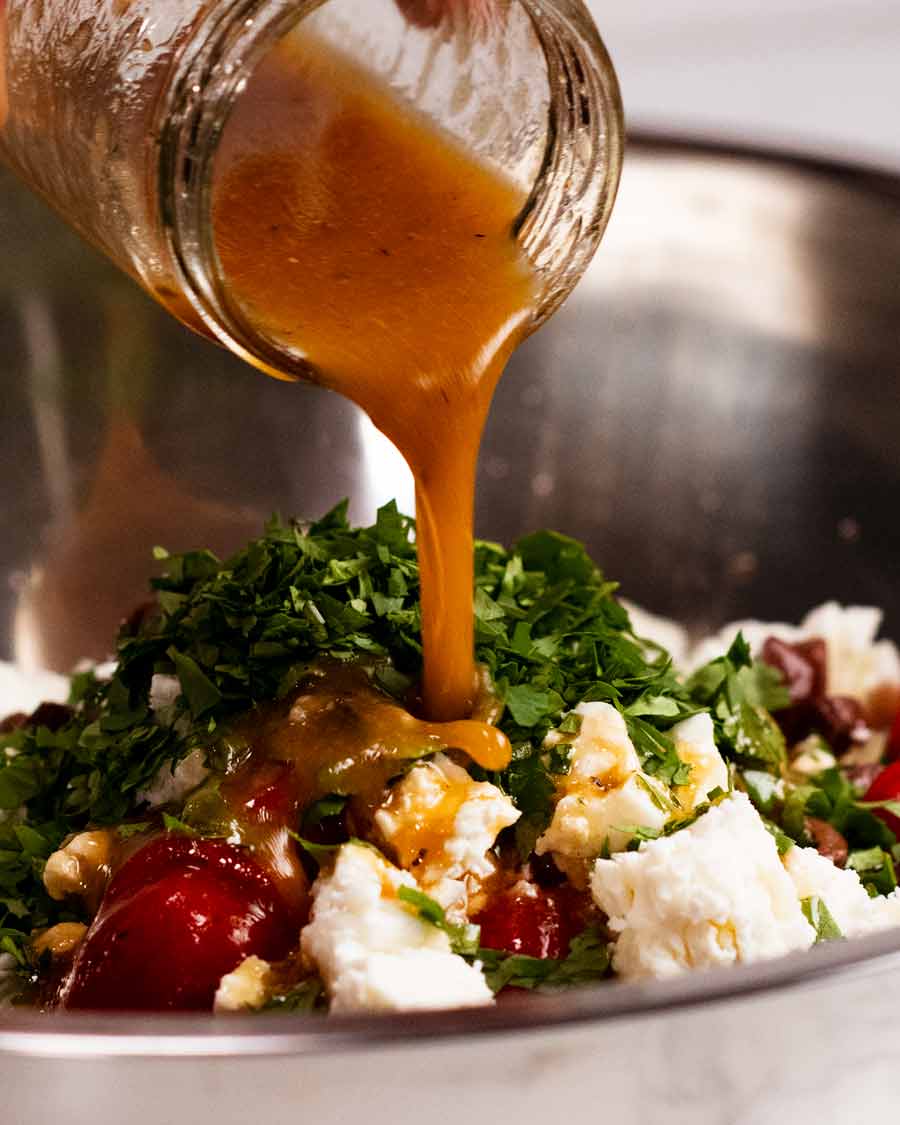
Dressing – Add the rest of the ingredients into the jar and shake well until combined. I like using jars to make dressing – fast and effective way to mix the dressing up thoroughly, and useful to store leftover.
Drain & roughly chop the artichokes, roasted red peppers and sun dried tomato.
Combine all the salad ingredients in a large bowl, but reserve a little feta and coriander/cilantro for garnish.
Pour over dressing.
Toss gently. Some of the feta will go a bit smeary and creamy – I love this! If you are after a more pristine look, then just hold the feta back until the end and do it throughout the salad.
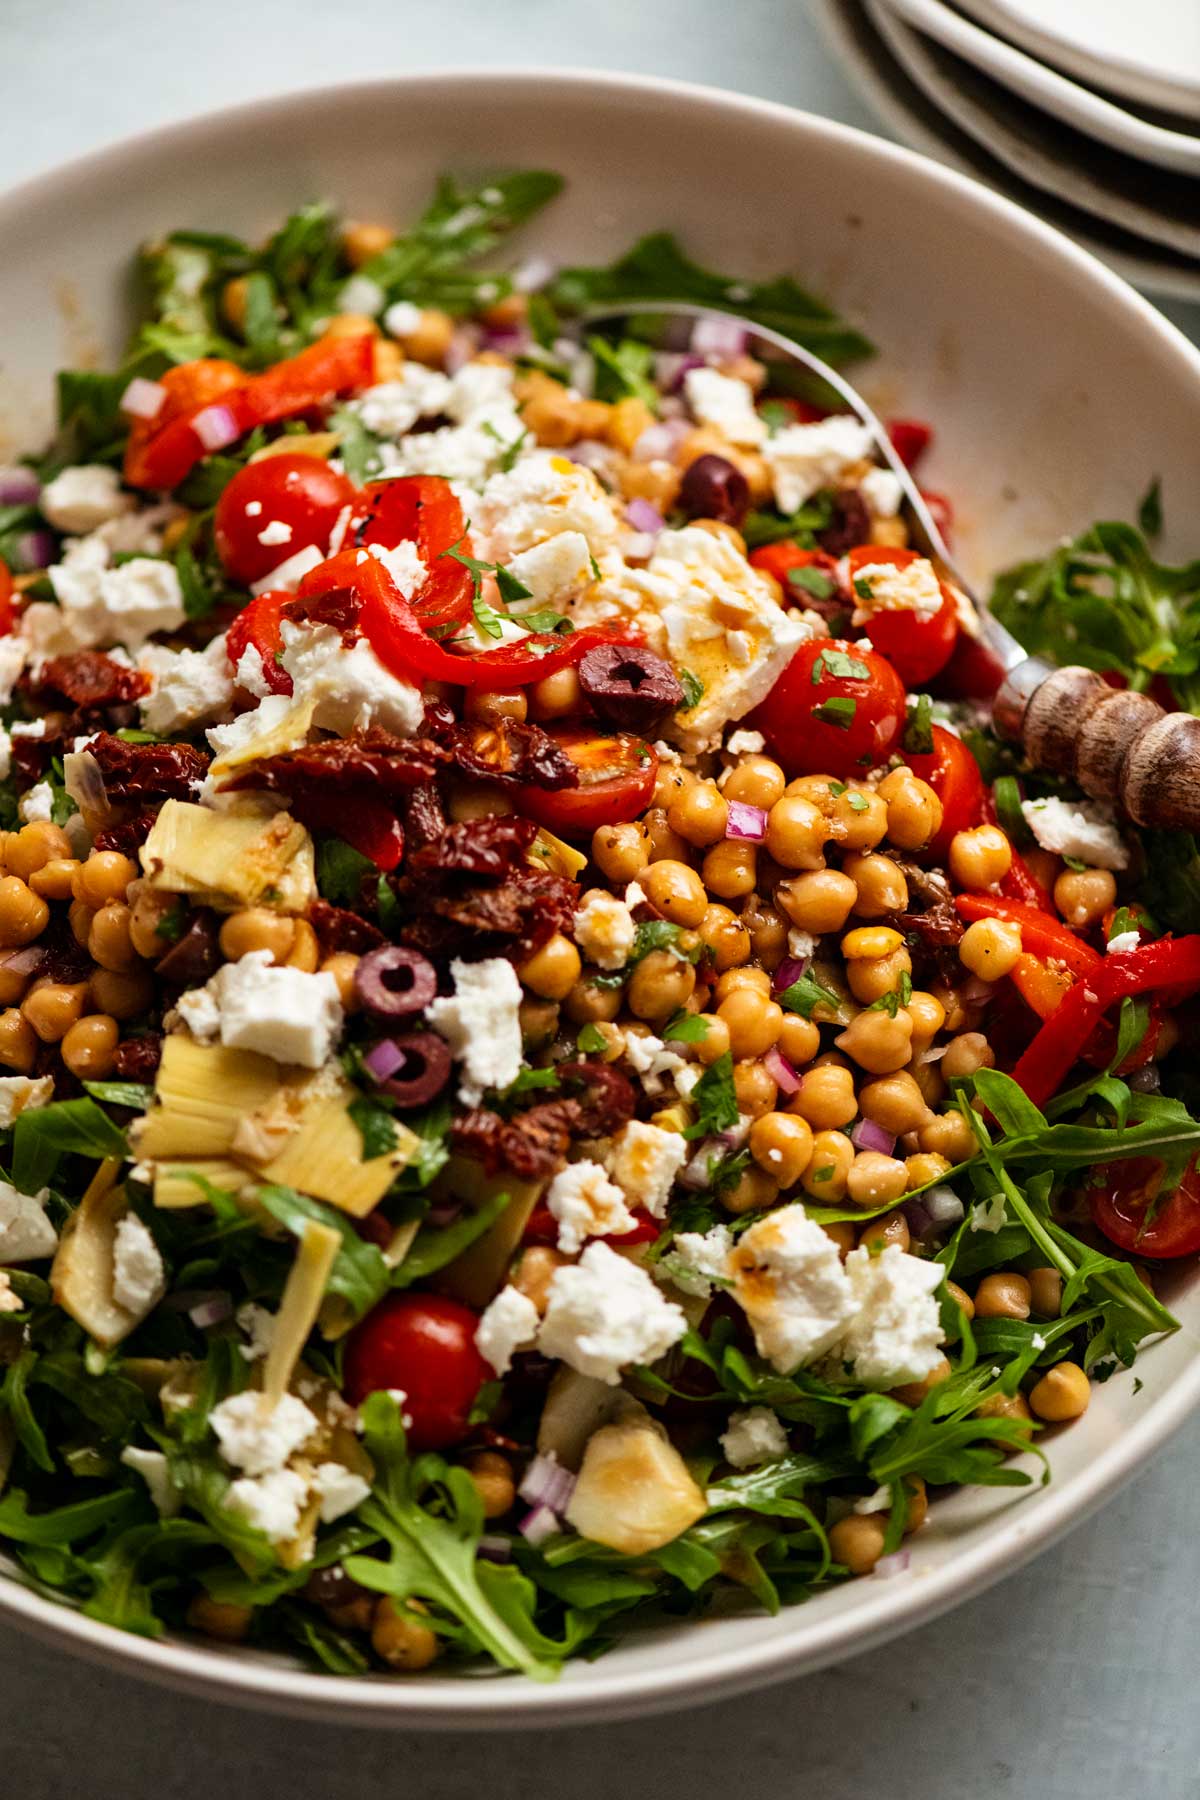
Now THAT is a bowl of chickpea deliciousness.
Make this for dinner tonight, work-lunch tomorrow then have any leftovers on the side of whatever you’re having for dinner the night after.
I can’t wait for you to get hooked on this as I am! – Nagi x
Watch how to make it
Antipasto chickpea salad
Ingredients
Dressing:
- 5 tbsp oil reserved from sun-dried tomatoes jar (in salad, below), or extra virgin olive oil
- 2 1/2 tbsp sherry vinegar (Note 1)
- 1 medium garlic clove , minced using garlic press (or finely grated)
- 1/4 tsp ground coriander
- 1/4 tsp cooking salt/kosher salt
- 1/4 tsp black pepper
Salad (Note 2):
- 2 x 400g/14 oz cans chickpeas , drained (Note 3 for dried)
- 3 packed cups baby rocket/arugula leaves , roughly torn by hand into 2.5cm / 1″ pieces (Note 4)
- 350g/12 oz jar roasted red pepper strips , drained, roughly chopped into 2.5cm/1″ pieces
- 200g/7 oz jar marinated artichoke hearts , drained, roughly chopped into 1.25 cm / 1/2″ pieces
- 1/2 cup sliced black kalamata olives
- 3/4 cup sun-dried tomato strips in oil , chopped into 1.25 cm / 1/2" pieces (reserve oil from jar for Dressing) (3 oz)
- 250g/8oz cherry tomatoes , halved
- 1/3 cup coriander/cilantro leaves , roughly chopped
- 200g/7 oz Danish feta (or Greek) , crumbled
Instructions
- Dressing – Shake ingredients in a jar to combine.
- Toss – Set aside a bit of coriander/cilantro and feta for garnish. Place all remaining salad ingredients into a big mixing bowl. Pour dressing over salad, and toss gently together to combine well. The feta will get a bit smeary – love it!
- Serve – Transfer to serving dish. Garnish with reserved feta and coriander/cilantro. Dig in!
Notes
Nutrition
Life of Dozer
Food even trumps playing. Like owner, like dog!

The post Antipasto Chickpea Salad appeared first on RecipeTin Eats.
]]> I know it should be as simple as dumping pesto on pasta…. but actually, it turns out I have some things to say about pesto pasta salad. That is, if you want a good one! Pesto pasta salad My pesto pasta salad rules are simple – don’t skimp on pesto, don’t be shy with olive oil,... Get the Recipe
The post Pesto pasta salad appeared first on RecipeTin Eats.
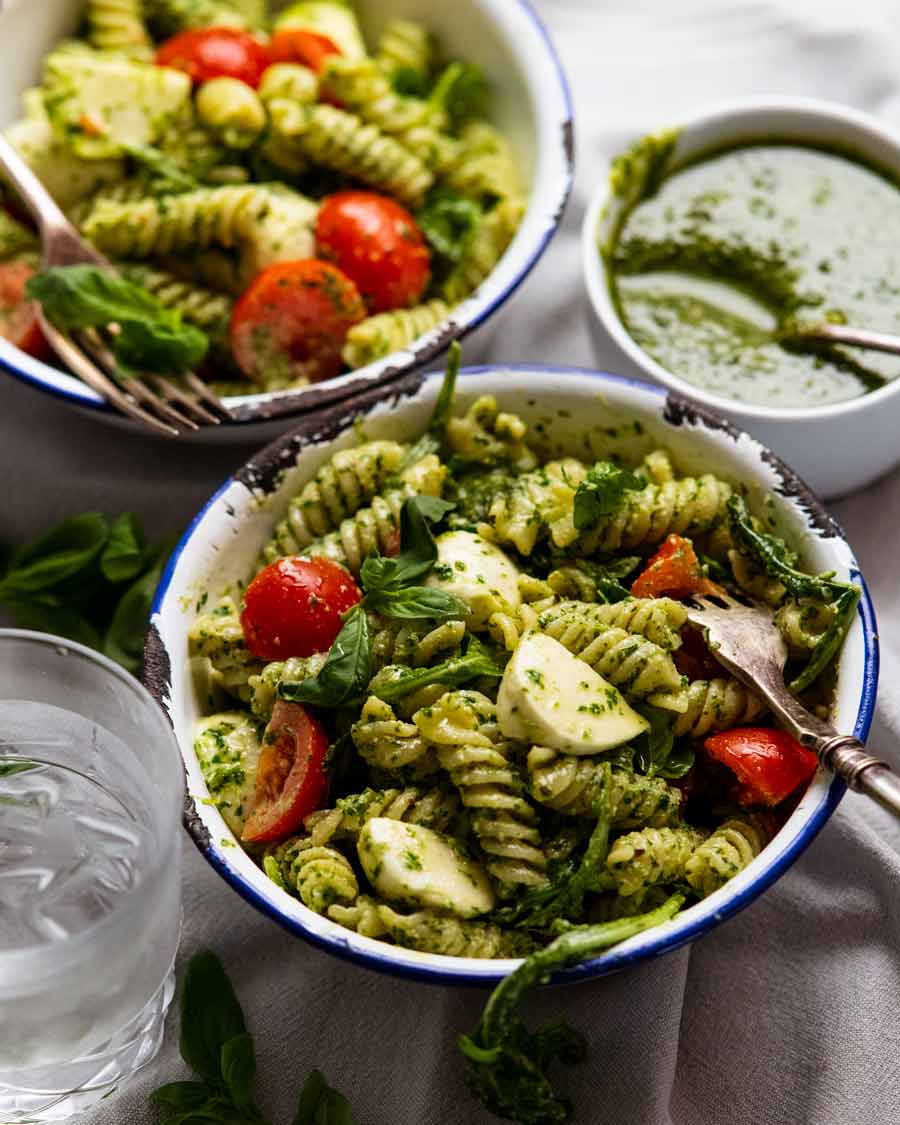
]]>I know it should be as simple as dumping pesto on pasta…. but actually, it turns out I have some things to say about pesto pasta salad. That is, if you want a good one!
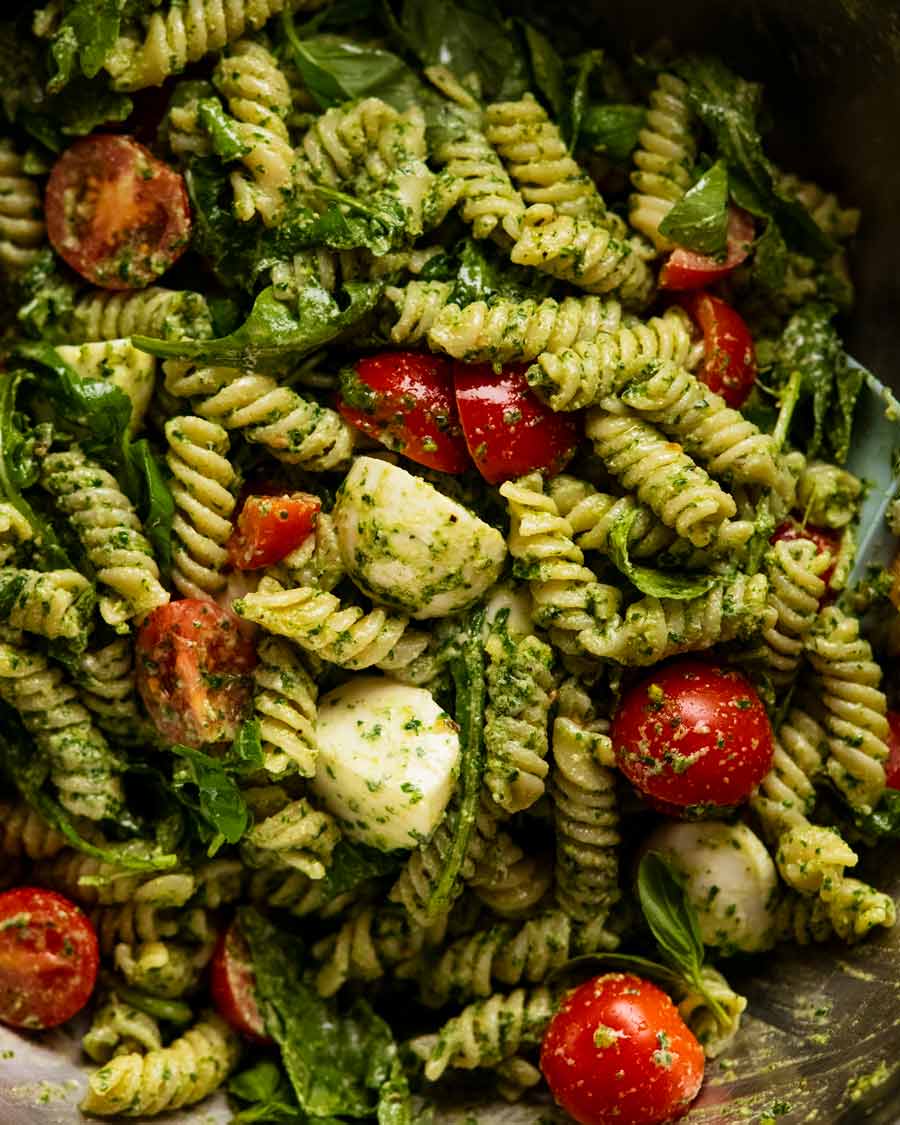
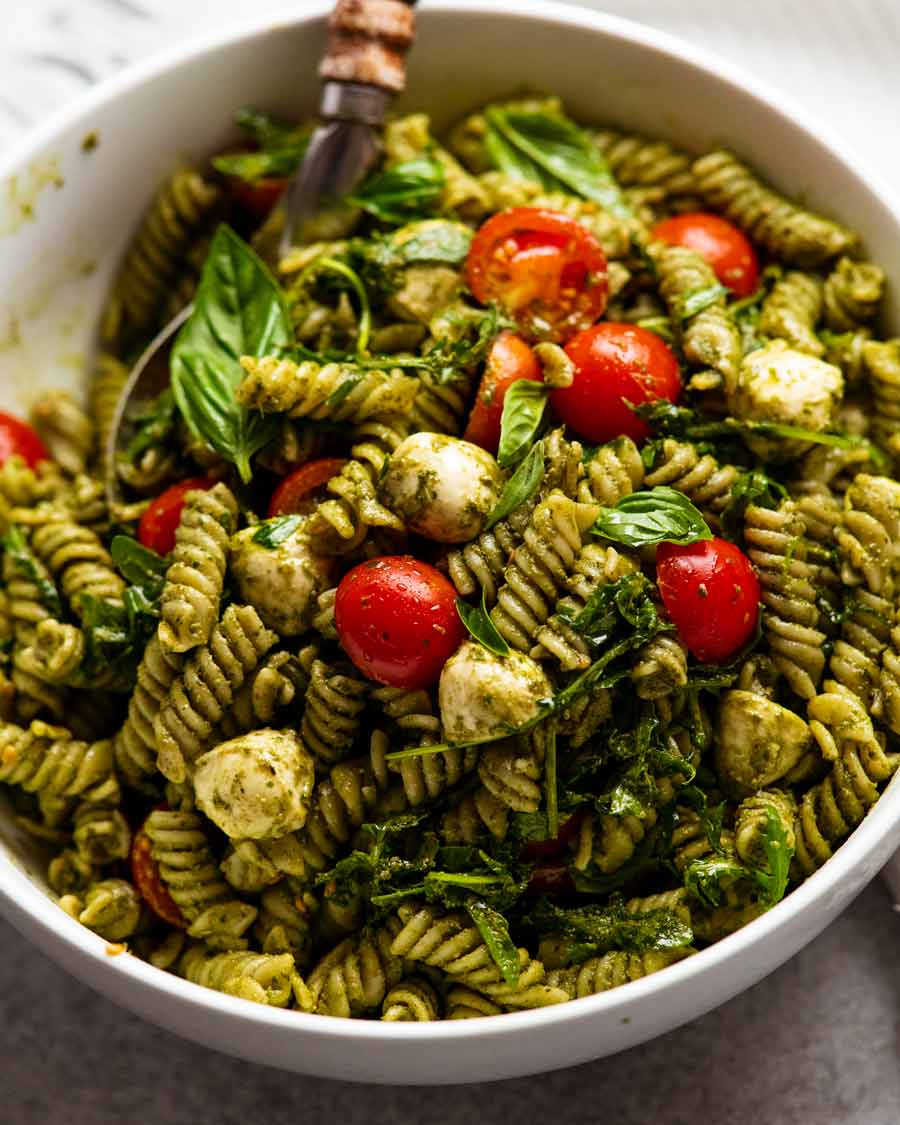
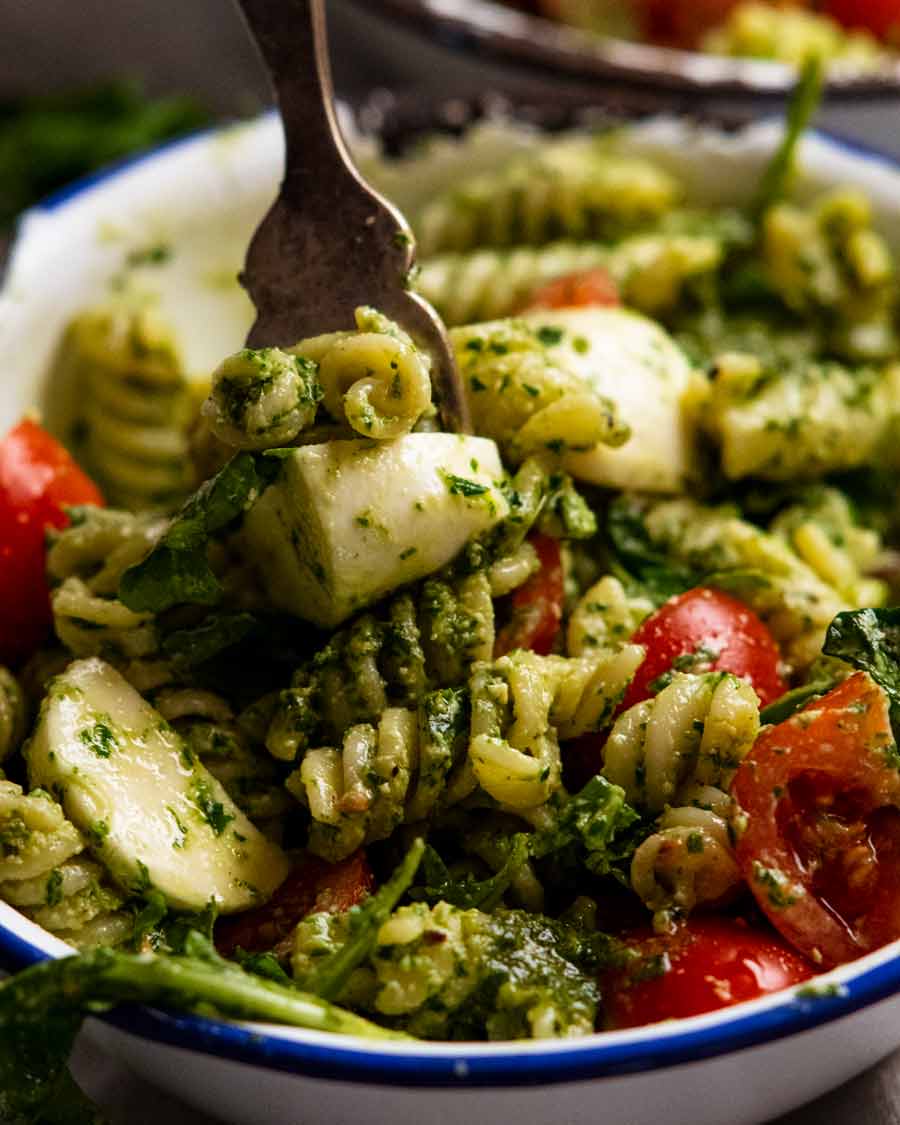
Pesto pasta salad
My pesto pasta salad rules are simple – don’t skimp on pesto, don’t be shy with olive oil, cook the pasta beyond al dente and add the smallest dab of mayonnaise to give it a touch of luxe as well as improving leftovers.
Why? Because these address two pet-peeves I have about pesto pasta salads.
Firstly, the pesto pasta salad that doesn’t actually taste much like pesto. Pasta with the faintest green colour, and if you close your eyes as you eat, it’d be impressive if you picked it as pesto.
Secondly, the dry pesto pasta salad. Actually, that’s a general pasta salad peeve. Just because it’s a cold pasta, that’s no excuse for dryness! I resort to all sorts of tricks to keep things juicy. Lots of dressing (using avocado is a neat, tasty trick, as is using a splash of pasta cooking water instead of gallons of oil). And juicy add-ins, like roast vegetables, tomato etc. (this marinated vegetable pasta salad is a solid summer staple).
Today’s trick? Just 2 tablespoons of mayonnaise. This works wonders to keep things extra juicy today – and even tomorrow when you pull it out from the fridge!
What you need for pesto pasta salad
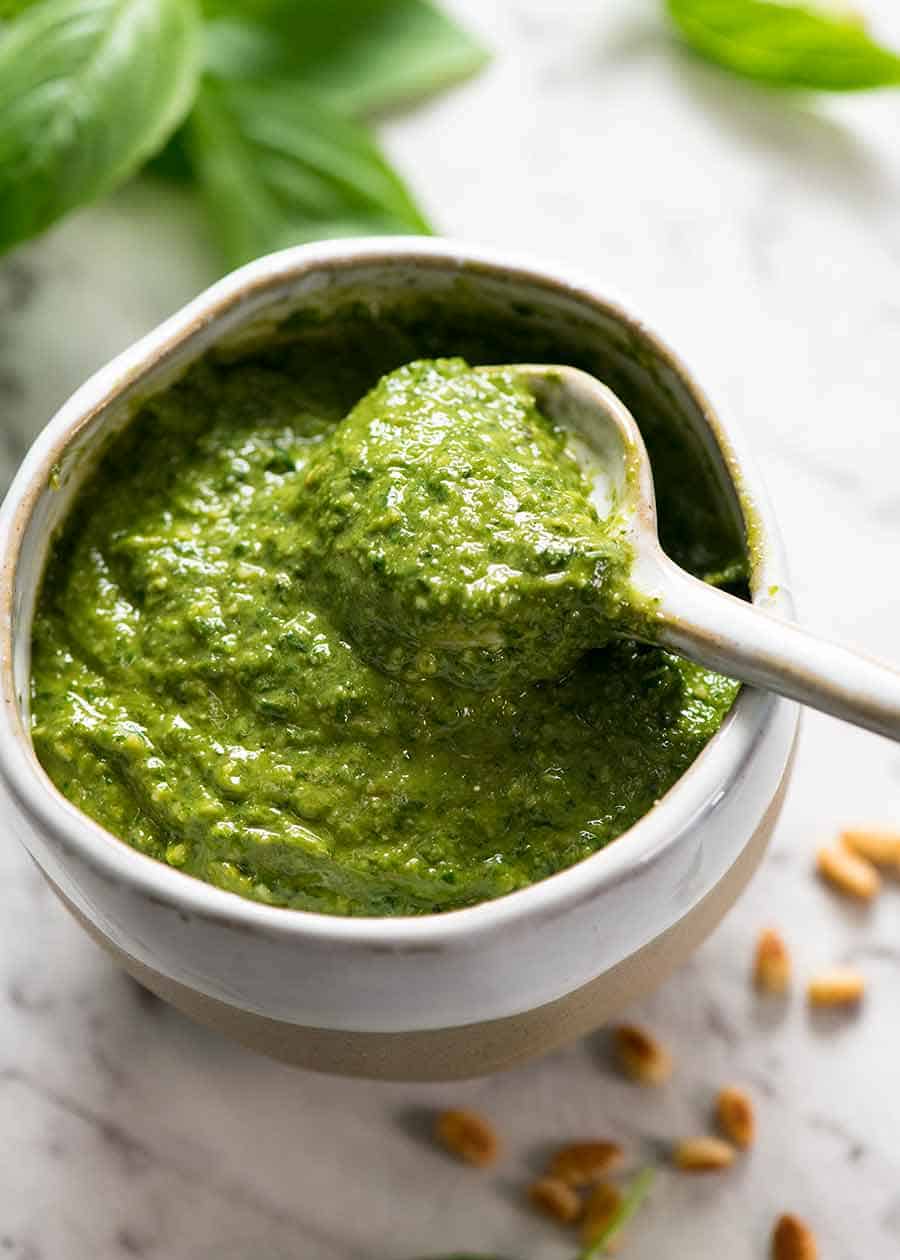
The one thing that will make your pesto pasta salad stand out is freshly made basil pesto. But if it’s an emergency, use the fresh pesto you get from the fridge section – tastes a whole lot fresher than off the shelves in aisles!
1. Homemade pesto
Here’s what you need for the basil pesto.
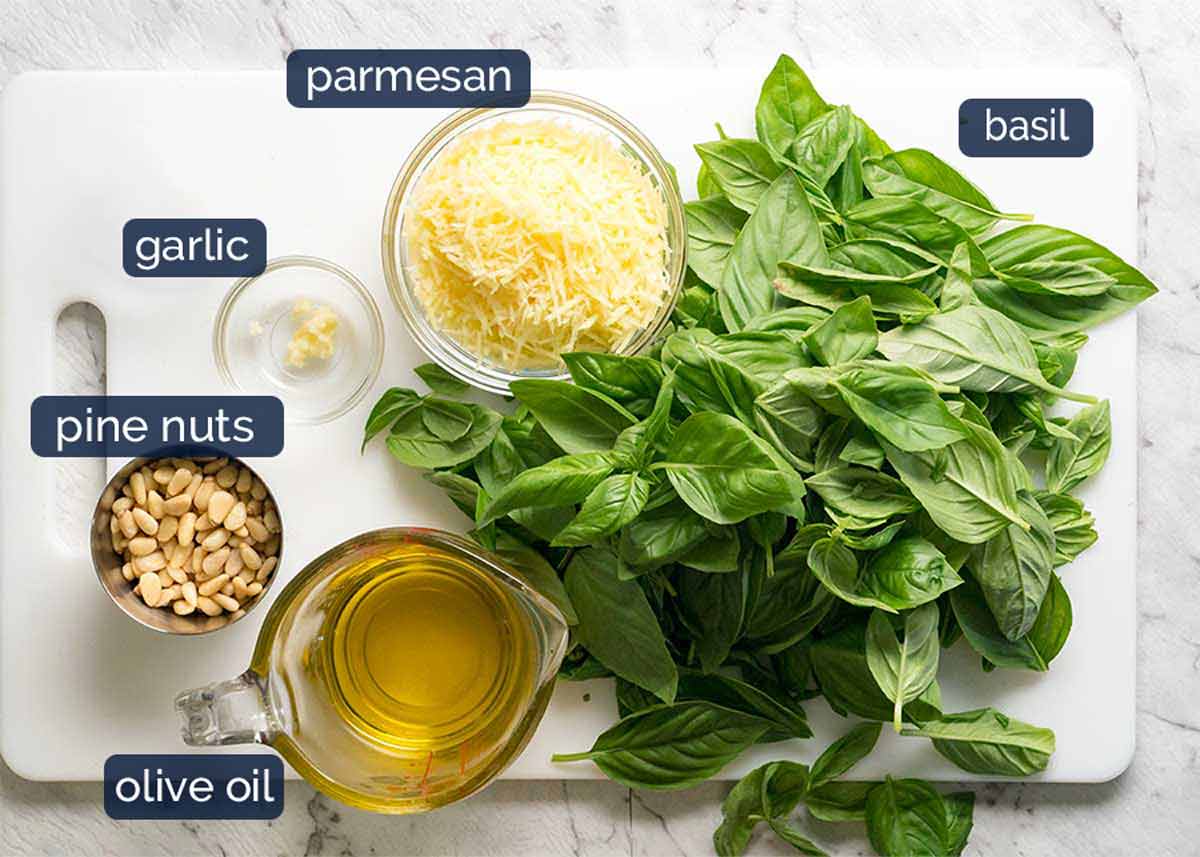
Fresh basil leaves – Abundant and excellent value during summer!
Parmesan – or, if you want to really go luxe, parmigiana reggiano.
Pine nuts – sometimes, to change things up, I use walnuts, cashews or almonds.
Olive oil – Or a 50/50 combination of olive oil and grapeseed oil (which has a more neutral flavour so let’s the basil flavour come through a little more).
Garlic – Just a touch. Because it’s raw, if you use too much it can be a little harsh, I find.
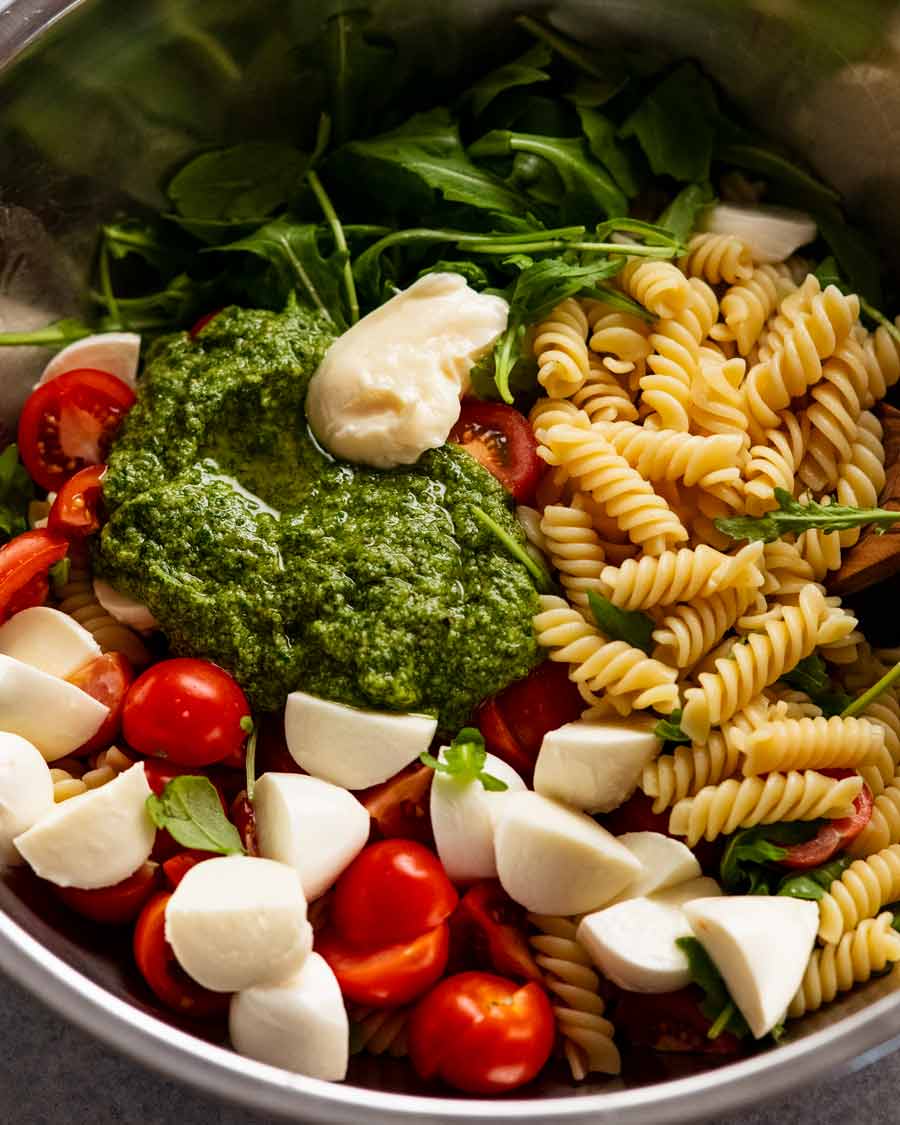
2. Pesto pasta salad ingredients
And here’s what goes into my pesto pasta salad.
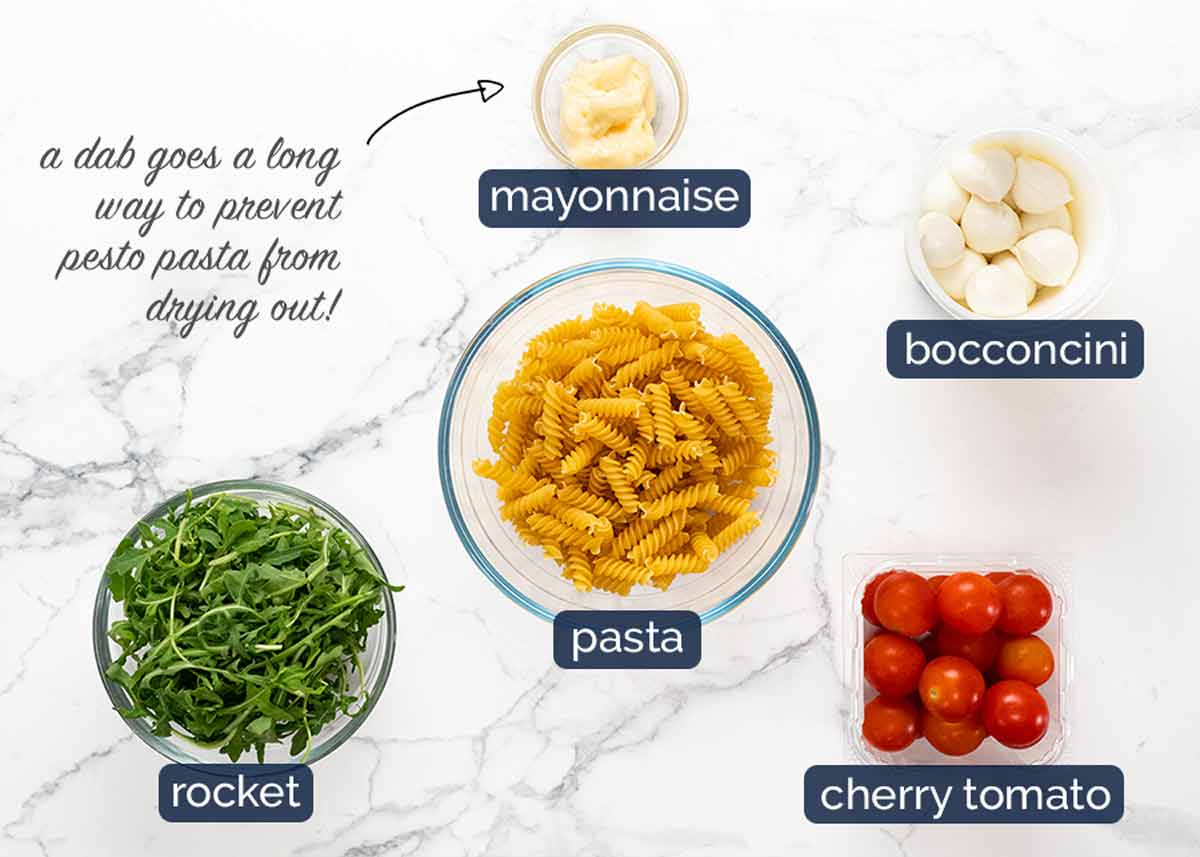
Pasta – Any short shape your heart desires! Shells, macaroni, wheels – go wild! I went spirals. I like to live life on the edge. 😂
Just a dab of MAYONNAISE – Not intended to make this a greasy mayo-laden pesto pasta salad! But a little dab goes a long way to give pesto pasta salad an edge of creaminess so it stays nice and “juicy” even the next day. It really makes a difference.
Prefer to skip it? Just add a little extra olive oil.
Bocconcini, cherry tomatoes – My add-ins of choice, so it’s not just all pasta. Love the combo of juicy tomato and the soft bites of bocconcini. If you want to skip these, just add a little more pasta. Or, use other add-ins of choice!
Rocket/arugula – I like to add some type of leafy greens into me pesto pasta salads for a hint of freshness and provide textural contrast. Rocket / arugula is great, love the hint of peppery freshness.
How I make pesto pasta salad
Simple – but I do have a couple of tips!
Cook the pasta beyond al dente so it’s quite soft. Why? Because pasta firms up when it cools. To the point of hard when refrigerated. Pre-empt this by cooking pasta a little longer so it’s extra soft when hot = perfect texture when cool!
Tossing order – Toss pasta, pesto and mayonnaise only first. Then the bocconcini and tomato. Lastly, leafy greens – as pesto tends to cling to it, and we can’t have leafy greens hogging the pesto!
Homemade pesto
It’s was simple as blitzing everything together using a handheld stick, until the pesto is quite smooth. Less clean up than using a food processor and a better result. Why? Read on!
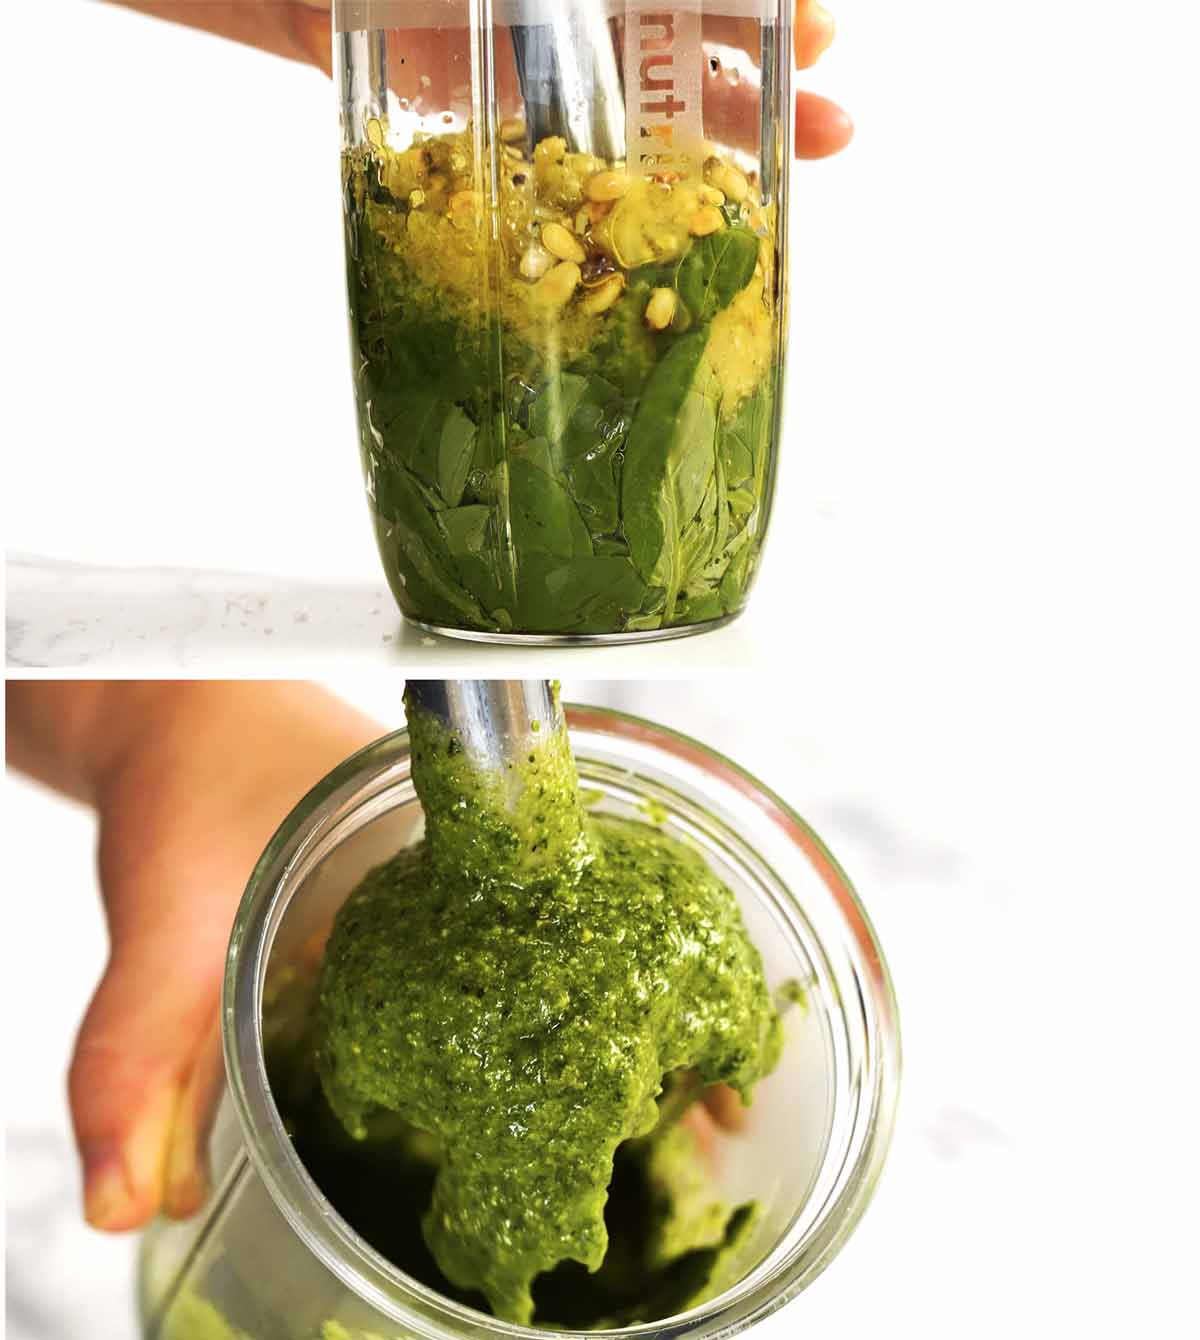
I prefer using a handheld stick because you can make the pesto smoother which I prefer for pasta salads. Better coverage on the pasta. I like chunky pesto for using as a dip, dolloping on crostini, that sort of thing, where a bit of texture is pleasant.
Bonus: handheld sticks are far easier to clean than a food processor! (Though you can use a food processor if you need to – directions in the recipe).
How to make the pesto pasta salad
Well, I’ve pretty much already given the steps, but I’ll write them out anyway!
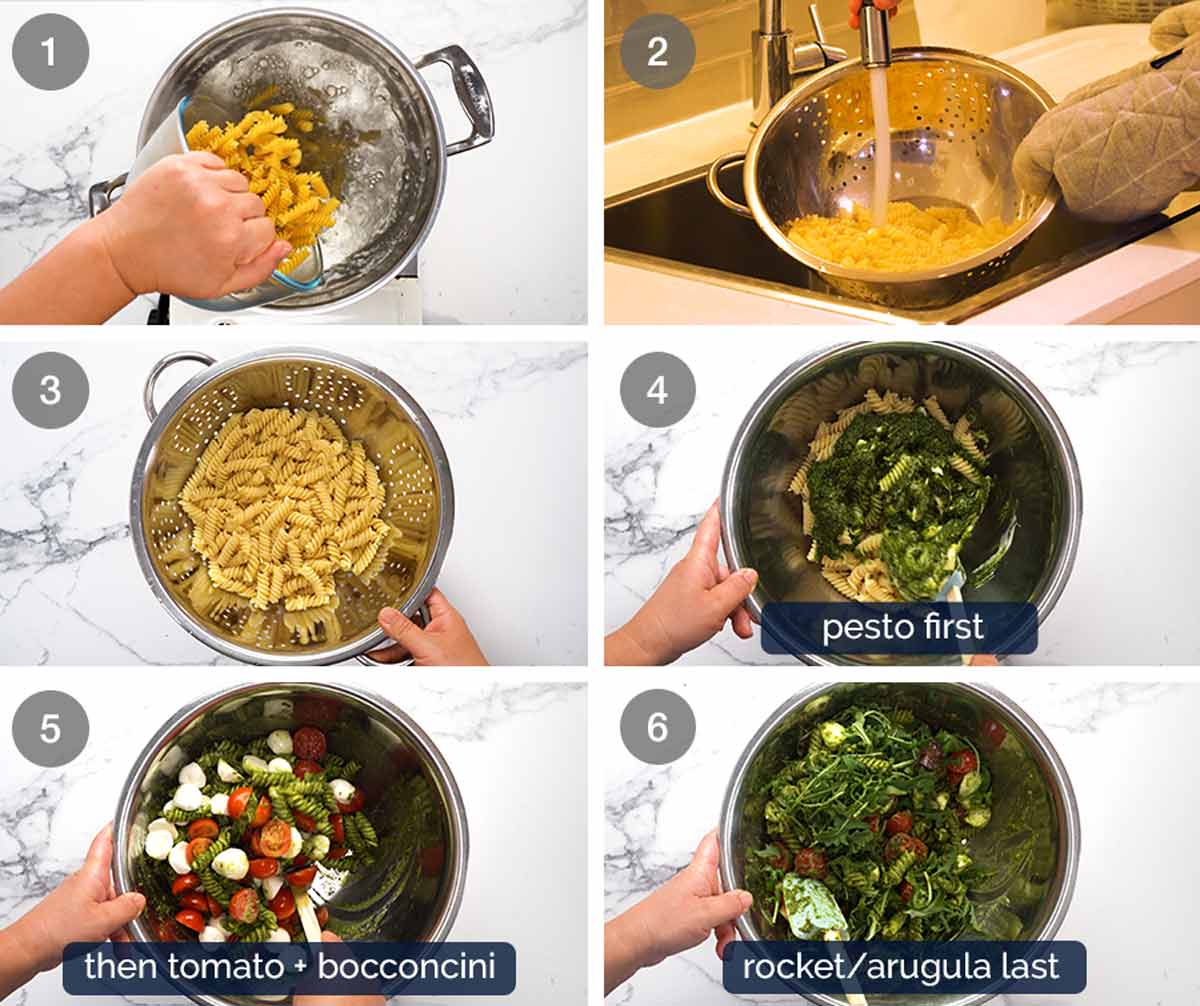
Cook pasta in salted water per packet time plus 1 minute so it’s extra soft, as explained above. Salted water is a must, else you will feel like your pasta salad is a little under seasoned.
BTW, I start my timer as soon as the pasta goes into the boiling water, not once it comes back up to the simmer. Just in case you’re wondering.
Rinse the pasta under cold running water to remove excess starch (which makes it sticky, not what we want for pasta salad) and cool.
Drain well and cool.
Pesto & mayonnaise first – Mix the pesto and mayonnaise through the pasta first.
Tomato & bocconcini next – Then gently mix through the tomato and bocconcini. We don’t want to bash up the tomato too much.
Leafy greens last – And lastly, toss through the rocket/arugula. Just quickly, to disperse. Don’t mix too much else the rocket tends to get weighed down with pesto. In other words – the leafy greens hog the pesto, and we can’t have that!
Storing leftover pesto pasta salad
Though pesto pasta salads are at their green-colour prime within a few hours of making, it will last for 2 days in the fridge and retain its green colour, albeit not quite as vibrant as when freshly made.
Also, the other big thing this pesto pasta salad has going for it is that it is still nice and juicy the next day, and the next. I find that cold pasta salads (other than mayo laden ones) are notorious for become dry in the fridge overnight because the pasta absorbs the dressing.
But in this one, the combination of using the right amount of pesto (generous!) and just 2 tablespoons of mayonnaise prevents this pasta salad from drying out.
Take it to picnics, as a side dish for gatherings, or take it to work for lunch. Such a great summer staple! – Nagi x
Watch how to make it

Pesto pasta salad
Ingredients
- 350g / 12oz spiral pasta (fusilli, or other of choice, 3 1/2 cups)
- 1 tbsp salt , for cooking pasta
Pesto (Note 1):
- 2 tbsp pinenuts , toasted (sub walnuts, cashews, almonds)
- 2 cups (tightly packed) basil leaves
- 1 small garlic clove , minced
- 1/2 cup parmesan , finely grated
- 1/2 tsp cooking/kosher salt
- 1/4 tsp black pepper
- 7 tbsp extra virgin olive oil (or 50/50 grapeseed/olive oil)
Pasta Salad:
- 2 tbsp mayonnaise (S&W, else Hellman’s, Note 2)
- 250g (1 heaped cup) cherry tomatoes, cut in half
- 220g/ 7 oz baby bocconcini , drained, cut in half (Note 3)
- 1 cup (tightly packed) baby rocket/arugula leaves (40g)
- 1/2 tsp cooking/kosher salt
- Small basil leaves , optional garnish
Instructions
- Cook pasta – Bring 3 litres of water to the boil with the salt. Cook for the pasta packet time + 1 minute. Drain in a colander, rinse under cold water. Shake off excess water well, then allow to fully cool and dry.
- Pesto – Place all ingredients in a tall jug just large enough to fit the head of a stick blender. Blitz under pretty smooth. Not a green smoothie, we still want some visible green bits! but not chunks.
- Toss – Place pasta in a bowl, scrape in the pesto. Add mayonnaise then toss well. Add bocconcini and tomato, toss gently just to disperse. Add rocket/arugula and toss just to disperse.
- Serve – Transfer into a serving bowl. Scatter with basil leaves, if using. Serve!
Notes
Nutrition
For the love of pasta salads


Life of Dozer
Current favourite toy. Changes frequently. He’s not very loyal.
PS In case you have a burning desire to know – it’s a hippo. I understand. There’s no way you could sleep tonight without knowing what that slobbery waterlogged grey mass of fur is. Now you can rest in peace.

Actually, on closer inspection, possibly not a hippo? Any thoughts from animal experts much appreciated.

The post Pesto pasta salad appeared first on RecipeTin Eats.
]]> Pearl couscous is the giant form of the more common tiny couscous. Also known as gourmet and Israeli couscous, it’s like little pearls of pasta – hence the name! Makes a fabulous salad and is a great one to take to gatherings for something different that never fails to impress. Pearl Couscous Salad The immature child... Get the Recipe
The post Pearl Couscous Salad appeared first on RecipeTin Eats.
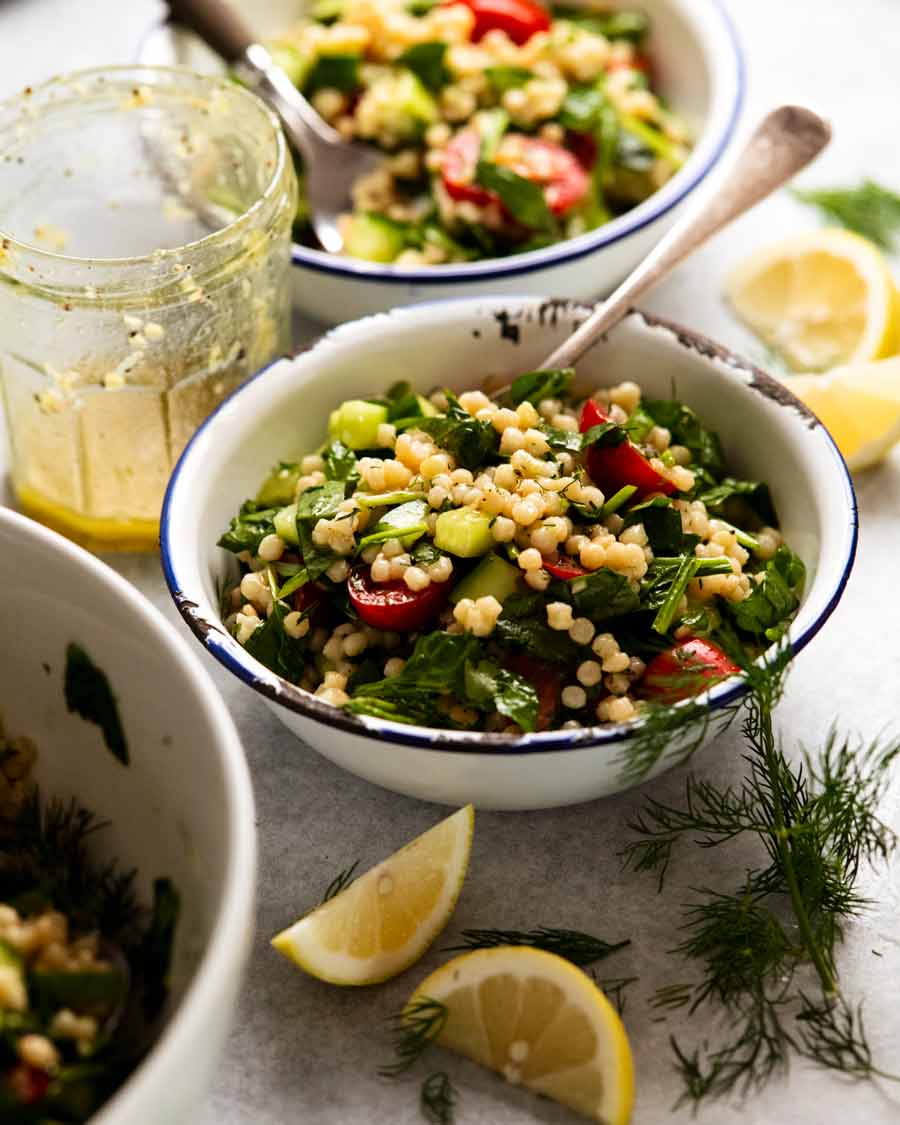
]]>Pearl couscous is the giant form of the more common tiny couscous. Also known as gourmet and Israeli couscous, it’s like little pearls of pasta – hence the name! Makes a fabulous salad and is a great one to take to gatherings for something different that never fails to impress.
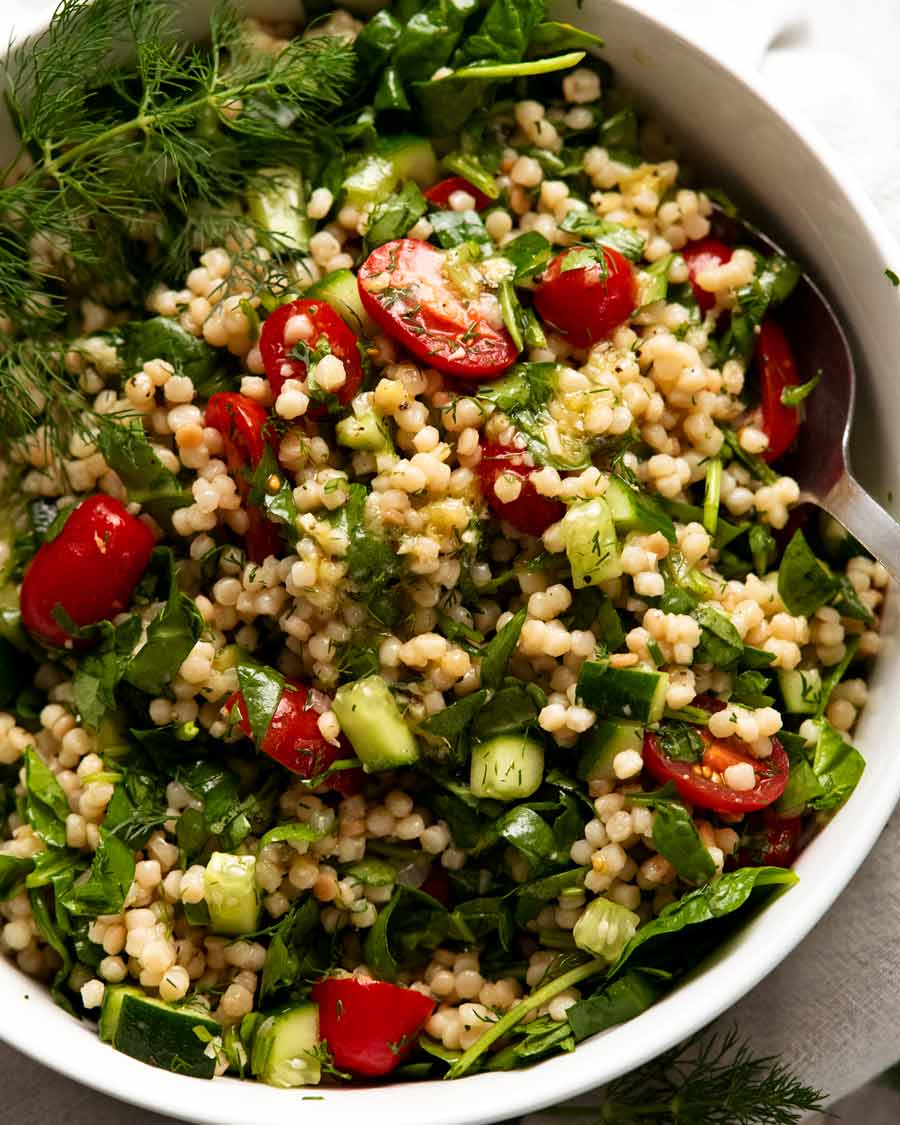
Pearl Couscous Salad
The immature child within wants to call this a Giant Couscous Salad. But the proper name is Pearl Couscous Salad, so I went with sensible. But now I’m kind of regretting it!
Pearl couscous is the big brother of the more common tiny couscous that I use as a side dish for Moroccan and African dishes like tagine. Commonly mistaken as a grain, couscous is actually a type of pasta, and is ideal used in salads like in this recipe, or as a side like in this Syrian chicken.
While the tiny couscous can be prepared by soaking in hot water, pearl couscous needs to be simmered on the stove. In my view, the most delicious way to do this is to cook it like risotto, starting with sautéed garlic and onion then using broth instead of water. This infuses the couscous with so much flavor, you can even serve it plain as a side.

What you need for this pearl couscous salad
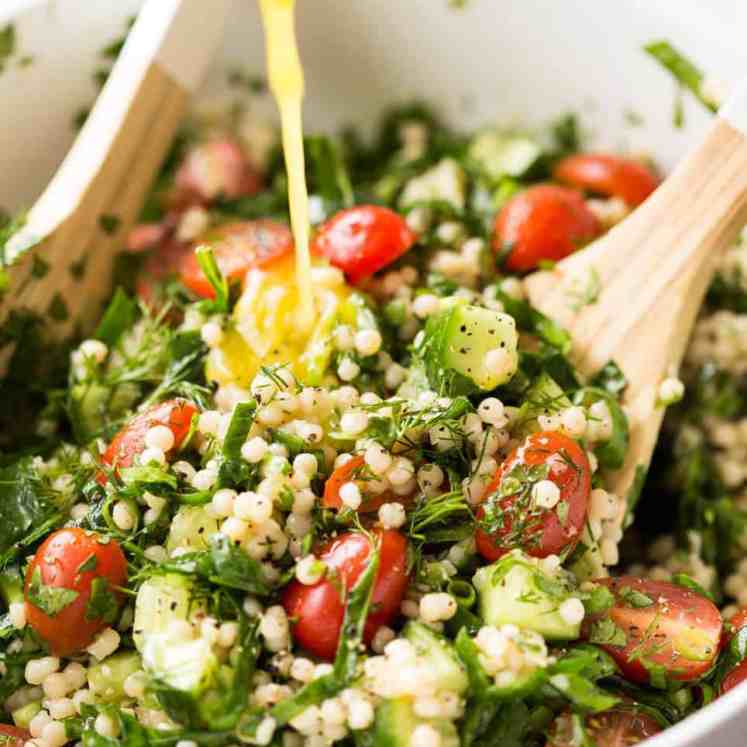
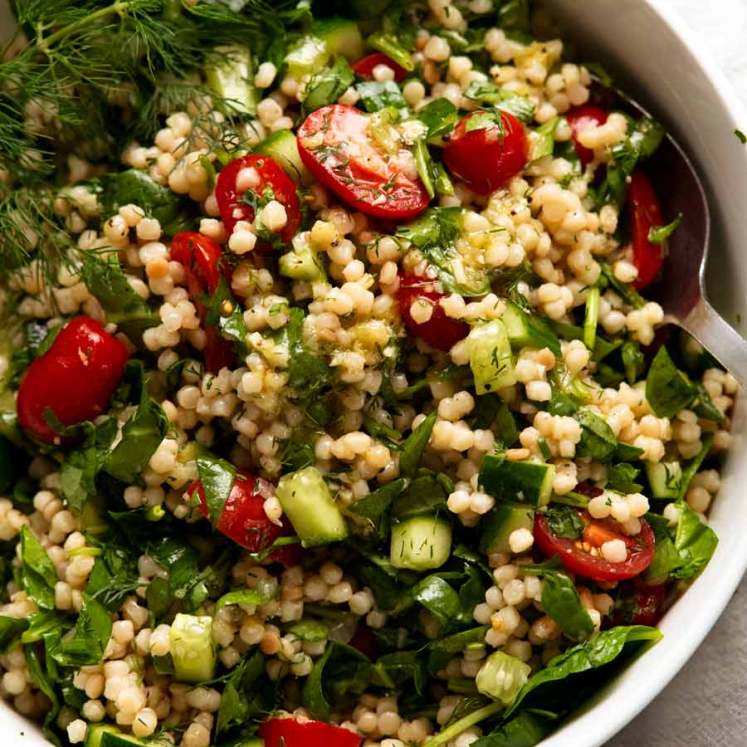
I’ve given this salad a Mediterranean spin with a bright lemon dressing, pops of tomato, juicy crunch of cucumber and a good hit of fresh herbs. The combination of dill and coriander/cilantro is a firm favourite. If you haven’t tried it before, you’re in for a treat!
For the salad
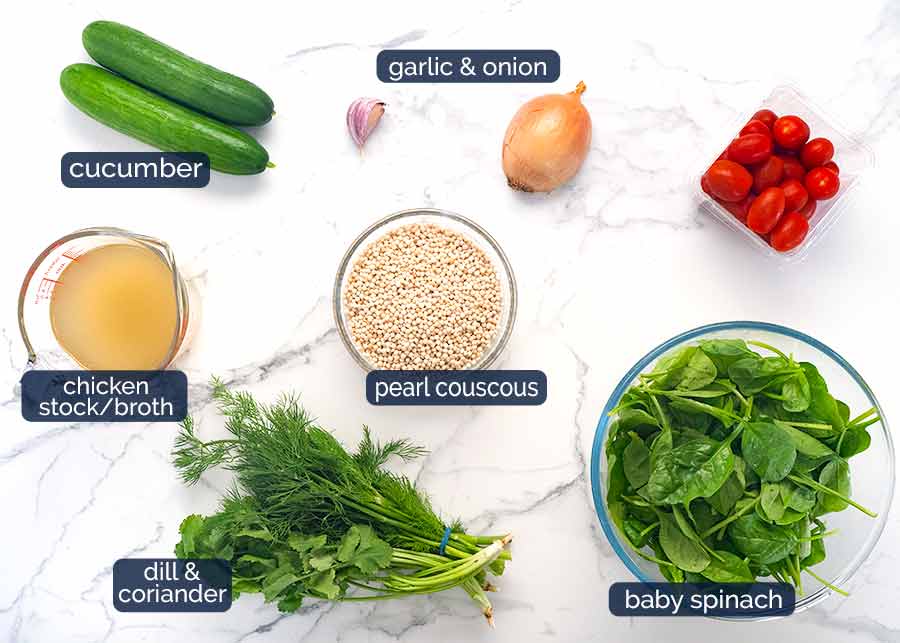
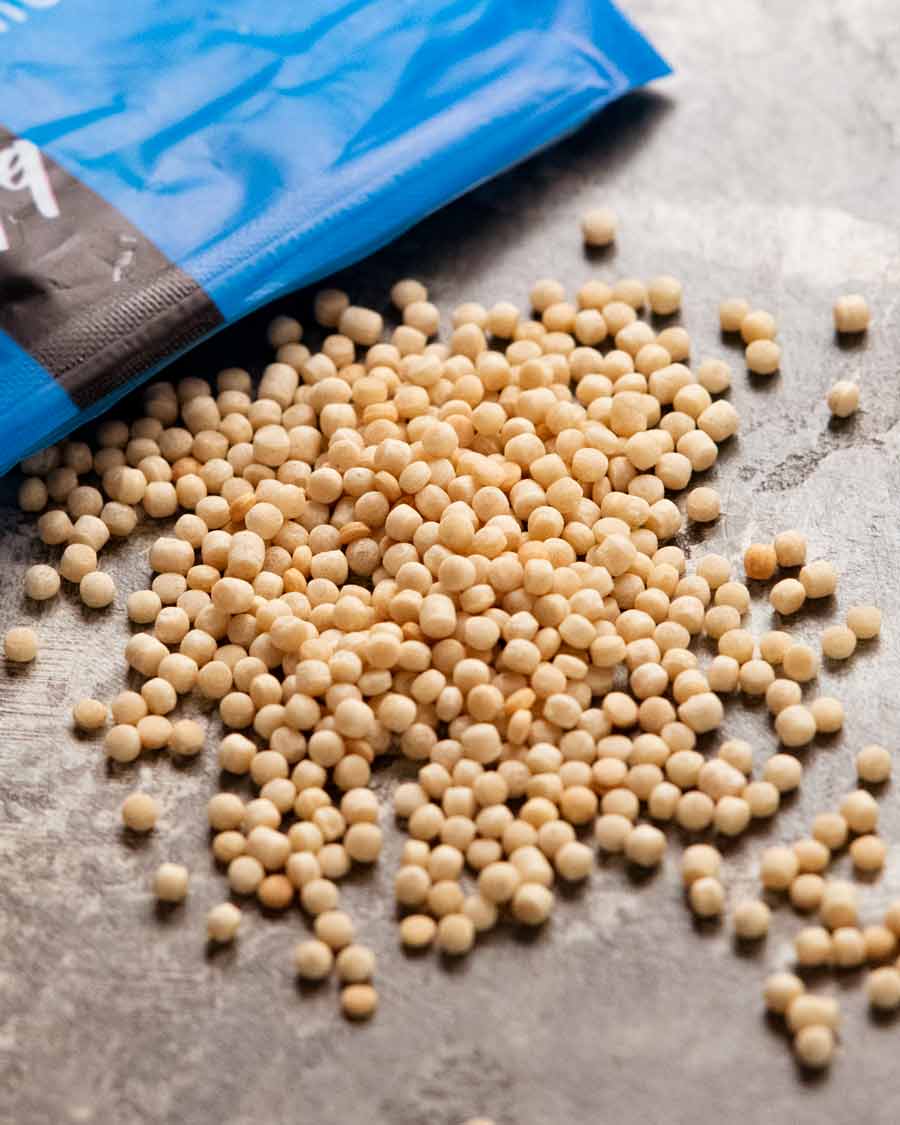
Pearl couscous (see photos above) – Giant couscous that are sold in packets labelled as such. Other names it goes by include gourmet couscous and Israeli couscous. Find it alongside ordinary tiny couscous, usually in the pasta aisle.
Garlic, onion and vegetable or chicken broth – This is for cooking the pearl couscous. As mentioned above, I like to cook the couscous in flavour to make it more delicious. Try it once and you’ll never look back!
Fresh herbs – Dill and coriander/cilantro are a wonderful combination that I love using. Really try not to skip the herbs as they lift the dish. But in my view, this is still worth making even if you do not have one or both of these as the couscous itself and dressing add great flavour into the salad.
Best substitutes are: parsley (same quantity) or a bit of chives (say, 1/4 cup finely sliced). For a different flavour profile but something beautifully fresh, try mint and parsley, finely chopped. Add to taste. Be bold!
Baby spinach – Leafy green of choice. Finely sliced so it tosses through the couscous.
Alternatives: Baby rocket/arugula, torn by hand or chopped into smaller bits (so it tosses though well). Or finely sliced kale, but best to marinate it first to soften the tougher leaves. Follow directions in this recipe.
Cherry tomatoes – For juicy pops and lovely colour. Ordinary tomato cut into chunks or large dice will also work.
Cucumber – For fresh crunch. Nice textural contrast as there’s no nuts or anything else crunchy in this.
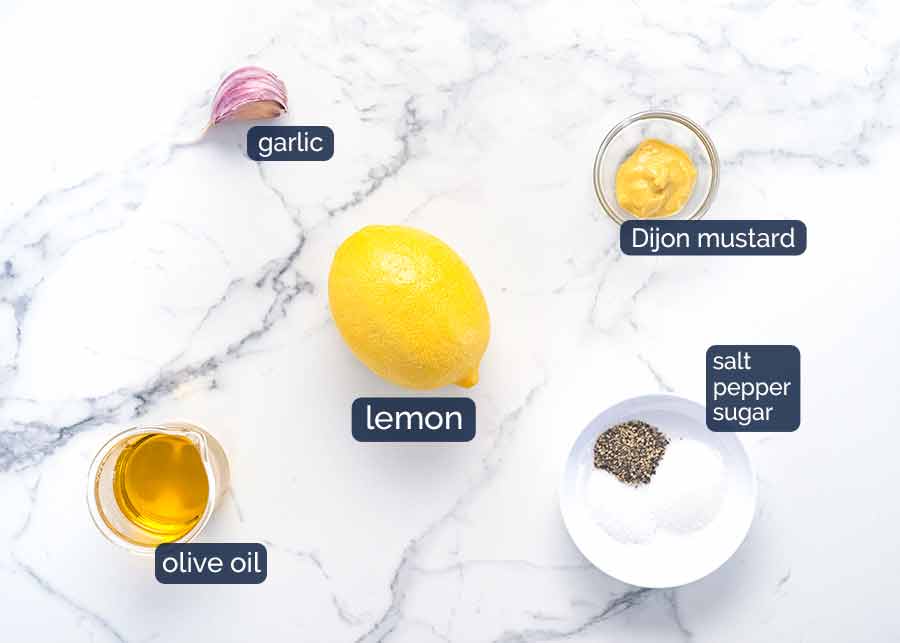
Lemon dressing
A bright lemon dressing is a natural pairing here. No surprises in the ingredients! If you don’t have Dijon Mustard, sub with ordinary yellow mustard. And the lemon juice can be substituted with apple cider vinegar or white wine vinegar.
How to make pearl couscous salad
The pearl couscous needs to be cooked around 1 hour in advance to give it sufficient time to cool before tossing with the salad ingredients. You can speed up the cooling process by spreading it on a tray and refrigerating it.
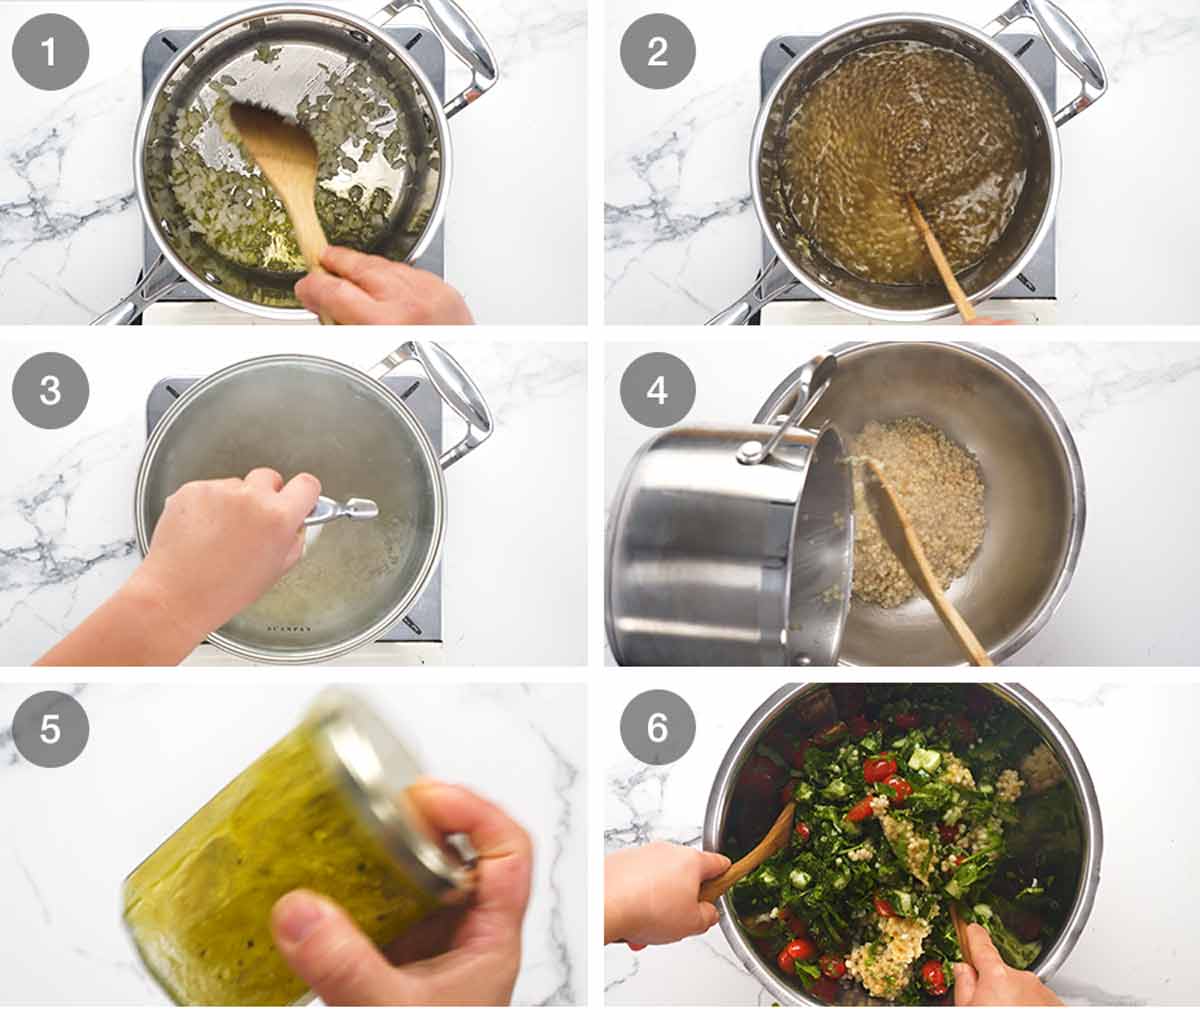
Sauté garlic and onion in a large saucepan or small pot over medium high heat until the onion is translucent and starting to brown.
Add couscous and stir, cooking for 1 minute, to coat it in the flavoured oil. Add the stock/broth and water. Then once it starts simmering, place the lid on and turn the heat down to medium low.
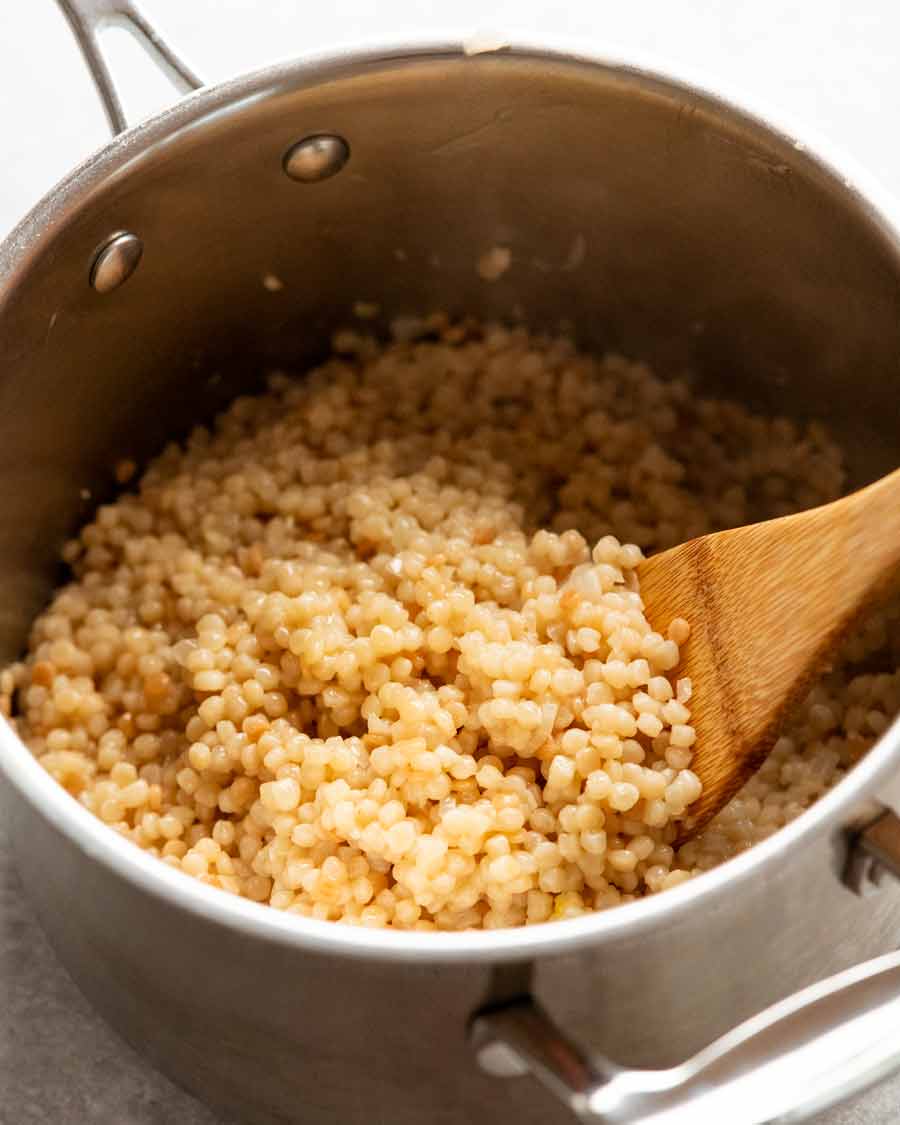
Cook for 10 minutes until the liquid is absorbed and the couscous is cooked through but still firm.
Cool – Use a fork to separate the couscous, then transfer into a large bowl to cool. The couscous will stick together into a big block. But don’t worry, it will separate when tossed with the dressing.
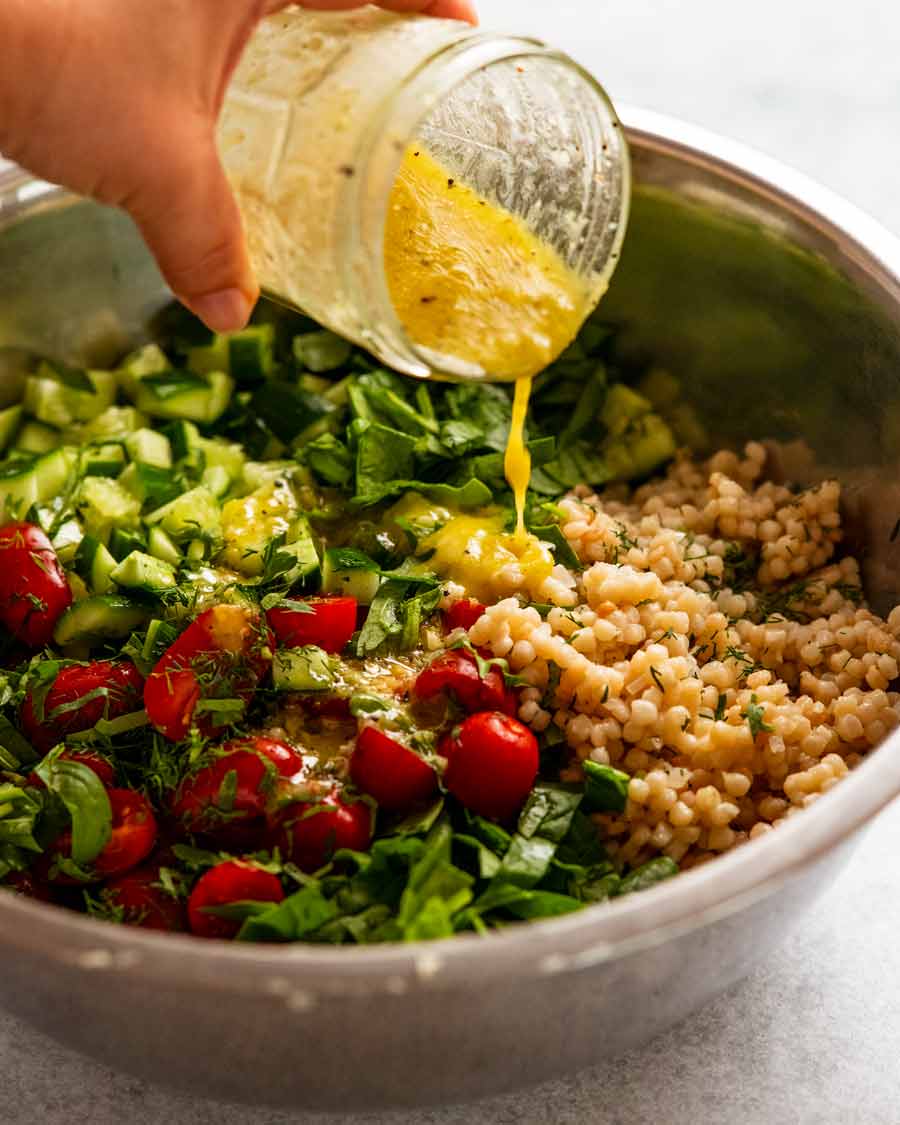
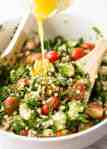
Dressing – Shake the ingredients together in a jar.
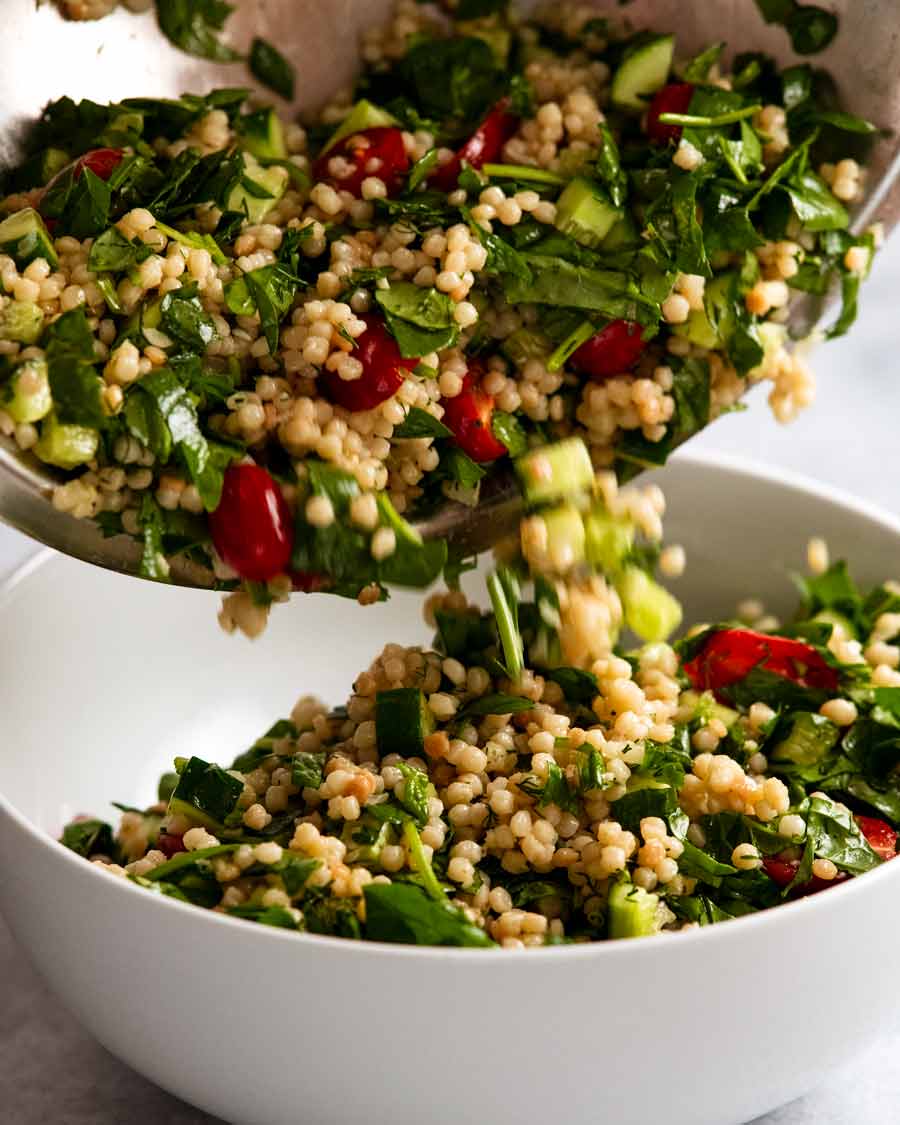
Toss! Add all the salad ingredients and fresh herbs into the bowl with the couscous then toss well with the Dressing. Serve immediately, at room temperature!
What to serve with this pearl couscous salad
Serve it as a meal in itself, which is what I often do, or as a side.
As a side dish, with the bright Mediterranean flavours in this, the obvious pairing would be all things Mediterranean like Greek Baked Chicken, Turkish lamb skewers, Greek Meatballs and Greek butterflied lamb leg. But I especially love serving this with African and Middle Eastern spiced things – like Chicken Shawarma which is pictured below. The fresh flavours of this pearl couscous salad are a terrific contrast to the earthy, complex flavours of Middle Eastern flavours.
Other similar spiced mains include Middle Eastern Lamb Koftas, Lamb Shawarma (oh my, this is SO GOOD!), Moroccan Lamb Meatballs and the Jerk Fish I shared earlier this week (YES! It would be amazing with this!).
Deceptively large amount of greens!
There is a deceptively large amount of greens packed into this salad. Because the beads of couscous are so small relative to, for example, pasta, there’s a lot more “stuff” for veggies to be stirred into. I’m not really explaining it very well! But if (WHEN!!!) you make this, you’ll feel like there’s a ton of greens for just 1 1/2 cups of couscous. But the couscous expands when cooking and once it’s all tossed together, it seems like just the right amount.
Hidden veggies!
Salad that can be eaten with a spoon!
Why does it feel so immature that this appeals to me so much??? – Nagi xx
Watch how to make it
Pearl Couscous Salad
Ingredients
Couscous:
- 2 tsp olive oil
- 1 garlic clove , minced
- ½ small onion , finely chopped
- 1 1/2 cups (250g/ 8oz) pearl couscous (aka gourmet or Israeli couscous, Note 1)
- 1 1/2 cups vegetable or chicken broth , low sodium
- 1 cup water
Salad:
- 2 cucumbers , diced (about 2 cups)
- 250g / 8 oz cherry tomatoes , halved (about 2 cups)
- 3 cups baby spinach , finely sliced (Note 2)
- ¼ cup coriander / cilantro , finely chopped (or sub with parsley)
- ¼ cup dill , finely chopped
Lemon Dressing (Note 3):
- 2 tsp lemon zest
- 2 tbsp lemon juice
- 1/4 cup extra virgin olive oil
- 1 tsp Dijon mustard
- 1 garlic clove , minced
- 1 tsp sugar , optional
- 3/4 tsp cooking / kosher salt
- 1/2 tsp black pepper
Instructions
Couscous:
- Sauté onion & garlic – Heat oil in a large saucepan or small pot over medium high heat. Add garlic and onion, saute until the onion is translucent and starting to brown.
- Couscous & broth – Add couscous and stir, cooking for 1 minute. Add broth and water, bring to a simmer. Then place the lid on and turn the heat down to medium low so it is simmering gently.
- Cook for 10 minutes until the liquid is absorbed and the couscous is cooked through but still firm. Use a fork to separate the couscous, then transfer into a large bowl to cool. (It will form a sticky block but don't worry, it will separate when tossed with Dressing).
Salad:
- Dressing – Place Dressing ingredients in a jar and shake well.
- Toss! Add Salad ingredients into the bowl, pour over Dressing and toss. Serve at room temperature.
Notes
Nutrition
Originally published July 2017. Updated January 2023 with a name change from Israeli Couscous Salad to Pearl Couscous Salad due to the political sensitivity around the recipe name. The brand I used to use sold this type of couscous labelled as “Israeli couscous”. I don’t want my website to be a political forum so I’ve changed the name. And actually, these days most packets are labelled “pearl couscous”. Post has also been updated with an improved video worthy of this fabulous salad and refreshed photos. No change to recipe – it’s perfect as is!
MORE SUMMER SALADS to take to gatherings
Wild Rice Salad <– reader fave!
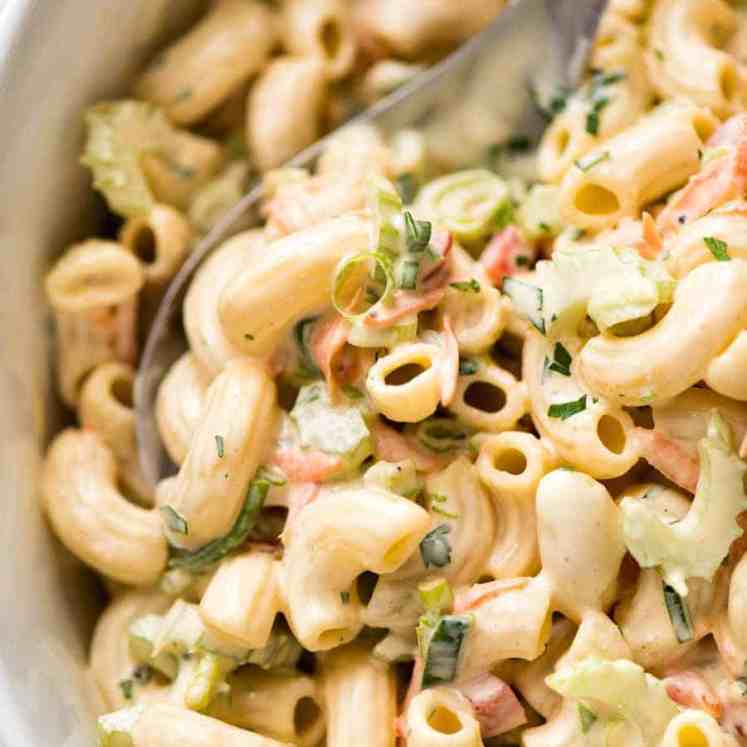
Everybody’s favourite Macaroni Salad
Browse all Pasta Salads and Rice Salad
Life of Dozer
Teamwork! 😂 (Dozer on the left with this friend Aggie on the right!)

The post Pearl Couscous Salad appeared first on RecipeTin Eats.
]]>