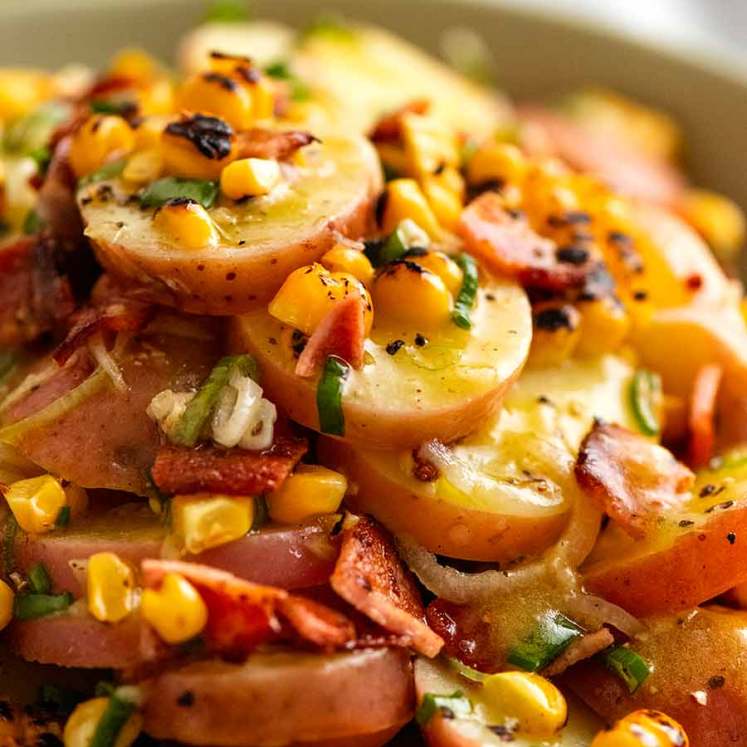
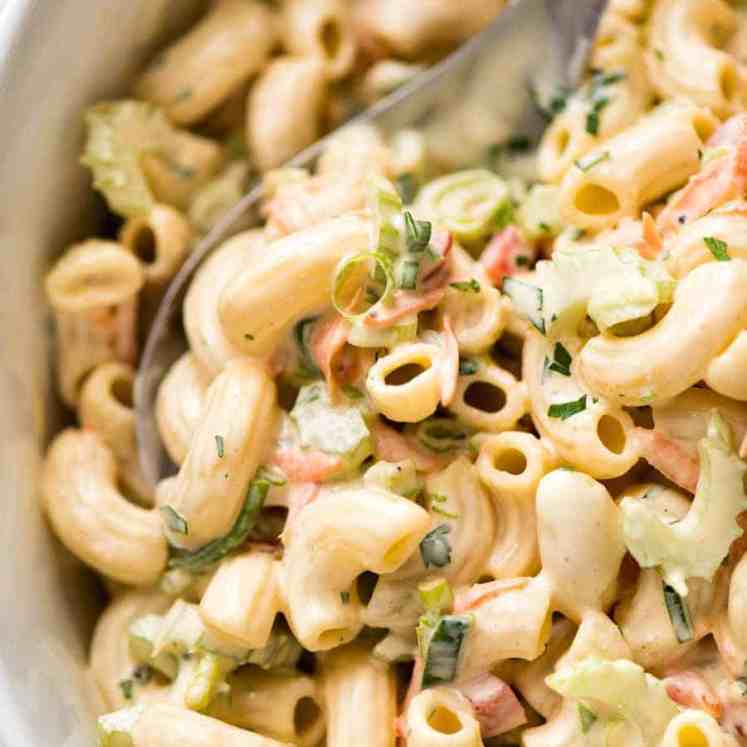
 The best potato salad is made by dousing hot potatoes with French Dressing so they take in the flavour before tossing in a creamy dressing. Complete with essential add-ins: bacon, cucumber and celery. Every bite is perfection! Prefer no mayo? Try German Potato Salad, Red Potato Salad with Charred Corn, Lemon Potato Salad and Wickedly... Get the Recipe
The post The Best Potato Salad appeared first on RecipeTin Eats.
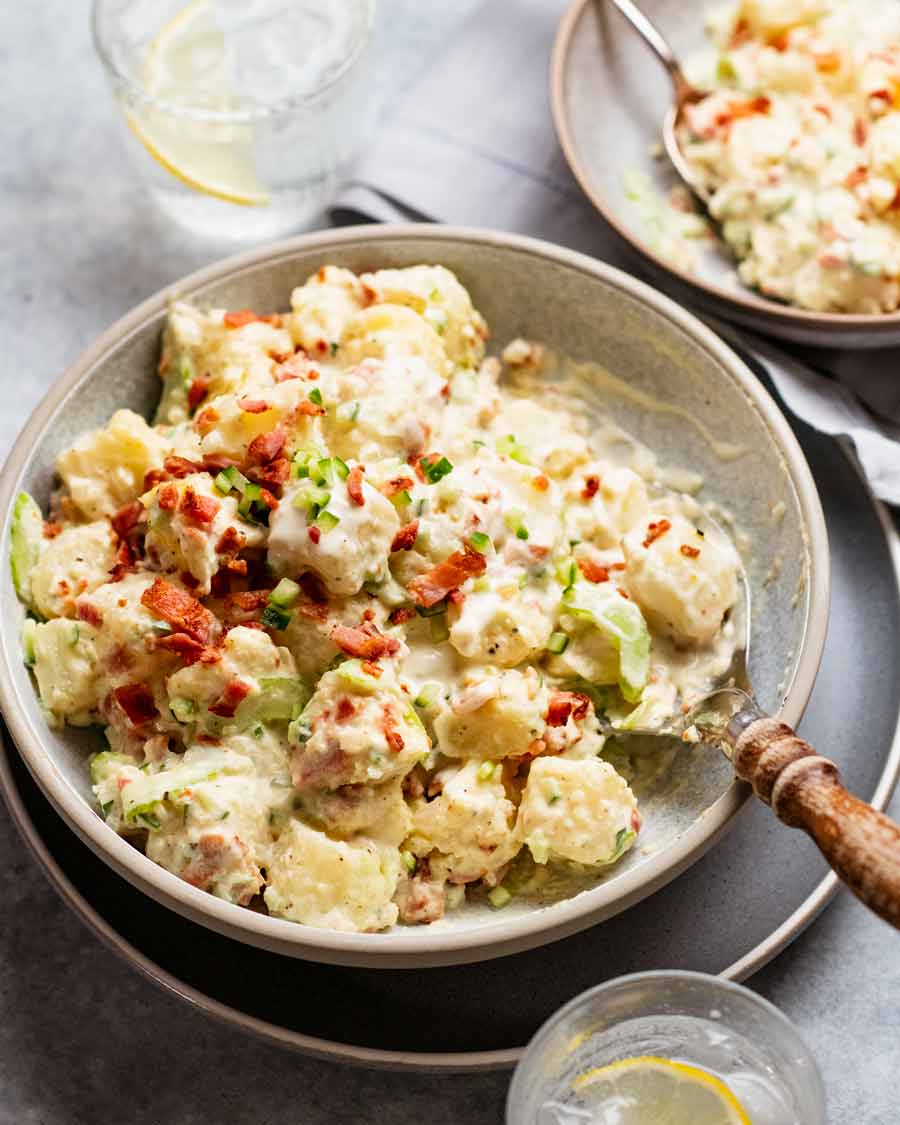
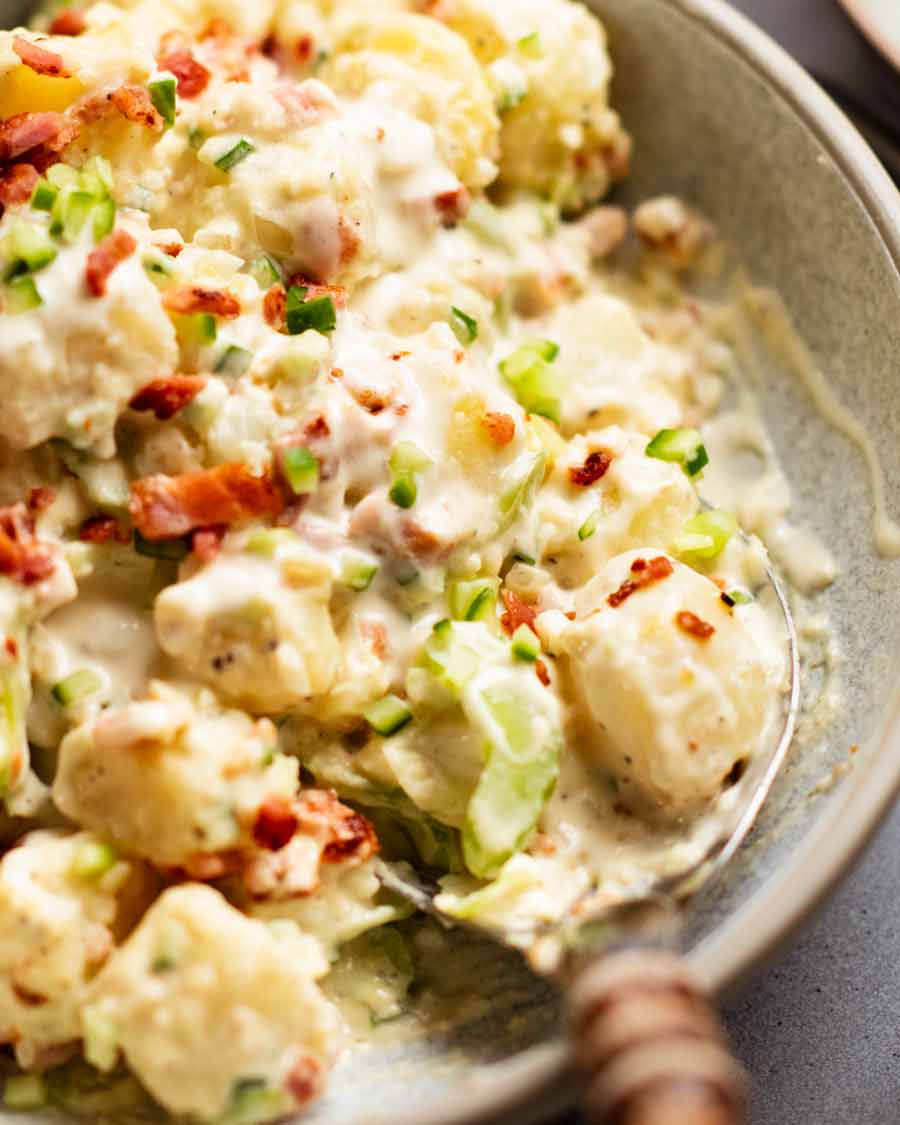
]]>The best potato salad is made by dousing hot potatoes with French Dressing so they take in the flavour before tossing in a creamy dressing. Complete with essential add-ins: bacon, cucumber and celery. Every bite is perfection!
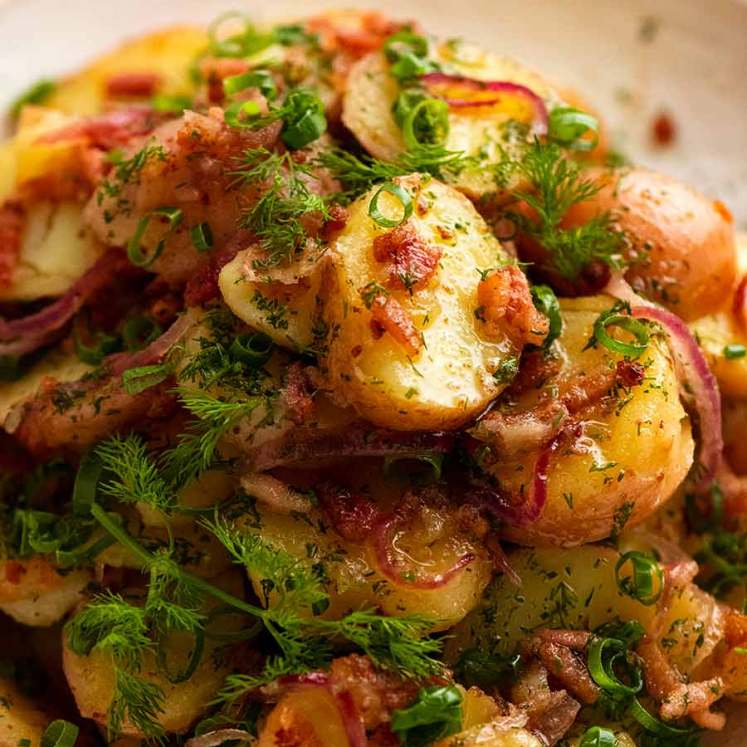
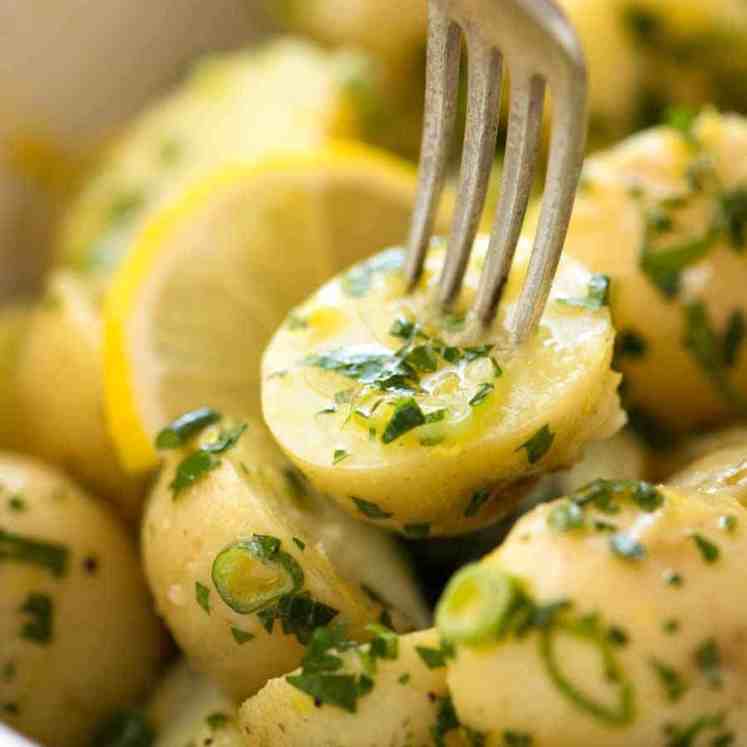
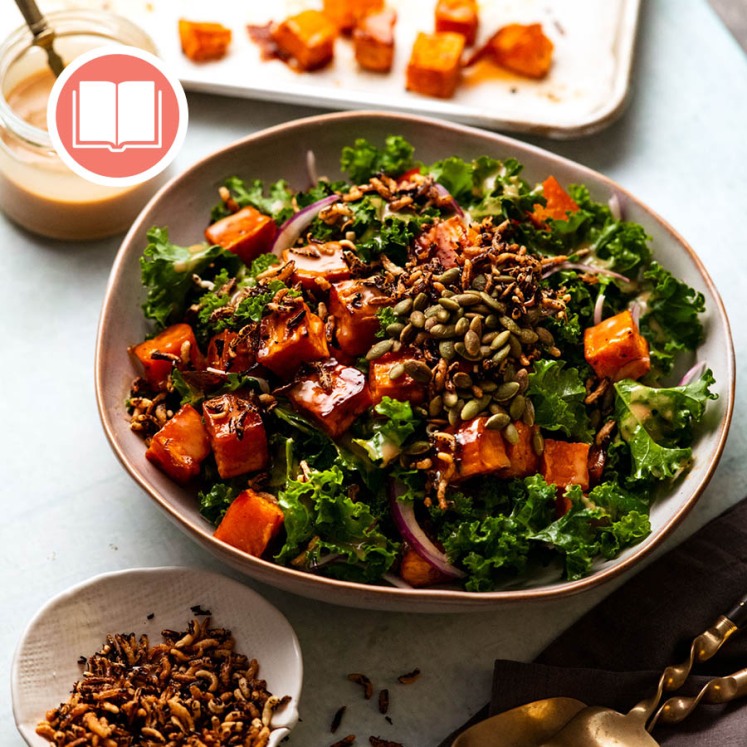
Prefer no mayo? Try German Potato Salad, Red Potato Salad with Charred Corn, Lemon Potato Salad and Wickedly Delish Sweet Potato Salad.
A Potato Salad you’ll make again and again…
This is a potato salad recipe given to me by the mother of a friend. To respect her privacy, let’s call her Mrs B.
The very first time I heard how Mrs B makes her potato salad, I instantly knew that this was one that would stand out from the crowd of thousands – millions – of potato salad recipes “out there” in the world wide web.
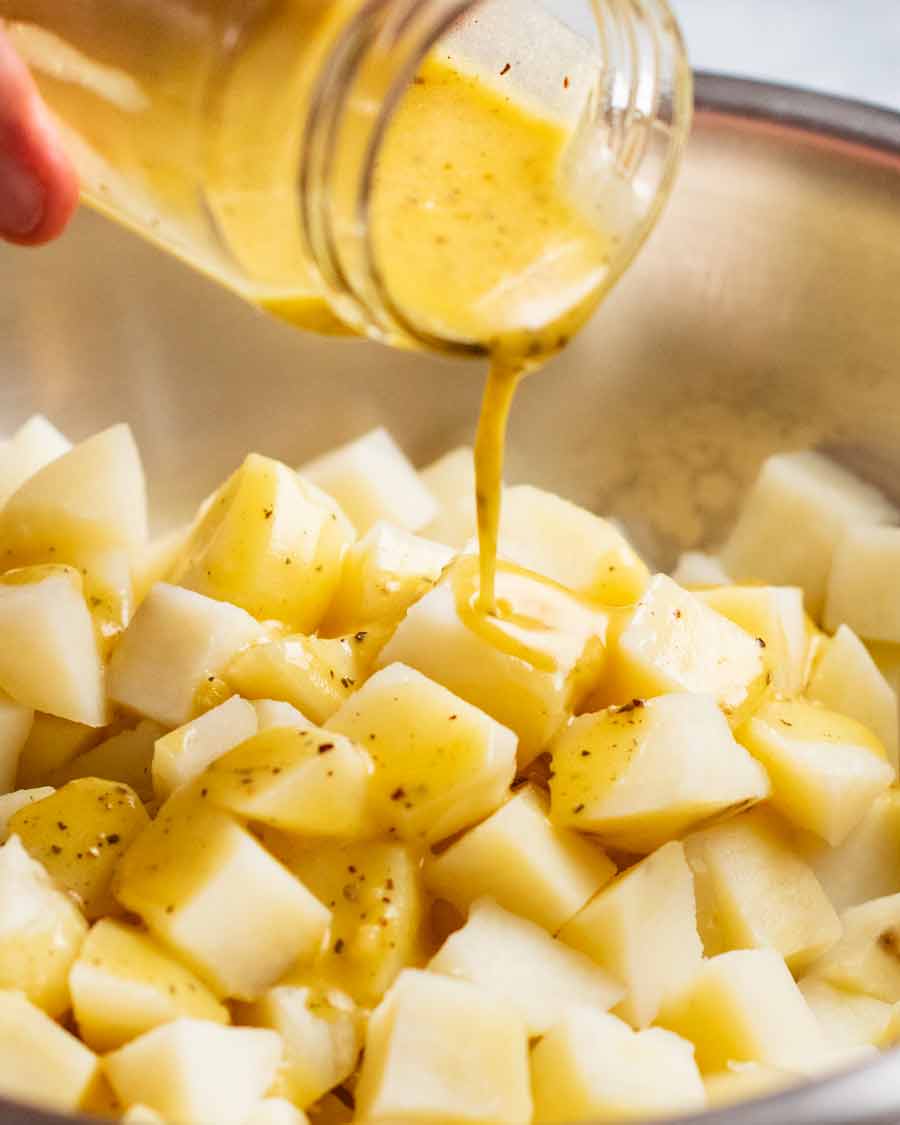
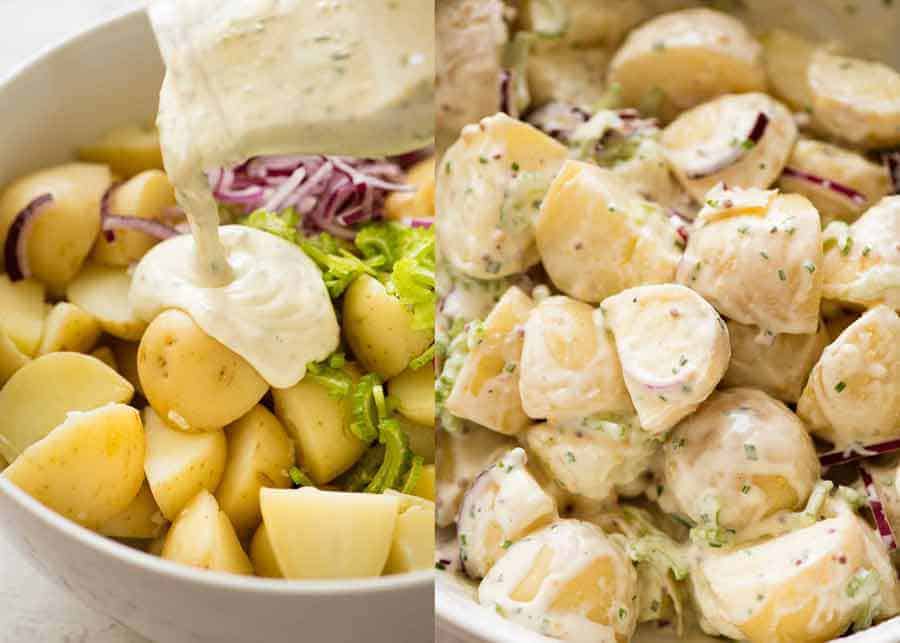
The thing that makes it so special is pouring French Salad Dressing over the hot boiled potatoes. By dressing while hot, they absorb the French Salad Dressing flavour rather than just coating them. Which means, flavour inside the potatoes not just on the outside.
Combined with the creamy sour cream-mayonnaise dressing, salty bacon, and fresh bursts of celery, cucumber and onion, every mouthful is the perfect bite!
Plenty of dressing….but not overly greasy
The other thing I really like about this potato salad is the dressing. While I love a creamy dressing, I find using only mayonnaise too greasy. But I also don’t want to skimp on dressing. There’s nothing worse than a dry potato salad!
The solution: break up the richness of mayonnaise by combining with sour cream. I use a 50/50 ratio.
The addition of tang and hint of zing from a dab of Horseradish Cream also helps to cut through the richness. It’s optional but adds an extra little something-something to it.
And don’t forget, all this mingles together with the French Dressing the potatoes are soaked in!
After a creamy no-mayo version? Try this Creamy Yogurt Potato Salad Dressing – it’s terrific!
Ingredients for the Best Potato Salad
Here’s what you need to make the best potato salad on the block!
The potatoes and add-ins
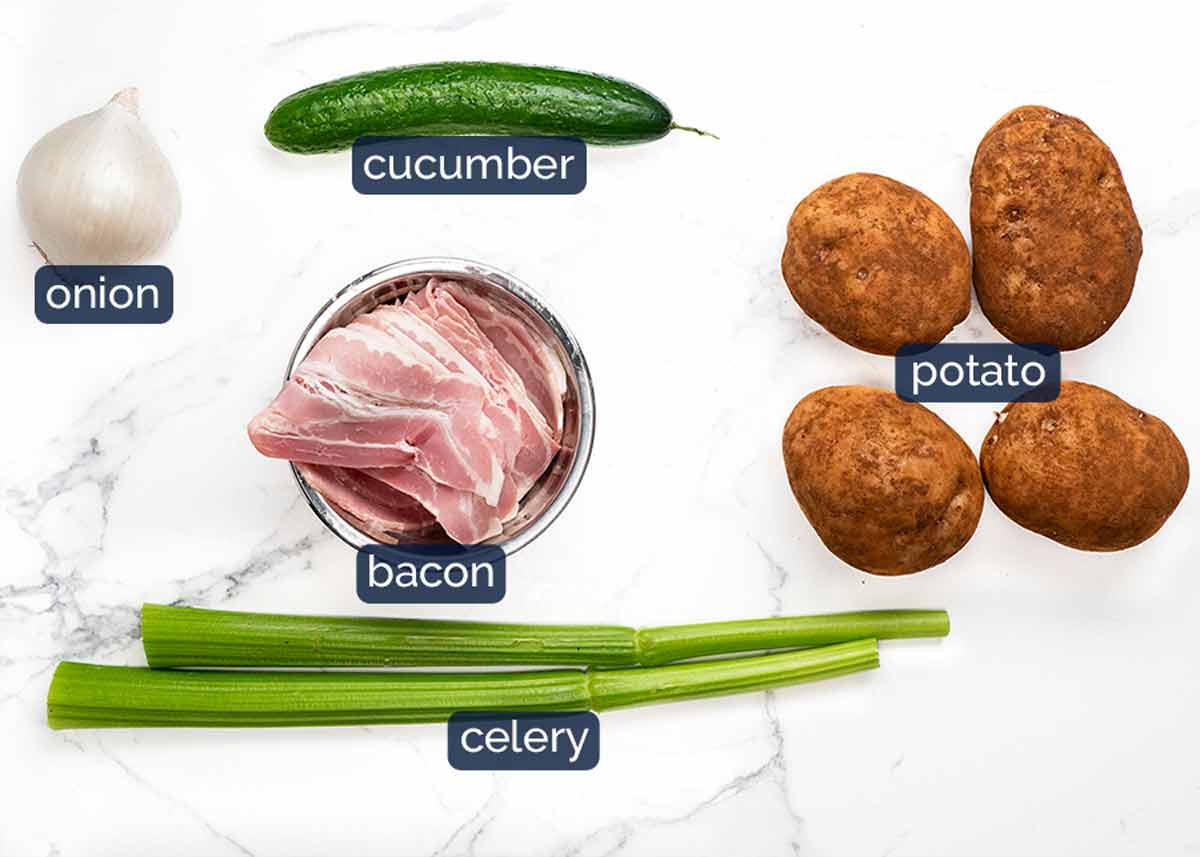
Potatoes – Potatoes vary widely in texture when cooked. For potato salad, I like to use starchy (floury) and all-rounder potatoes which become soft and fluffy when cooked and are a sponge to absorb the French dressing. The edges of the potato cubes mash up a bit when tossed with the dressing (nobody wants sharp-edged cubes in their potato salad!) and the surface becomes a little ragged so the creamy dressing clings to every surface
Starchy/all-rounder potato types:
– Australia: Sebago (dirt-brushed common potatoes), Coliban (white skin potatoes common at supermarkets)
– US: Russet, Idaho and Yukon gold
– UK: Maris Piper, King Edward, and RussetWaxy potatoes, on the other hand, do not absorb flavour nearly as well and have a firmer texture when cooked. While the potato cubes will hold their shape more perfectly when cooked with sharp cut edges, the surface is slippery so the dressing doesn’t adhere to it as well.
Celery and cucumber – Welcome freshness! The celery is sliced finely so you get soft crunch but it becomes floppy rather than stiff sprigs sticking out. And the cucumber is finely diced rather than the typical slicing so you get great soft juicy little crunchy pops. Love!
Raw onion (finely minced) – This cuts through the creaminess of the dressing and adds great subtle fresh flavour into the whole salad. The fact that it’s finely minced rather than just chopped or sliced helps – better dispersion throughout the whole salad plus you get the juiciness too. It kind of takes the place of garlic which I put in “everything” but is a little harsh in this particular potato salad.
Bacon – Essential for a classic potato salad!
Dressing 1: The French Dressing
This is the dressing the hot potatoes soak up! The original recipe shared with me by Mrs B used store bought French Dressing which is an option. However, I just make my own – here’s all you need:

White wine vinegar – The classic vinegar used for French dressing but can be substituted with apple cider vinegar, sherry or champagne vinegar (last resort: plain white vinegar).
Olive oil is the oil of choice. The better the quality, the better the flavour!
Dijon mustard – For flavour and thickening.
Water – Missing from the photo!
 I use just 1 tablespoon of water to stretch out the dressing, rather than more oil (simply for health reasons).
Garlic – flavour!
Sugar – Just a touch, which takes the edge off the tang a bit too.
Dressing 2: The creamy dressing!
As noted right up front, I like my potato salad nice and creamy but I find just using mayonnaise is overly heavy. So I use a 50/50 sour cream/mayo combination.
(Reminder – mayo free version here!)
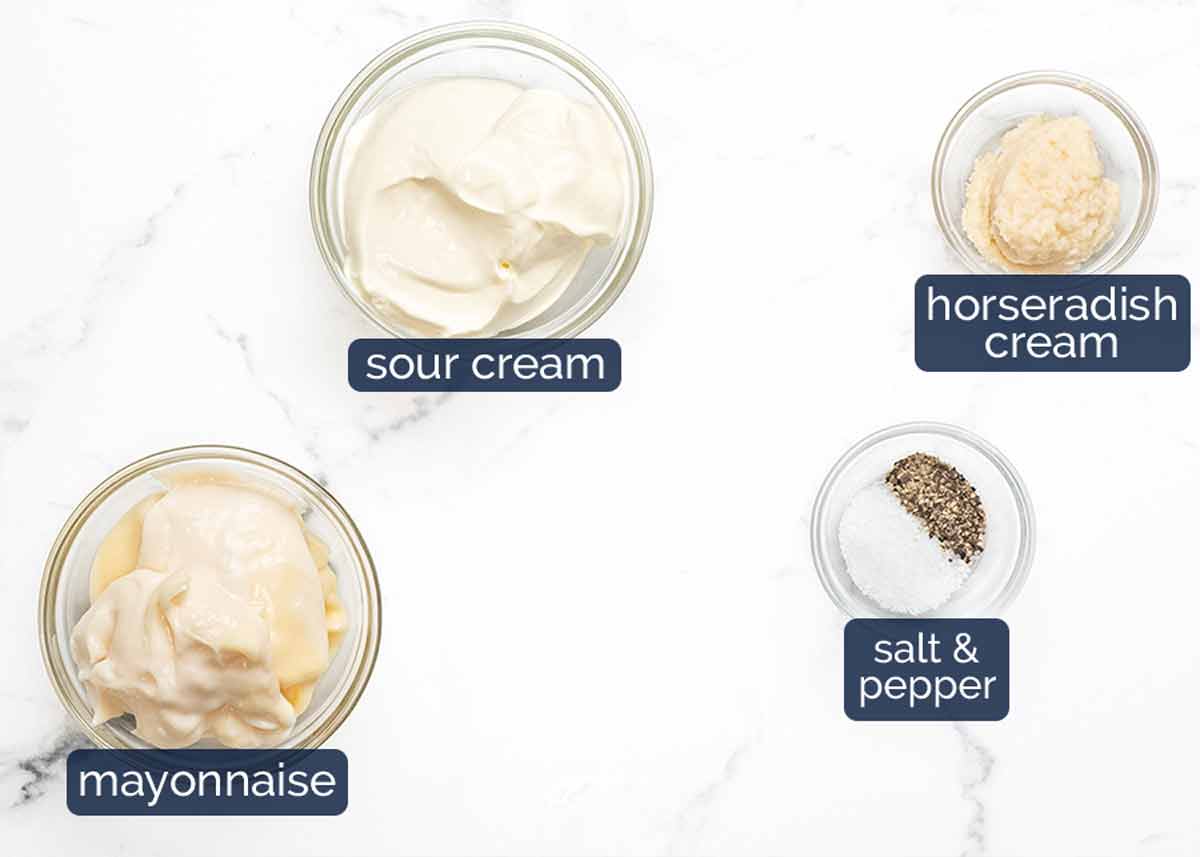
Mayonnaise – Whole egg mayo is best as it is creamier and less tangy than ordinary mayonnaise. Readily available these days in grocery stores (it will say “whole egg mayo” on the label).
Sour cream – Full fat please! Yogurt can be used as a substitute but sour cream does have a creamier mouthfeel.
Horseradish cream – This is pickled fresh horseradish which has a zingy spiciness like wasabi. Because it’s pickled, it is vinegary. So this adds both a hint of spicy warmth and tang to the dressing.
If you’re lucky enough to have fresh horseradish, use half the amount and add a couple of teaspoons of vinegar.
How to make potato salad
IMPORTANT! Creamy potato salads really are better made with starchy potatoes for texture and flavour, but you really need to take care not to overcook else they will crumble too much when tossing. Waxy potatoes would be easier to use because they hold their shape….but the eating part is not as good! I’ve done a lot of potato salad eating in my time to arrive at this conclusion.
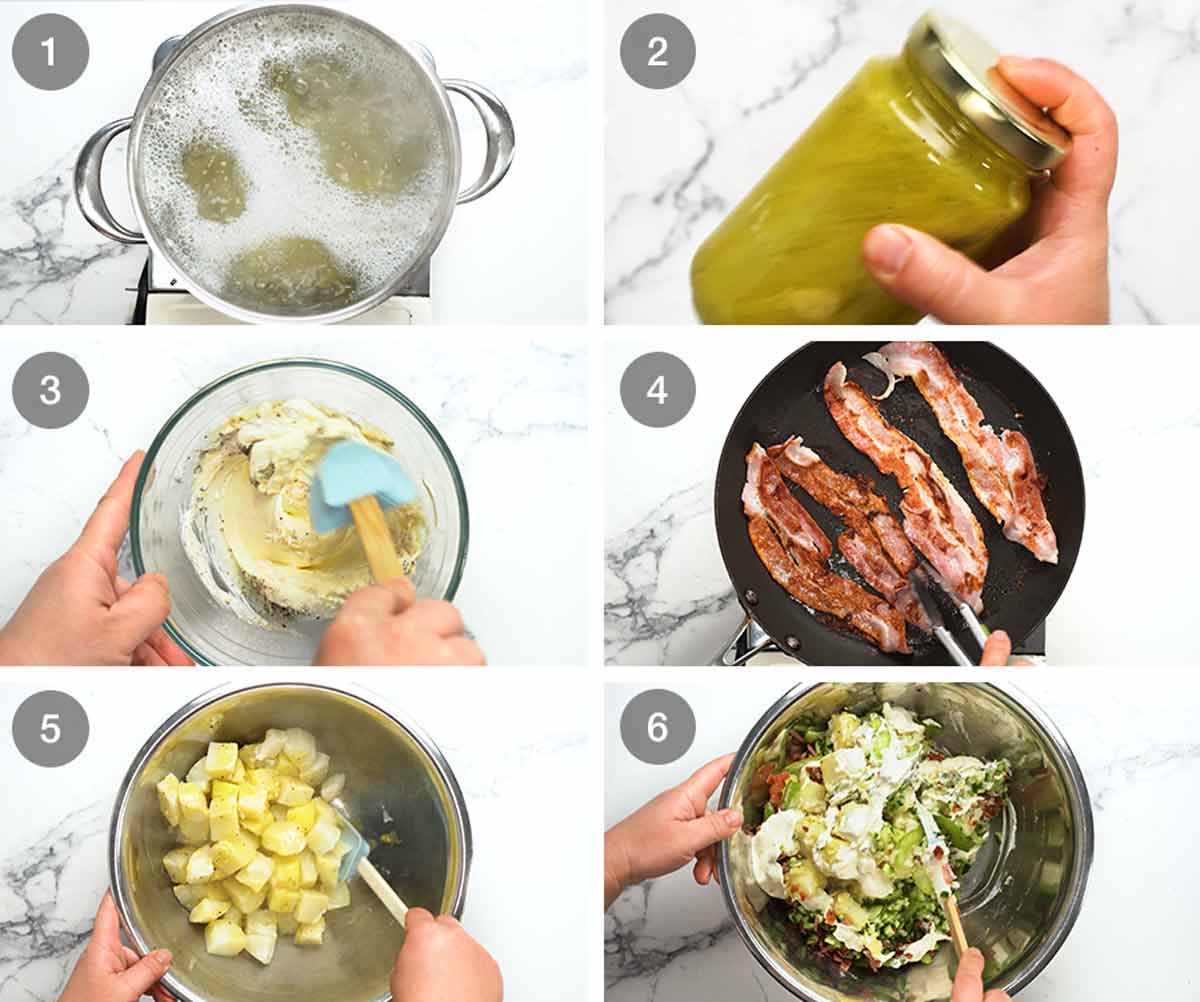
Start in cold water – Cook cut potatoes starting in cold water. Never start potatoes in boiling water else they will cook too much on the outside before the inside cooks and crumble when tossed!
Check frequently – Once the water comes up to the boil, start checking at 4 minutes and every 30 seconds thereafter. As soon as you can pierce a potato with almost no resistance, drain immediately. They will continue cooking with the residual heat.
French Dressing – Shake French Dressing ingredients in a jar until combined.
Creamy Dressing – Mix the ingredients in a bowl until smooth.
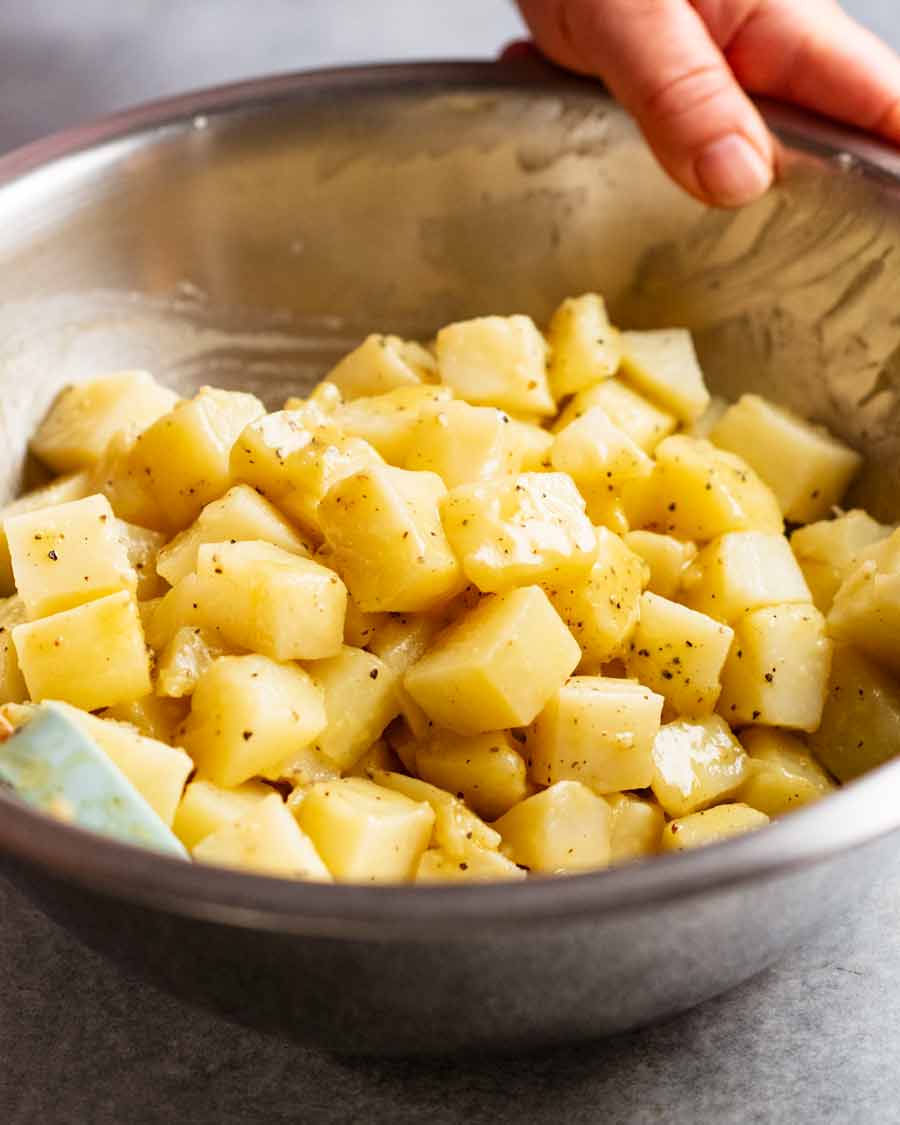
Soak hot potatoes – Gently transfer the potatoes in a bowl and pour over the French Dressing. Toss very gently using a rubber spatula. Minimum tosses just to coat, then set aside for at least 2 hours for the potatoes to cool and absorb the dressing. We are essentially marinating the potatoes here. You know this is going to be good!
The cooled potatoes are also less fragile less susceptible to breaking when we mix with the remaining ingredients.
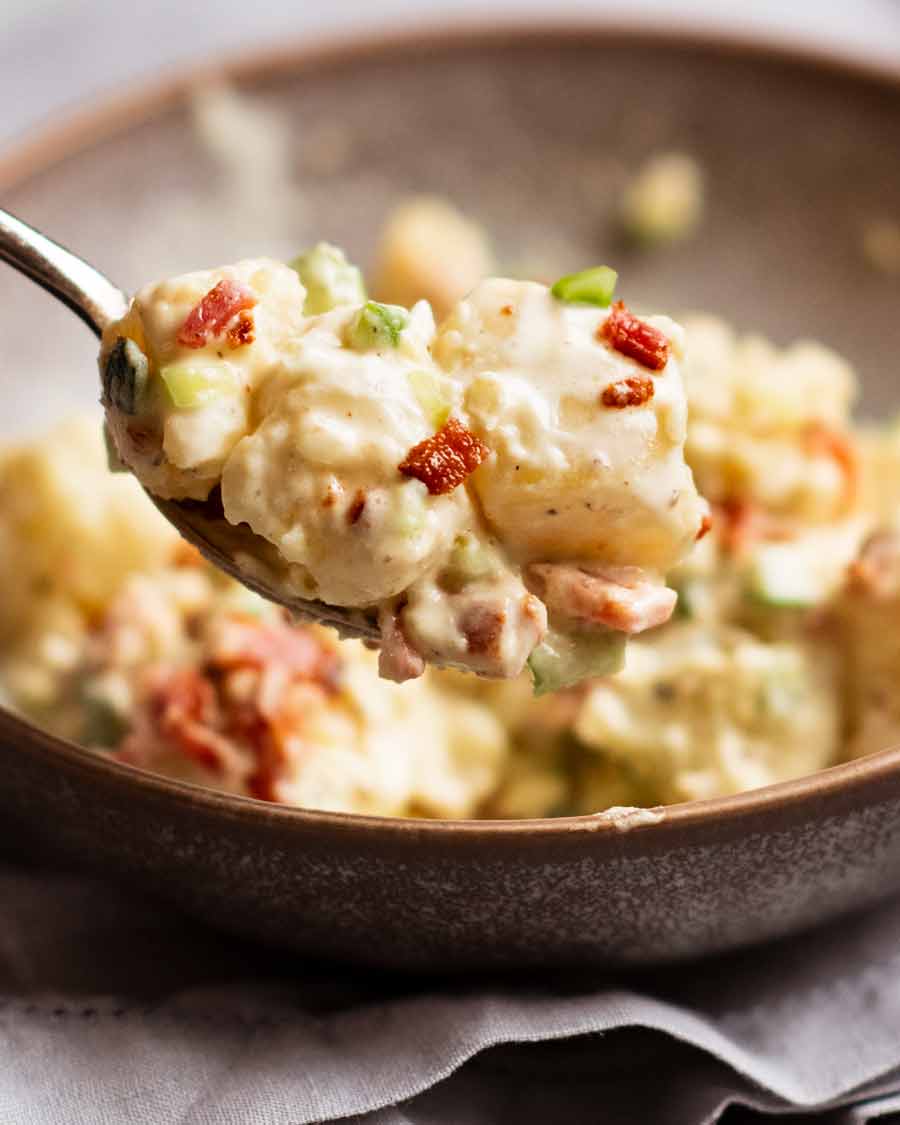
Add-ins – Add the cucumber, celery, onion, most of the bacon and all the creamy dressing. Toss gently until mixed through. If time permits, set aside for a few hours or better yet overnight, to let the flavours meld together. But honestly, even if you serve it straight away, it will still be the best potato salad of your life!
Proof of excellence
This potato salad will last 4 to 5 days in the fridge, and it just gets better with time. Make it once, and it will be a staple at all gatherings for years to come. I have never strayed from this recipe since the moment I tried it!
And as final proof of how great this potato salad is, even my mother who is a die-hard Japanese Potato Salad devotee couldn’t stop eating this. That’s just about the highest praise you can get.
Thank you Mrs B! – Nagi x
Watch how to make it

The best Potato Salad
Ingredients
Potato Salad
- 1 kg / 2 lb potatoes peeled and cut into 2cm/ 3/4" cubes (Aus – Sebago, Colban; US – Russet, Idaho Yukon; UK – Maris Piper, King Edward) (Note 1)
- 2 tsp cooking / kosher salt , for cooking potatoes
- 250g / 8oz streaky bacon
- 1/2 cup French Dressing – homemade (below) or store bought (Note 2)
- 3/4 cup cucumber, finely diced (1 x 15cm/6" cucumber, cut lengthwise and remove watery seeds first)
- 1 cups celery, finely sliced diagonally (~ 2 ribs)
- 1/4 cup white onion, finely minced , ~ 1/2 onion (Note 3)
Potato Salad Dressing
- 1/3 cup mayonnaise , preferably whole-egg
- 1/3 cup sour cream , full fat (sub yogurt)
- 1 tbsp horseradish cream (or horseradish relish) (Note 4)
- 1/2 tsp cooking / kosher salt
- 1/4 tsp black pepper
French Dressing (essential! Note 2)
- 1 tbsp dijon mustard
- 2 tbsp white wine vinegar (sub apple cider vinegar)
- 1/4 cup extra virgin olive oil
- 1 tbsp water (for volume, rather than more oil)
- 1/2 tsp white sugar
- 1/2 garlic clove , finely grated or minced
- 1/2 tsp salt
- 1/4 tsp black pepper
Instructions
- French Dressing – Shake ingredients in a jar until well combined.
- Cook potatoes (CAREFUL! Note 5) – Put potatoes and 2 teaspoon salt in a large pot of cold water. Turn the stove on. Once the water is simmering, cook for 4 minutes or until the potatoes are JUST cooked (still bit firm in the middle) – they will keep cooking with residual heat. Drain immediately (gently!).
- Douse hot potatoes! Carefully transfer potatoes into a large bowl and pour over French Dressing. Gently toss to coat then set aside for 2 hours so potatoes absorb the dressing and cool (less fragile).
- Crispy bacon – Lay half the bacon in a cold non-stick pan. Turn onto medium high and cook until golden (the fat will melt as the pan warms up so it cooks in its own fat). Turn and cook the other side until golden. Drain paper towels, repeat with remaining bacon. Once cool and crisp, chop into small pieces.
- Creamy Dressing – Mix ingredients in a bowl until combined.
- Toss – Add creamy dressing, celery, cucumber, onion, and most of the bacon. Toss gently to combine.
- Serving – Serve garnished with remaining bacon. If time permits, I recommend setting aside for a few hours, or even better, overnight, to give the flavours a chance to meld. But still amazing served straight away! Always serve at room temperature, not fridge cold.
Notes
Nutrition
Originally published August 2014. This is such a staple recipe in my life, I had to re-publish it with a video, sparkling new photos and of course add a Life of Dozer section!!
The potato salad family
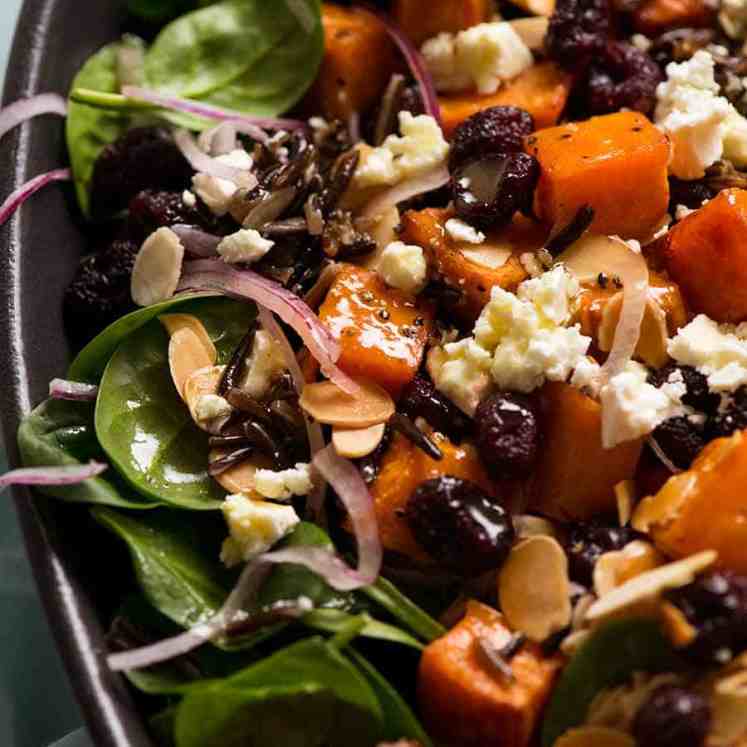
Summer salads I love

Life of Dozer
I was at the Good Food & Wine Show in Sydney on the weekend! JB and I were doing a cooking show on stage and book signings/meet ‘n greets.
The Fun Police (council) wouldn’t let Dozer into a food show. So I took the next best thing – a life size cardboard cut out. We’re getting a lot of mileage out of 2D Dozer! 😂


The post The Best Potato Salad appeared first on RecipeTin Eats.
]]> Mashed Potato Casserole is an outrageously delicious yet highly practical way to make mashed potato ahead of time! A layer of cheese and bacon prevents the mash from drying out as it reheats in the oven, while transforming this humble side into something extra-devilish and decadent. Oh the power of cheese (plus bacon)! Make it... Get the Recipe
The post Make-ahead Mashed Potato Casserole appeared first on RecipeTin Eats.
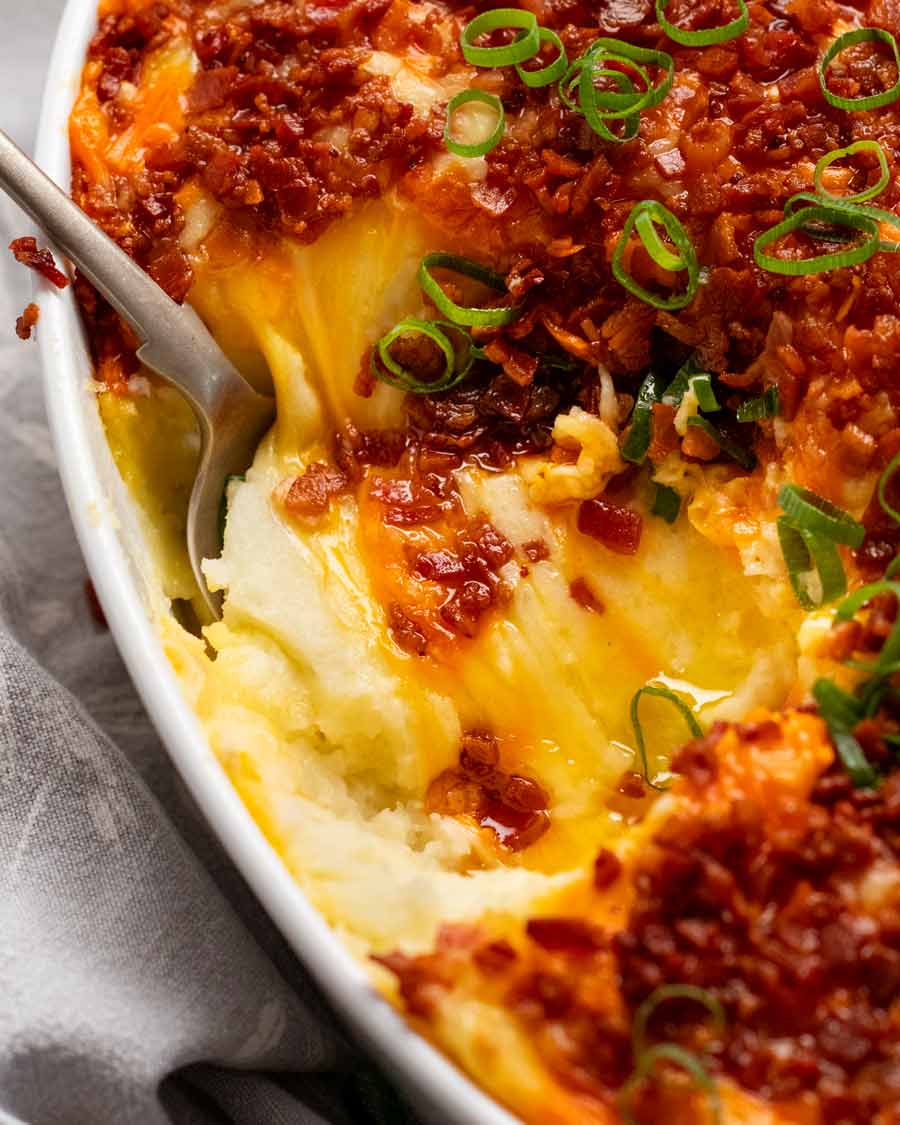
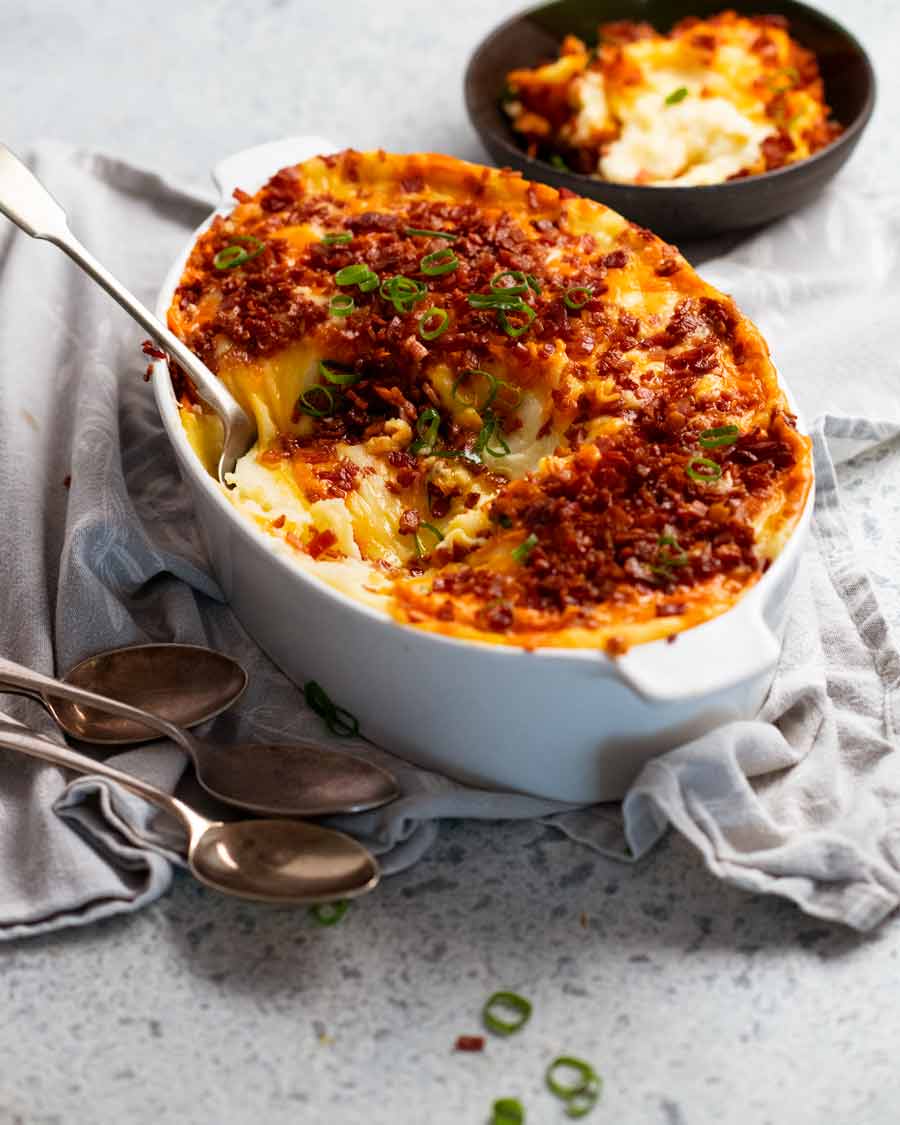
]]>Mashed Potato Casserole is an outrageously delicious yet highly practical way to make mashed potato ahead of time! A layer of cheese and bacon prevents the mash from drying out as it reheats in the oven, while transforming this humble side into something extra-devilish and decadent. Oh the power of cheese (plus bacon)!
Make it fresh, or assemble ahead and reheat when required. Serve in place of plain ole’ mash.
Make-ahead mashed potato
With the holidays fast approaching, I thought it would be timely to share my favourite way to make mashed potato ahead of time.
The thing with make-ahead mash is that you cannot simply reheat it in the microwave or oven. You might think a splash of milk and good stir is all it takes to restore it. But I can tell you that’s the path to a mouthful of gluey horridness.
While there are nifty ways to reheat cold mashed potato successfully*, a big dish of creamy Mashed Potato Casserole takes the prize for the most foolproof-yet-show-stopping way I know! It also wins the prize for the lowest effort on the day-of because you literally just pop the pre-assembled dish into the oven. It’s a win-win, 10/10 – nothing could be more fitting for your holiday feast menu!!
* How I reheat plain mashed potato: Cold mash in hot cream (recipe here, but note it’s more work on the day) or in heavy duty piping bags submerged in boiling water, a trick caterers use (see my demo here on Instagram).
Is there such a thing as too much bacon??
Confession: I think I was a little heavy-handed with the bacon in the photos while being a tad short on the stuff for the recipe video!! So the recipe card as written is a happy medium. 😊
But actually, looking at the photo below, it does look pretty enticing with almost full bacon coverage on the surface. And … is there even such a thing as too much bacon?? (Yeah nah)

What you need for Mashed Potato Casserole
Here’s what you need to make Mashed Potato Casserole:
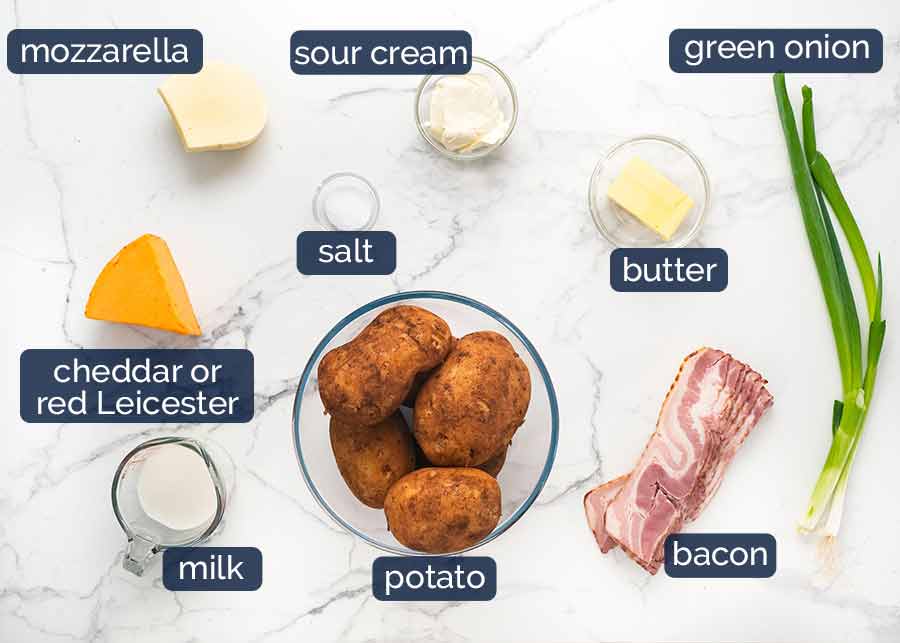
Potato – Floury and all-rounder potatoes work best to achieve a fluffy yet creamy mash without fussing with potato ricers and other gadgets.
– Australia: the cheap dirt-brushed potatoes sold everywhere (called Sebago) are ideal
– US: Russet
– UK: Maris PiperMilk – Our liquid to loosen the potato up to form mash. If making ahead, we add extra (see How To Make section for more).
Sour cream – I prefer using sour cream rather than cream in mashed potato casserole because the slight tang makes a nice counterpoint to all the other richness going on here (butter, cheese, bacon). It doesn’t make it sour in the least. It sort of adds creaminess into the mash without adding cloying richness. Does that makes sense??
Butter – Mash without butter is not mash. #strongopinions!
Cheese – I use a combination: Mozzarella for excellent melty-cheesy-stretchiness. Then Red Leicester for flavour (it’s savoury and a bit sharp, like aged cheddar), and to add a lovely orange hue to the mash surface. If you’re in the States, your orange cheddar is ideal here.
Otherwise, use any melting cheese you like (colby and Monterey Jack are other personal favourites). If you opt to use mozzarella as your main cheese, add a handful of parmesan for flavour because mozzarella alone is actually quite bland and lacks saltiness.
Shred your own – One of my five non-negotiable rules stated loudly on the first page of my cookbook is, “Always shred your own cheese”! Store-bought pre-shredded cheese is coated in anti-caking agents which prevent it from melting as well as freshly-grated. I use a standard box grater for the work.
Pack your cups of cheese – For consistency I prefer weight over volume to measure cheese. So I’ll weigh a hunk of cheese before grating it. But if you are using cup measures, be sure to pack your cups tightly when measuring the shredded cheese otherwise you will be short. Nobody wants to be short on cheese, ever!Bacon – For sprinkling over the casserole surface. Note: I always use streaky bacon. Because fat = flavour! Also, fatty bacon crisps up and colours better, without drying out.
Green onion – For a touch of oniony freshness and colour.
How to make Mashed Potato Casserole
No rocket science here. We make mash, spread it into a casserole dish, top with cheese, bacon and then stop here if making ahead. Finally, on the day of your do, bake it!
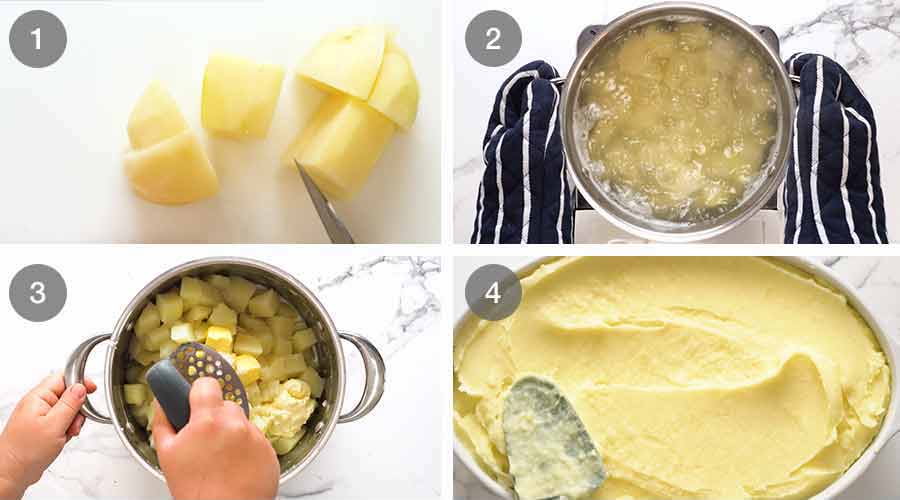
Cut potatoes – Peel and cut the potatoes into even sized pieces.
Boil until soft – Place the potatoes in cold salted water. Bring it up to a boil over high heat then reduce the heat down to medium high or medium so it is simmering rapidly. Cook for 15 minutes (no lid) or until the potatoes are very soft. They should fall apart when you jab it with a fork.
Mash – Drain the potatoes well in a colander and pour them back into the empty pot. Mash with the butter, milk, sour cream and salt.
MAKE-AHEAD ADJUSTMENT – If you are making this dish with the intention of serving it the next day, then add an extra 2/3 cup milk. The mash will seem too loose, but this is intentional. It is to factor in the fact that mashed potato firms up when refrigerated overnight. So once reheated, it has the same consistency as when it is freshly made!
Potato masher – I like to use a potato masher that is like a round disc with holes in it, as pictured above. It’s the fastest and most effective tool for a smooth mash without using a potato ricer (which I reserve just for Paris Mash, when seeking that next-level-luxe, ultra-smooth, 3-Michelin-restaurant result!).
Spread in a casserole dish.
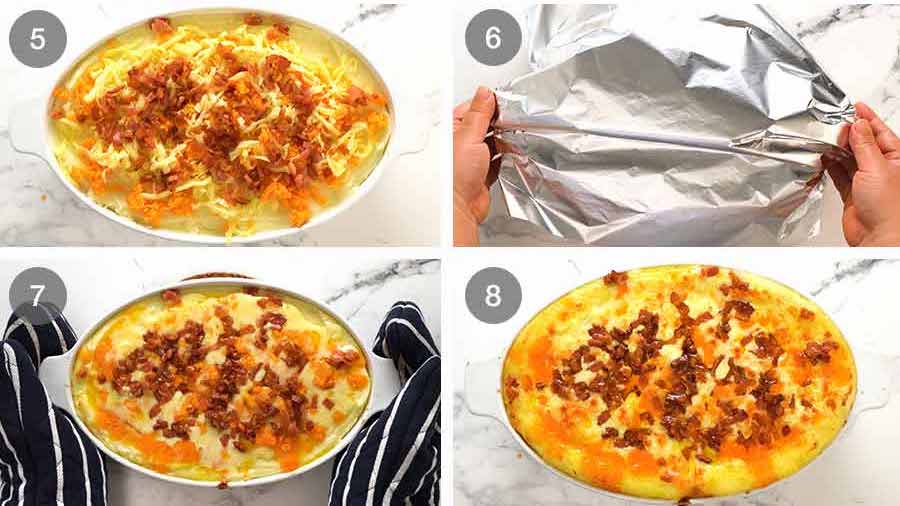
Top with the cheeses and bacon. (Yes you eagle-eyed spotters, I was short on bacon for these shots 😂)
For make ahead – At this stage, the assembled dish can be popped in the fridge for up to 3 days. Just take it out of the fridge 2 hours ahead so it has time to de-chill. This will make it reheat faster and more evenly in the oven.Cover with foil then bake for 20 minutes at 200°C / 400°F (180°C fan), if freshly made. Add an extra 15 minutes if you’re reheating a make-ahead casserole you prepared the day before.
Uncover – Remove from the oven and bake for a further 10 minutes until bubbly and golden.
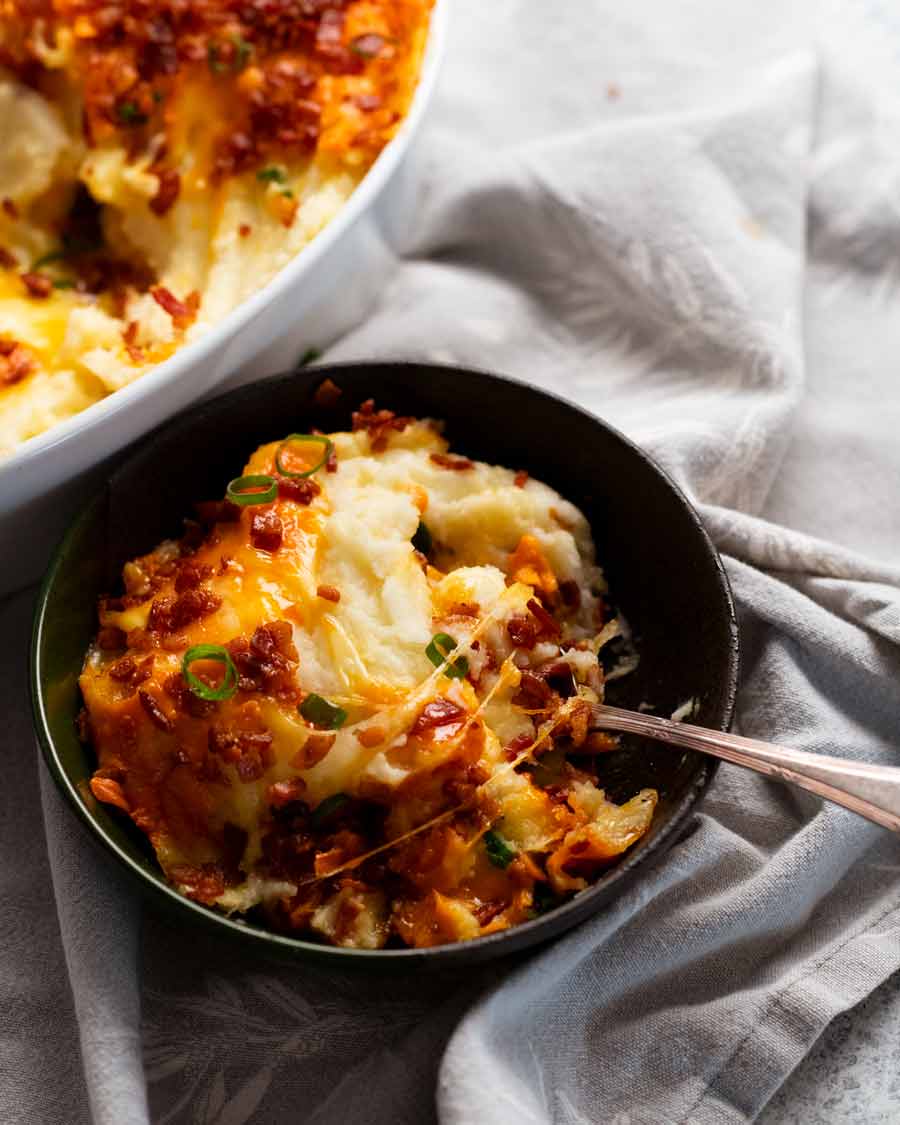
Voila, ready to serve! Crack through that molten cheese surface and marvel at how creamy the mash underneath is!
How to serve Mashed Potato Casserole
This is a dish designed to be a side. (I know we can all picture it moonlighting as a standalone dish after a big night on the turps or a shocking day at work, but it’s meant to take the place of traditional plain mashed potato, I swear.) Because actually, though this has cheese and bacon on it, underneath is all creamy plain mashed potato.
So place it on the table or on the buffet alongside the mains and let everybody dig in and help themselves! Try to get in first though. Because you know full well the first in line are going to take more than their fair share of that cheese bacon topping – and we know full well we also cannot blame them….. – Nagi x
Watch how to make it

Mashed Potato Casserole
Ingredients
- 1.75kg/ 3.5 lb potatoes (Sebago (Aus), Russet (US), Maris Piper / King Edwards (UK)(Note 1)
- 1 tbsp cooking / kosher salt , for cooking potatoes
- 2/3 cup milk (preferably full fat/whole milk but lite ok)
- 2/3 cup EXTRA milk , for make-ahead option only (Note 2)
- 75g / 5 tbsp unsalted butter , cut into 1cm / 1/2″ cubes
- 1/2 cup sour cream (or yogurt), full fat best
- 1 tsp cooking/kosher salt , or to taste
- 1 1/2 cups (tightly packed) mozzarella , freshly shredded (Note 3)
- 1 cup (tightly packed) Red Leicester, cheddar or other flavoured cheese(Note 3)
- 200g / 6 oz bacon (streaky), chopped (Note 4)
- 1/4 cup green onion , finely sliced
Instructions
Cook bacon:
- Place bacon in a cold non-stick pan over medium heat (no oil). As the pan heats up the bacon fat will melt. Once you see some melted bacon fat, turn the heat up to medium high and stir for 3 minute or until golden.
- Drain on paper towels.
Mash:
- Potatoes – Peel then cut into 3cm /1" chunks.
- Boil – Place in a large pot and cover with water so it’s 10cm / 4” above the potatoes. Add 1 tablespoon salt. Bring to a boil over high heat then reduce heat so it’s simmering rapidly. Cook 15 minutes or until potatoes are very soft (jab with fork to test, they should fall apart).
- Drain well, then return into pot. Leave for 1 minute, shaking pot every now and then, to encourage evaporation of water.
- Mash – Add milk (including EXTRA milk if making-ahead), butter, sour cream and 1 tsp salt. Mash until smooth. (Do not use food processor, blender or beater, makes it gluey!)
Make-ahead directions:
- Fridge – Allow to fully cool on the counter then cover tightly with cling wrap and refrigerate.
- Dechill – Take out onto counter 2 hours prior to reheating.
Assemble:
- Preheat oven to 200°C / 400°F (180°C fan).
- Spread the potato in a 2 litre / 2 quart baking dish (Note 5). Smooth the surface.
- Sprinkle – Sprinkle potato with the cheeses, then bacon.
- Bake covered – Cover loosely with foil. Bake for 20 minutes covered (if freshly made) or 35 minutes (make-ahead option).
- Bake uncovered – Remove foil then bake a further 10 minutes until the cheese is bubbly and golden.
- Serve – Sprinkle with green onion then serve! It stays warm for a good 20 minutes thanks to that protective layer of cheese. Oh, the powers of cheese!
Notes
5. Dish – A 2 litre / 2 quart baking dish is the ideal size, it will be filled to the brim. A 23 x 33cm / 9 x 13″ dish (3L/3 qt) works fine too – will be filled about 2/3 of the way up.
6. Make-head – Keeps for 3 days in the fridge, uncooked, fully assembled except for the green onion. Be sure to take it out of the fridge 2 hours prior to reheating to take the chill out of the it so it reheats more evenly.
Freezing – A former team member reported excellent results freezing the assembled dish, thawing then reheating. But I never tried it myself – I will come back and update if (no, when!) I do.
Leftovers will keep for 3 days, but the mash won’t be as creamy. Consider using it to make mashed potato cakes instead!
7. Nutrition per serving assuming 12 servings, as part of a larger banquet.Nutrition
Life of Dozer
People have been wondering how Jeff is, our friendly local who lives at my local dog park (Bayview, in Sydney’s northern beaches), an official RecipeTin taste tester. He is doing well! This is how I start every weekend – coffee for Jeff, a ham and cheese croissant for his dog Cubby (sometimes Jeff gets a bite) and Dozer, waiting for scraps – until he gives up and gallops down to the beach to join his mates in the water!

Photo captured by Kevin of Unleashed Northern Beaches, a local photographer. Wonderful gift idea: voucher for a private pooch photo shoot!
The post Make-ahead Mashed Potato Casserole appeared first on RecipeTin Eats.
]]> Finally, here it is – The perfect french fries recipe! Based on a ground-breaking method from the legendary Kenji López-Alt’s The Food Lab, these hot chips are so crispy they stay that way even after they’ve gone cold. It’s rare to find fries this good even at up-market bistros! No false promises – these french... Get the Recipe
The post Perfect Crispy French fries appeared first on RecipeTin Eats.
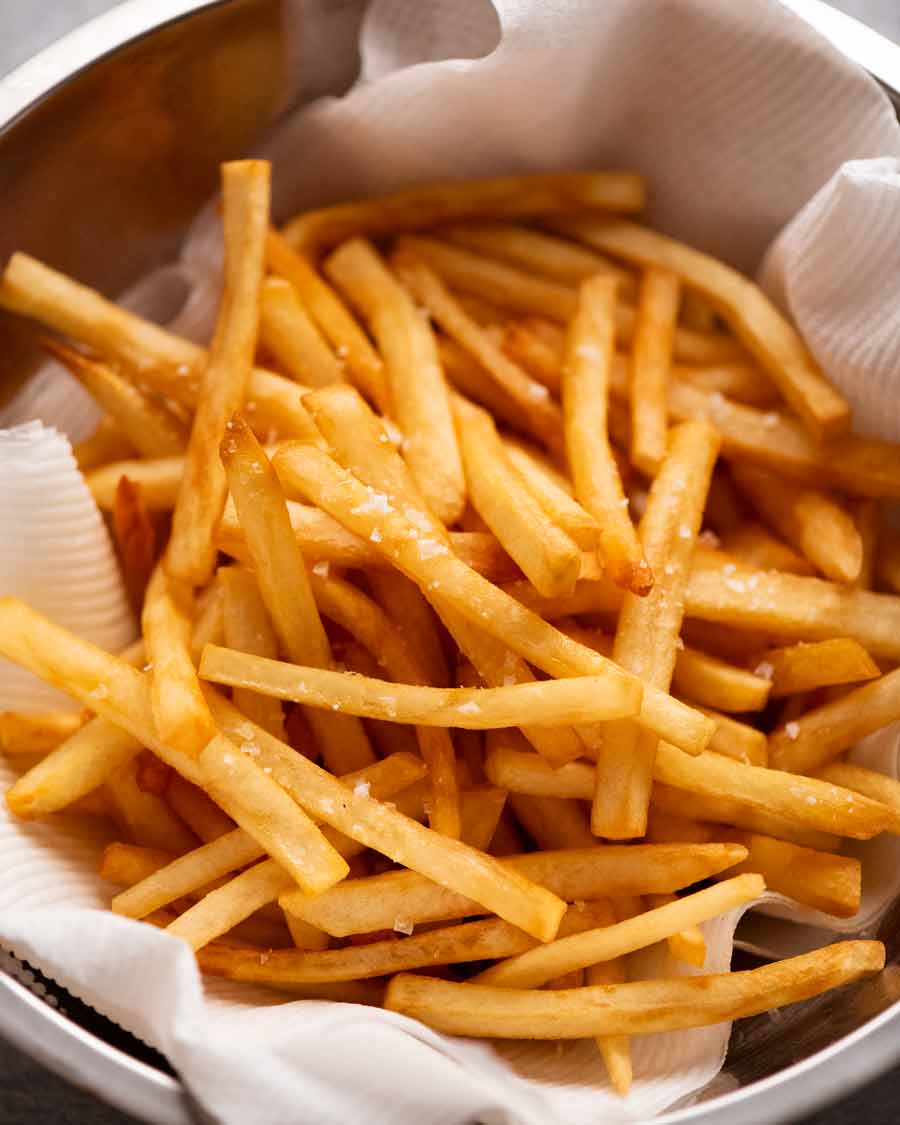
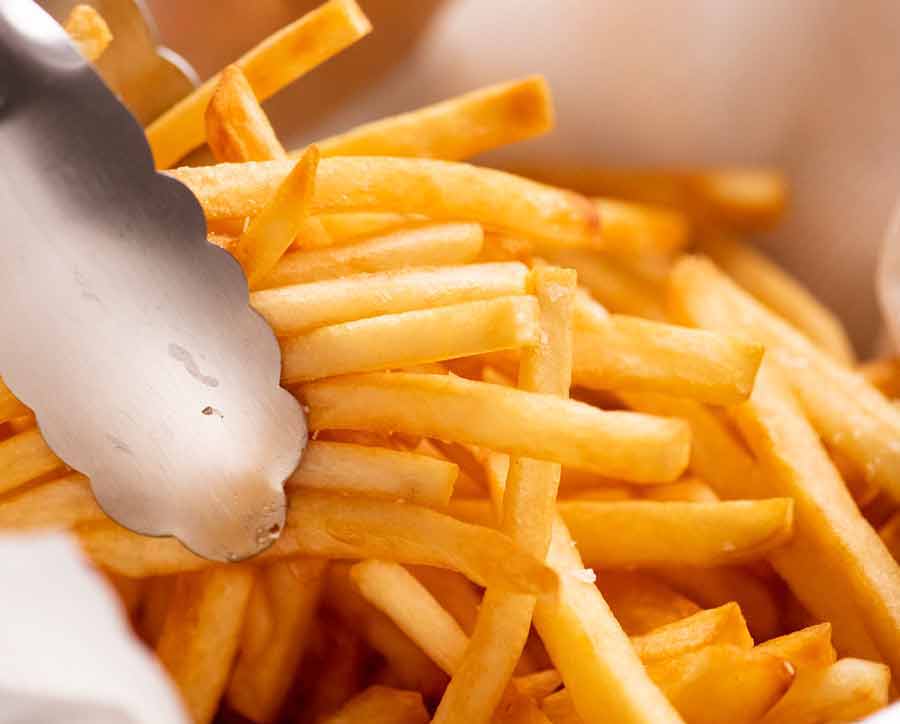
]]>Finally, here it is – The perfect french fries recipe! Based on a ground-breaking method from the legendary Kenji López-Alt’s The Food Lab, these hot chips are so crispy they stay that way even after they’ve gone cold. It’s rare to find fries this good even at up-market bistros!
No false promises – these french fries really stay crisp!
There’s nothing more deflating than going to all the effort of making your own fries from scratch, only to find they start losing crispiness before they even hit the table. Which is what happens if you use the standard way of cooking homemade fries – soaking in water followed by a double fry.
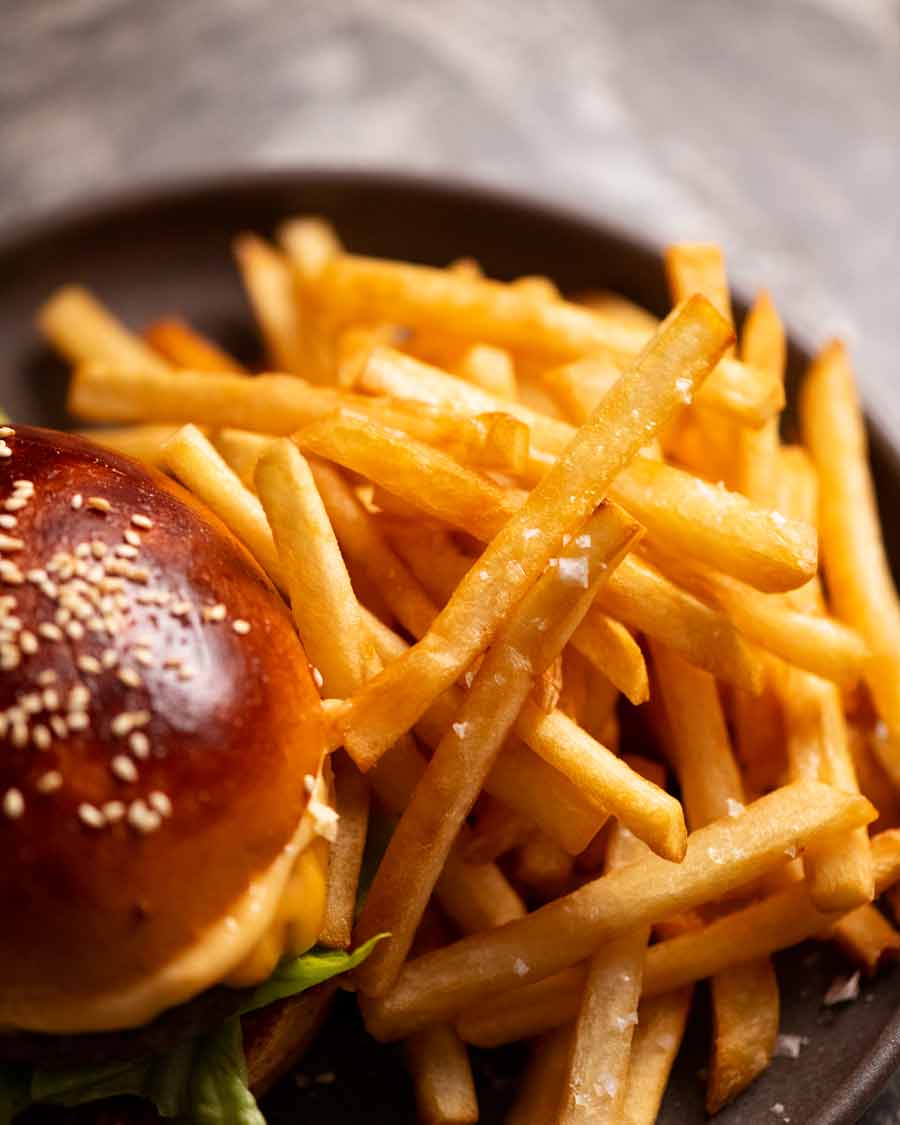
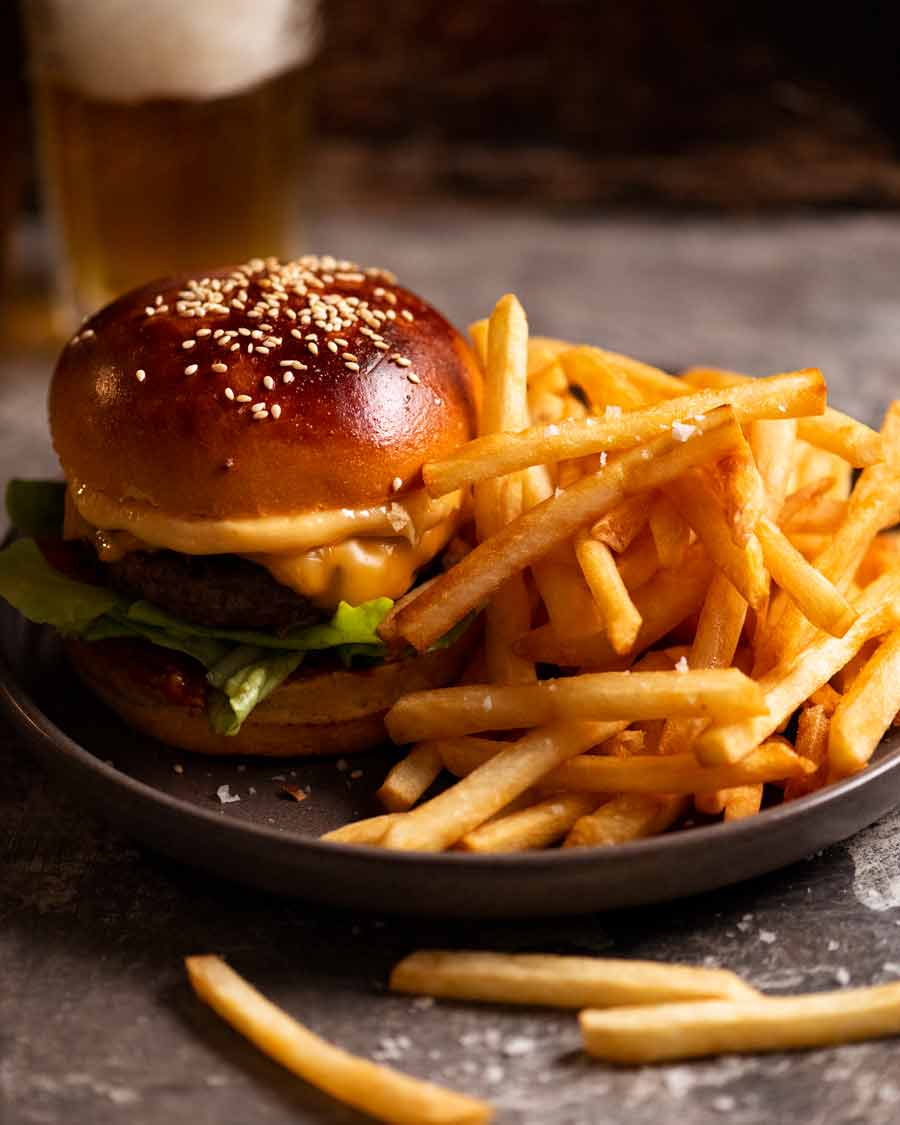
Well, it’s taken me years but with the help of the impressively thorough french fry research documented in Kenji López-Alt’s The Food Lab, Chef JB and I have finally nailed down the recipe for the perfect homemade french fries. Fluffy on the inside, crispy on the outside – and stays crispy well beyond the time it takes to eat the fries and, say, a big juicy Cheeseburger. The ideal french fry!
Really, the crispiness endurance is insane. These french fries are still crispy even after they’ve gone cold!
Heads up – this post is quite long because I cover the “why” and also want to arm French fry first-timers with the confidence to make this recipe. So if you’re a pro, skip to the recipe , recipe video or better yet, Dozer!
French fries recipe overview
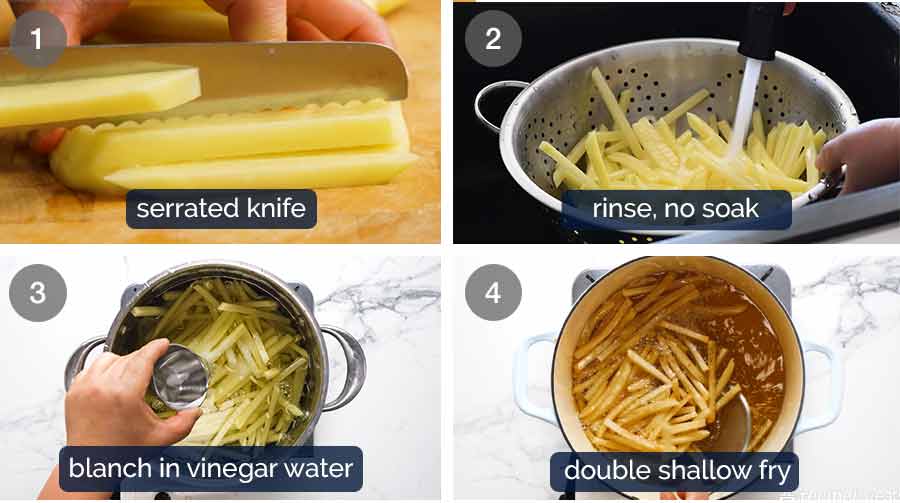
Cut fries with a serrated knife (secret crispiness tip #1)
No soaking, just rinse
Gently simmer 10 minutes in vinegar water (secret crispiness tip #2! And no, you can’t taste vinegar)
Shallow-fry twice
Skip to the Recipe | Video | Dozer
Background: Rethinking the french fry method
The conventional way of making french fries involves firstly soaking the raw fries in water followed by a double fry. This was (still is?) the way students were taught at cookery school and is still the default method used by many restaurants and pubs.
This method will yield crispy fries when they are piping hot, straight out of the fryer. But the first problem is that within minutes, before they even hit the table, they start to lose crispiness. I also found this classical method is heavily dependent on the potato. You get varying levels of crispiness depending on the potato quality and even season, as the starch / sugar levels of potatoes vary throughout the year. This is true even if you use the ideal variety of potato.
Well, this won’t-stay-crispy problem and unpredictability just won’t cut it anymore. So, old school method ditched. It’s time to look at modern methods with better and more reliable results!
Actually it’s not just me. Times have changed generally and restaurants around the world use all sorts of methods these days in pursuit of the ultimate crispy French fries. Some go to extreme lengths like triple or quadruple frying, overnight resting, or frying in pure beef drippings.
But we don’t need to dabble in any such tedious restaurant kitchen shenanigans. This method I’m sharing today is one that any home cook can do. It is adapted from Kenji Lopez-Alt’s french fries recipe from his iconic cookbook The Food Lab. It’s not particularly technical. But you do need to be comfortable frying in oil. That said, in this recipe we only shallow fry and not deep fry – always a bonus!
What you need
Here’s all you need to make your crispy french fry dreams a reality. Yep, this is all!
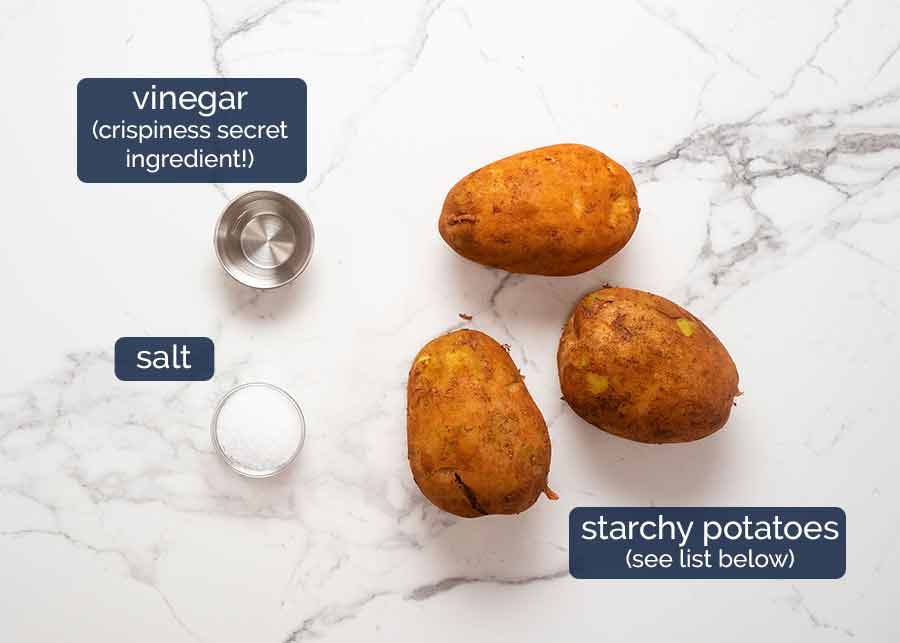
Potato – The type is important. Starchy, floury potatoes are the potatoes you need for crispy fries.
Australia: Sebago (the common dirty brushed potatoes you see everywhere)
US: Russet (also known as Idaho potatoes)
UK: Maris Piper or King Edward.
Vinegar – For simmering the potatoes, it is one secret weapon for perfect fries. There is no trace of vinegar flavour once cooked. See Step 4 below for the why.
Salt – For seasoning the water so the potatoes are seasoned all the way through.
Oil – For frying. I use vegetable or canola oil which are neutrally-flavoured oils. Re-using the oil: The oil can be re-used 3 to 4 times, or more. It won’t even need to be strained. Just cool, pour into jars and keep in the pantry, and have a browse in this recipe collection to decide what to make next!
How to make stay-crispy French fries
To get ahead or cook big batches, make the fries up to the end of Fry #1, cool then freeze until you’re ready to cook. Then do Fry #2 from frozen. Handy!
1. Cut fries
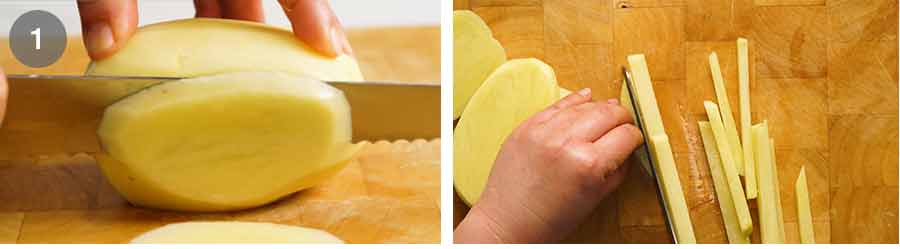
First, we have to cut our fries. A neat little crispy fries trick you may not have seen before: use a serrated knife to cut the potatoes. Though not visible to the eye, it makes the surface rougher therefore creating more surface area to crisp up = crispier fries!
What size to cut the fries: 6 mm / 1/4″ batons is the ideal size for optimum crispiness and fluffy insides. Thicker = less crispy. Thinner = not enough fluffiness inside.
How to slice: Cut a whole potato into 6 mm / 1/4″ thick slices. Stack 2 or 3 slices then cut into 6 mm / 1/4″ thick batons.
2. Keep in water to prevent browning
Keep cut fries in water to prevent them from browning as you continue cutting. No soaking time is actually required. A simple rinse followed by simmering the potatoes in vinegar water takes care of this for us.
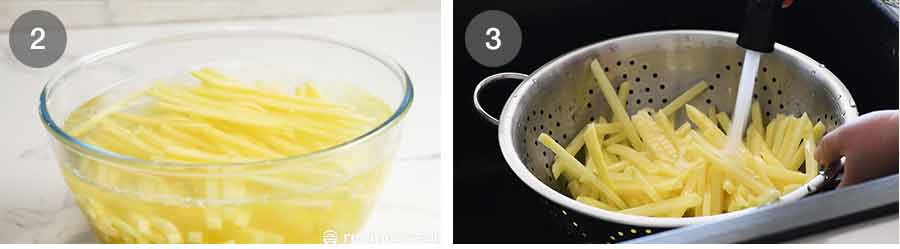
3. Rinse
Once all the fries are cut, place in a colander then rinse under tap water for 15 – 20 seconds. This is the first step to remove excess sugars from the surface of the potatoes (more on the “why” of this below, but in short it’s to aid crispiness – of course!). Meanwhile, the insides remain untouched by water so they’ll cook up nice and fluffy.
4. Cook in vinegar water = superior crispiness
Once the potatoes are rinsed, place them in a pot with cold tap water, vinegar and salt. Bring to a boil on high heat then immediately turn down to low so the surface is barely rippling. Cook for 10 minutes. See below for the “why” for this step!

What is the purpose of cooking in vinegar water?
This is the really clever part, a no-extra-effort step discovered by Kenji Lopez-Alt from Serious Eats which makes all the difference. There’s a lot of technical science behind the why, but in a nutshell:
Simmering the fries in water washes away the excess sugars that can cause the fries to brown too much before they have a chance to properly crisp up when frying
The water also activates the starches in the potato. Starch, when fried, is what creates that crispy surface we want!
Meanwhile adding acid (the vinegar) to the water prevents the potatoes from disintegrating for the 10 minute simmering time required. (Like how tart Granny Smith apples don’t turn into baby food mush when cooked whereas sweet red apples do.)
In case you are wondering, yes I tried variations like no-vinegar, shorter and longer cooking times, rapid boil versus gentle simmering. The vinegar water simmering method for 10 minutes works. Don’t skip it or shortcut it!
5. Drain and dry
Use a spider or large slotted spoon to remove the potatoes from the water into a colander. Then carefully spread the potatoes out on two tea towel-lined trays to steam dry for 5 minutes. No need to pat them dry, the residual heat will do the job for us.

6. Cooking vessel and oil
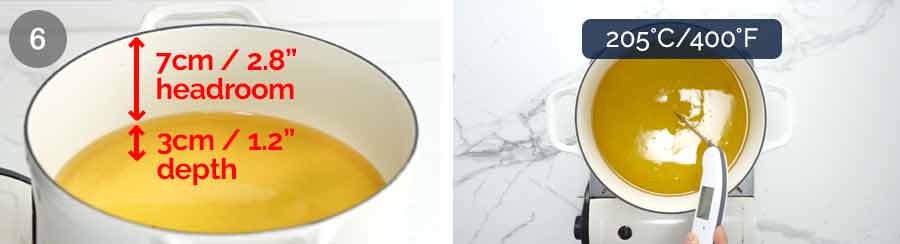
Cooking vessel – Use a heavy-based, large pot that is at least 10 cm / 4″ deep. We need:
Oil depth – 3 cm / 1.2″ of oil (1 litre/quart for the pictured 24cm / 10″ pot). It’s barely deep-frying, it’s more like shallow-frying!
Safety headroom – 7 cm / 2.8″ headroom above the surface of the oil for safety purposes as the oil bubbles up quite a lot when we fry. ⚠️ THIS IS IMPORTANT! Oil overflow is a real risk if you do not do this. It’s scary and dangerous, as I found out first hand! Learn from my mistakes. ☺️
Oil temperature – Preheat the oil to 205°C/400°F. Use a thermometer to monitor the temperature. I use a Thermapen, see my Essential Kitchenwares post for more details.
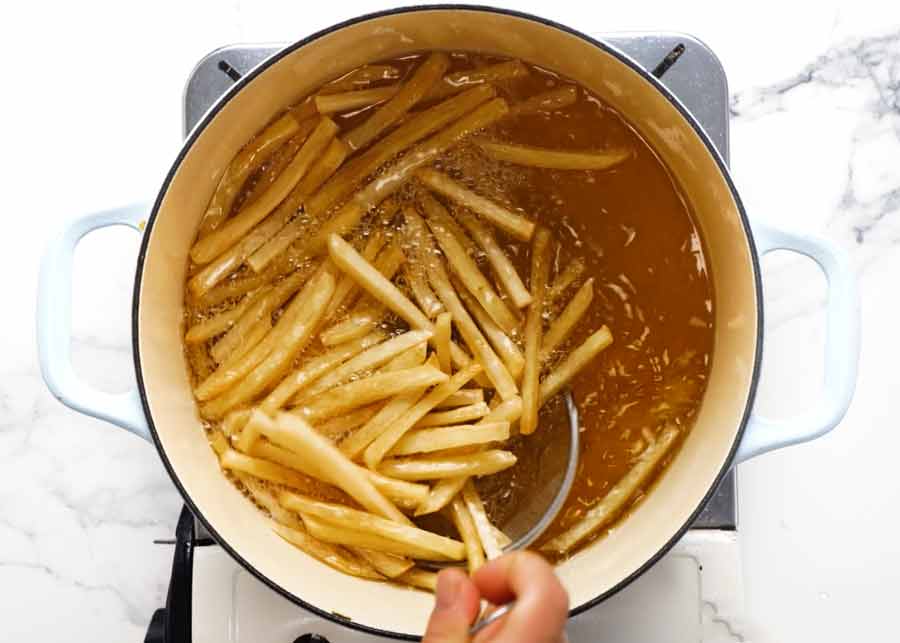
7. Fry #1
⚠️ IMPORTANT: For safety reasons, please follow the directions to pause 10 seconds between adding batches of more potato into the oil! As you can see in the photos below, the oil bubbles up quite high and vigorously as soon as you add some potato. If you add all the potato in one go, the oil will bubble up even higher and faster, which is risky. I’m speaking from first hand experience here!
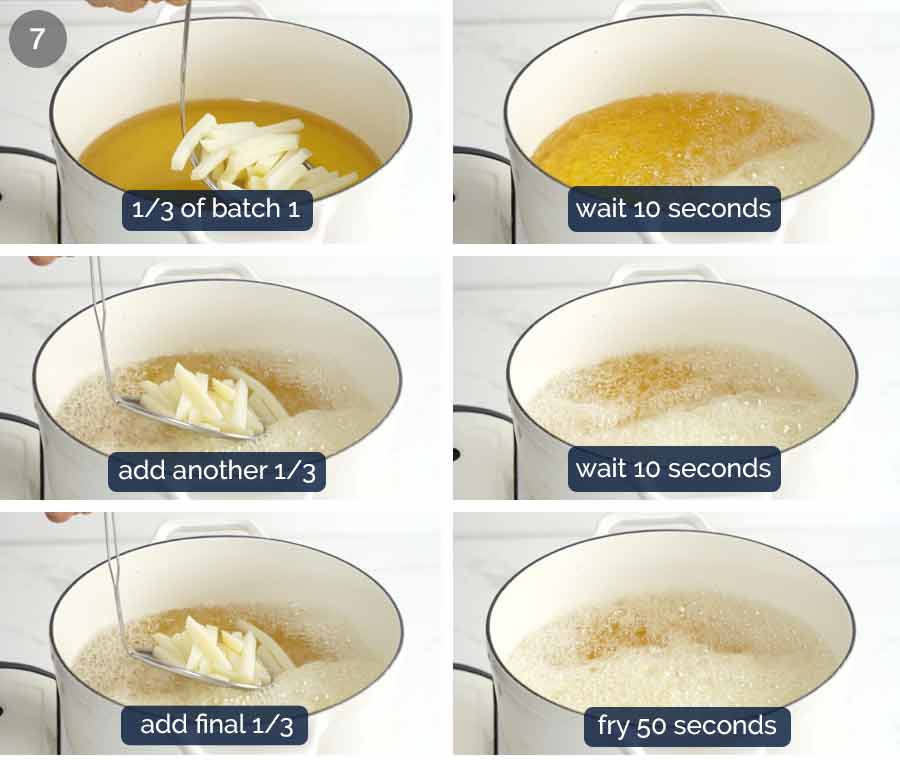
Cook the fries in 3 batches – Separate the cooked potatoes into 3 even piles (batches). We will be doing Fry #1 in three batches in a 24 cm / 10″ pot. If your pot is larger or smaller, adjust the number of batches accordingly so all the fries in one batch can float in a single layer in the oil.
Add 1/3 of Batch #1 – Using a spider or slotted spoon, carefully add 1/3 of the first batch into the oil.
⚠️ WAIT 10 seconds then add another 1/3 of batch #1. Pausing before adding more fries is important to ensure the oil doesn’t bubble up too high. Use this time to load up, ready to add more fries.
Repeat – Wait 10 seconds, then add the final 1/3 of Batch #1.
Fry 50 seconds – Once all the fries are in, start the timer and fry for 50 seconds, moving the fries around once or twice.
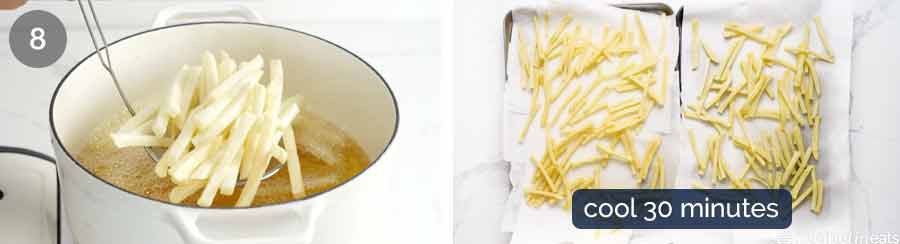
8. Cool 30 minutes
Remove the fries from the oil using a slotted spoon and spread onto a paper towel-lined tray in a single layer. They will be pale and not yet crispy.
Carry out Fry #1 for the remaining two batches using the same staggered approach (ie. 1/3 + 1/3 + 1/3) within each batch. Ensure the oil is back at 205°C/400°F before starting each batch. Then cool all the fries for 30 minutes on some paper towel-lined trays.
9. Fry #2 – crisp them up!
After cooling the fries, heat the oil to 205°C/400°F again. Now fry half all the french fries for 4 minutes until they are a gorgeous golden colour and wonderfully crispy.
Remove with a slotted spoon into a large paper towel-lined bowl then repeat with the remaining fries.
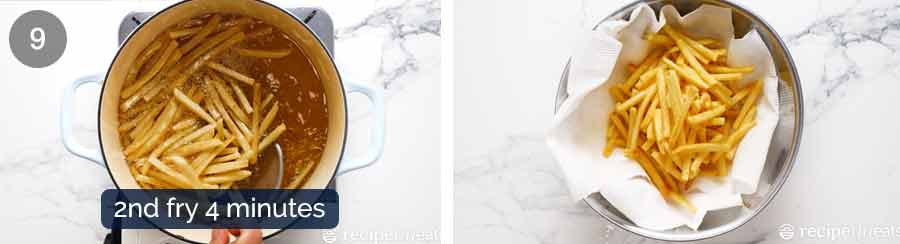
Why a bowl instead of tray to hold the fries? A bowl keeps the cooked fries warmer whilst still allowing for oil drainage. This way the first batch you cook will still be hot by the time you finish cooking the second batch. The bowl also doubles as a suitable tossing vessel once sprinkled with your favourite seasoning, as you’ll see later!
How to cook lots of fries and serve them all hot? Completed fries can be flash-fried for an extra 30 seconds to 1 minute to reheat. This way you can serve up all the fries piping hot!
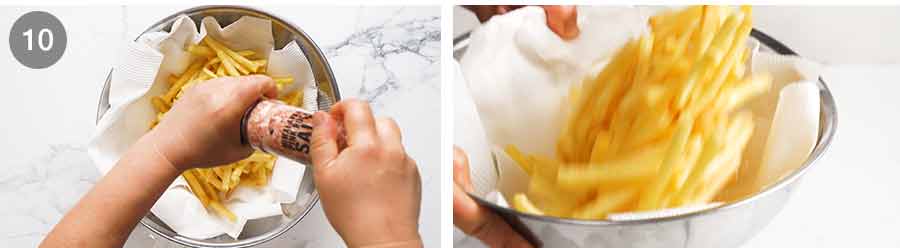
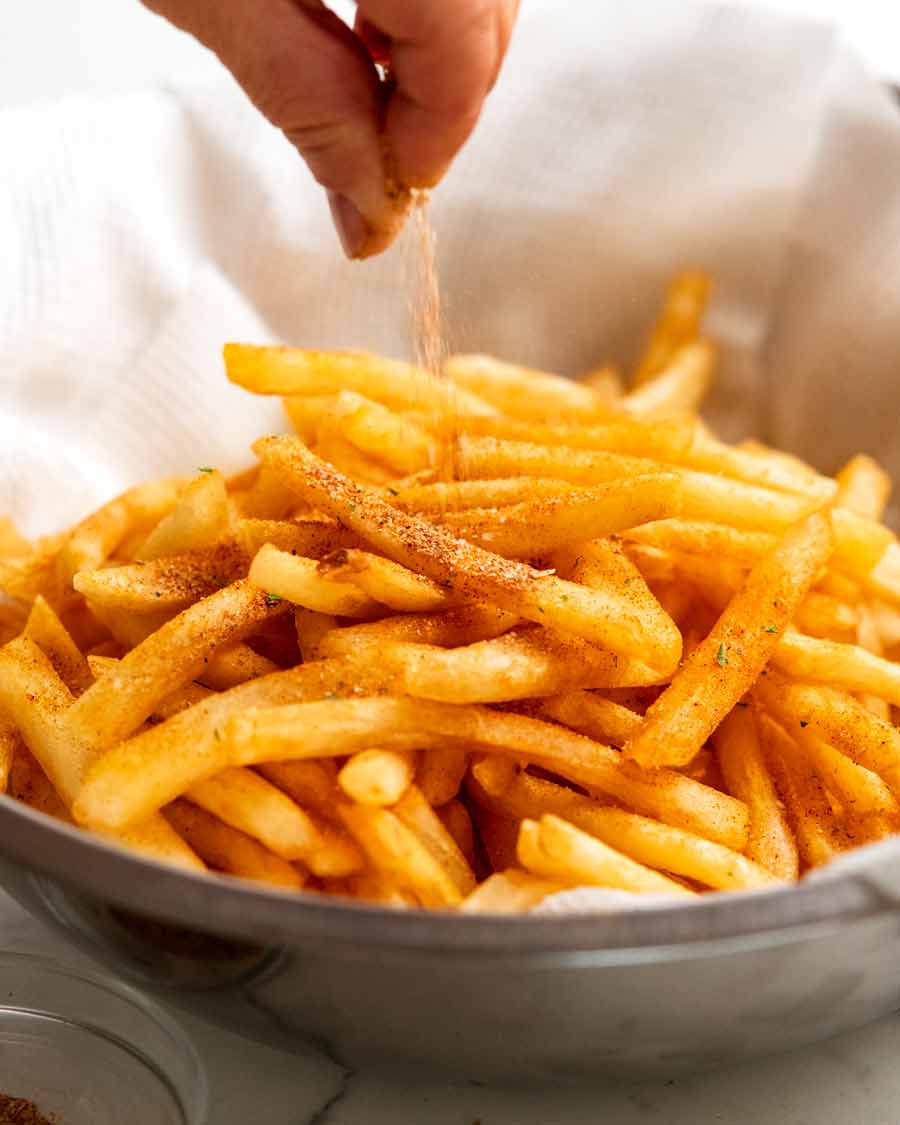
10. Seasoning!
Now that your fries are done, sprinkle with salt or your favourite fries seasoning while hot so the salt sticks. Toss, then serve! Remember, these fries will stay crispy for more than 15 minutes, though of course they are best consumed piping hot!
Tip: Remember these French fries are also pre-salted inside because we blanched them in salted water. So don’t go too crazy with the seasoning salt. Sprinkle judiciously, taste (I know, I hate to ask that of you), and then sprinkle more if you think it needs it.
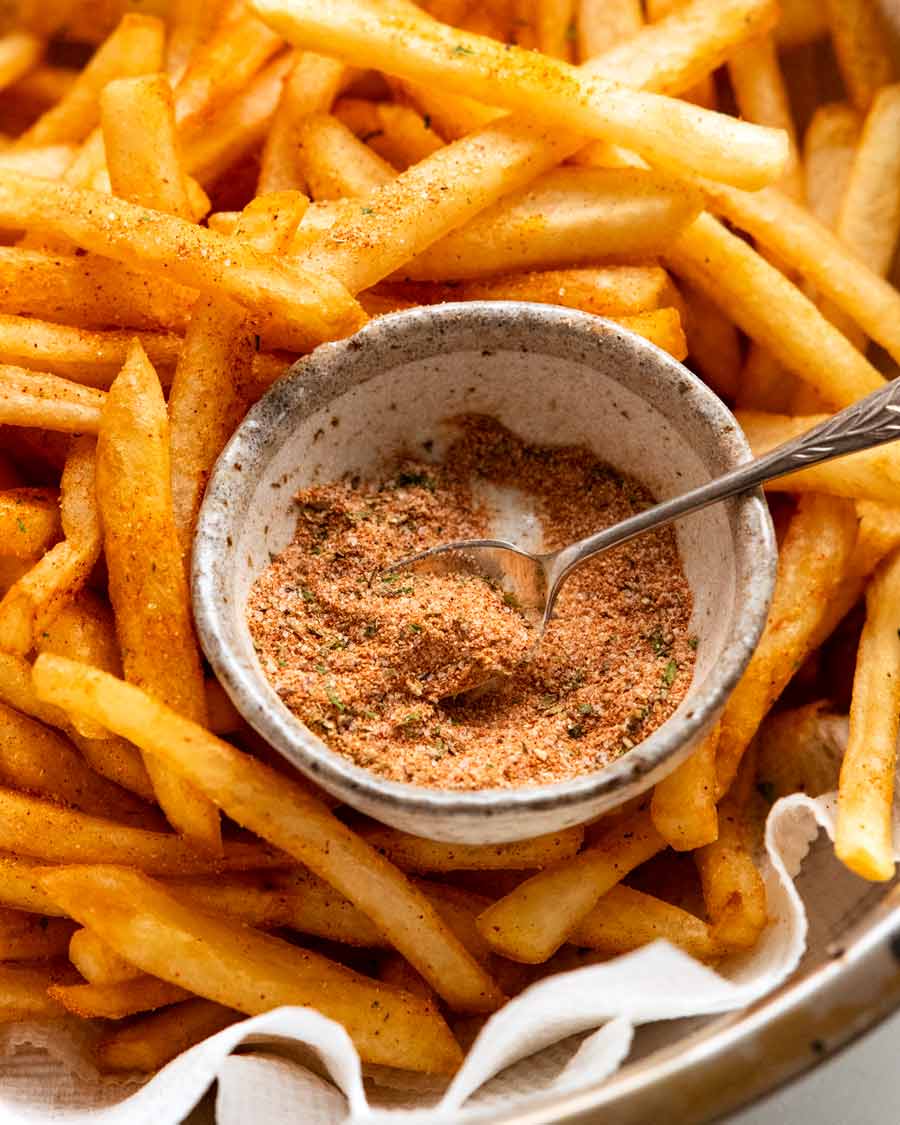
Seasoning options:
Salt – table salt or sea salt flakes. Larger-grained cooking or kosher salt doesn’t stick as well.
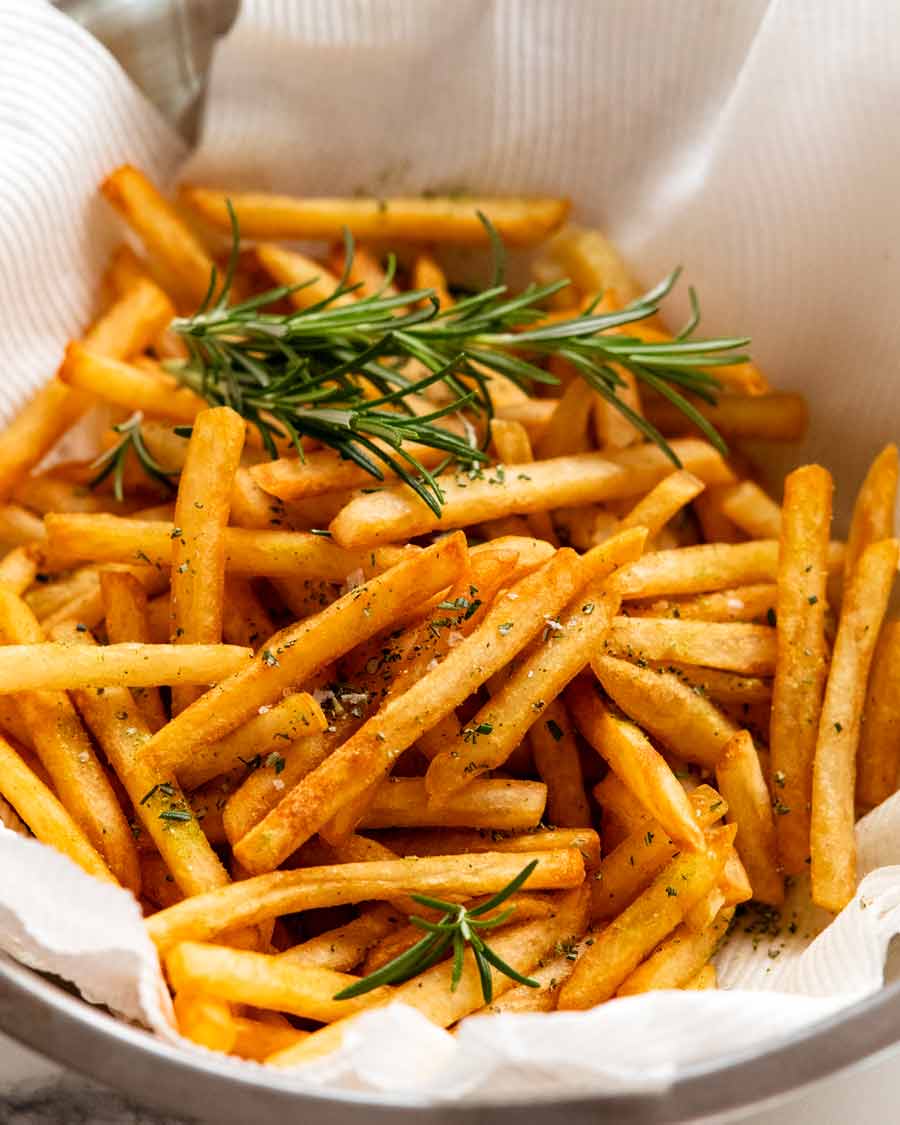
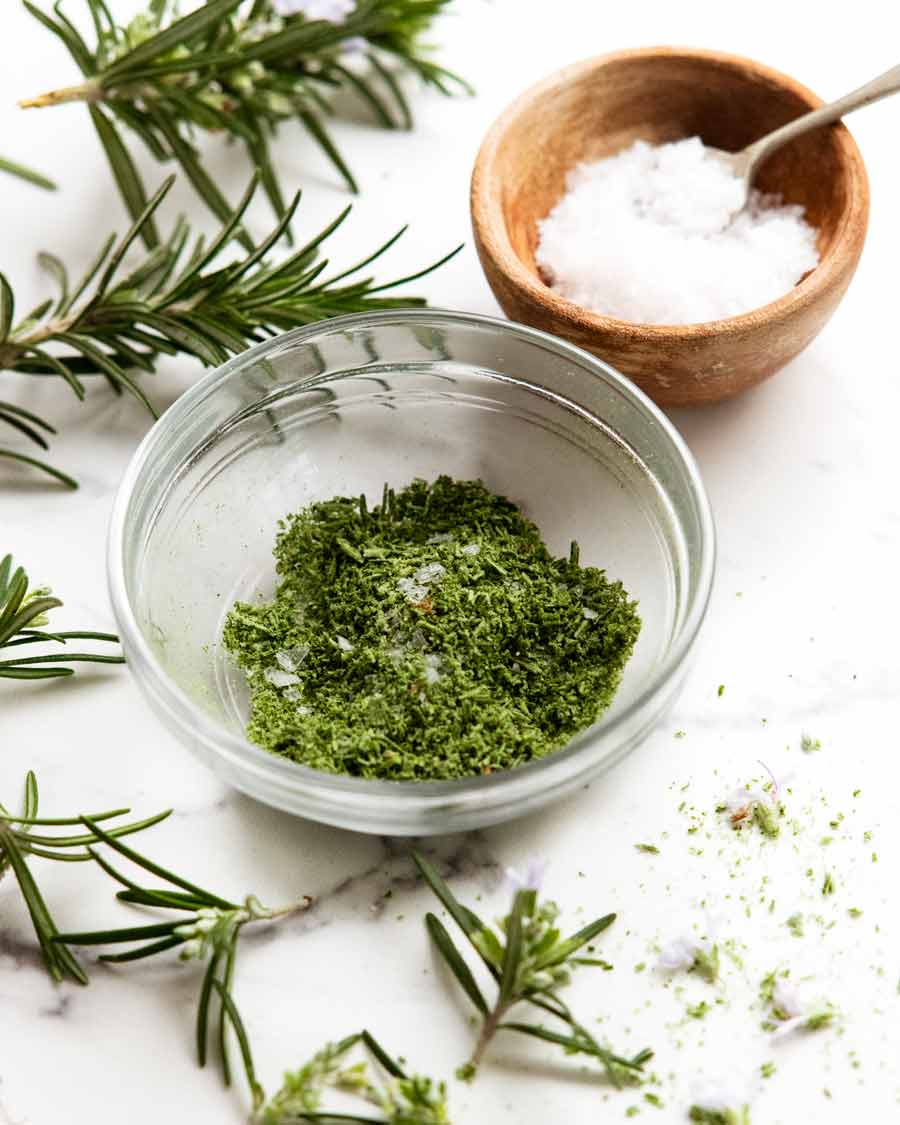
Rosemary salt (recipe) – made with fresh rosemary. My favourite!
Fries seasoning (recipe) – a savoury fries seasoning blend. Addictive!
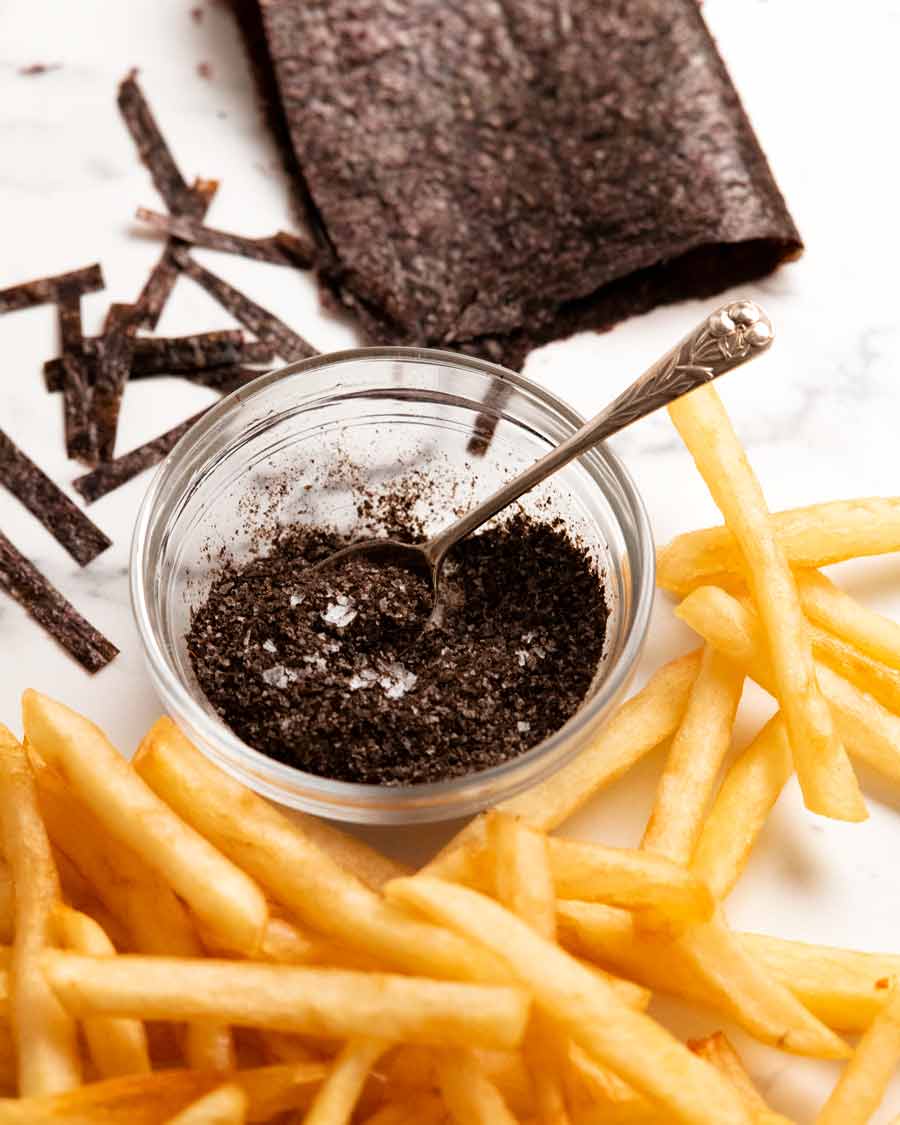
Nori seasoning (coming soon) – made with finely ground nori (dried seaweed). Très trendy!
Phew!
I know that’s a lot of information to digest for just some bits of fried potato 😂. But for this recipe, I thought some people might find the why behind certain steps interesting (we tested these fries a LOT!!!). Also, I want to give everyone the confidence to try this even if you aren’t experienced frying in oil. Remember, these chips are shallow-fried not deep-fried! Shallow-frying is easier, cleaner, safer and less resource-intensive than deep-frying – all good reasons why you should give this a go. ☺️
Truly worth making
I know frying is something that many people are not so comfortable with, or at least gives pause to wonder if it’s worth all the effort.
These fries? Hand on heart, they are worth the effort! It is rare to find fries this good even at really up-market bistros and restaurants, never mind the money you’ll shell out for them. Maccas fries (McDonalds, to you non-Aussies!) are incomparable – they’re dry and tasteless compared to homemade. Believe me – my memory is still fresh from when I ate them side by side as a test yesterday! 😂
I really hope you try these one day, so you get to experience the rare pleasure of truly amazing french fries, cooked fresh in your own home. And if you do, share your thoughts in the comments below. I’d love to know what you think – especially all you french fry connoisseurs!! – Nagi x
Serve with…


Watch how to make it

Perfect Crispy French Fries
Ingredients
- 1 kg / 2 lb (3 – 4) floury potatoes (Note 1, Aus: Sebago/dirt aka brushed, US: Russet/Idaho, UK: Maris Piper, King Edward)
- 2 tbsp white vinegar (Note 2)
- 1 tbsp cooking salt / kosher salt (Note 3)
- 1 litre/quart canola/vegetable oil
Seasoning (choose):
- Salt – table salt or sea salt flakes
- Shaker fries seasoning
- Rosemary salt
- Nori salt (coming soon)
Instructions
- Cut: Peel the potatoes. Cut into 6 mm / 1/4" French fries using a serrated knife. (Note 4)
- Keep cut fries submerged in a bowl of water to prevent them from going brown while you cut the remainder. (No need for actual soaking beyond this.)
- Rinse: Transfer potatoes to a colander and rinse under tap water for 15 – 20 seconds.
- Simmer: Place fries in a large pot with 2 litres/quarts of cold tap water, vinegar and salt. Bring to a boil over high heat then immediately reduce stove to low so the surface is rippling gently (Note 5), not big bubbles. Cook for 10 minutes then carefully remove using a slotted spoon into a colander (do not tip into colander, fries will break).
- Dry 5 min: Spread the fries on 2 tea towel lined trays. Leave to steam dry for 5 minutes.
- Pot: Pour 3 cm / 1.2" of oil in a pot that is at least 10cm/4" high (⚠️for safety, need at least 7 cm / 3" from oil surface to rim of pot, Note 6)
- Separate the fries into 3 Batches (for cooking).
Fry #1
- Heat oil to 205°C/400°F over medium high heat.
- ⚠️10 sec pause (Note 7): Lower 1/3 of Batch 1 fries into the oil using a slotted spoon. WAIT 10 seconds, add another 1/3 of the fries, wait 10 seconds, then add the remaining Batch 1 fries.
- 50 sec fry: Fry for 50 seconds, moving them around once or twice. Then remove with a slotted spoon onto 2 paper towel lined trays, spread out in a single layer. The fries will still be white and floppy.
- Repeat Fry #1 with Batches 2 and 3, ensuring the oil is back at 205°C/400°F before cooking.
Fry #2
- 30 min cool: Leaves fries to cool for 30 minutes.
- Line a large bowl with paper towels – for draining and tossing.
- Fry #2: Heat oil to 205°C/400°F. Fry half the French fries for 4 minutes, moving them around twice, or until golden brown and crispy. Drain in the lined bowl, then repeat with remaining fries.
Season & serve!
- Sprinkle fries with salt or seasoning or choice. (Note 8) Toss and serve!
- Fries will stay crispy even once cool. See note for large batch cooking tip.
Notes
Life of Dozer
Behind every door, there’s a Dozer….


The post Perfect Crispy French fries appeared first on RecipeTin Eats.
]]> These adorable Potato Gratin Stacks are the mini version of Potatoes au Gratin (Dauphinoise). Layers of thinly sliced potato baked in a muffin tin with cream, cheese, garlic and thyme, the best bit are the crusty caramelised cheesy edges! Serve as a potato side for dinner. Breakfast with eggs. Party food bites. So many possibilities!... Get the Recipe
The post Cheesy Mini Potato Gratin Stacks (Muffin Tin) appeared first on RecipeTin Eats.
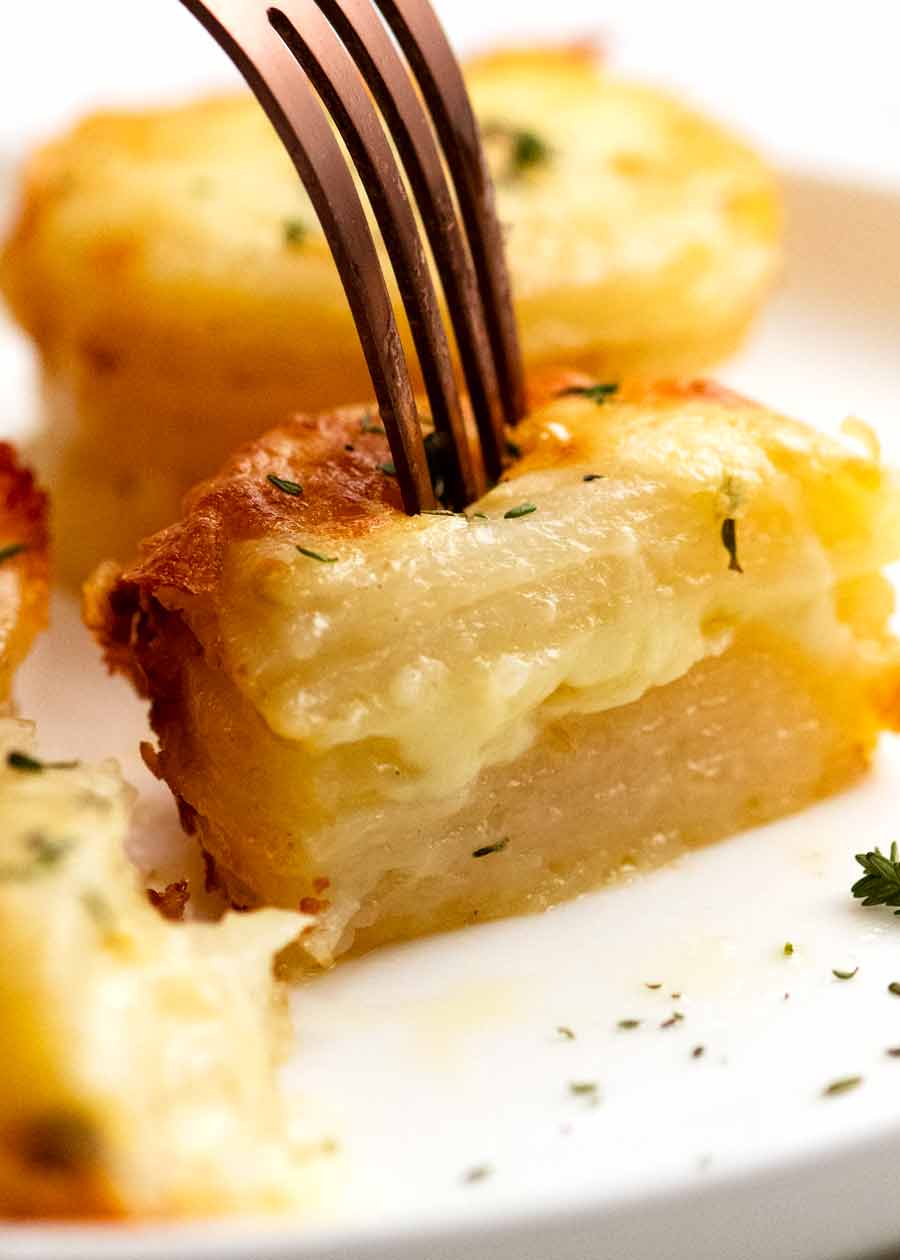
]]>These adorable Potato Gratin Stacks are the mini version of Potatoes au Gratin (Dauphinoise). Layers of thinly sliced potato baked in a muffin tin with cream, cheese, garlic and thyme, the best bit are the crusty caramelised cheesy edges!
Serve as a potato side for dinner. Breakfast with eggs. Party food bites. So many possibilities!
Mini Potato Gratin Stacks (Dauphinoise)
All you need to know is that these Mini Potato Gratin Stacks are cheesy, creamy and ridiculously irresistible. I mean, let’s be blunt. Potatoes + cheese + cream + garlic + butter. BAM! That’s a home run right there!
Actually, they’re a mini version of French Potato Gratin / Dauphinoise. I’ve said it before and I’ll say it again – everything is better in mini form, not just because it’s cute. But because you get the whole thing to yourself.
Right? 🤷🏻♀️
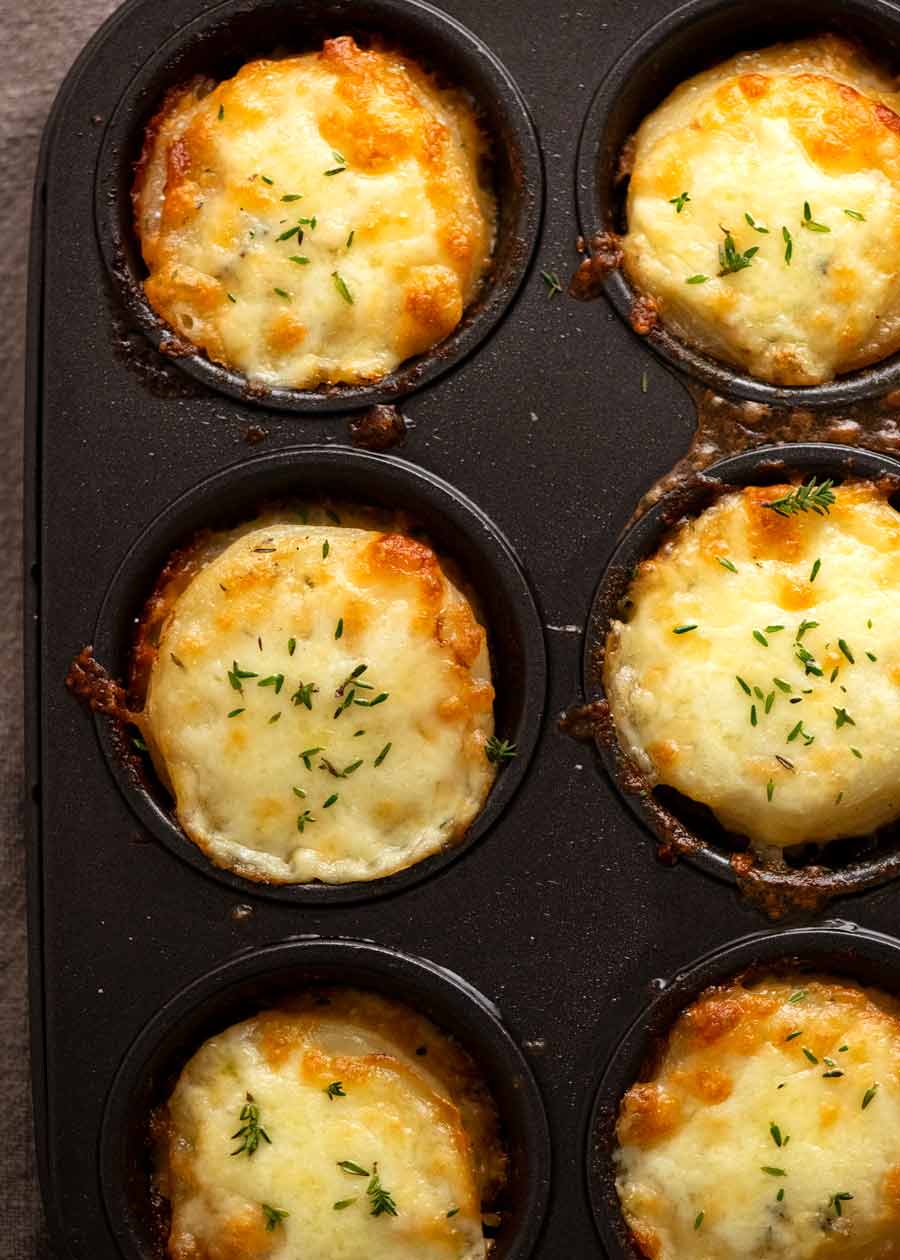

Besides not having to share, making these in mini form means you get nice golden cheesy edges on each piece which might be my favourite part. No golden edges when you make Dauphinoise the usual way!
What you need to make Mini Potato Gratin Stacks
Here’s what you need to make these:
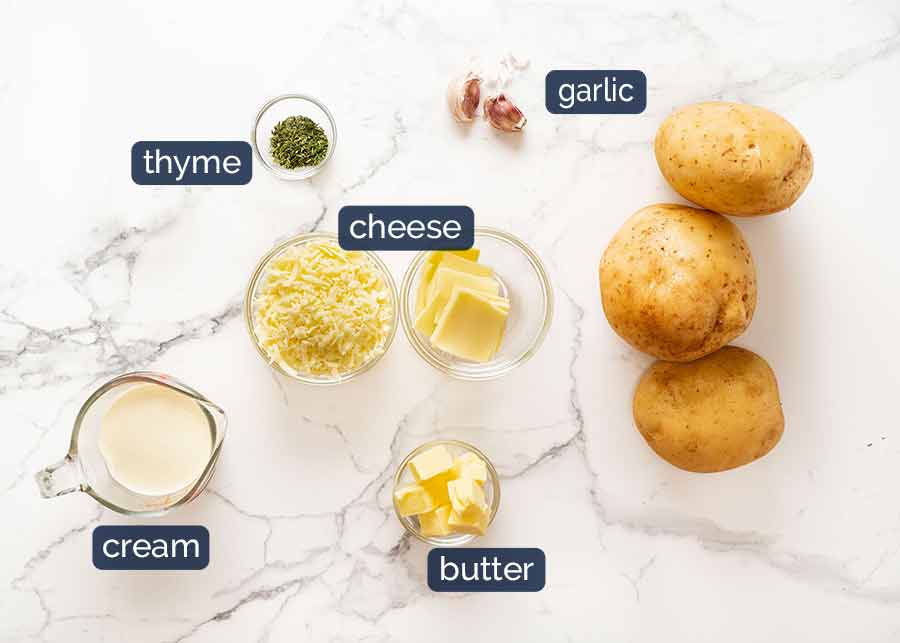
Potatoes – Use starchy or all-rounder ones so they become fluffy when cooked and absorb flavour. Sebago (the common dirt brushed potatoes in Australia), Russet (US), Dutch creams, King Edwards and red delight are all ideal.
If you use waxy potatoes, the layers sort of slip apart when you cut into them.
Shape – Opt for long thin ones so you have less offcuts when trimmed into a cylinder shape to cut slices that fit the muffin thin.
Cheese – Gruyere and Swiss cheese are my favourites here, for their melting quality and flavour. Any cheese that melts will work just fine – cheddar, Colby, tasty cheese. I tend not to use mozzarella because it doesn’t have as much salt / flavour as other cheese but you can if you wish.
Shredded and sliced – I find it best to use slices of cheese between the potato layers and shredded cheese on top.
Cream – Thickened / heavy cream works best because it’s thicker so it pools on the layers better.
Garlic – For flavour, to infuse the cream sauce.
Thyme – Classic herb flavouring for Dauphinoise.
How to make Mini Potato Gratin Stacks
Assembling each gratin stack does take a little more effort than making one big bubbly Dauphinoise for sharing. But it’s worth it – especially for the golden cheesy edges that you never get when you make one big gratin bake!!
1. Cutting the potato slices
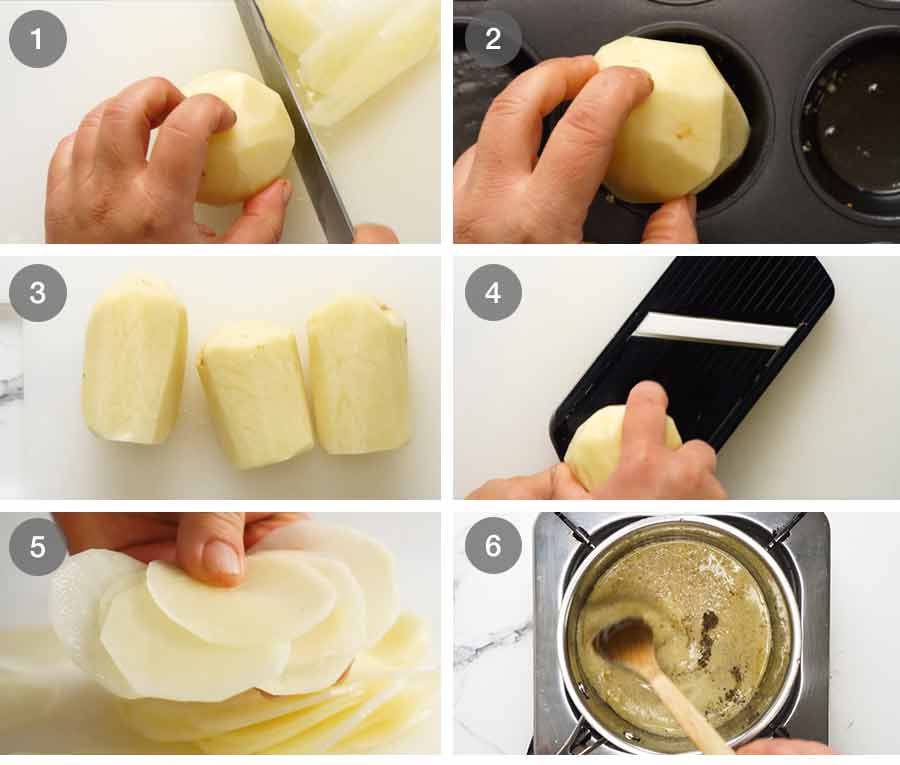
Peel and trim – Peel the potatoes then cut the base so it is stable when standing upright. Then trim the potato to make a (rough!) cylinder shape. It doesn’t matter if they are not a perfect round – mine aren’t!. Once they are cooked, you can’t really tell if your potatoes are a little more hexagon-y or octogon-y, or even rectangular or triangular!!!
Check size – The cylinder should be the size of the muffin tin holes.
Potato cylinders – Repeat with remaining potato. To fill a standard 12 hoc muffin tin, you will need 3 potato cylinders cut from 1.2 kg / 2.4 lb of potato.
Slice thinly – Using either a mandolin or a sharp knife, cut the potato into 2mm / 0.1″ thin slices.
Separate slices – Use your fingers to separate the slices as they have a tendency to stick. We want to make sure the creamy sauce seeps between all the potato layers!
Cream sauce – Melt the butter in a saucepan then sauté the garlic for 20 seconds or until it smells amazing. Then add the cream and salt, and simmer for 30 seconds to bring the flavours together.
Now, we’re ready to assemble!
2. Assembling the gratin stacks
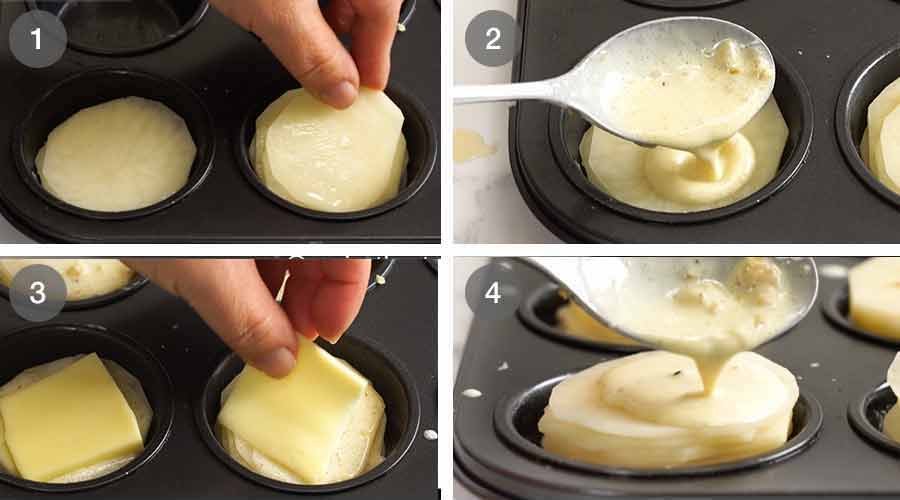
Fill halfway – Place a stack of potato slices in the muffin tin hole so they come up halfway.
Pour over cream – Drizzle about 1 teaspoon of cream over the potatoes. No need to be exact here, just use about half the cream.
Cheese slices – Top with a slice of cheese.
Potato and cream – Top each stack with another stack of potatoes so they are just higher than the rim of the muffin tin. We want to make them taller because they sink slightly once cooked.
Then drizzle the remaining cream over each stack.
3. Bake!
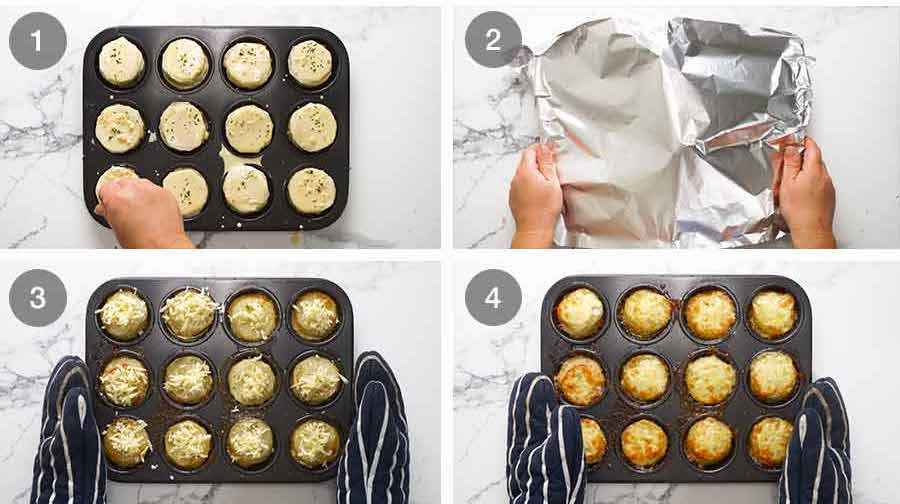
Thyme – Sprinkle each stack with most of the thyme. Reserve a bit to sprinkle on at the end. A hint of fresh thyme is a really nice finishing touch!
Cover and bake – Cover loosely with foil then bake for 40 minutes at 180°C/350°F or until the potato is cooked. Check by inserting a knife all the way to the bottom – there should be no resistance.
Cheese then oven – Top with the shredded cheese and return to the oven uncovered for 10 minutes or until the cheese is melted and there are some lovely golden spots on the surface.
Garnish with thyme & serve! Sprinkle the top with the remaining thyme, then serve immediately!

What to serve with Mini Potato Gratin Stacks
You will want to eat them straight out of the oven, and they are certainly tasty enough to do so! But actually, they are intended to be a side dish.
I tend to pull these out for special occasions when we want a side dish that’s a bit special. Think, holidays and celebratory gatherings, alongside things such as:
the most glorious buttery, herby, garlicky roast chicken
the roast pork of your dreams (because it’s completely encased in crackling)
a grand Thanksgiving Turkey (brined is the only way!)
a big juicy steakhouse steak
If you make these for just-a-usual-midweek-dinner, I wish I was you. I could eat these everyday and never tire of them. There’s a reason my nickname was Potato Girl when I was growing up!! – Nagi x
Watch how to make it

Cheesy Potato Gratin Stacks (Muffin Tin)
Ingredients
- Oil spray
- 1.2 kg / 2.4 lb starchy potatoes , large long ones (Note 1)
- 30g /2 tbsp butter , unsalted
- 2 garlic cloves , finely minced
- 1/2 cup heavy / thickened cream
- 1 tsp fresh thyme leaves (or 3/4 tsp dried)
- 1/2 tsp salt
- Black pepper
- 75g / 2.5 oz gruyere cheese sliced into 12 squares to fit into muffin tin (or other melting cheese, Note 2)
- 3/4 cup gruyere cheese (or other melting cheese), shredded
Instructions
- Preheat oven to 350°F/180°C (all oven types).
- Brush muffin tin with butter: Melt butter in a saucepan over medium heat then use what you need to lightly brush the muffin tin holes with butter. (Remaining butter is for the cream sauce)
- Cream sauce: Into the remaining butter, add garlic and cook for 20 seconds. Add cream and salt then bring to a simmer. Simmer for 30 seconds, then remove from stove and keep warm.
- Slice potato: Peel potatoes. Trim base so it stands upright. Then cut into cylinder shapes that fit the muffin tin. Cut into 2mm/ 1/10" slices using a mandolin or sharp knife.
- Assemble stacks: Place potato slices into the muffin tin so they go halfway up the muffin tin holes. Try to match by size to make them into neat stacks.
- Cream: Drizzle each potato stack with 1 tsp of cream mixture – use 1/2 of the mixture.
- Cheese slice: Top with cheese slice.
- Top with potato, cream then thyme: Top each stack with remaining potato slices so the height is about 1cm / 1/3" above the rim of the muffin tin (they sink once baked). Drizzle with remaining cream mixture and sprinkle with most of the thyme (reserve some for topping).
- Baked 40 minutes: Cover loosely with foil and bake for 40 minutes or until potato is cooked through. A small sharp knife should go through without any resistance.
- Top with cheese, bake 10 minutes: Remove from oven, sprinkle with shredded cheese and bake without foil for 10 minutes or until golden.
- Garnish with thyme: Sprinkle with remaining thyme.
- Stand 5 minutes then remove to serve. Use a tablespoon or butter knife to help scope them out. (Note 3)
- To Serve: Dinner – serve as a side. Finger food – serve warm as is. Breakfast – serve with eggs and bacon.
Notes
Nutrition
Originally published September 2015. Updated November 2021 with improved recipe, new instructional photos and better video.
Life of Dozer
Happy to help with the washing up….!
This is how I deal with dishes on big recipe development days for the cookbook – pile them into tubs to keep them out of the way then do giant loads at a time. The amount of dirty pots and pans we generate on big cook days is pretty phenomenal…!!!

The post Cheesy Mini Potato Gratin Stacks (Muffin Tin) appeared first on RecipeTin Eats.
]]>