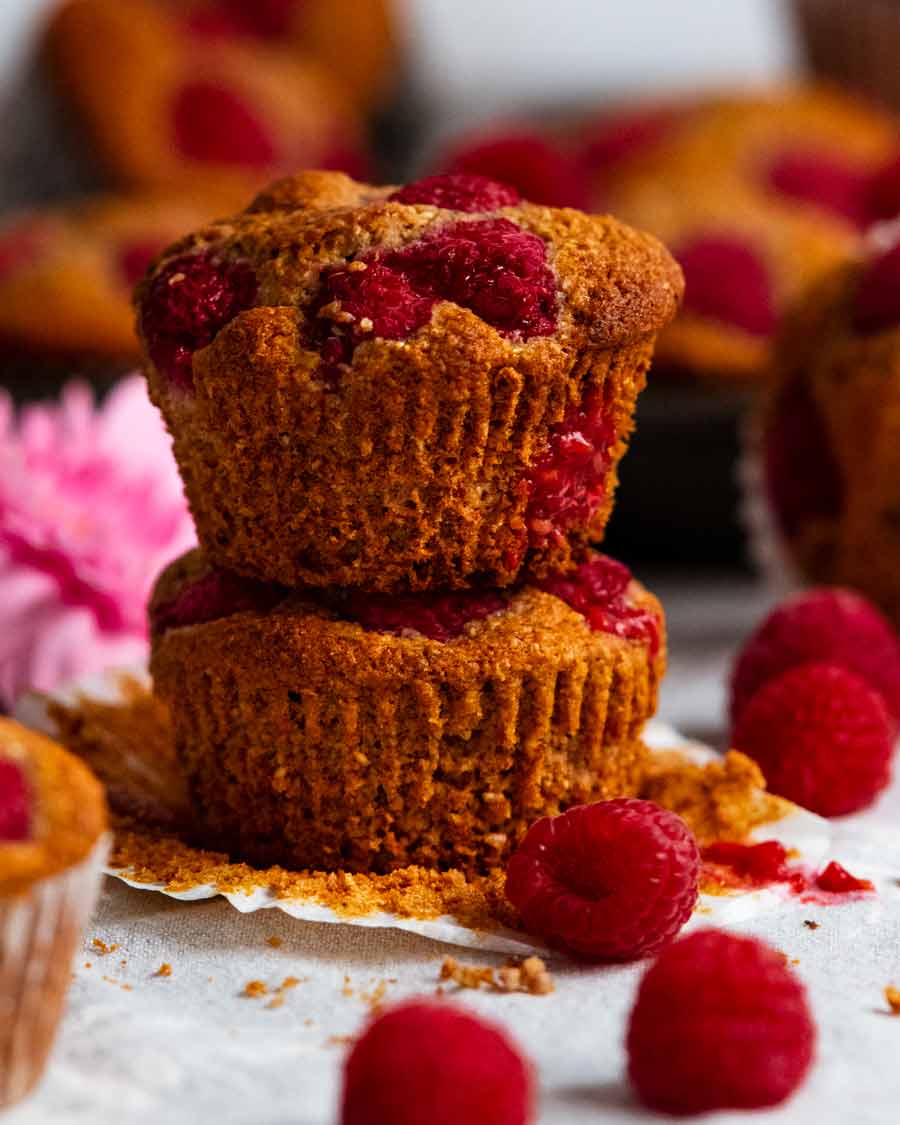
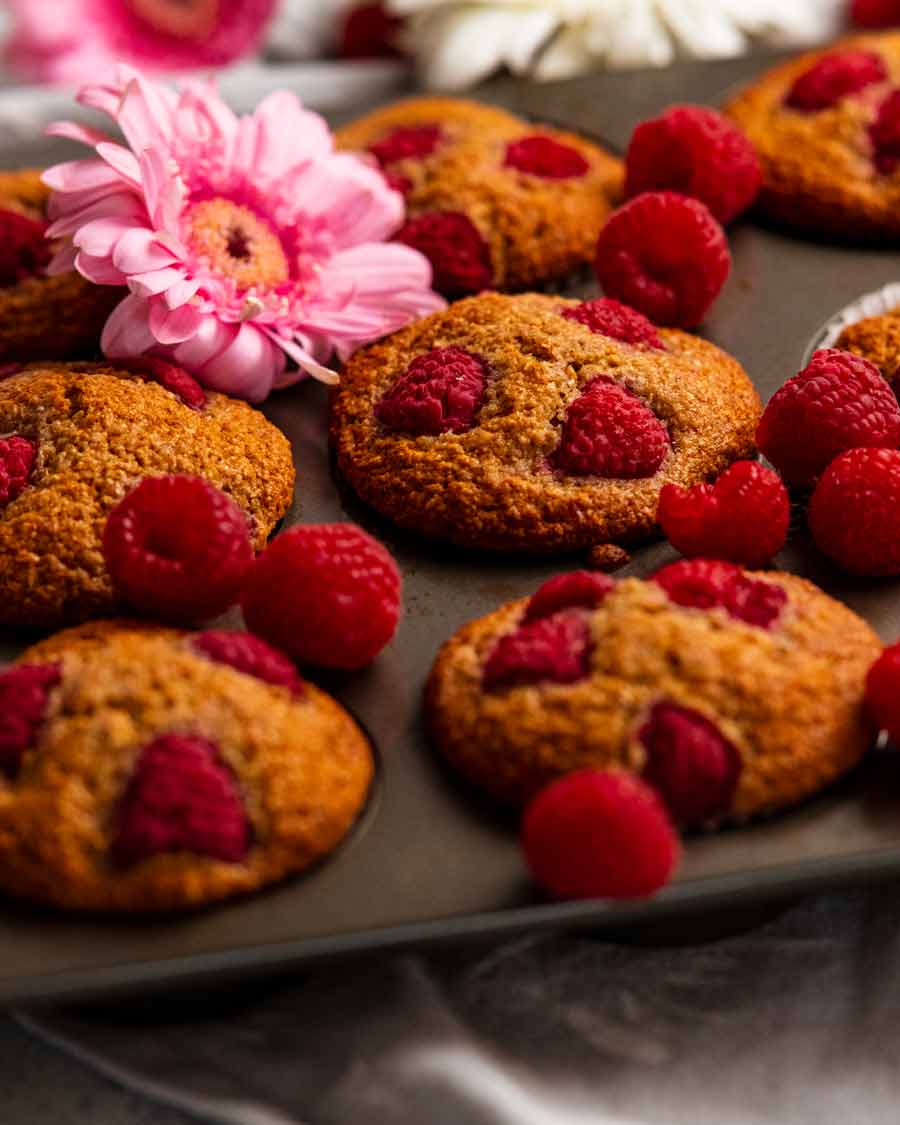
 Healthy muffins that are actually delicious! A copy-cat of the raspberry bran muffins from Sydney’s beloved Bowan Island Bakery, these breakfast muffins are a nutritious, convenient breakfast option that’s far better for you than take-away on the way to school or work. Up-and-go Breakfast Muffins Being a savoury gal, I’ve always been partial to savoury... Get the Recipe
The post Up-and-go breakfast muffins! appeared first on RecipeTin Eats.
]]>Healthy muffins that are actually delicious! A copy-cat of the raspberry bran muffins from Sydney’s beloved Bowan Island Bakery, these breakfast muffins are a nutritious, convenient breakfast option that’s far better for you than take-away on the way to school or work.
Up-and-go Breakfast Muffins
Being a savoury gal, I’ve always been partial to savoury muffins for breakfast (proof here, here and here). But a breakfast muffin with a sweet slant has been on my list for a while. I’m talking about the type that doesn’t make you feel like you’re eating cake for breakfast, a muffin that is just sweet enough but still good for you and good to eat.
So here it is!
Why these muffins are better for you
Low fat – just 1 1/4 tsp coconut oil per muffin
Refined-sugar free
Lightly sweetened – Just 2 teaspoons honey per muffin
Extra dietary fibre – keeps your insides….err….moving, shall we say ☺️ as well as keeping you full for longer and stabilising your blood sugars.
Convenient – Grab and go! No need to reheat, eat on the move.
Long shelf life – These last for 4 to 5 days, and are freezable.
Easy to make – One-bowl batter mixed with just a wooden spoon
Add-ins of choice – dried fruit and nuts, oats, fruit, choc chips!
Ingredients in breakfast muffins
Here’s what you need to make these breakfast muffins. Add-ins are flexible – see below for suggestions.
The key ingredient in this for goodness and flavour is wheat germ. Good-for-you extra fibre that gives these muffins a fabulous nutty flavour and lovely warm brown colour!
Dry ingredients
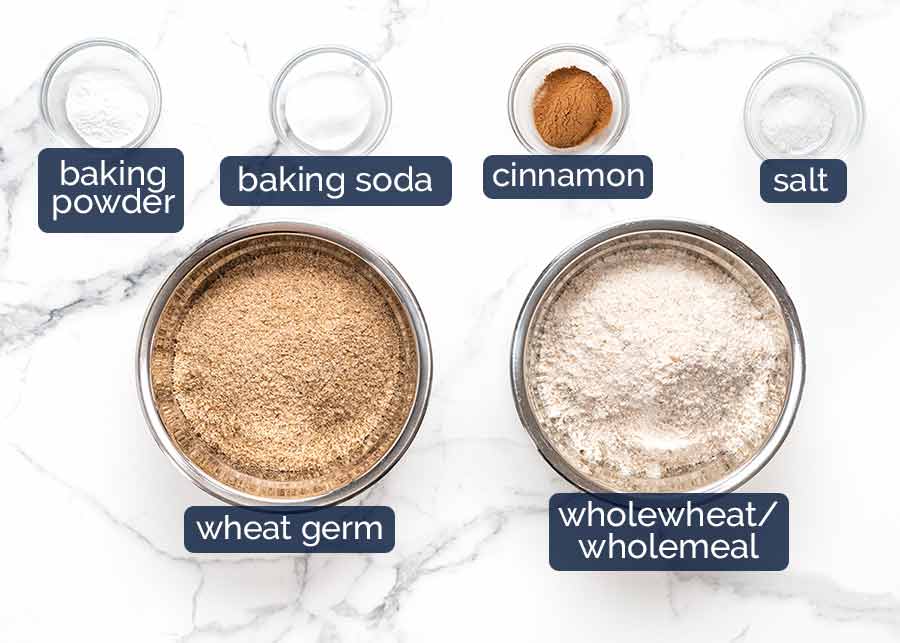
Wheat germ (sub wheat bran) – The good-for-you extra fibre boost! Found in either the cereal aisle, health food section or flour aisle or grocery stores. While both wheat germ and wheat bran work, I think wheat germ is nicer. It has lovely nutty flavour because it’s the seed inside wheat kernels. Whereas wheat germ is the exterior of wheat kernels so it gives the muffins a slightly earthier flavour. Both have similar nutrition characteristics – high in dietary fibre as well as other nutrients. Better for you than plain flour!
Wholewheat / wholemeal flour – In keeping with the better-for-you spirit of these muffins, I’ve opted for wholemeal rather than plain white flour. It has more nutrients because it’s less processed, plus it enhances the nutty flavour of these muffins.
Baking powder AND baking soda (bi-carbonate) – These both make things rise but baking soda is 3x as strong and they each have different rising characteristics. For this recipe, using a combination of both delivers the muffin top shape and crumb texture I want.
The baking soda can be substituted with more baking powder but the crumb is not quite as soft. See recipe card notes for quantity.
Cinnamon – For flavour!
Salt – Brings out the other flavours in the muffins, doesn’t make it salty!
Wet ingredients
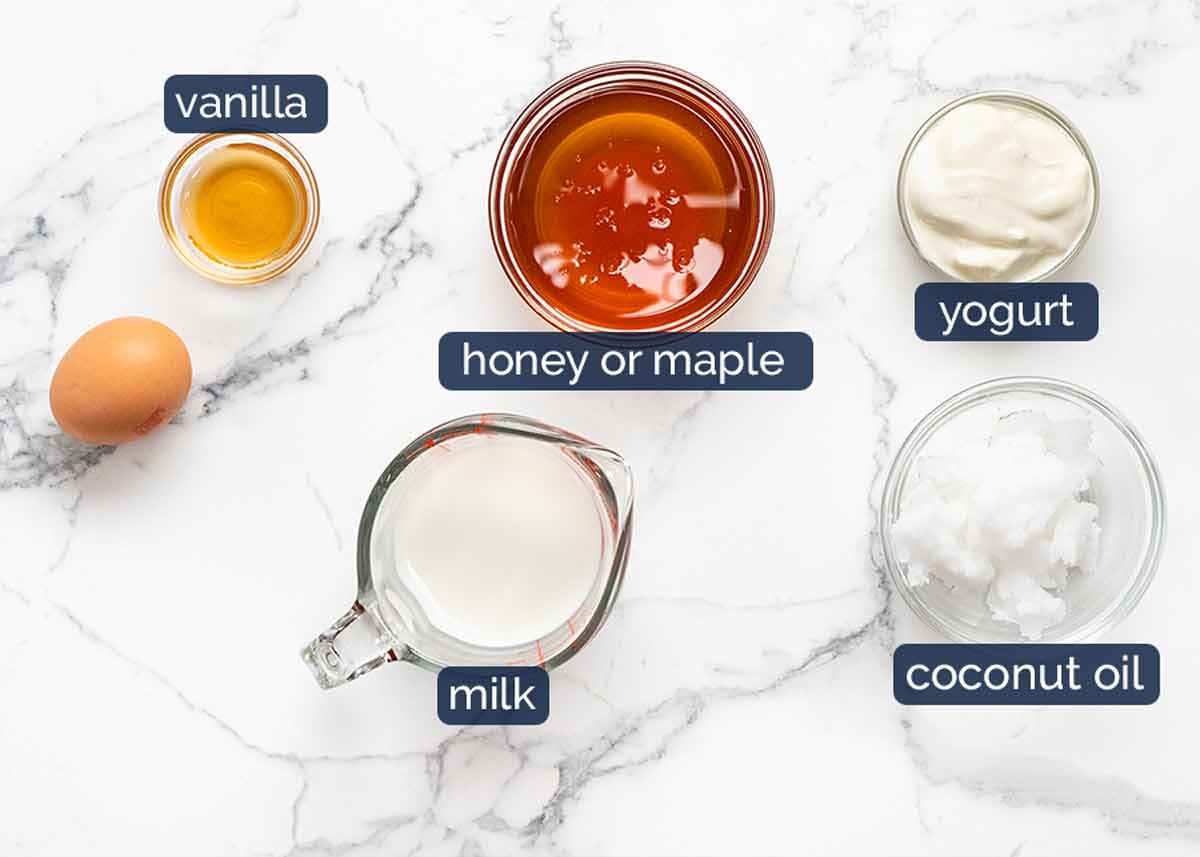
Honey or maple syrup – For sweetening! We only use 1/2 cup across 12 muffins which equates to 2 teaspoons per muffin. See commentary below on why honey is better for you than sugar.
Coconut oil – This is the fat in the muffins. I like to use unrefined / virgin coconut oil which adds a lovely very subtle coconut flavour into the muffins. By no means would anyone call these “coconut muffins”! Use the type that is firm like butter and needs to be melted to mix into batters, rather than the pourable type.
Note: There is also refined coconut oil which is stripped of all coconut oil and aroma. This and other oils will work in this recipe but will not add flavour. If you opt for another oil, I’d suggest doubling the vanilla and adding extra cinnamon.

Yogurt and milk – This is the wet in the batter. Using yogurt serves two purposes. Firstly, it has acid in it which gives the baking soda a rising kick start. Sometimes I use a teaspoon of vinegar in recipes to serve the same purpose, like in my Magic Stay-Moist Apple Muffins.
Secondly, yogurt is not as watery as milk. So it adds wetness to batters without making it as loose which means less flour needed = muffin more moist!
Egg – Just one, to hold the muffins together. Using only 1 egg makes a massive difference to the moistness of the crumb of muffins as the more egg you use, the sturdier but drier the crumb gets.
Vanilla – For flavour.
Why is honey better than sugar?
Because honey is:
sweeter than sugar so you can use less in recipes;
lower GI so your blood sugar levels won’t spike as quickly – which keeps you feeling full for longer; and
more nutritious than sugar which is “empty calories”. That is, sugar literally just contains sugar and nothing else! Honey contains nutrients such as amino acids, enzymes, vitamins and minerals.
Add-ins of choice!
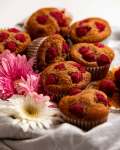
I’ve used raspberries in these because they were on special. However, you really can add any add-ins you want. See suggestions below.
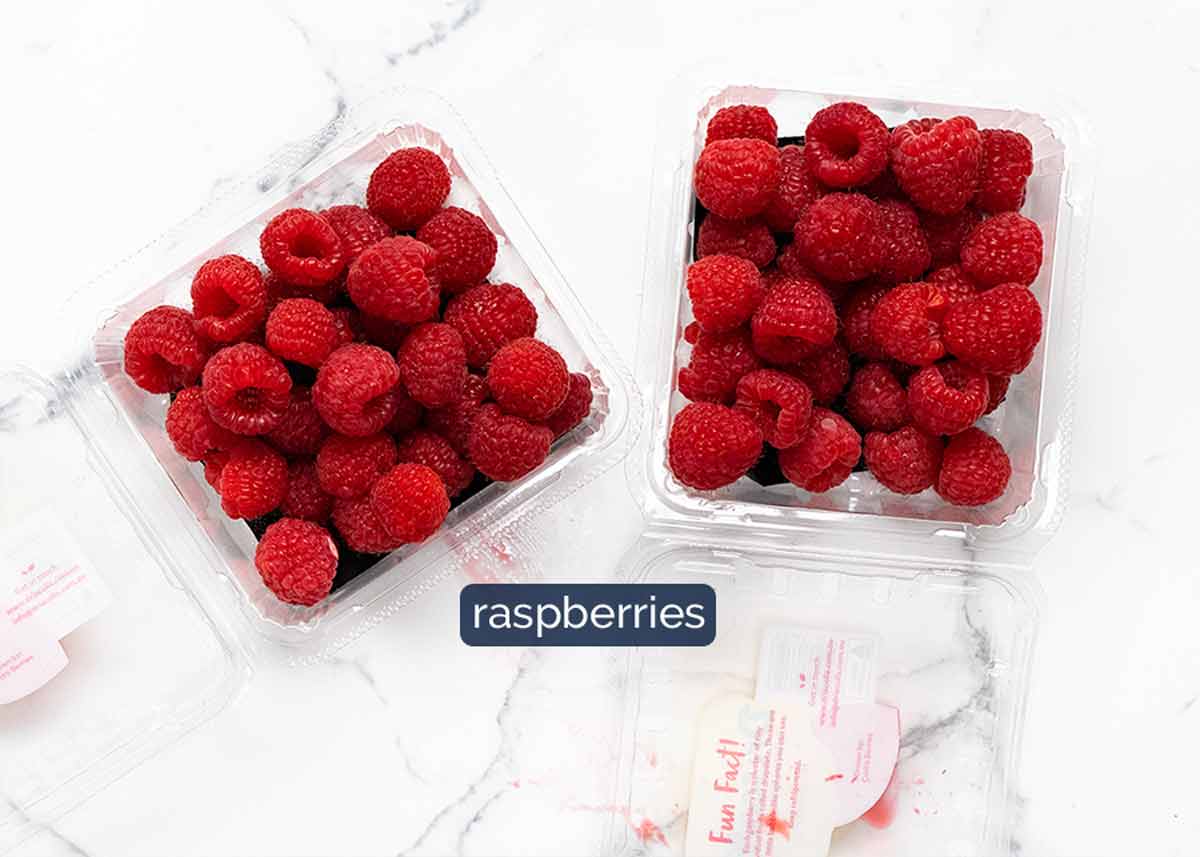
Add-in options:
Raspberries or blueberries, other berries – 250g/8oz, 2 heaped cups
Chopped fruit like apple, pears, cherries, grapes. (Not overly juicy fruit like oranges, peaches etc as they will leech too much liquid into the batter)
Dried fruit – sultanas, apricots, cranberries, apple, mango – anything goes!
Nuts and seeds
Chocolate chips – I mean, the rest of the muffin is healthy. So this tips the scales back to neutral? 😈
How to make breakfast muffins
It’s as easy as 1-2-3:
Mix wet ingredients
Mix in dry ingredients
Fill muffin holes and bake!
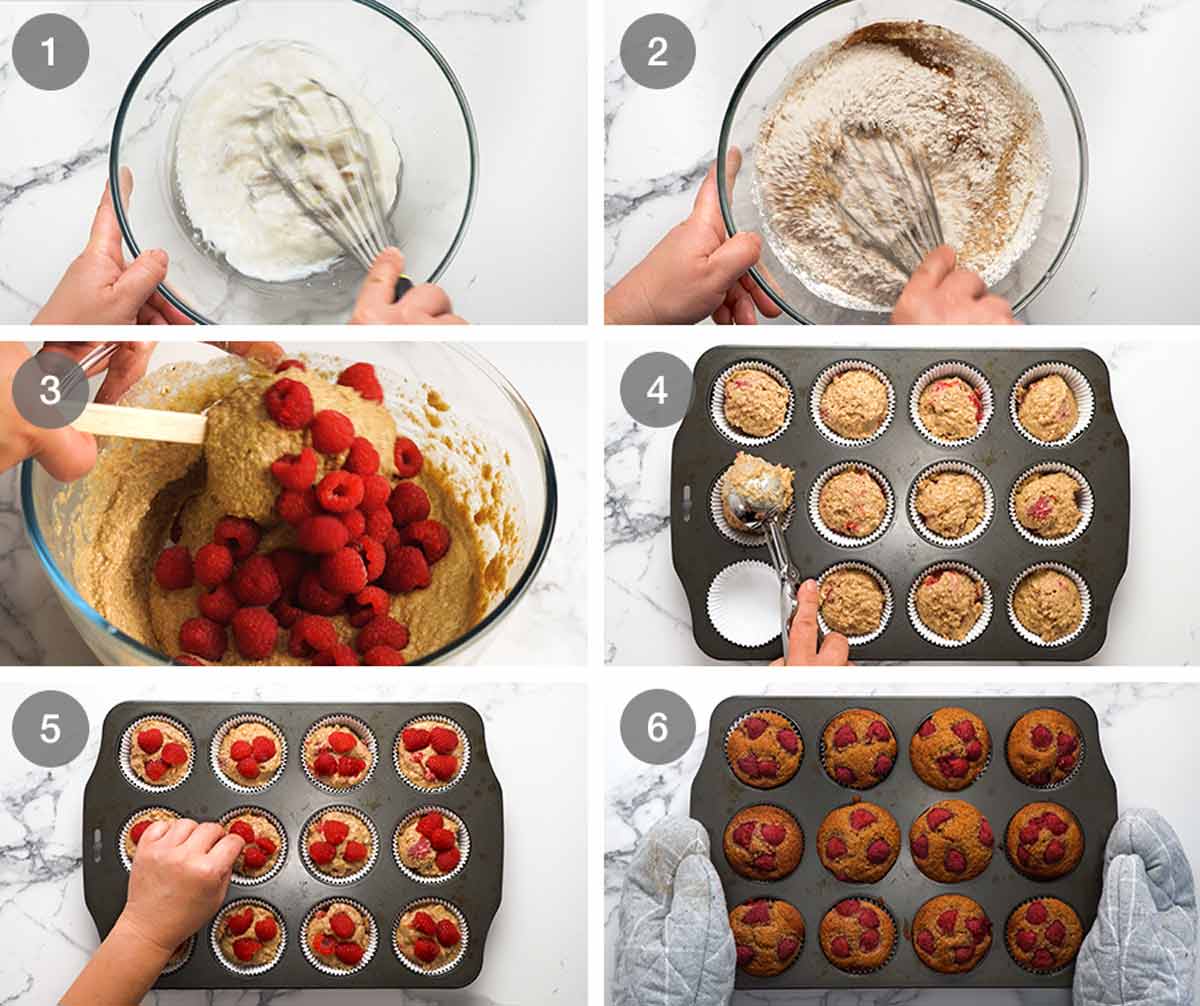
I like to reserve some raspberries to decorate the top, but this entirely optional – for visual purposes only. I know some people prefer more INSIDE the muffins!
Whisk wet – Melt the coconut oil in a microwavable bowl. Then whisk in all the wet ingredients: egg, yogurt, milk, honey and vanilla.
Mix in dry ingredients – Scatter across the surface (incorporates easier) then whisk in. Once you can no longer see flour, stop! Don’t get too enthusiastic with mixing as it will make the muffins tough.
Add-ins – Fold through the raspberries or whatever add-ins you’re using.
Divide between 12 holes. I used liners but it’s not essential, you could just spray with oil.
Top with reserved raspberries, if using.
Bake for 25 minutes at 190°C / 375°F (170°C fan) or until golden brown on the surface. Cool then devour!
Other matters of Up-and-Go Breakfast Muffins
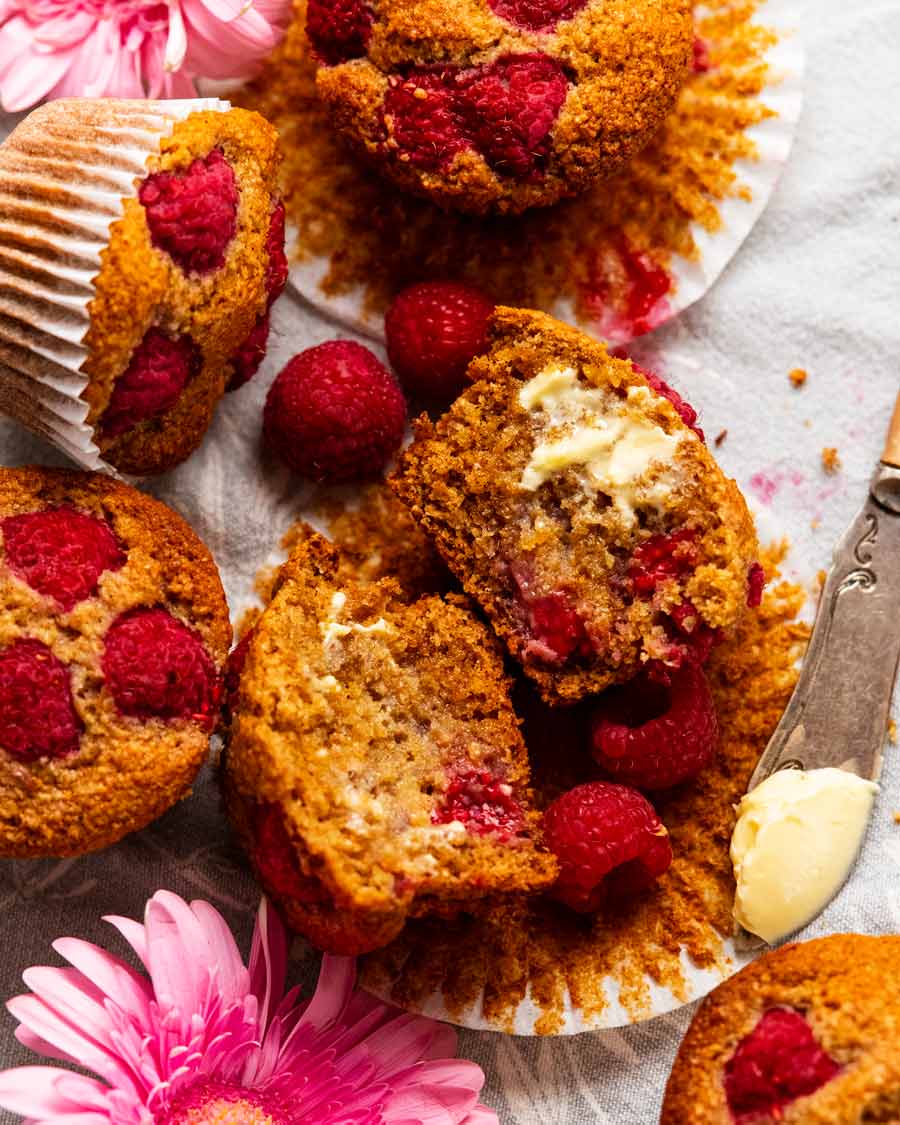
Breakfast on the run – I’ve named these breakfast muffins as such because they are a great grab-and-go breakfast that doesn’t need heating and can be literally eaten on the run. More filling and less sweet than than muesli bars which I personally consider to be more suitable for a snack rather than breakfast.
Storage – These will keep for 4 to 5 days without going stale because they are more moist than typical muffins thanks to the coconut oil and yogurt. If it’s hot where you are, best to keep them in the fridge, otherwise just keep them in the pantry in an airtight container. They will also freeze for 3 months.
And with that, I think I’ve said all I need to on the matter of these breakfast muffins! Just to reiterate, these are less sweet than your usual muffins. To me, they are the perfect sweetness to have as breakfast without feeling like you’re being naughty and eating cake. And they are just sweet enough to have as a morning tea treat. In fact, people who often find Western cakes and cookies too sweet will probably find these the perfect level of sweetness.
Hope you give them a go! Love to know what add-ins you use if you do. – Nagi x
Watch how to make it
Up-and-go breakfast muffins!
Stays fresh for days.Ingredients
Wet:
- 1/3 cup coconut oil , virgin or unrefined (normal oil also works but not as tasty, Note 1)
- 1 large egg , at room temperature (~55g/2oz)
- 2/3 cup milk , at room temperature – full fat best (low fat and non-dairy ok too)
- 1/3 cup yogurt , plain/unsweetened
- 1/2 cup honey (or maple syrup)
- 1/2 tsp vanilla extract
Dry:
- 1 1/4 cups wheat germ (best) OR 1 1/4 cups (80g) wheat bran (Note 2)
- 1 1/2 cups wholemeal flour (sub ordinary flour – Note 3)
- 1/4 tsp salt
- 1 tsp cinnamon powder
- 1 tsp baking powder (Note 4)
- 1 tsp baking soda , sifted if lumpy (or 3 tsp extra baking powder) – Note 4
Add ins – CHOOSE ONE:
- 250g / 8 oz raspberries , 18 set aside and cut in half to decorate top if desired
- 2 cups diced fresh fruit (not watery) – like apples, pears
- 1 1/4 cups dried fruit, nuts, choc chips etc
Instructions
- Preheat oven to 190°C / 375°F (170°C fan). Line a 12 hole standard muffin tin with muffin cases OR spray generously with oil.
- Whisk wet – Place coconut oil in a microwave proof bowl. Microwave for 45 seconds on high or until melted. Add remaining Wet ingredients, whisk until smooth.
- Mix in Dry – Sprinkle the Dry ingredients across the surface in the order listed. Mix just until combined.
- Raspberries – Gently stir in the whole raspberries or other add-ins of choice.
- Fill muffin tin – Divide batter between the 12 holes using an ice cream scoop. Decorate top with halved raspberries.
- Bake 25 minutes. Cool 5 minutes then transfer to a cooling rack.
Notes
Nutrition
Life of Dozer
While I’m in Melbourne for the Good Food & Wine Show, Dozer is with the golden retriever boarder and apparently not showing any signs of separation anxiety. Hmmph!

The post Up-and-go breakfast muffins! appeared first on RecipeTin Eats.
]]> Chocolate muffins that truly taste of chocolate and stay fresh for days are a rarity! This recipe delivers, thanks to some tidy tricks including hot milk to bloom the cocoa, and a little coffee to enhance the chocolate flavour (you won’t taste the coffee). Using brown sugar, oil, sour cream and less egg meanwhile is... Get the Recipe
The post Chocolate Muffins appeared first on RecipeTin Eats.
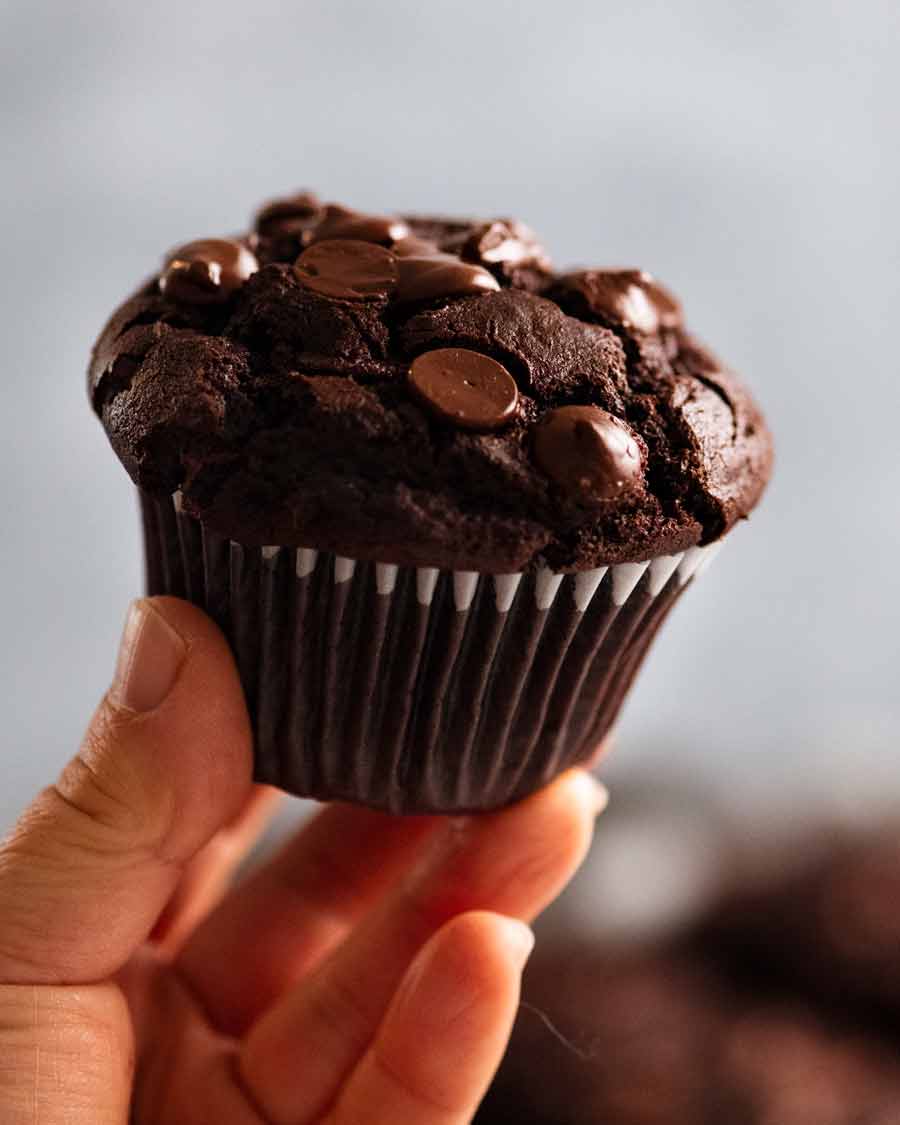
]]>Chocolate muffins that truly taste of chocolate and stay fresh for days are a rarity! This recipe delivers, thanks to some tidy tricks including hot milk to bloom the cocoa, and a little coffee to enhance the chocolate flavour (you won’t taste the coffee). Using brown sugar, oil, sour cream and less egg meanwhile is the secret to keeping the crumb ultra-moist and tender!
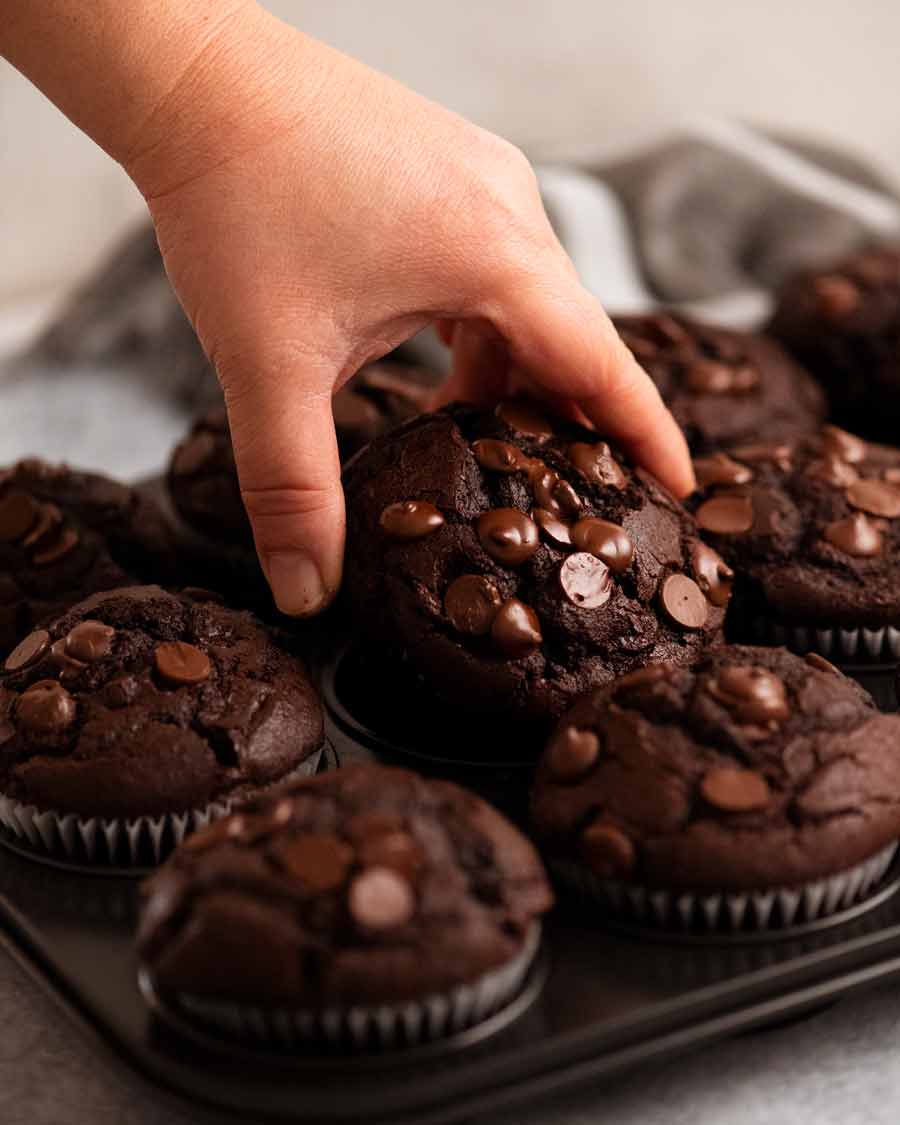
Chocolate Muffins
Chocolate muffins are not all created equal. I’m fussy about mine and make no apologies about it – there are a lot of calories in a muffin, so every one of them better be worth it! 😂 Here’s my laundry list of things a great chocolate muffin needs to have. It must:
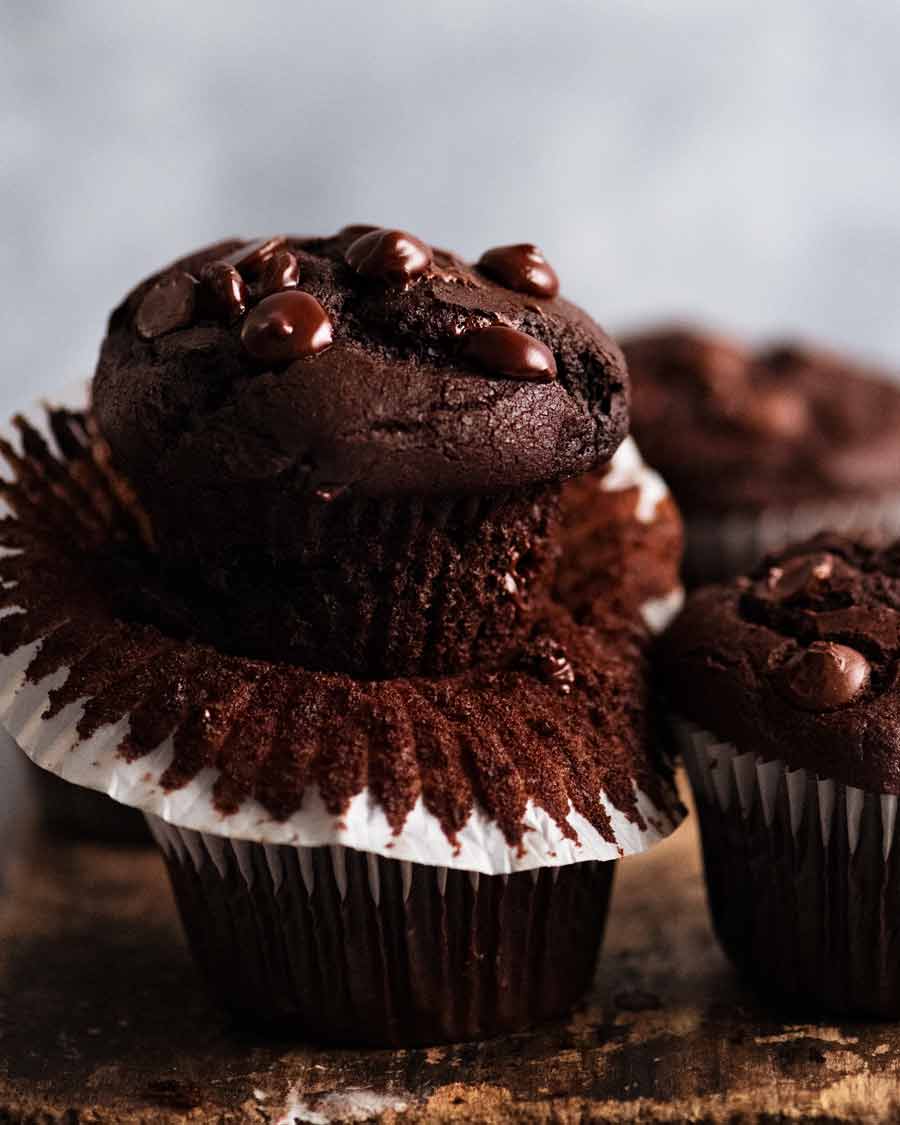
Have a lovely crisp dome
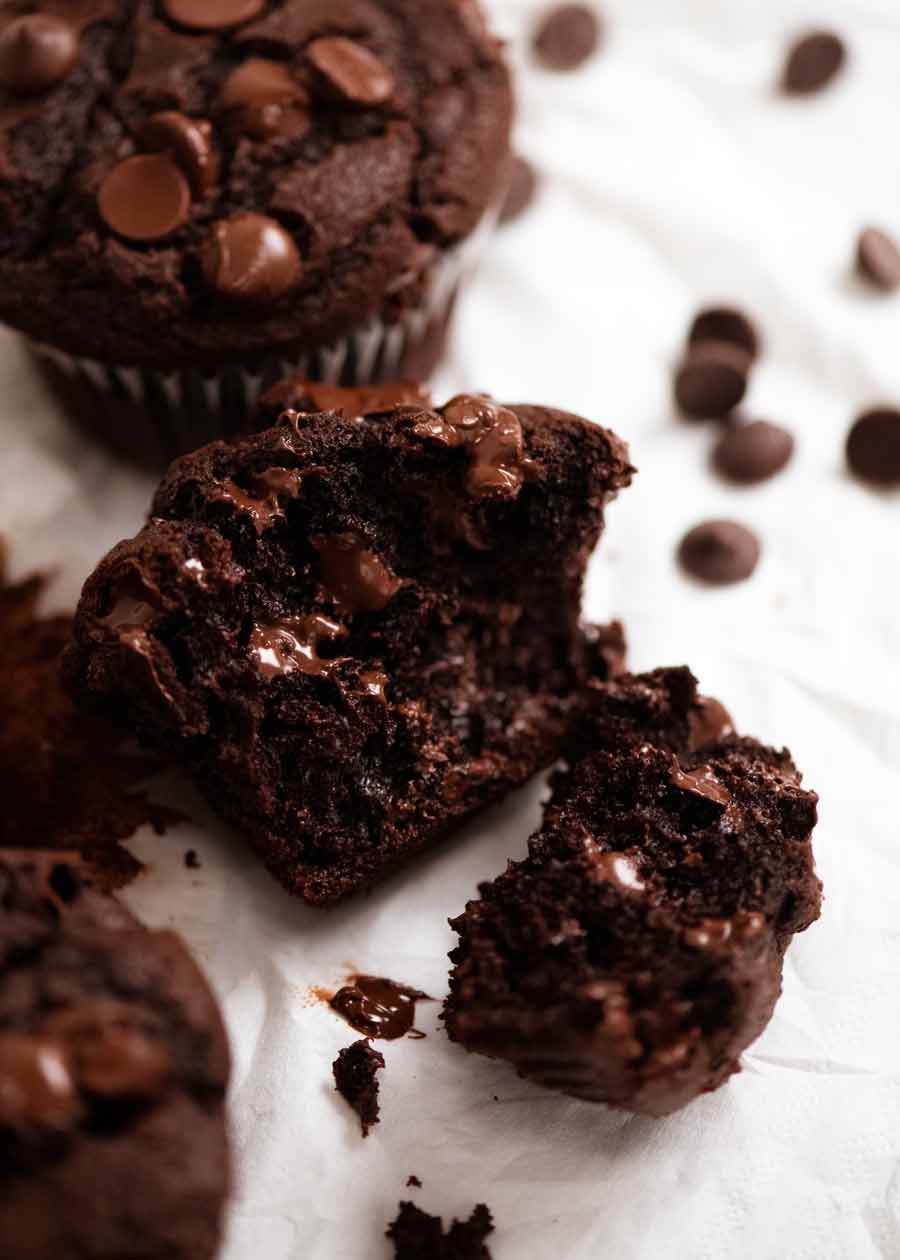
Be tender and moist inside
Truly taste of chocolate
Be quick and easy to make (as muffins should be!)
Not include obscure or just plain weird ingredients
Stay fresh for 3 days
Be still good for even another 2 days after that!
While this list of chocolate muffin characteristics might sound obvious to you, finding a recipe that ticks all these boxes is much harder than you think! In fact, in my whole cooking life, I have never come across a keeper.
After (many!) years of attempts, I finally buckled down and committed myself to pursuing the ultimate chocolate muffin recipe, even if it killed me. In the end, it was a plethora of simple baking tricks that came together in creating what is my idea of the perfect chocolate muffin. I’m VERY happy with the end result and thrilled to share it!
Chocolate muffins are notorious for being dry because of the cocoa powder. But not these!
The simple baking tricks for the BEST Chocolate Muffins ever!
Here’s the complete list of the simple tricks that make all the difference in this recipe. An explanation of the why behind each of these is in the ingredients section below.
1 egg rather than the usual 2 eggs;
Brown sugar instead of white sugar;
Oil instead of butter;
Sour cream instead of milk;
Coffee to enhance chocolate flavour (optional);
Dutch-process cocoa powder for more intense chocolate flavour (optional);
Blooming the cocoa powder with hot milk;
Thinner batter than the usual muffin batters; and
Briefly bake on a high temperature then lower temperature to finish!
Ingredients in Chocolate Muffins
Here’s what you need to make these Chocolate Muffins. If you’re wondering – coffee? Did she make mistake? Read on below for why!!
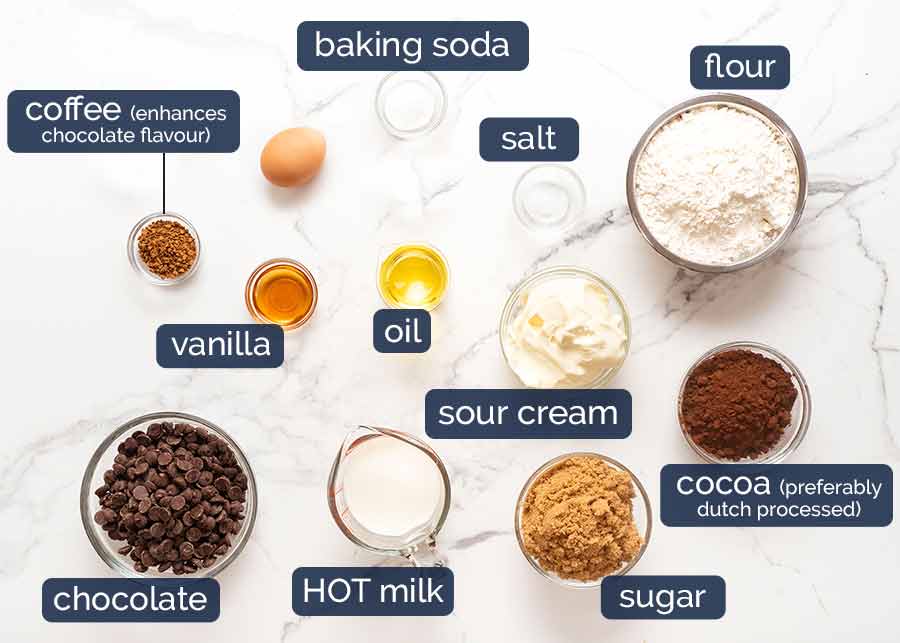
Instant coffee powder or granules – This is an age-old baking trick used to enhance chocolate flavours because chocolate and coffee share similar taste characteristics. You can taste the coffee in the raw batter but once baked, you cannot taste it. Any instant coffee powder or granules works fine here, no need to use an expensive one!
Dutch process cocoa powder – This is a darker cocoa with a more intense chocolate flavour and colour than ordinary cocoa powder. It is slightly more expensive but yields a better result.
Ordinary cocoa powder (unsweetened) will work just fine too. The colour of the muffins however will not be quite as deep and also it will taste slightly less chocolatey.
HOT milk – A trick used in my Chocolate Cake and Fudge Cake, hot liquid (usually water) mixed with cocoa powder makes it bloom! This brings out the flavour and makes the muffins taste more chocolatey.
Just 1 egg – Eggs are required to bind the crumb of cakes. But the problem is the whites tend to also dry baked goods out! So we use just 1 egg here. Compared to using 2 eggs, the extra moistness in the crumb is remarkable.
Oil – This is the fat used in the chocolate muffins instead of the usual butter. While I love the flavour butter brings to baked goods, it actually has a drying effect on the crumb compared to oil. My side by side tests confirmed this also for this muffin recipe. So, oil it is!
Brown sugar – While white sugar will make a slightly crisper dome, brown sugar retains moisture better which means the crumb is more moist (notice a trend we’re aiming for here??). It also adds a lovely caramel flavour to the crumb which compliments the chocolate flavour.
As for making the dome crisp? I wasn’t willing to give that up! So I just blast the muffins at a slightly higher temperature for the first 5 minutes which helps give it a nice crispy dome. Now we get the best of both worlds!
Baking soda (bi-carb) – This makes the muffins rise slightly better than using baking powder, while preserving the intense dark chocolate colour of the crumb. Baking powder does also work perfectly fine (use 4 teaspoons) but the muffins rise slightly less and give a slightly paler crumb colour.
Vanilla – Just a touch, for flavour! Vanilla extract is fine to use here and is preferable to artificial vanilla flavouring. While real vanilla beans or vanilla bean paste has its place, I wouldn’t bother wasting them for this recipe.
Sour cream – Another baking trick! This lets us introduce wetness in the batter but keeps the batter a thicker consistency than using, say, more milk. We need a thicker batter for chocolate muffins than for, say, cupcakes, in order to achieve that lovely dome.
Yogurt can also be used in place of sour cream.
Flour – Just plain / all-purpose flour. Self raising flour does work in place of using plain flour + baking soda as done here, but the muffins don’t rise quite as well. (I’d still use self raising flour if that’s all I had, though.)
Chocolate chips – I use dark chocolate chips (called semi-sweet chips in the US) but any type of chocolate chips will work just fine here. Or chopped chocolate! Just be sure to use baking chocolate (from the baking aisle), not eating chocolate. The latter is not made for cooking in the oven and funky things happen when you do!
Salt – Just a touch, it brings out the flavour in baked goods. Standard practice!
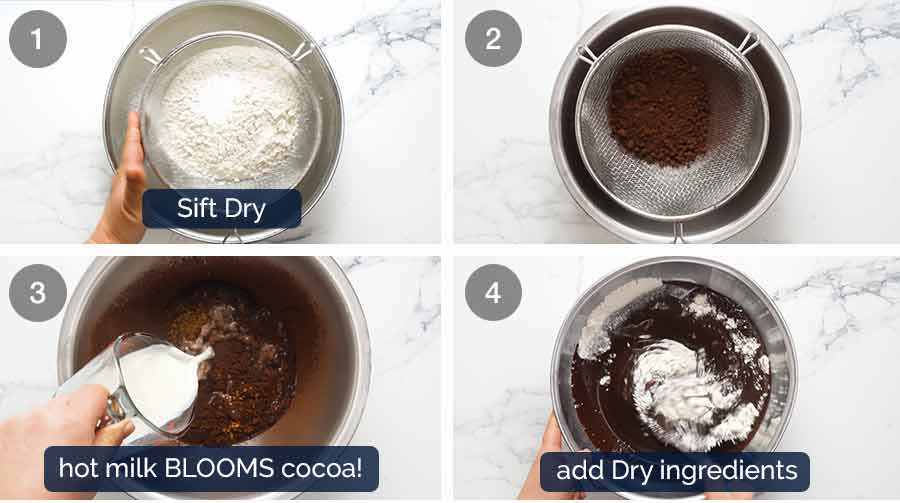
How to make Chocolate Muffins
Mix Dry , mix Wet, mix Dry into Wet. Bake. Do you really need me to give you any more detail? 😂
The nice thing about these muffins is that you don’t need to be as careful about not over-mixing the batter (which causes a dry muffin) because this batter is not as thick as most muffin batters.
Sift Dry ingredients – Sift flour, baking soda and salt into a large bowl. I don’t typically bother sifting flour for muffins, but seeing as we’re sifting cocoa anyway, I figure we may as well. Using the same sifter for the cocoa without cleaning the flour off is fine.
Sift cocoa powder into a separate bowl.
Bloom cocoa – Add the coffee powder and hot milk to the cocoa and give it a good whisk. This step of adding a hot liquid (usually boiling water) to cocoa powder makes the cocoa “bloom”, bringing out its flavour. It’s an age-old baking trick, one I use for things like Chocolate Cake and my Fudge Cake.
Finish batter – Whisk in remaining wet ingredients (oil, sour cream, vanilla, egg, sugar – yes, sugar is classified as a “wet” ingredient in baking!) with the cocoa.
Then pour this mixture into the flour and whisk. Initially, after the flour is incorporated, the batter will look a bit split (ie. it’ll have fine oil streaks). Whisk until it’s smooth and glossy, but stop once it is. Don’t keep mixing on blindly! This will overwork the gluten in the flour and make your muffins tough rather than pillowy soft! That said, this batter is thinner than most muffins batters so it’s more failsafe in this regard.
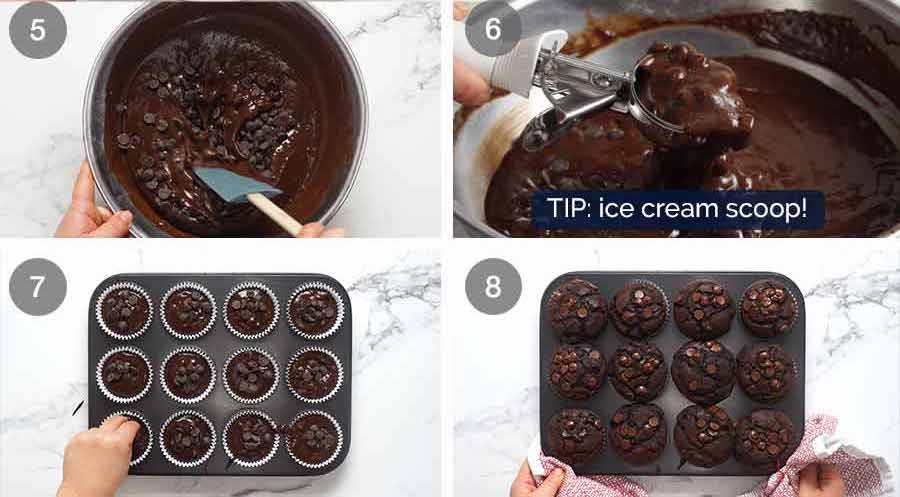
Stir in most of the chocolate chips – reserved about 1/4 cup for topping.
Note: This batter is THINNER than typical muffin batters. This is one reason why these cupcakes have a much more tender and moist crumb than the usual chocolate muffins.
Fill muffin cases. Use an ice cream scoop with a lever if you have one. This is a super-handy tool for muffins, cupcakes, fritters, even meatballs!
Do not overfill! Fill the muffin cases up to 0.5cm / 0.2″ from rim of paper liner. Don’t fill any higher as the muffin will overflow when baked since this batter is quite thin. (see Note 5)
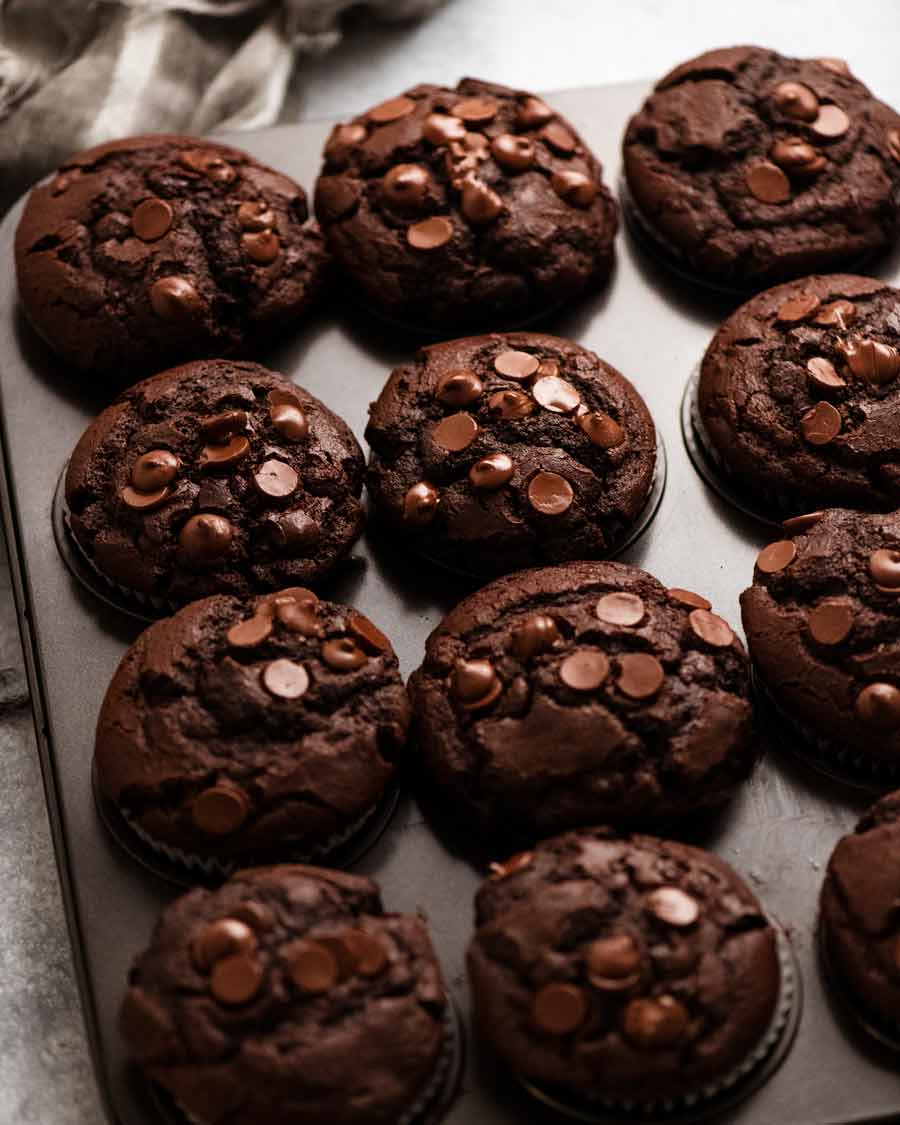
Top with reserved chocolate chips. Just pile them in the middle, they will spread out as the muffin rises.
Bake at HIGH temp 5 minutes – Bake for 5 minutes at 210°C / 410°F (190°C fan). Starting off at a slightly higher temperature gives the muffins a kick start on the rise (required for this thinner batter) and gives the muffins a crunchier top.
Bake at LOW temp 20 minutes – Turn oven DOWN to 190°C / 375°F (170°C fan) then bake further 20 minutes. So, 25 minutes in total. This is longer than most muffins and it’s because the batter is thinner (contains more liquid).
Notes on oven temperature: I know these oven temperatures are a bit unusual compared to the typical 180°C/350°F. I tried baking these at all sorts of temperatures and I honestly think the temperatures I’ve landed on yield the best result. The muffins have a nice rise, crisp dome, moist crumb inside, without overcooked edges.
How to tell the muffins are baked: Start checking the muffins at the 15 min mark on the low temp bake. When a toothpick inserted into the middle muffins comes out clean, they’re done. Don’t confuse melted chocolate with raw batter! Probe in multiple places if you are unsure. (PS. The slightest faint smear of batter on the toothpick is ok because residual heat will take care of any remaining rawness).
Cool for a few minutes in the muffin tin until you can handle them. The muffins are quite fragile straight out of the oven because they are so tender inside, so handle with care.
Transfer to a cooling rack, and allow to cool for at least 15 minutes before attacking them!
How long these chocolate muffins stay fresh
These Chocolate Muffins will stay very fresh for 3 days which is a rare feat in the muffin world! Most muffins begin to turn stale within hours of being made. By the next day they usually need to be warmed up to resurrect them.
These muffins do start to lose freshness on Day 4 but a quick 10 second zap in the microwave is all you need to revive them to near fresh-baked-perfection.
Sounds all too good to be true right?? Well, I think you’ll just have to make these and see for yourself! I’d love to hear how long you kept yours good for. Or, if they even made it beyond Day 1 before they disappeared entirely!! 😉 – Nagi x
Watch how to make it

Chocolate Muffins
Ingredients
- 1 3/4 cups plain flour (all-purpose flour) (Note 1)
- 1 1/4 tsp baking soda / bi-carb (Note 2)
- 1/2 tsp salt
- 1/2 cup Dutch process cocoa powder , sifted (Note 3)
- 1 tbsp instant coffee granules / powder , optional (Note 4)
- 3/4 cup milk , full fat, HOT
- 1/2 cup canola oil (or veg or other neutral flavoured oil)
- 1 cup brown sugar , packed (Note 5)
- 1 tsp vanilla extract
- 3/4 cup sour cream or thick plain yogurt (fridge-cold fine, Note 6)
- 1 large egg (55-60g / 2oz) (fridge-cold fine, Note 6)
- 1 1/2 cups dark chocolate chips (US: semi-sweet chips)
Instructions
- Preheat oven to 210°C / 410°F (190°C fan). Place shelf in the top 1/3 of the oven. Line a 12-hole standard muffin tin with paper cases.
- Sift Dry ingredients: Sift flour, baking soda and salt into a large bowl.
- Bloom cocoa: In a separate bowl, sift the cocoa then add coffee and HOT milk. Whisk until lump-free.
- Add remaining Wet ingredients: To the cocoa mixture, add sugar, oil, egg, sour cream and vanilla. Whisk until smooth.
- Mix flour in: Pour Wet mix into the bowl holding the flour. Whisk until smooth and glossy. Stop once it's smooth, don't mix excessively. (Note 7)
- Add chocolate chips: Stir in most of the chocolate chips – reserve approx 1/4 cup for topping.
- Fill muffin tin: Divide the batter between the 12 holes, up to 0.5cm / 0.2" from rim of paper liner. (Note 8)
- Top with chocolate chips: Top muffins with reserved chocolate chips (just pile in middle, they spread when baked).
- Bake at high temp, 5 minutes: Bake for 5 minutes in preheated oven. The higher temp kick will start the rise.
- Lower oven, 20 minutes: Turn oven DOWN to 190°C / 375°F (170°C fan). Bake a further 20 minutes, checking at 15 minutes. When toothpick comes out clean they're ready. Don't confuse melted chocolate with raw batter!
- EAT! Rest in muffin tin for a few minutes, then transfer to cooling rack. Allow to cool for 15 minutes before devouring!
Notes
Nutrition
Life of Dozer
He found a new bed.

The post Chocolate Muffins appeared first on RecipeTin Eats.
]]> Ever wondered how Red Velvet Cupcakes got their name? It’s the crumb, for one. True to its name, this cupcake version of Red Velvet Cake is a striking scarlet colour that’s velvety and soft, with a hint of vanilla and chocolate flavour. Topped with fluffy cream cheese frosting, it loves to steal the lime light.... Get the Recipe
The post Red Velvet Cupcakes appeared first on RecipeTin Eats.
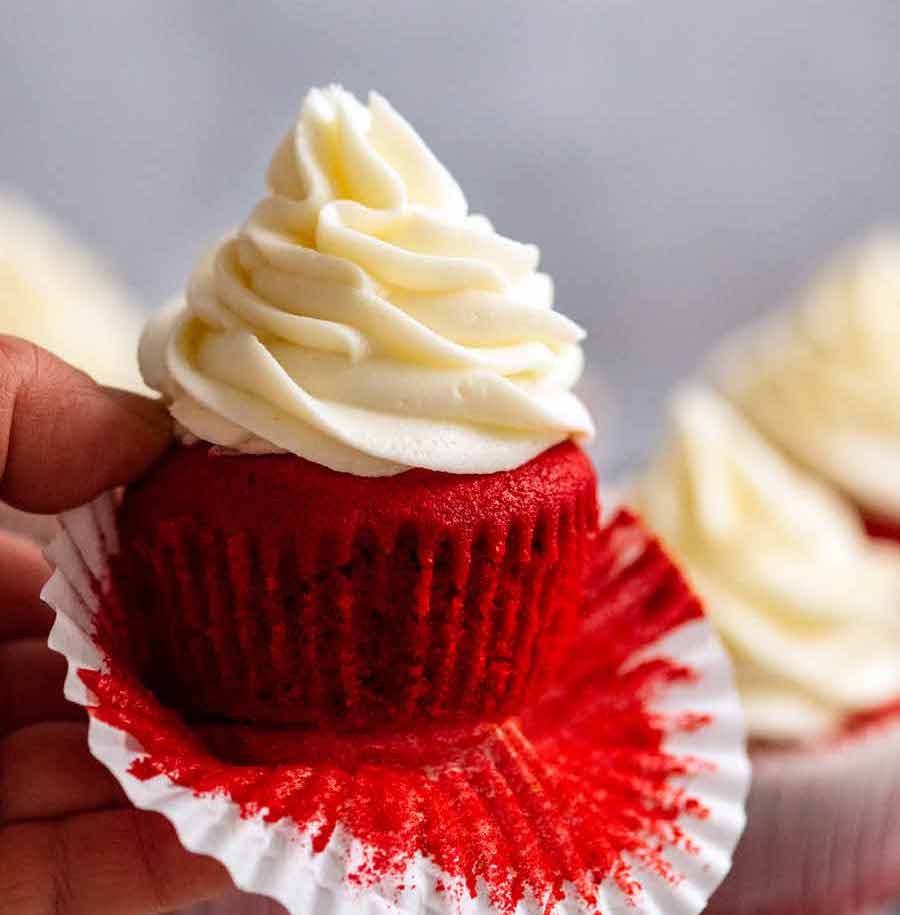
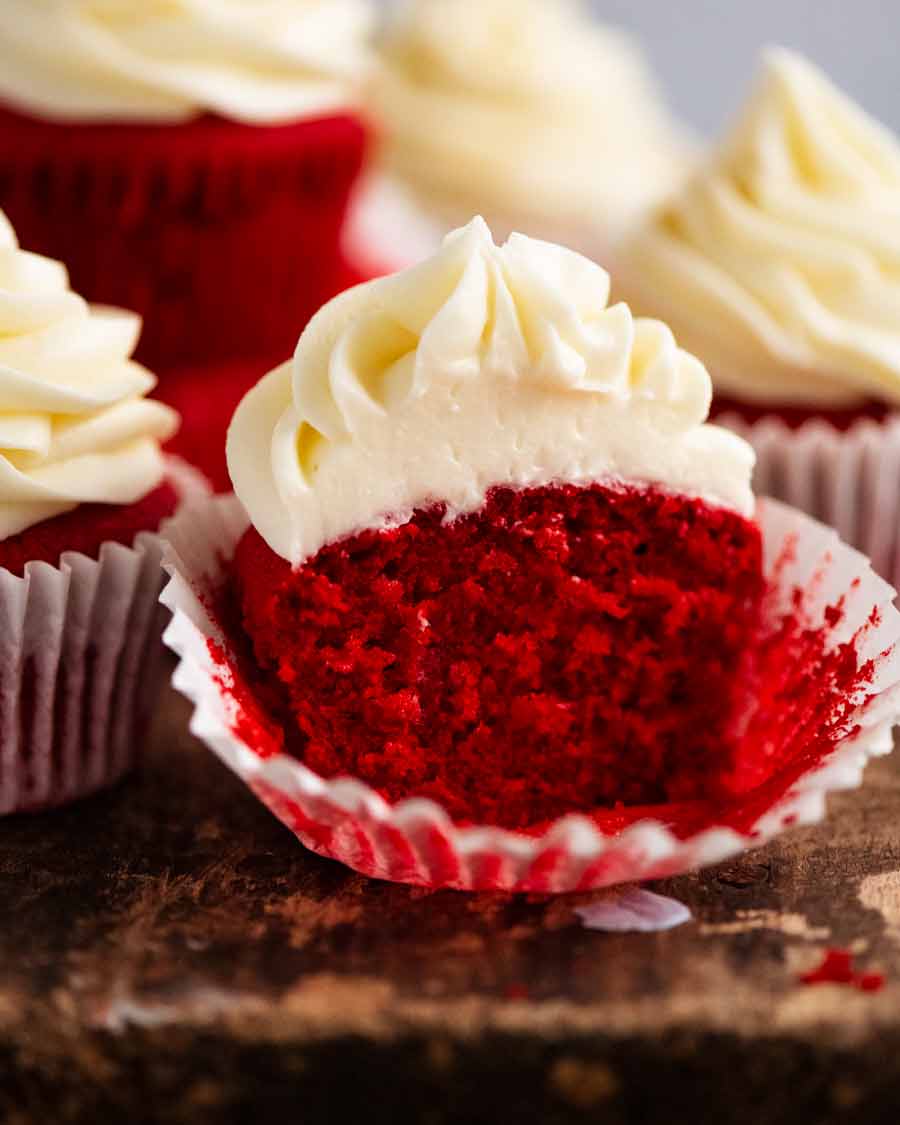
]]>Ever wondered how Red Velvet Cupcakes got their name? It’s the crumb, for one. True to its name, this cupcake version of Red Velvet Cake is a striking scarlet colour that’s velvety and soft, with a hint of vanilla and chocolate flavour. Topped with fluffy cream cheese frosting, it loves to steal the lime light. And we happily let it!
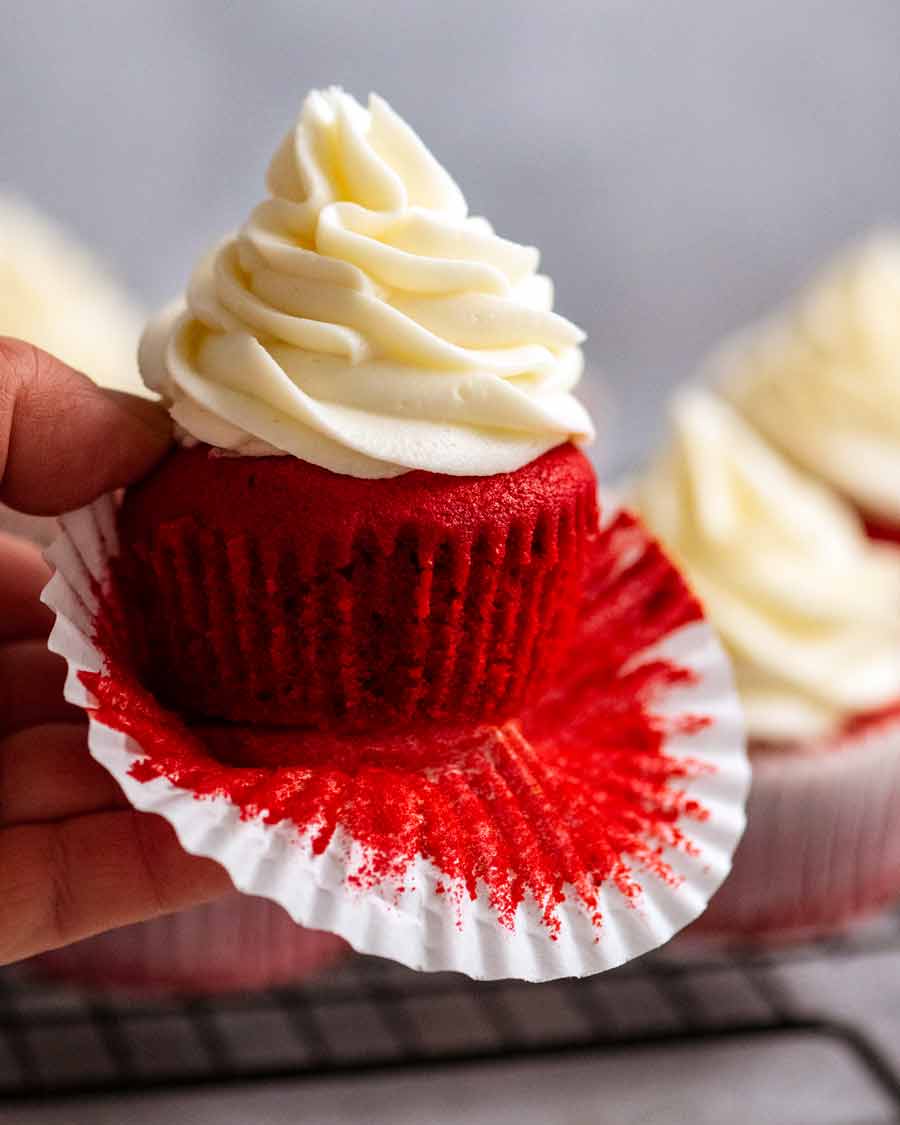
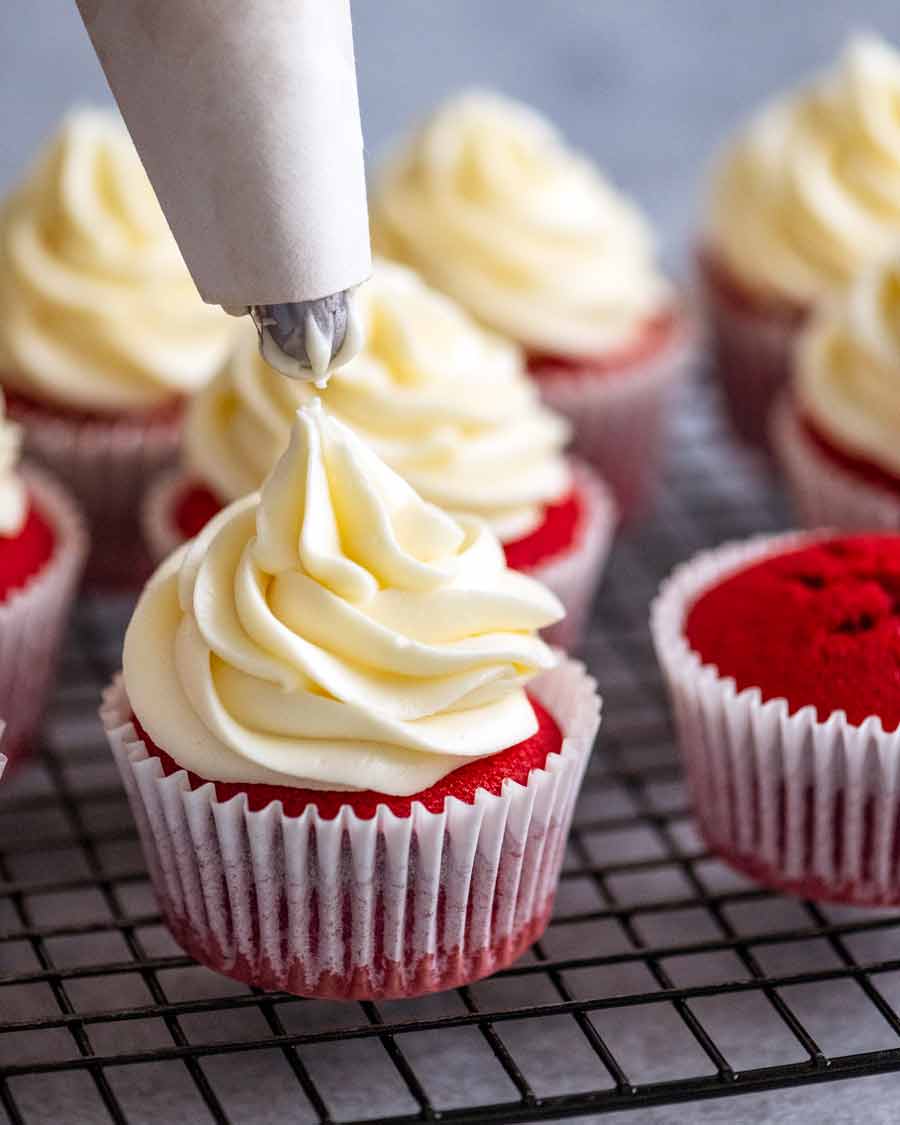
Red Velvet Cupcakes
The eye-catching cupcake version of the iconic Red Velvet Cake taste like a cross between vanilla and chocolate cupcakes, and are piled high with swirls of fluffy cream cheese frosting. With a superior, buttery and “velvety” sponge, Red Velvet Cupcakes are THE treat to make when you want to be the talk of a gathering.
It commands attention – both visually, and by virtue of pure deliciousness. And just think: No matter how crowded the pot luck buffet table is, everybody’s eyes will immediately be drawn to YOUR cupcakes. Because how can one miss these? (Answer: You can’t!)
Ingredients in Red Velvet Cupcakes
Here’s what you need for the Red Velvet Cupcakes. You might be wondering – vinegar? Why oil AND butter? And is cake flour really necessary? Read on to find out the answers!
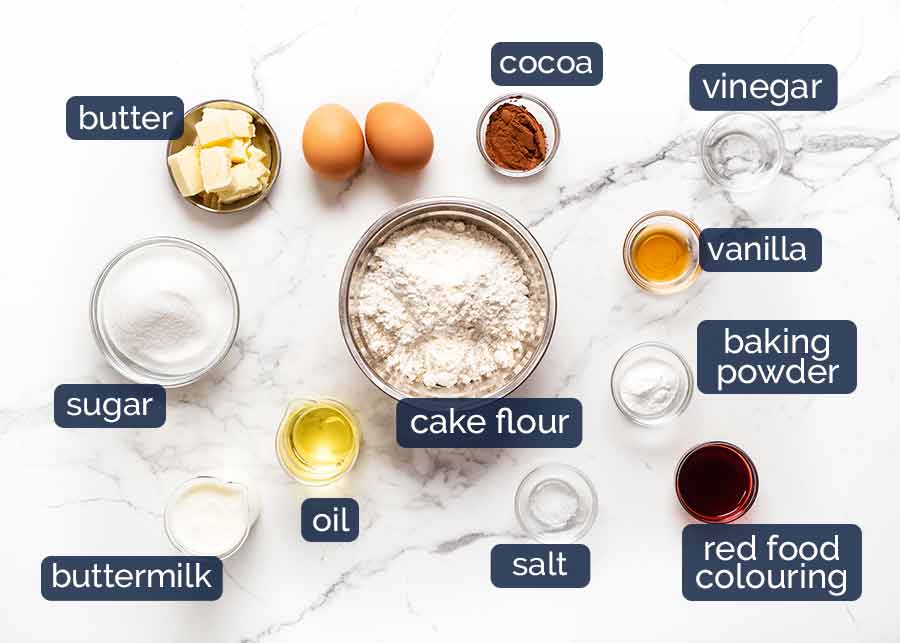
Cake flour – This low protein flour is specifically to make the crumb of cakes more tender. For Red Velvet Cupcakes, it also makes the dome more nicely rounded compared to using plain flour (all purpose flour).
If you use plain / all purpose flour, the cupcake is still excellent, however, you will notice that the dome has a bit more of a peak to it. Not drastic or offensive, and it’s hidden under the frosting anyway!
My advice? Worth hunting down cake flour if you’re making this for a special occasion / wanting to show off. Otherwise, don’t make a special trip to the store.
Buttermilk – Fermented milk that is thicker than plain milk but thinner than cream, with a slight tang. An ingredient used in baking for flavour (the subtle background tang is a signature characteristic of Red Velvet Cupcakes), and to make cakes lighter because the acid in it helps tenderise gluten.
It is also commonly used in baking to make cakes lighter because the acid in buttermilk activates baking soda to make cakes rise. However, this doesn’t apply to Red Velvet Cupcakes because we’re using baking powder instead which already has acid in it to activate the rising power.
Don’t have buttermilk? Make it yourself. It just requires lemon juice or vinegar and milk! Directions in recipe notes.
Baking powder – To make the cupcakes rise! Note: I use baking soda for Red Velvet Cake. But for cupcakes, I prefer baking powder because it gives the cupcakes a prettier dome (baking soda gives it a slightly unsightly peak).
Vinegar – This is sometimes used in baking recipes that use baking soda as the leavening agent to make them rise, such as in my Red Velvet Cake recipe, because the vinegar gives the baking soda a kick start in the rising process.
However, it also plays a part in the tenderness of the crumb because acid helps breakdown gluten (as noted above in buttermilk). And interestingly, I found that using vinegar helps preserve the vibrant red colour in the cupcakes.
So even though we are not using baking soda in this recipe, vinegar stays in!
Oil AND butter – Yes, both are necessary in this recipe for best results! We love butter for flavour, but it doesn’t make things moist. Oil makes cakes moist but doesn’t add flavour. So use both!
Vanilla – Vanilla extract trumps artificial vanilla essence. Don’t waste vanilla bean on this recipe.
Cocoa powder – Just a bit, for the subtle chocolate flavour we know and love about Red Velvet! Standard cocoa powder is called for here, though the more intense flavoured dutch processed works just fine too.
Sugar – Caster sugar / superfine sugar works best here because it dissolves more easily into the batter. But granulated / ordinary white sugar can be used if that’s all you’ve got.
Red food colouring – To make the cupcake RED! Using ordinary food colouring (rather than intense gel) you need 1 whole tablespoon of red food colouring. If using gel, dip-and-smear a toothpick 3 times, and match the batter colour to the photos below.
Eggs – Make sure your eggs are at room temperature, not fridge cold, and are labelled “large eggs” which is an industry standard size in Australia and the US (55-60g / 2 oz each). The carton will be labelled as such.
Why do eggs have to be at room temperature? Because they incorporate better into the batter. Also, cold eggs mixed in with creamed butter makes the butter solidify again! Yep, been there, done that!
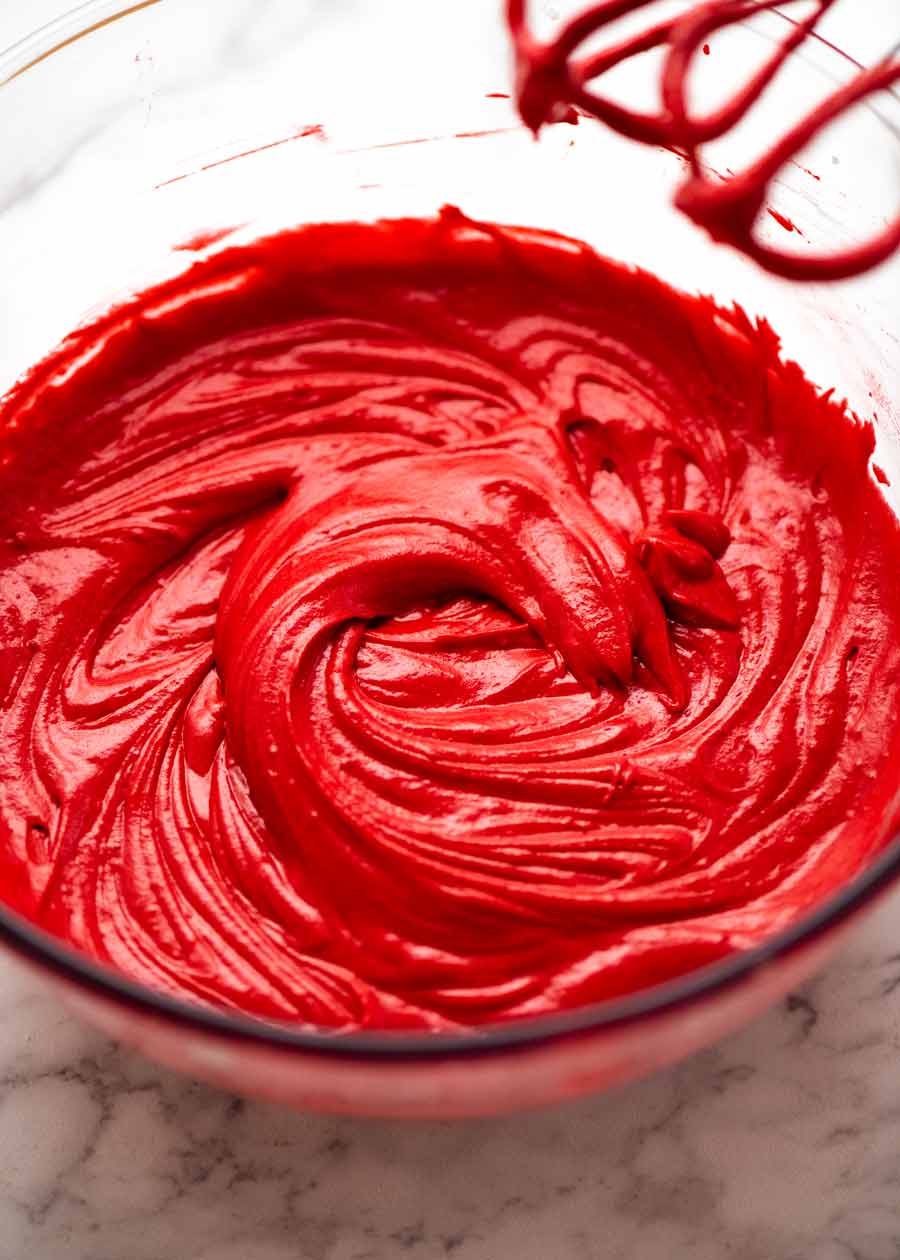
How to make Red Velvet Cupcakes
The making part is really no different to typical butter based cakes.
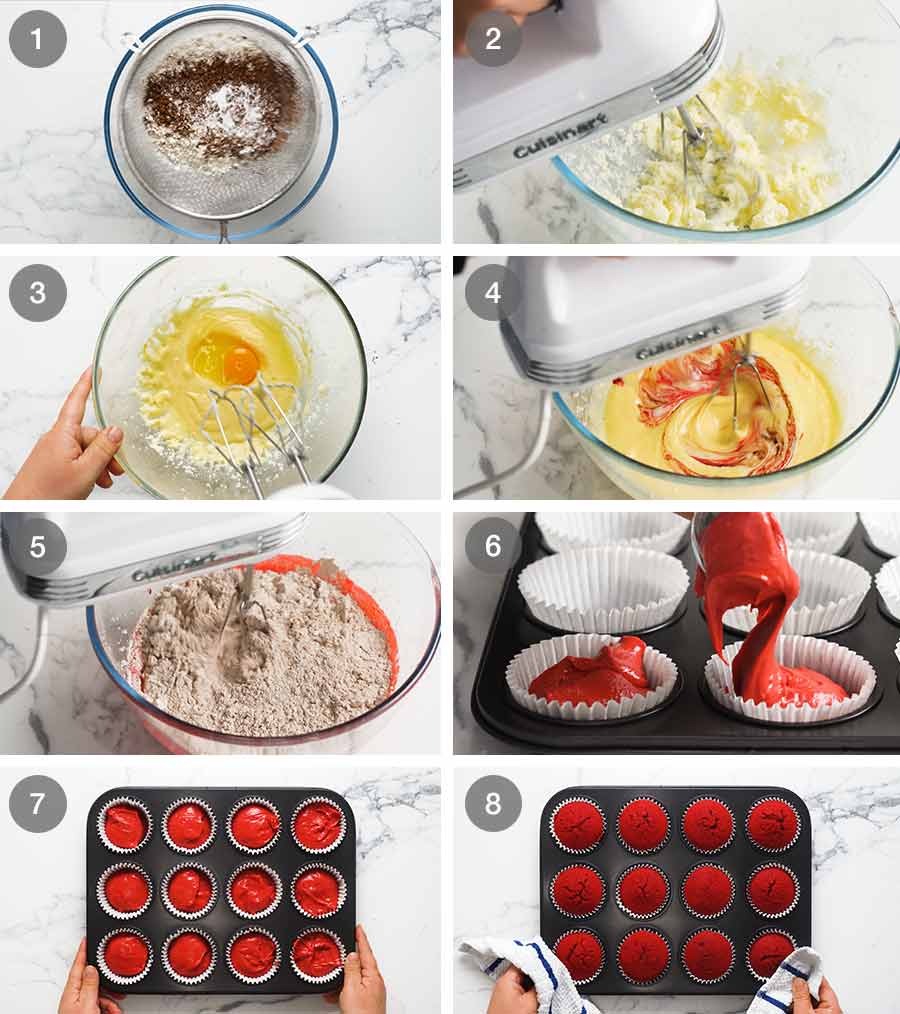
Sift the dry ingredients into a bowl so they’re lump free. I don’t like sifting, but in this situation, it’s necessary because cocoa powder has a tendency to get lumps in it.
Cream butter, then sugar – Cream the softened butter and beat with an electric beater or a stand mixer for 1 minute until it’s smooth. THEN add the sugar and beat for a further 2 minutes until it’s fluffy and the butter has changed from yellow to very pale yellow, almost white.
Eggs – Add eggs one by one, beating in between until incorporated.
Oil, buttermilk, vinegar and vanilla – Then beat in remaining wet ingredients until incorporated.
Add Dry Ingredients – Lastly, add the Dry ingredients and mix for just 30 seconds until incorporated and you no longer see streaks of flour. There may be some small lumps still, and that’s ok. It’s better than over mixing which is a common mistake with cupcakes. This causes the batter to be over worked which makes the cupcake less tender.
Important – Once the dry ingredients are mixed with the wet ingredients, do not stop. Fill the muffin tin and get it in the oven quick smart. The reason is because once the wet ingredients are combined with the dry, the baking powder is activated. If you leave it sitting around, the baking powder will be bubbling away in the raw batter and by the time it’s baked, it won’t rise as well. This rule applies to all baking recipes!
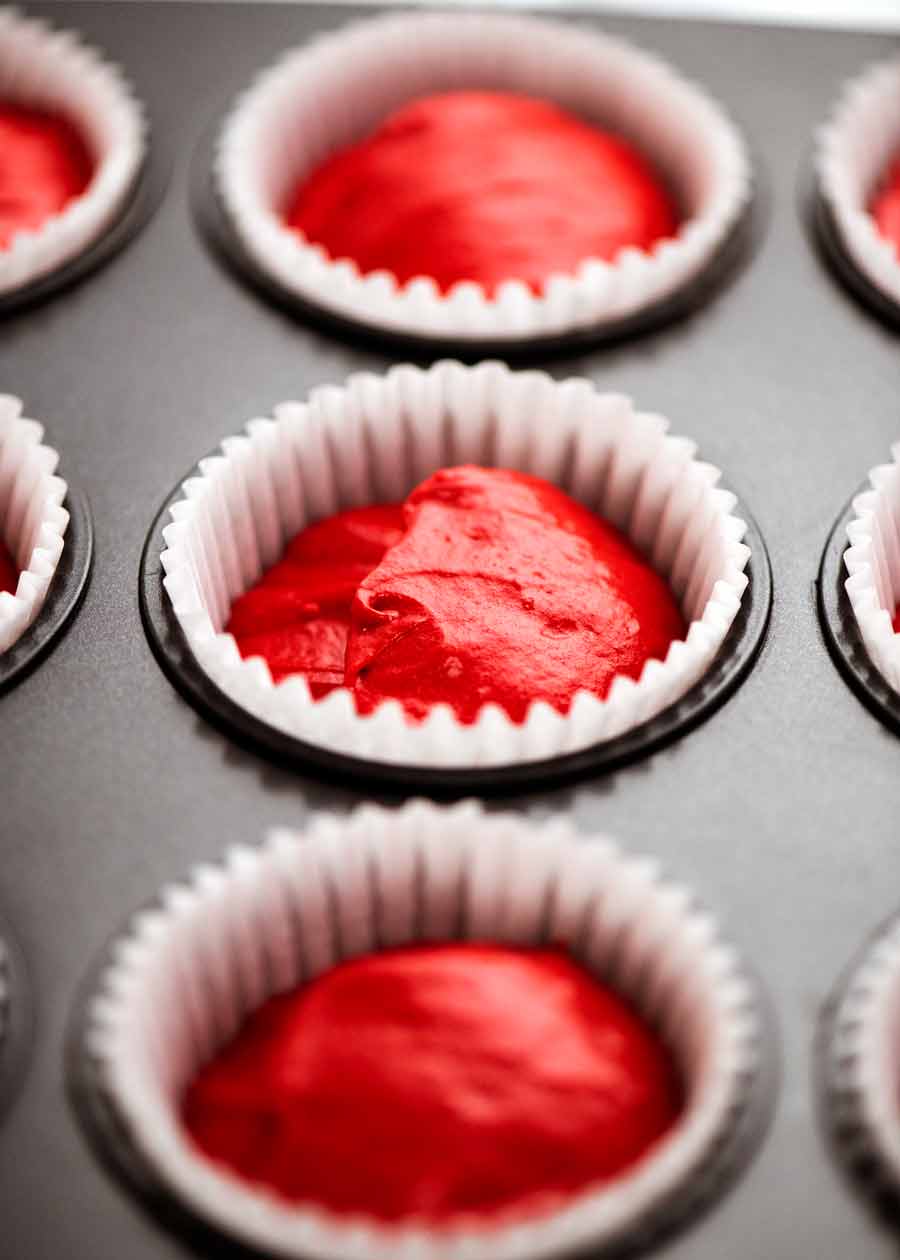
Fill muffin tin with the batter. It makes 12 perfect cupcakes, so divide all the batter between the 12 holes. If you use a standard muffin tin with cupcake liners the size I use, then it should fill the paper liners 3/4 of the way up to produce perfectly domed cupcakes!
Bake for just 20 minutes in a 180°C/350°F (160°C fan) oven, or until a toothpick inserted in the middle cupcake comes out clean.
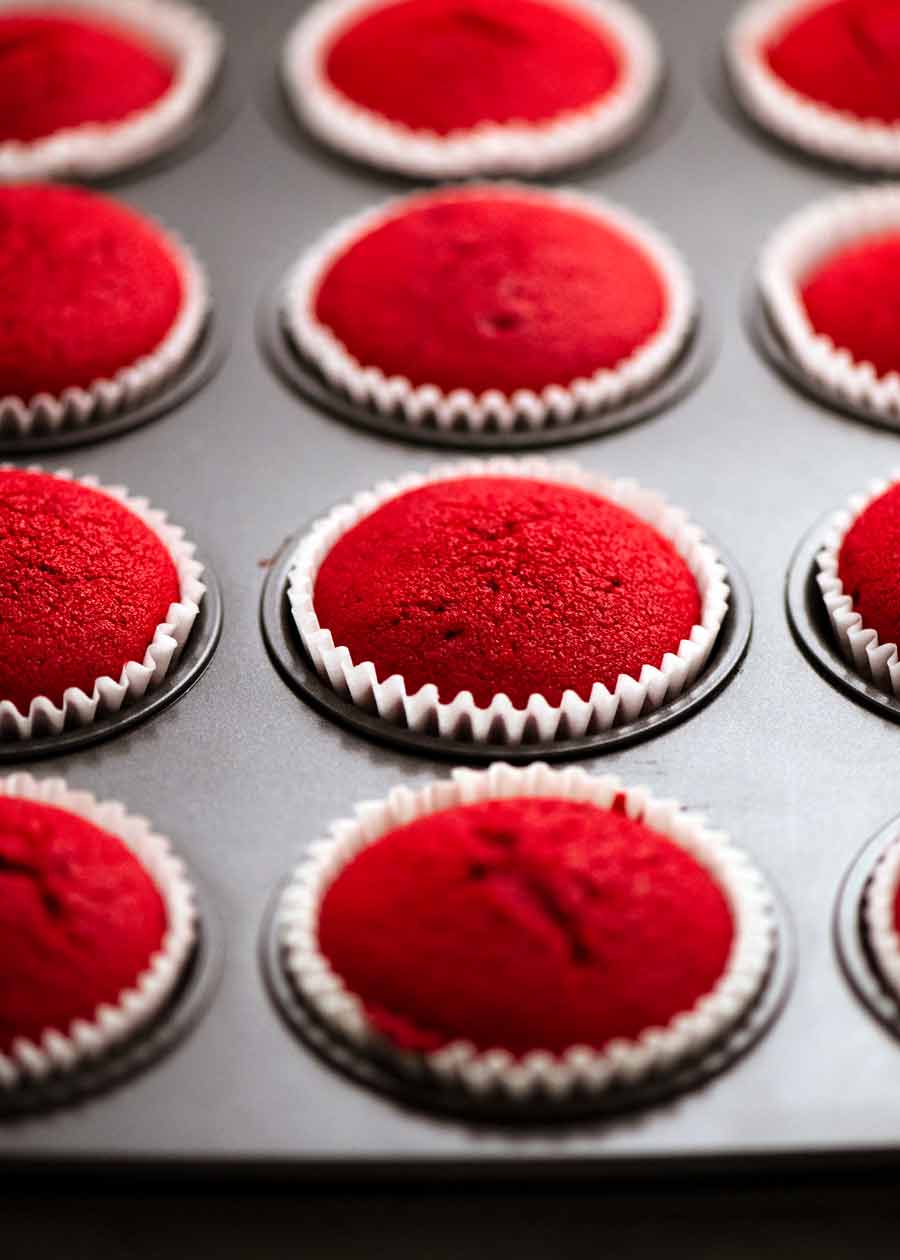
The surface of some of the cupcakes will be a little cracked. But that is absolutely no issue. Because in what world do people send out unfrosted cupcakes?? 😂
Cool completely before frosting. Warm cupcakes with butter based frosting = disaster! (In the form of melted frosting!)
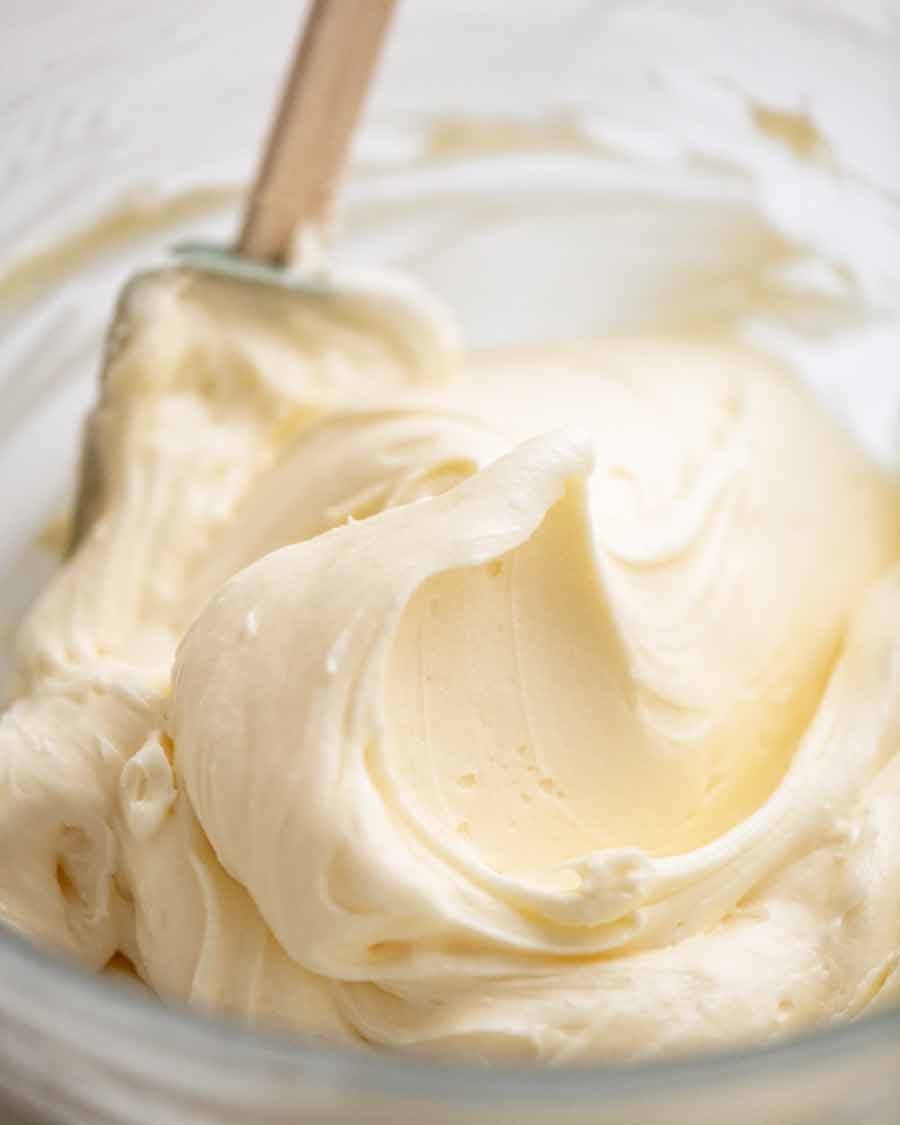
Ingredients for Cream Cheese Frosting for Red Velvet
Cream Cheese is the most common frosting you see these days for Red Velvet Cake and Cupcakes, and that’s what I’m sharing today. The creamy, fluffy sweet frosting with the tang from cream cheese is a perfect match with the cupcakes!
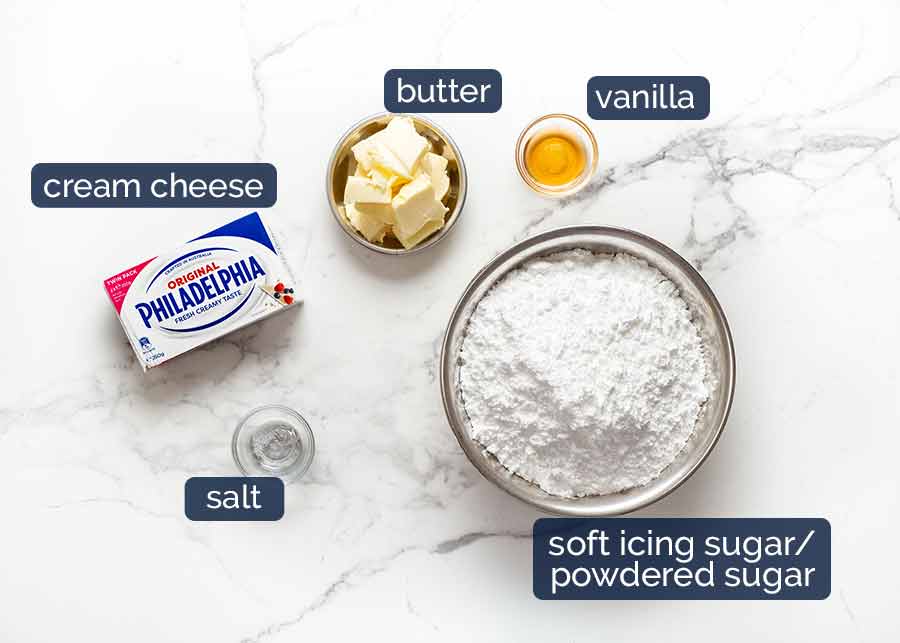
Cream cheese – Must be block, not the tub cream cheese which is softer as it’s the spreadable kind. If you use tub, the frosting will be too soft and sloppy.
Philadelphia is still my brand of choice, though these days better value brands are actually pretty good (I wouldn’t have said that 5 years ago!). Make sure it’s softened so it can be whipped to make it fluffy and creamy. If you’re in Australia, Philadelphia cream cheese these days is soft enough straight out of the fridge to whip. If you’re in the US, leave it on the counter for a bit.
Soft icing sugar / powdered sugar – Not to be confused with pure icing sugar which sets hard for things like royal icing, soft icing sugar / powdered sugar is a mix of cane sugar and tapioca or maize starch so it dissolves easily into frosting intended to be soft, fluffy and creamy.
Butter – To add richness to the frosting as well as giving it structure so it can be piped.
Vanilla – For flavour.
Salt – Just a pinch brings out flavour in baked goods!
How to make Cream Cheese Frosting
The trick to making a lovely fluffy, creamy cream cheese frosting is to beat, beat, beat. Oh – and to beat the butter first before adding the cream cheese, and to add the icing sugar in parts so you don’t get a dust storm in your face!
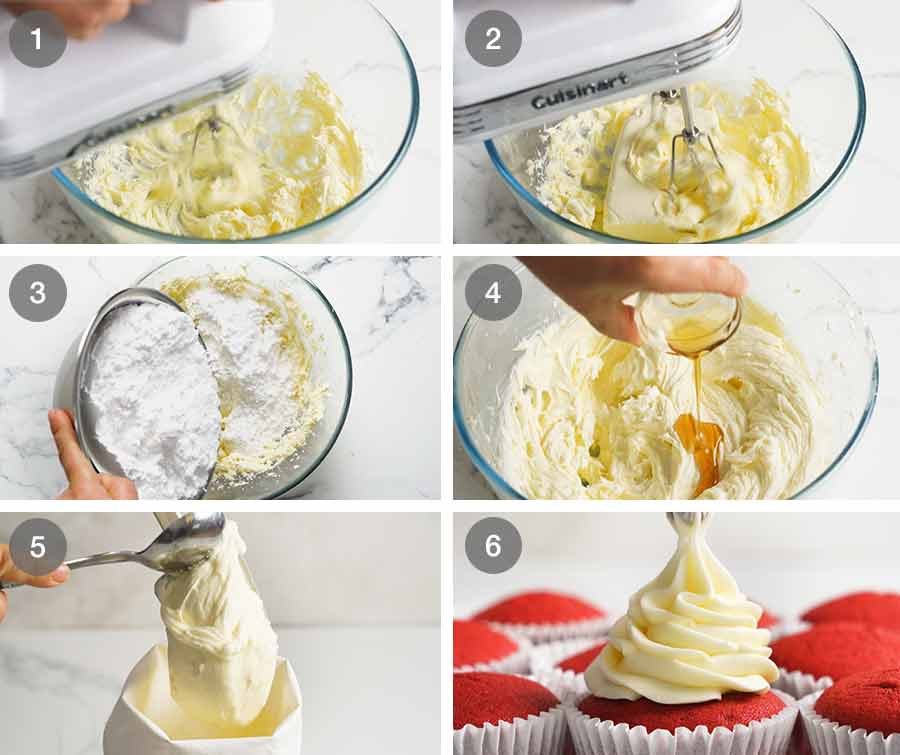
Cream butter: Beat the butter first for 1 minute until it’s smooth and starts to become paler in colour – speed 6 on stand mixer using the paddle attachment, or speed 9 for electric beater. I do this because the butter needs to be creamed longer than cream cheese. It also helps to make the frosting more white – butter changes from yellow to almost white the longer you beat it.
Cream cream cheese: Add cream cheese then beat for a further 1 minute on the same speed until smooth.
Add icing sugar: Add icing sugar in 4 batches, beating in between until incorporated, starting on speed 1 so you don’t get a dust storm in your face! If you do have dust storm problems, just place a clean tea towel over the bowl as you beat.
Beat until fluffy: Add vanilla and salt, then beat for 2 minutes until fluffy – speed 6 with stand mixer, speed 9 with electric beater. It should be creamy but still hold its shape in a peak (see video). If it’s too sloppy, place in fridge for 30 minutes, then beat again.
Piping bag: Transfer into piping bag with desired piping tip.
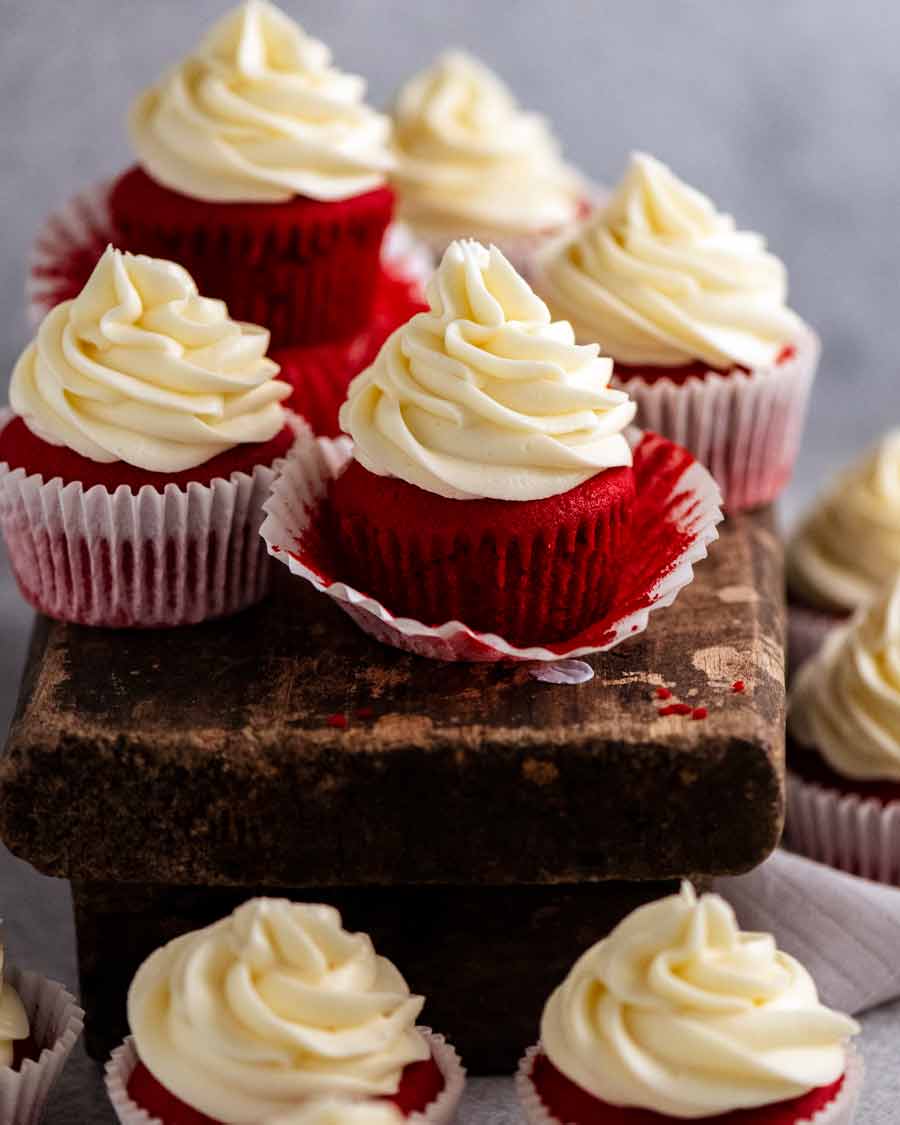
Pipe onto cupcake, swirling it up nice and high! This recipe makes enough to generously frost 12 cupcakes as pictured in post.
Fresh for 3 days – more tender than most!
You’ll find these Red Velvet Cupcakes are more moist and tender than the typical recipe, owing to the use of the combination of both butter and oil (as opposed to just butter) and the rather strict beating times I provide. Over beating is one of the most common causes of tough cupcakes with “rough” crumbs. Stick to the times I provide, and I guarantee you will have the most plush Red Velvet Cupcakes on the block!
The other benefit of extra soft Red Velvet Cupcakes is shelf life. Cupcakes are notorious for becoming quite dry the next day. But not these! The shelf life of these is 3 days in an airtight container. Keep them in the fridge if it’s warm where you are. The frosting will become firm, so be sure to bring to room temperature before eating so the frosting becomes nice and creamy again! – Nagi x
Watch how to make it

Red Velvet Cupcakes with Cream Cheese Frosting
Ingredients
Dry Ingredients:
- 1 1/3 cups cake flour (sub plain / all purpose flour, Note 1)
- 1 tbsp cocoa powder , unsweetened (Note 2)
- 1 1/2 tsp baking powder (not baking soda, Note 3)
- Pinch of salt
Wet Ingredients:
- 60g / 4 tbsp unsalted butter , softened (Note 4)
- 2/3 cup caster sugar (superfine sugar)
- 2 large eggs , at room temperature (Note 5)
- 1/3 cup vegetable oil (or canola)
- 1/2 cup buttermilk , at room temperature (Note 6)
- 1 tsp vanilla extract
- 1/2 tsp white vinegar (Note 7)
- 1 tbsp red food colouring (yes, 1 whole tablespoon!)
Cream Cheese Frosting:
- 1/3 cup unsalted butter , softened (Note 4)
- 170g / 6oz Philadelphia block cream cheese , softened (Note 8)
- 1/2 tsp vanilla extract
- 1/8 tsp salt
- 2 1/2 cups soft icing sugar mixture (powdered sugar) , sifted (Note 9)
Instructions
Cupcakes:
- Preheat oven to 180°C/350°F (160°C fan). Line a standard 12 hole muffin tin with cupcake liners.
- Sift Dry ingredients together into a bowl.
- Cream butter: Put the butter in a separate bowl and beat on speed 2 for 1 minute with an electric mixer or stand mixer (paddle attachment).
- Cream sugar: Add sugar then beat for a further 2 minutes, same speed, until the butter is very pale yellow, almost white.
- Beat in eggs: Add the eggs one at a time beating for 30 seconds on speed 1 after each addition.
- Add remaining Wet ingredients: Add oil, buttermilk, vanilla and red food colouring then beat on Speed 1 until incorporated and the batter is smooth.
- Beat in flour: Sprinkle the Dry ingredients across the surface and mix on Speed 1 for just 20 seconds. Scrape down sides of the bowl, then mix again for 10 seconds. The batter should now be smooth – few small lumps is ok. Do not keep beating – overworks batter = cupcakes not as soft!
- Fill pan: Divide the batter between the 12 cupcake liners – it should fill 3/4 of the way, but it depends on the size of the cupcake liners you use.
- Bake for 20 minutes or until a skewer inserted into the centre of the middle cupcake comes out clean.
- Cool: Immediately remove cupcakes onto a wire rack. Cool completely before frosting with cream cheese frosting.
Frosting:
- Cream butter: Place butter in a bowl and beat for 1 minute until it's smooth and starts to become paler in colour – speed 6 on stand mixer, speed 9 for electric beater.
- Cream cream cheese: Add cream cheese then beat for a further 1 minute on the same speed until smooth.
- Add icing sugar: Add icing sugar in 4 batches, beating in between until incorporated, starting on speed 1 so you don't get a dust storm in your face!
- Beat until fluffy: Add vanilla and salt, then beat for 2 minutes until fluffy – speed 6 with stand mixer, speed 9 with electric beater. It should be creamy but still hold its shape in a peak (see video). If it's too sloppy, place in fridge for 30 minutes, then beat again.
- Pipe: Transfer into piping bag with desired piping tip. Pipe onto cupcakes – makes enough to generously frost 12 cupcakes as pictured in post.
Notes
Nutrition
Life of Dozer
He’s such a good shoot assistant….

The post Red Velvet Cupcakes appeared first on RecipeTin Eats.
]]> Madeleines are petite, bite-sized French sponge cakes that are as delightful to the eye as they are to the mouth. Flavoured with a hint of lemon, these adorable mini-butter cakes are gorgeously tender. With their signature shell shape they make for a lovely afternoon tea or a pretty finish to any meal! Madeleines It’s another... Get the Recipe
The post Madeleines appeared first on RecipeTin Eats.
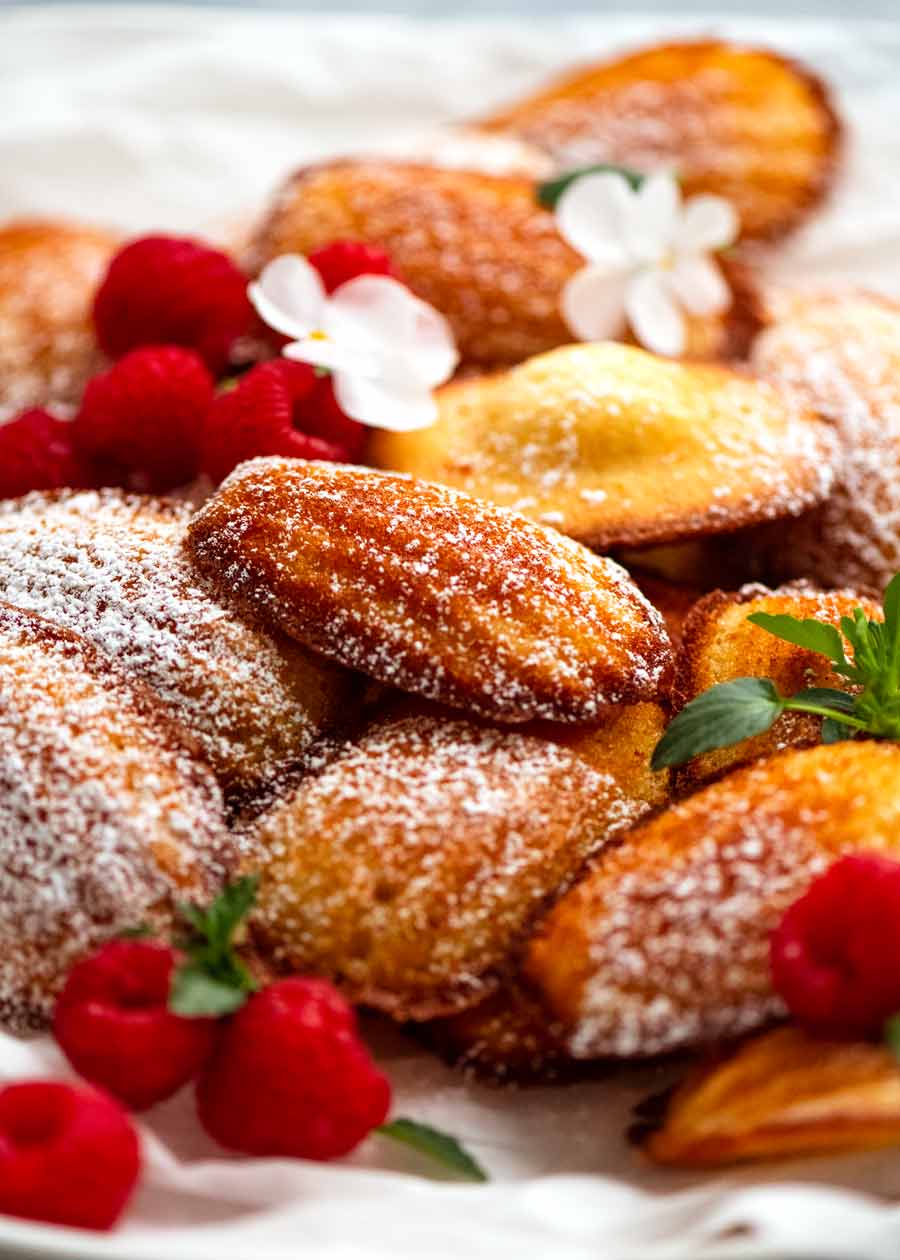
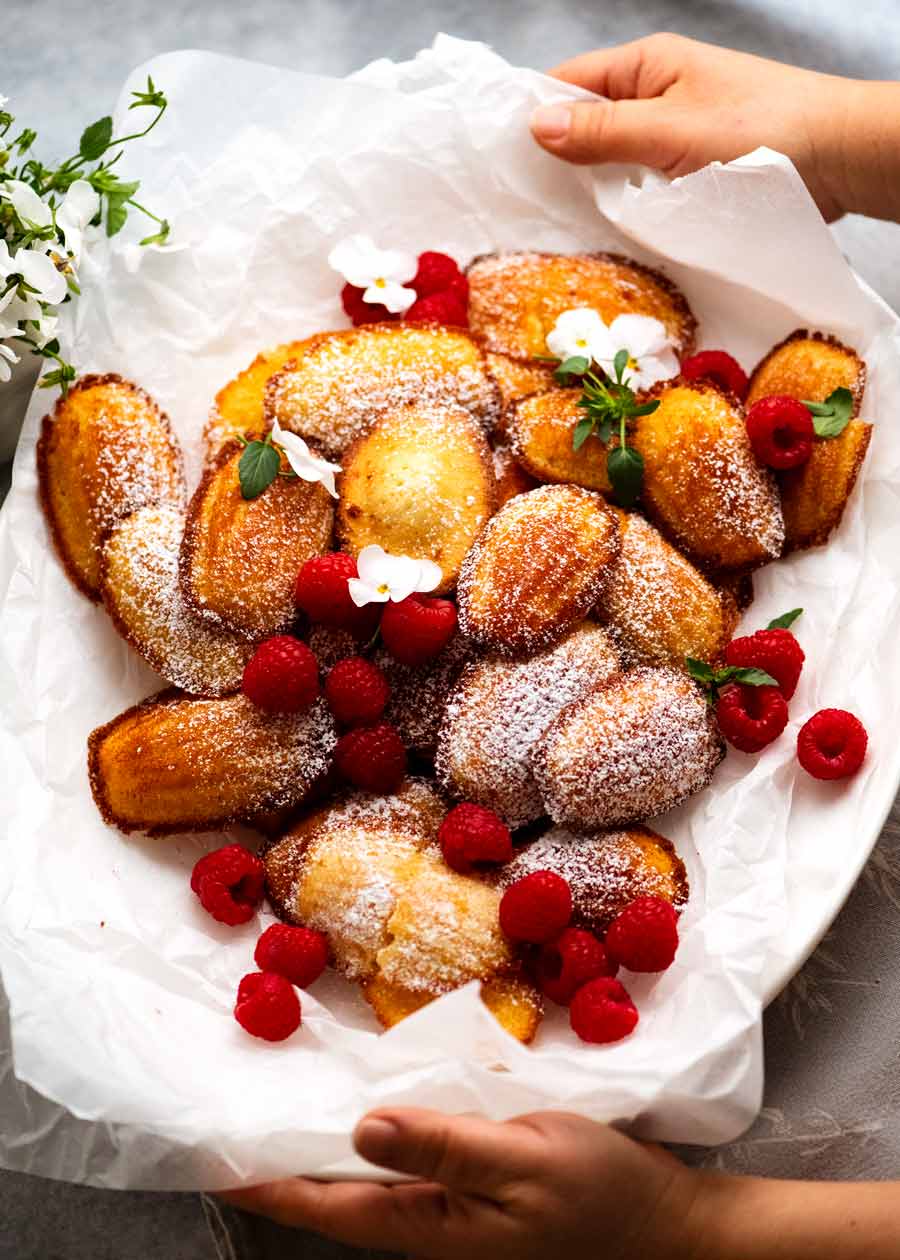
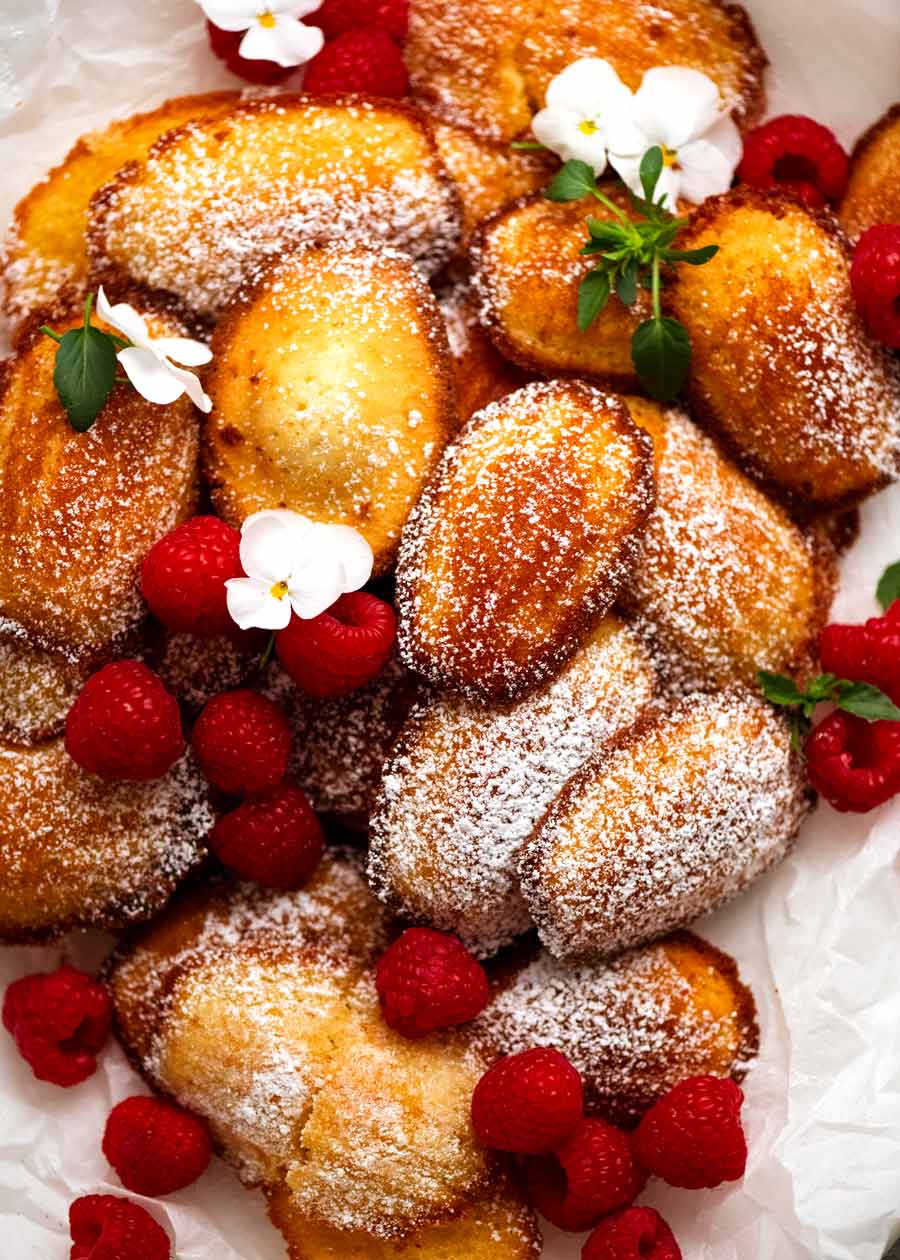
]]>Madeleines are petite, bite-sized French sponge cakes that are as delightful to the eye as they are to the mouth. Flavoured with a hint of lemon, these adorable mini-butter cakes are gorgeously tender. With their signature shell shape they make for a lovely afternoon tea or a pretty finish to any meal!
Madeleines
It’s another classic French baking recipe courtesy of Chef Jean-Baptiste! Boy was he determined to get this one just perfect. The reputation of his motherland is on the line here, after all!!
There were many, many Madeleines made in the quest to perfect this recipe and find answers to all the what-ifs in the making. We aren’t fussy around these parts… not at all! 😂
So what makes a perfect Madeleine, according to a French chef?
A tender, elegant crumb with fine, delicate holes. Not large, crude, irregular-sized holes. We aren’t making sourdough here!
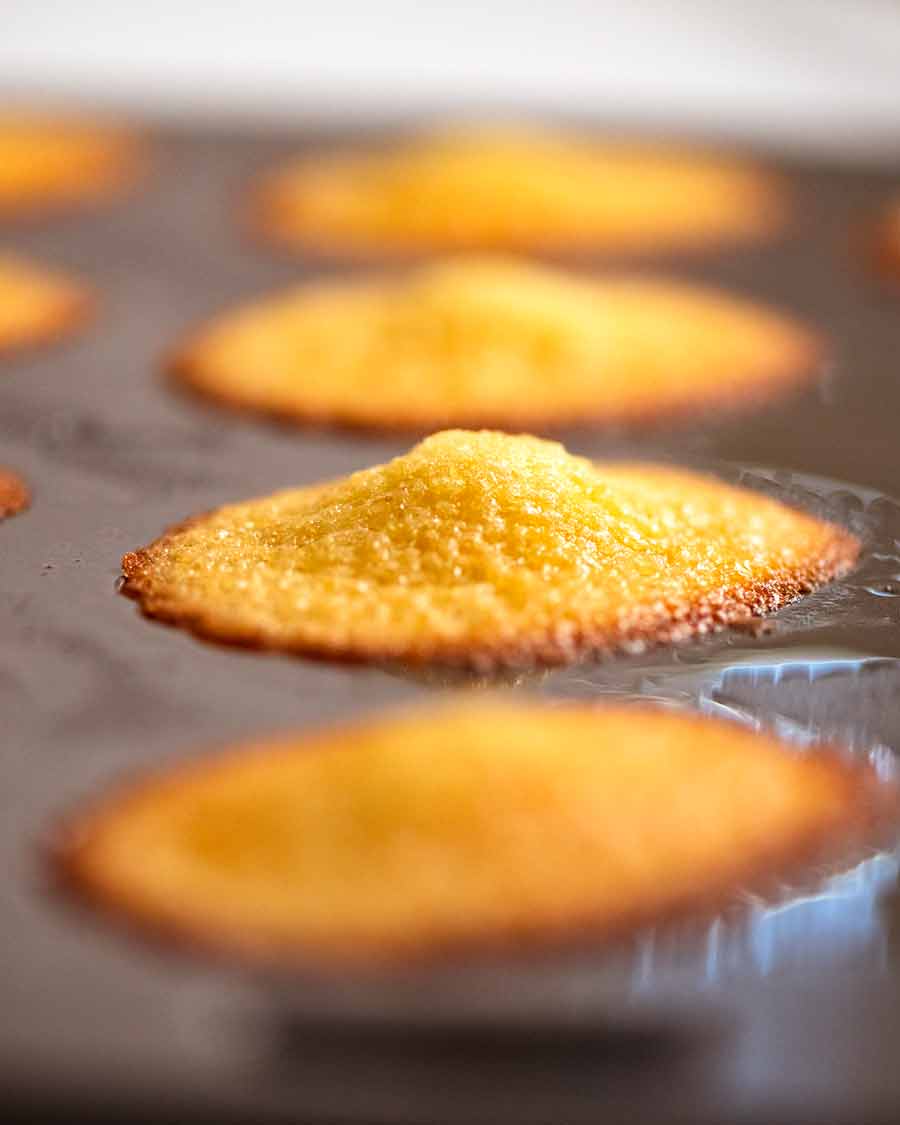
It is soft and moist on the inside while just-crisp on the edges;
There’s a signature, plump doming shape in the middle. This is a sign of a well-baked Madeleine!
It’s buttery in a melt-in-your-mouth way, not a greasy way.
It’s sweet but not overly so, and flavoured with the lightest touch of citrus; and
It’s a light golden colour on the top, and a deeper golden on the underside with the distinct, signature shell grooves.
I think we got to Madeleine #226 before he finally conceded that Batch #1 was indeed the best. Isn’t it always the way? 😂

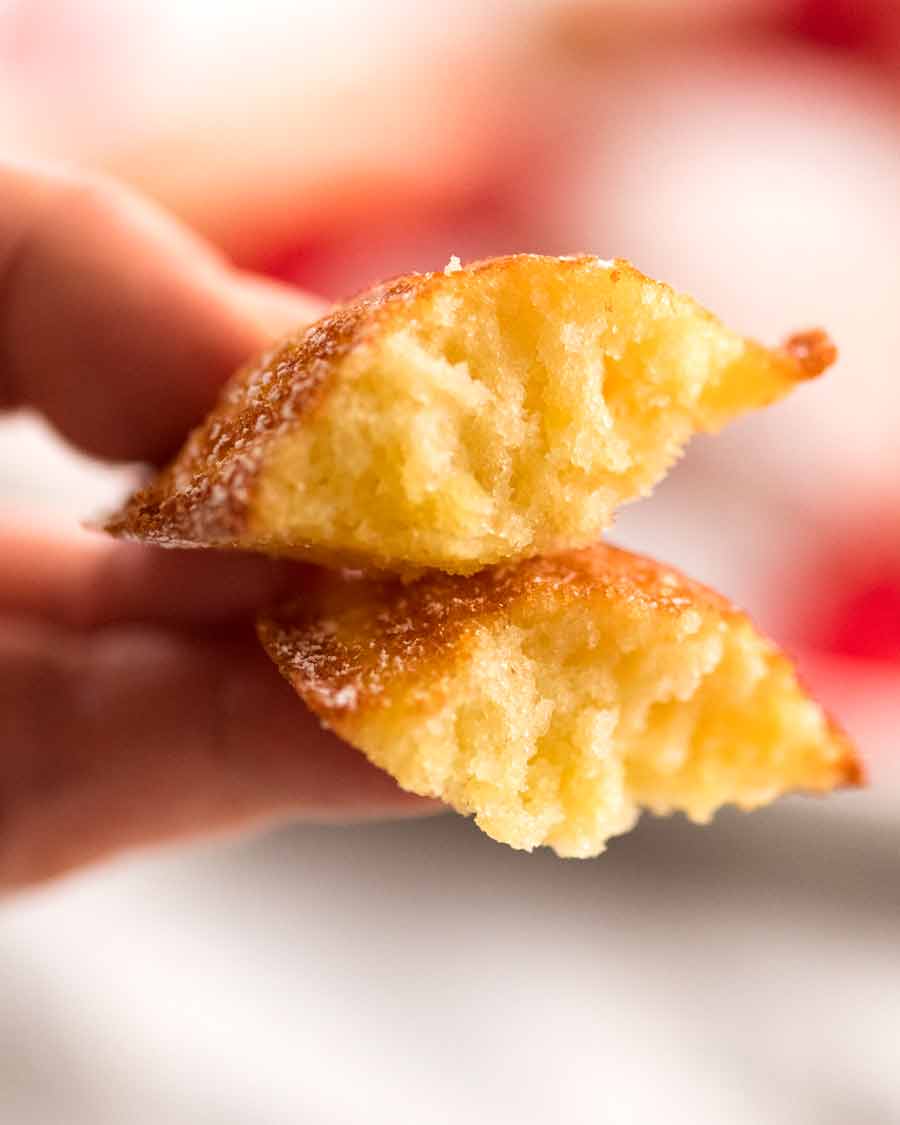
Impossible to capture how melt-in-your-mouth these are. Just make them for yourself!
(PS. Chef JB also wants me to pass on that you might find Madeleines on the internet with bigger humps. However a bigger hump = thicker batter = drier Madeleines. It is all about finding the right balance, he says, ie. The best hump with the most moist crumb inside.👌🏻)
What you need for Madeleines
Here’s what you need to make Madeleines – though note that I accidentally left out lemon zest in this photo!!
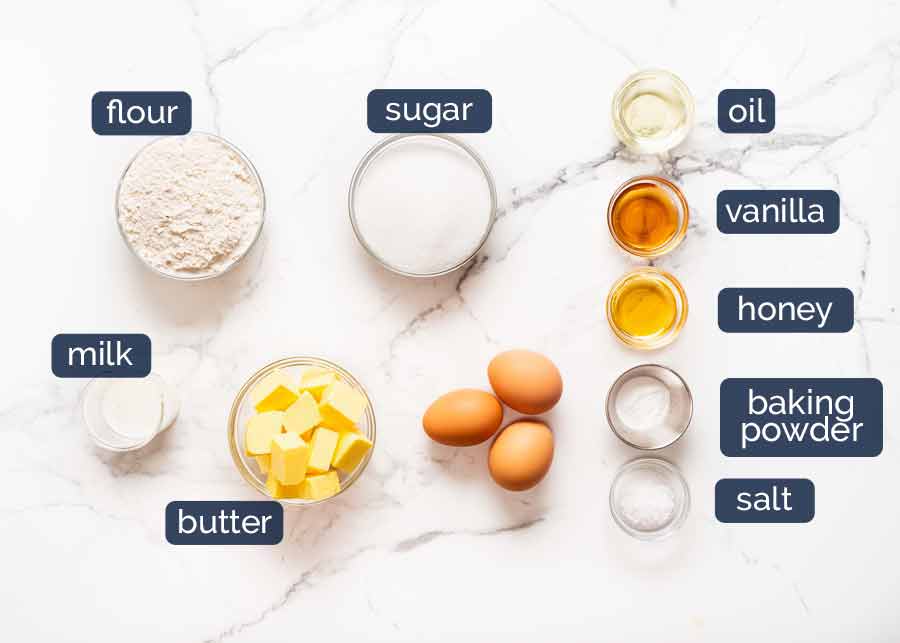
Flour – Just plain flour / all purpose flour. Though I haven’t tried, self raising flour should work too (skip the baking powder);
Sugar – Caster / superfine sugar works best here because it dissolves more easily into the batter. However, granulated / ordinary white sugar will work ok too;
Baking powder – This is what makes the batter rise and makes the crumb beautifully light and fluffy.
Check baking powder is still good – If your baking powder has been sitting in the dark depths of your cupboard for a while, it’s best to check it’s still good – see here. Baking powder can be dead even if it’s not past the due date.
Eggs at room temperature – The eggs need to be at room temperature and not fridge-cold, to ensure it incorporates properly into the batter easily. A quick way to warm up fridge-cold eggs: Place eggs in a large bowl, cover with warm tap water (just warm, not hot) and leave for 5 min. Wipe dry, then use per recipe.
Egg size (“large eggs”): 50 – 55g / 2 oz per egg is the industry standard of sizes sold as “large eggs” in Australia and the US. If your eggs are significantly larger or smaller in size, just weigh different eggs and use 150-165g / 6 oz in total (including shell) or 135 – 150g / 5.4 oz in total excluding shell (useful if you need to use a partial egg to make up the total required weight. Crack eggs, beat whites and yolks together, THEN pour into a bowl to measure out what you need);
Butter – The butter is melted so no need to soften to room temperature;
Vanilla extract – Extract is better than essence which is artificial. Use the best you can afford, for the best flavour;
Honey – For a touch of flavour;
Lemon zest – A hint of citrus flavour is traditional, and it really does give them the perfect finishing touch!
Salt – A pinch of salt in sweet baked goods is always a good thing. You can’t (shouldn’t!) be able to taste the saltiness, it’s there to help bring out flavour.
How to make Madeleines
The traditional way to make Madeleines is to refrigerate the batter overnight which allows the batter to chill and thicken so when you bake them, you get the signature bump on the surface. You can even freeze the batter for 2 months!
Because of this, they make for a terrific treat to bake to order. Have the batter sealed in a piping bag. Then it literally takes 40 seconds to pipe them into the pan and pop them in the oven, then you’re just 10 minutes away from freshly cooked Madeleines! (Oh ok fine, it might take you 90 seconds, or 2 minutes. But you get my point – it’s fast!)
Part 1: The Madeleines batter
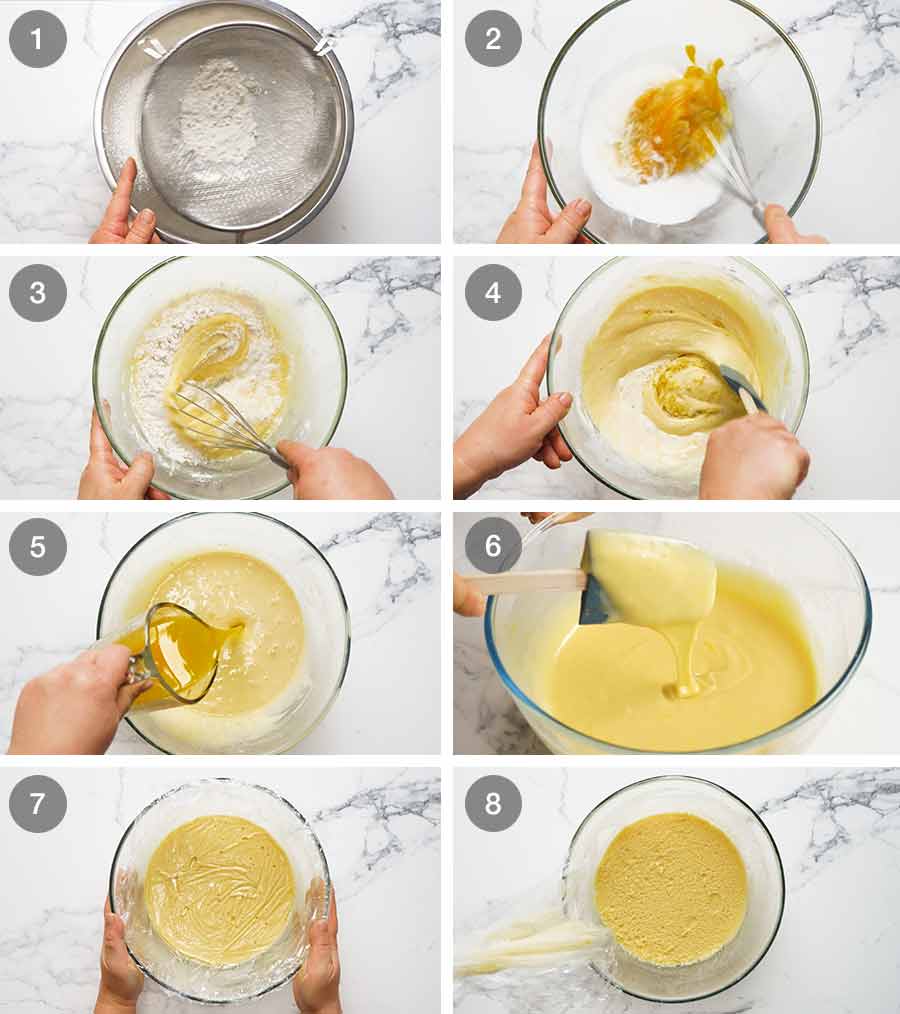
Sift flour: Sift the flour and baking powder into a bowl;
Whisk eggs and sugar: Whisk the eggs and sugar vigorously until it becomes pale and a bit foamy on the surface. This will take about 2 minutes by hand (and a bit of bicep strength!) or 1 minute on speed 6 with handheld beater;
Mix flour in 3 parts: Add the flour mixture in 3 parts, whisking gently in between until combined. Use a gentle touch here so we don’t over work the gluten which makes the crumb less tender;
Add everything else except butter: Add salt, oil, milk, honey, vanilla and lemon. Mix until combined.
Add butter: Add butter, mix gently with a rubber spatula until combined;
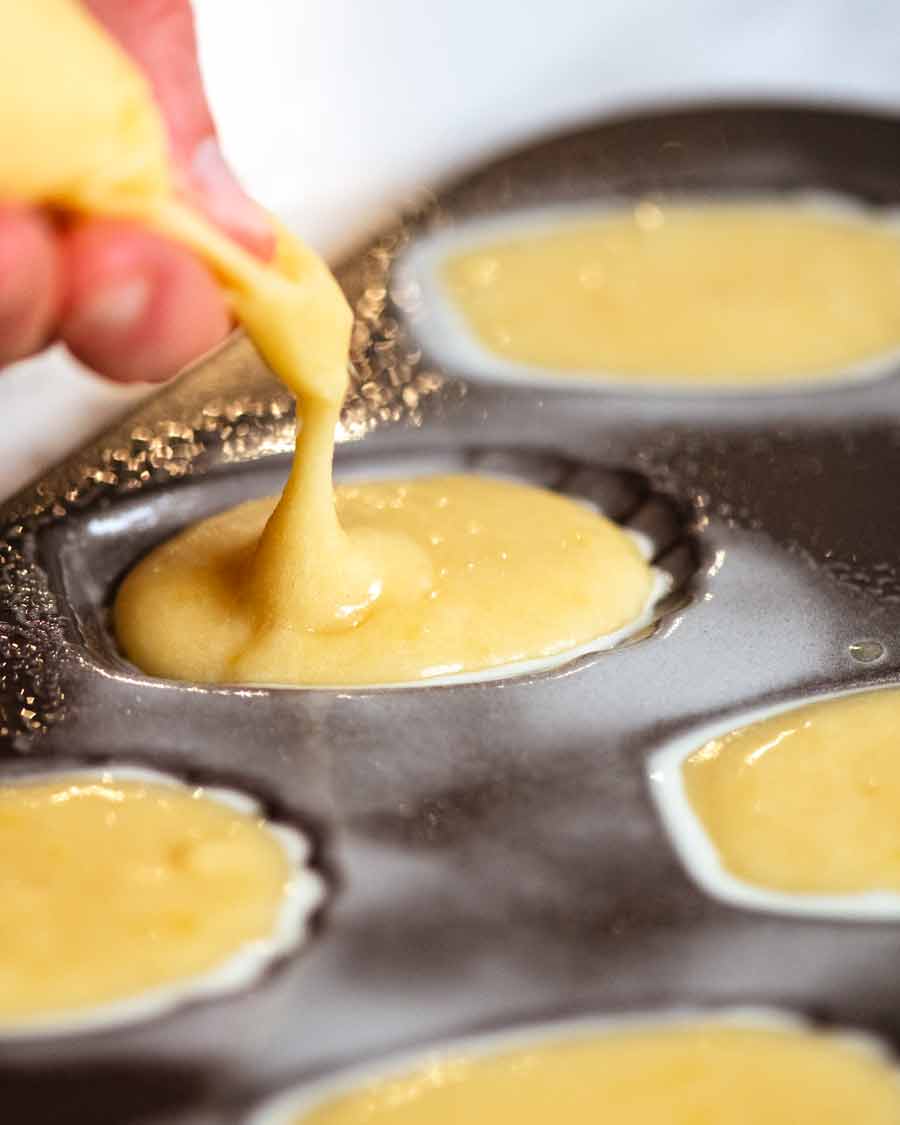
Goal batter: The batter is fairly thin but should leave a faint ribbon briefly on the surface, as pictured above (also see video);
Cover and refrigerate: Cover with plastic wrap touching the surface and leave it in the fridge overnight (minimum 6 hours). The purpose of this is to chill the batter which also thickens it. This is what creates the signature hump on the Madeleines – the shock of the heat hitting the cold batter, and the thicker batter which allows the cake to rise faster;
Ready to use: Remove the chilled batter from the fridge. Now it’s time to get it into a piping bag to make it easy to fill the pans!
Part 2: Baking
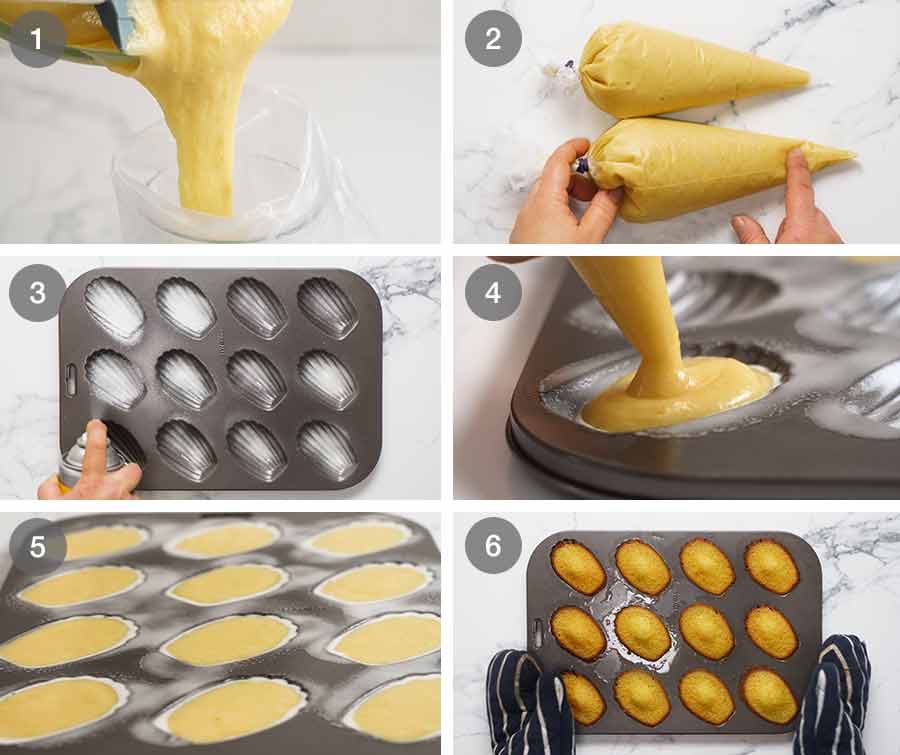
Fill piping bag with the batter, fitted with a small round nozzle. I fit the bag into a tall glass or my Nutribullet jug, then pour the batter in;
Refrigerate until required: Bags filled, it’s now ready to pipe into the pan. Or, if you want to bake them fresh on demand, just pop them into the fridge. You can even freeze them for up to 2 months!
Spray Madeleine pans: Spray the pans with canola oil or any other neutral flavoured oil. In case you’re wondering why we don’t brush with butter, it’s because it doesn’t grease it as well – some of the Madeleines will get a bit stuck. This is because butter is not pure fat, there’s dairy and water components in it (food trivia of the day!)
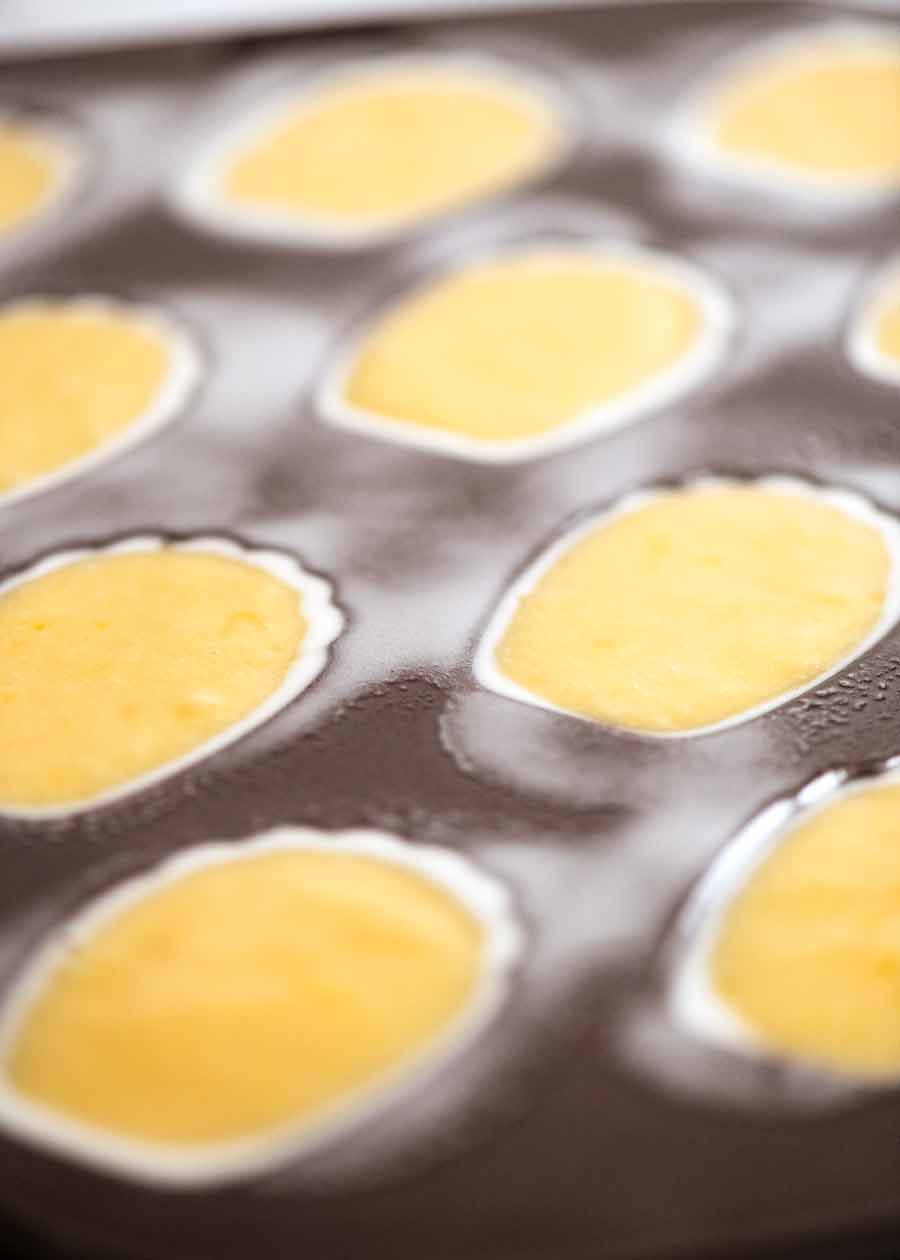
Pipe batter into the pan, filling it just shy of the top of the rim;
Bake: Bake for 10 minutes in a 200°C/390°F oven (180°C). The oven is hotter than you might imagine for delicate little sponge cakes like this because this is how you achieve the beautiful golden surface in such a short baking time, and the signature hump. As mentioned above, that hump is the sign of a well made Madeleine – so we want the hump!!
Ready to serve! The Madeleines are ready when they are golden on the surface and have the signature hump. Unmold straight away so they don’t continue cooking. Dust with icing sugar and serve immediately, while hot!
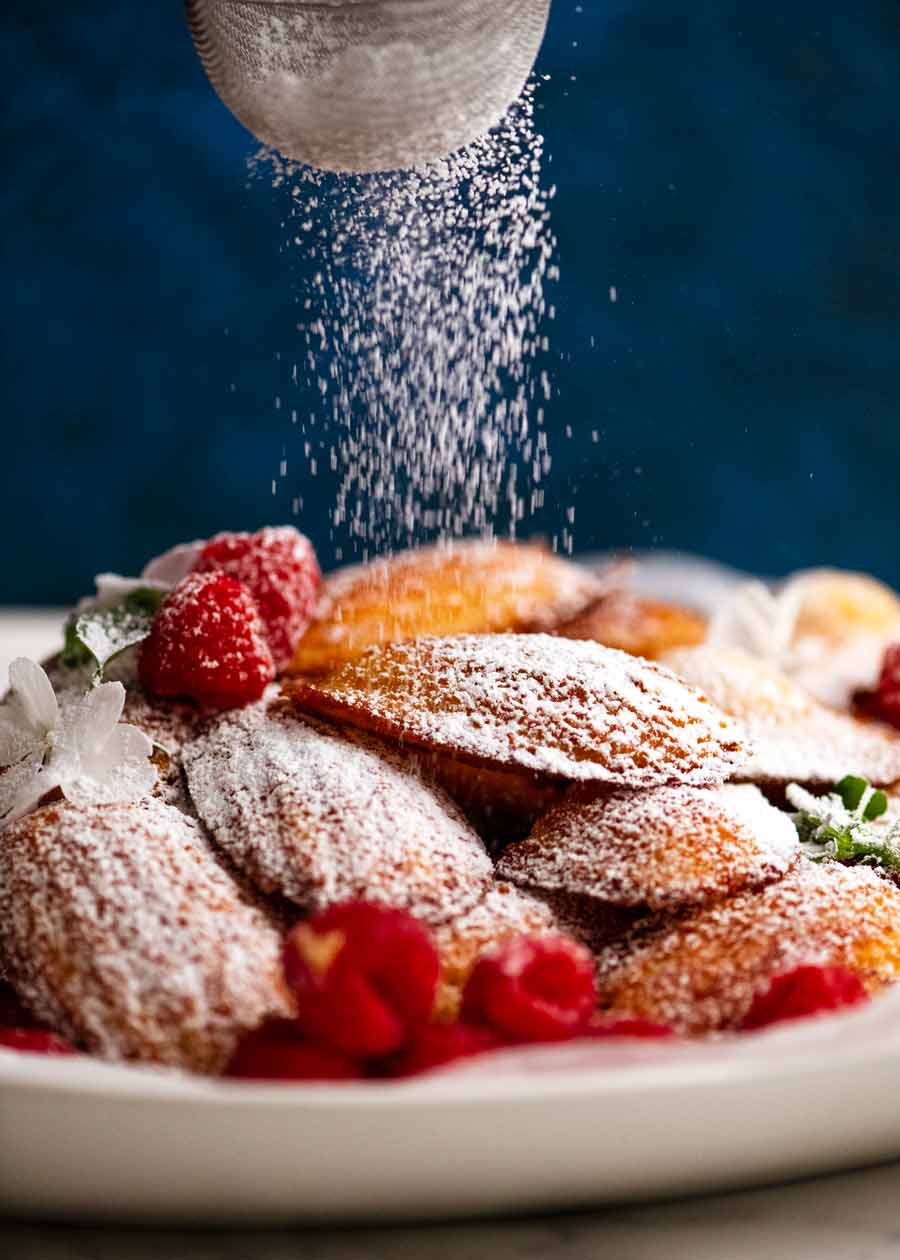
When and how to serve Madeleines
Ask the French, and they’ll tell you Madeleines are typically served for afternoon tea.
Ask me, and I’ll tell you there’s a place for Madeleines at any time of the day. Morning tea, afternoon tea, as a freshly-baked dessert after dinner (this was received extremely well in my case!) … like I said, any time!
And honestly, try telling me you could resist if I put a plate of these out at breakfast? Anyone who says they could is either made of stone – or a liar!😂 – Nagi x
Watch how to make it
Madeleines
Ingredients
- 3/4 cup + 1 tbsp plain flour (all purpose flour)
- 1 1/4 tsp baking powder (make sure it's still good)
- 3 large eggs , at room temperature (Note 1)
- 2/3 cup caster sugar (superfine sugar) (ordinary / granulated sugar ok too)
- 1 tsp salt
- 1 tbsp vegetable oil (or other neutral oil)
- 3 tbsp milk , full fat (low fat ok too)
- 2 tsp honey (or maple syrup)
- 2 tsp vanilla extract
- 2 tsp lemon zest
- 135g / 9.5 tbsp unsalted butter , melted, warm (not hot)
- Canola oil spray (or other neutral oil)
- Icing sugar / powdered sugar (optional, for dusting)
Instructions
- Sift flour: Sift the flour and baking powder into a bowl.
- Whisk eggs and sugar: Whisk the eggs and sugar vigorously for 2 minutes until it becomes paler in colour and it's foamy (or 1 minute on speed 6 with handheld beater).
- Mix flour in 3 parts: Add the flour mixture in 3 parts, whisking gently in between until combined.
- Add everything else except butter: Add salt, oil, milk, honey, vanilla and lemon. Mix until combined.
- Add butter: Add butter, mix gently with a rubber spatula until combined. The batter is fairly thin but should leave a faint ribbon briefly on the surface (see video).
- Cover and refrigerate: Cover with plastic wrap touching the surface and leave it in the fridge overnight (minimum 6 hours).
Baking (next day):
- Preheat oven to 200°C / 390°F (180°C fan) for at least 30 minutes.
- Piping bags – Pour the madeleine batter into 2 piping bags (or 1 large) either fitted with a round tip nozzle around 0.7 – 1.2cm (0.3 – 0.5") wide, or snip the end off. (You can refrigerate until required at this stage, or freeze 2 months).
- Spray and fill pan: Spray the madeleine pan with oil. Fill each hole almost to the top (2just 1m from the rim).
- Bake: Bake for 10 minutes until light golden.
- Serve warm! Unmold straight away. Pile onto serving platter. Dust with icing sugar and serve immediately, while hot!
Notes
Nutrition
Life of Dozer
That sweet buttery smell….

The post Madeleines appeared first on RecipeTin Eats.
]]>