 You just can’t buy rum raisin ice cream with real rum flavour like homemade! This recipe uses a tried-and-proven method using whipped cream and condensed milk, no ice cream maker required. So easy it’s going to blow your mind! Welcome back to the final instalment of Jamaican week! To recap, we started off with Jerk... Get the Recipe
The post Rum raisin ice cream (easy!) appeared first on RecipeTin Eats.
]]>You just can’t buy rum raisin ice cream with real rum flavour like homemade! This recipe uses a tried-and-proven method using whipped cream and condensed milk, no ice cream maker required. So easy it’s going to blow your mind!
Welcome back to the final instalment of Jamaican week! To recap, we started off with Jerk Fish, followed by two fabulous Jamaican sides – coconut rice and peas (beans, actually!) and Jamaican Slaw (adore). And here today with dessert – rum raisin ice cream, the EASY way!!

Worth making: rum raisin ice cream
These days you can actually get quite good quality ice cream at the grocery store, though you do pay through the nose for it. But there are certain ice cream flavours that just don’t translate well when produced on a mass scale. Real fruit flavours, for one (like strawberry and mango).
And real rum flavour. Partially, I assume, because of regulations prohibiting the sale of booze-laden food in regular grocery stores.
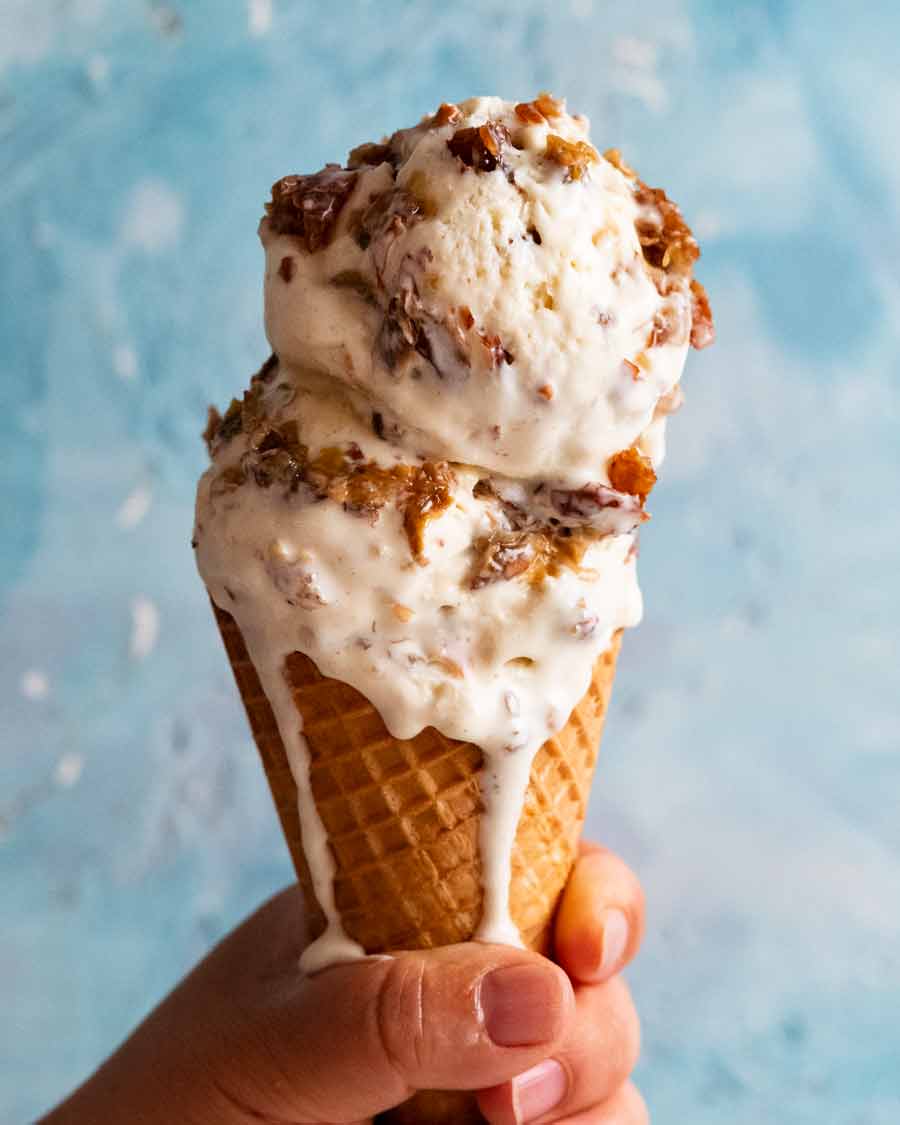
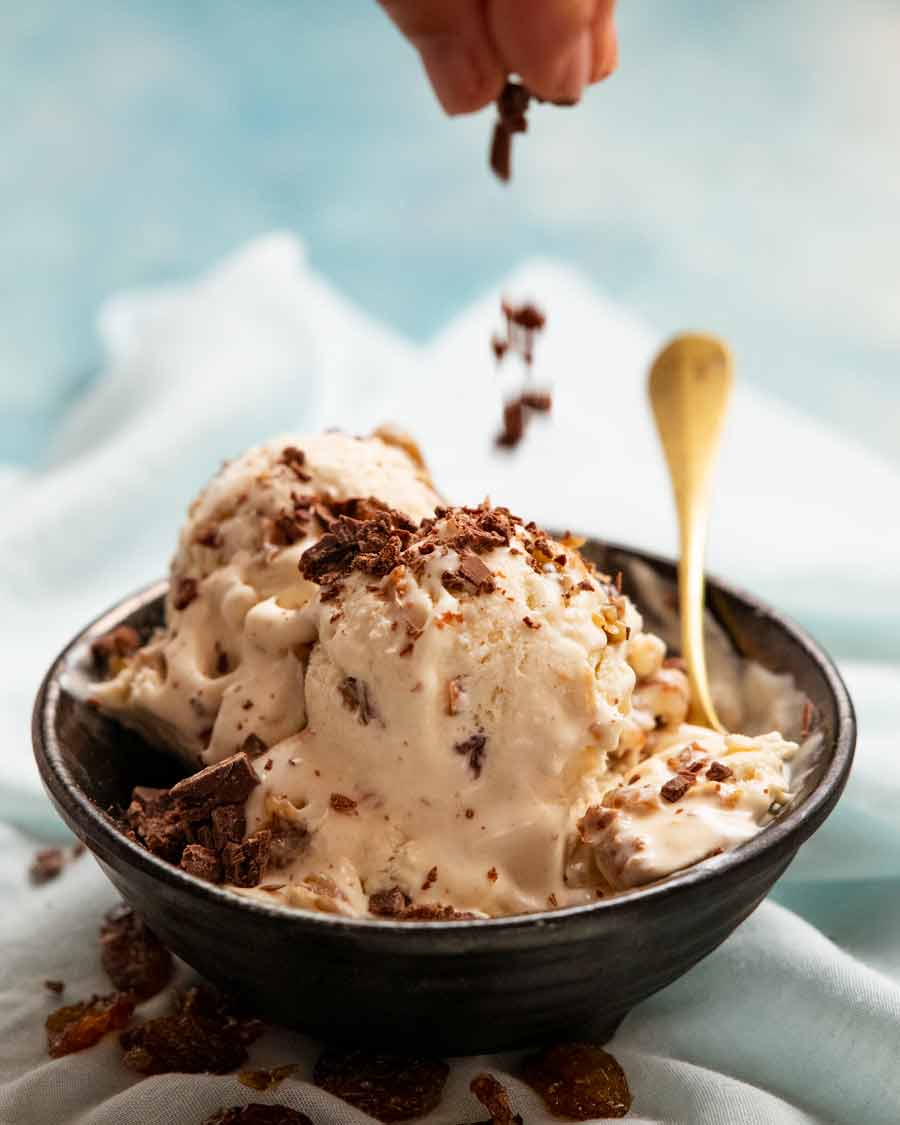
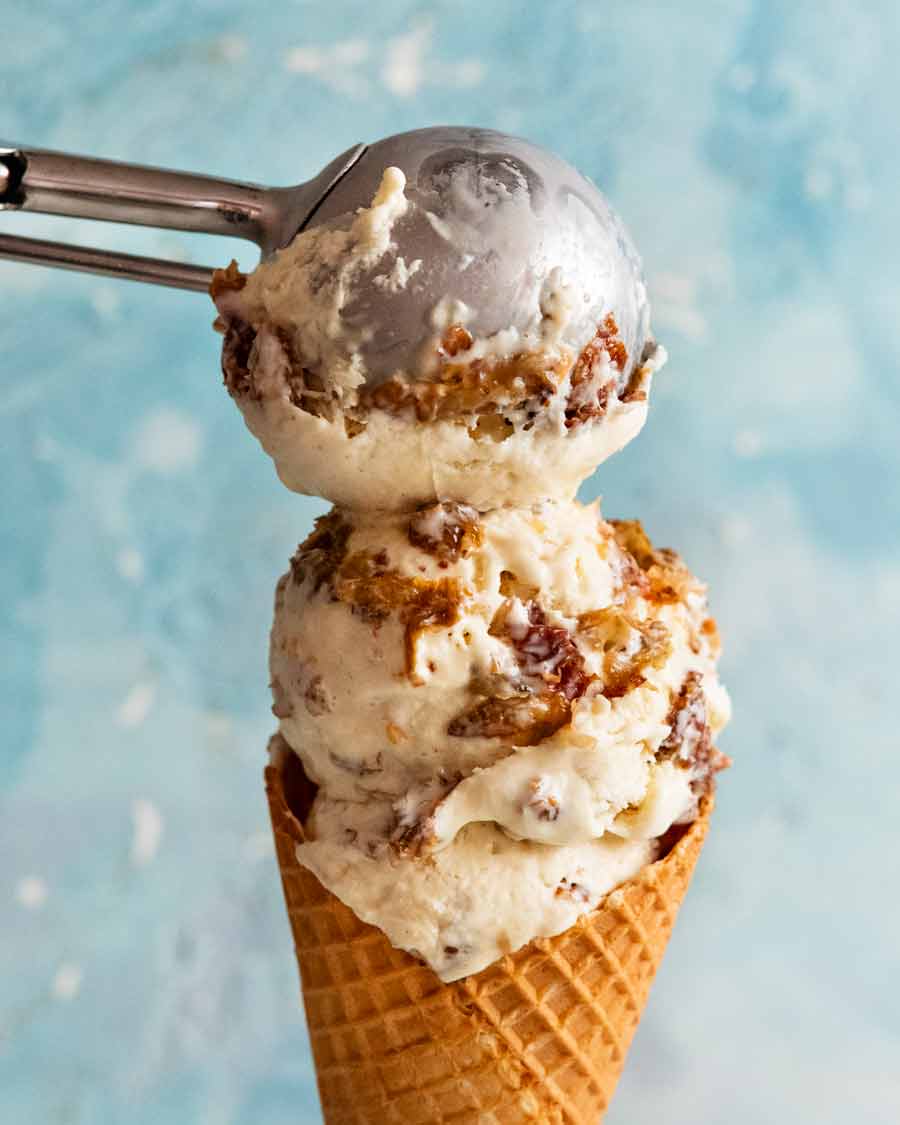
So if you’ve only ever had store bought rum raisin ice cream, the flavour in this homemade one is going to knock your socks off. I especially love the little chewy pops of rum soaked raisins!
About the no-churn ice cream method
This ice cream recipe uses a miracle no-ice-cream-maker method that’s been around for decades! It uses fluffy whipped cream which replicates the effect of incorporating air into traditional ice cream by churning in an ice cream maker. Meanwhile, the condensed milk adds sweetness as well as preventing the mixture from freezing into a block of ice.
The outcome? An ice cream that’s scoop-able and creamy, just like real ice cream! Skeptical? Don’t blame you. Read glowing reviews here and here!
What’s the difference to using an ice cream maker? The melted ice cream is a bit richer (creamier) because no-churn ice cream is made using cream as the base whereas traditional ice cream is made with milk and egg. Hardly a “negative”! You can see the drips on the ice cream at the top of the post are thicker than traditional ice cream.
Ingredients in rum raisin ice cream
Here’s what you need to make this incredible rum raisin ice cream:
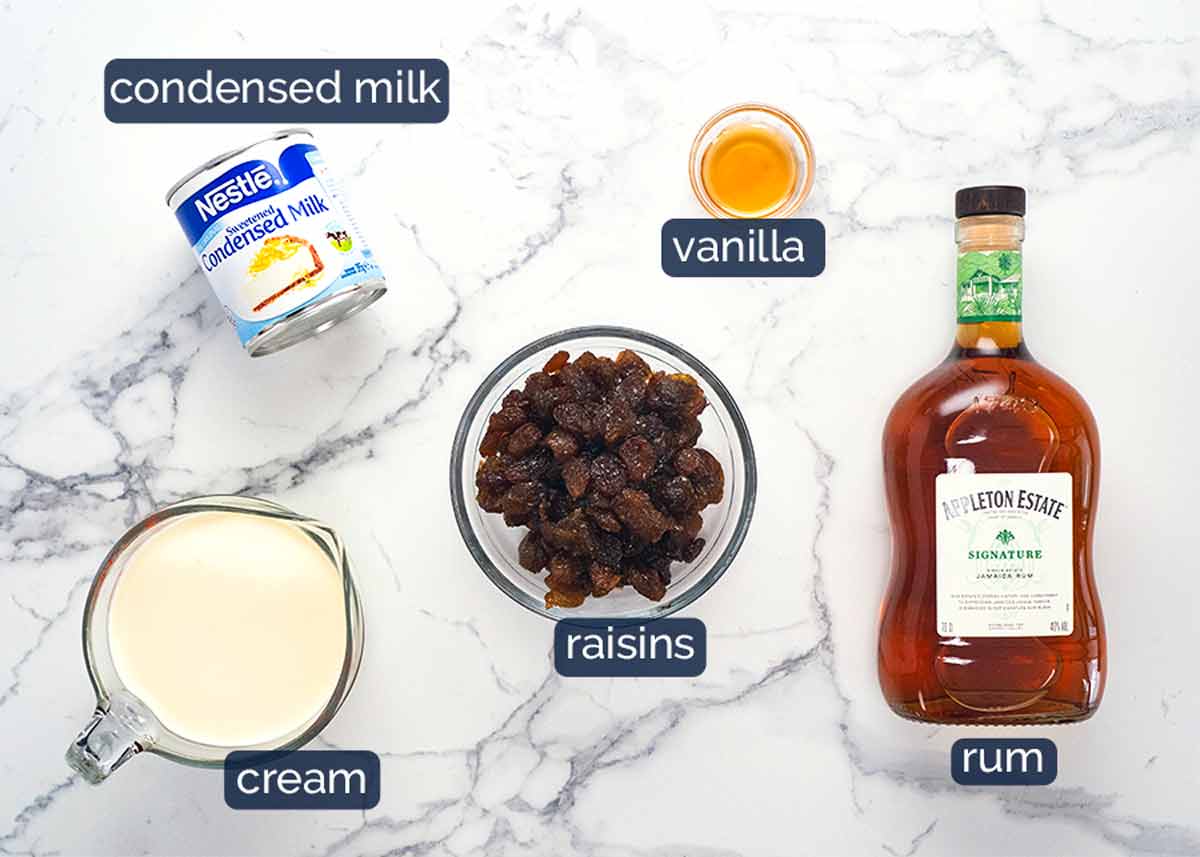
Cream – Just ordinary whipping cream. I use thickened cream (heavy cream) but any whipping cream works fine. (Low fat cream is not an option here, recipe won’t work).
The aeration in the whipped cream replicates the effect of churning with an ice cream maker which is called for with traditional ice cream recipes.
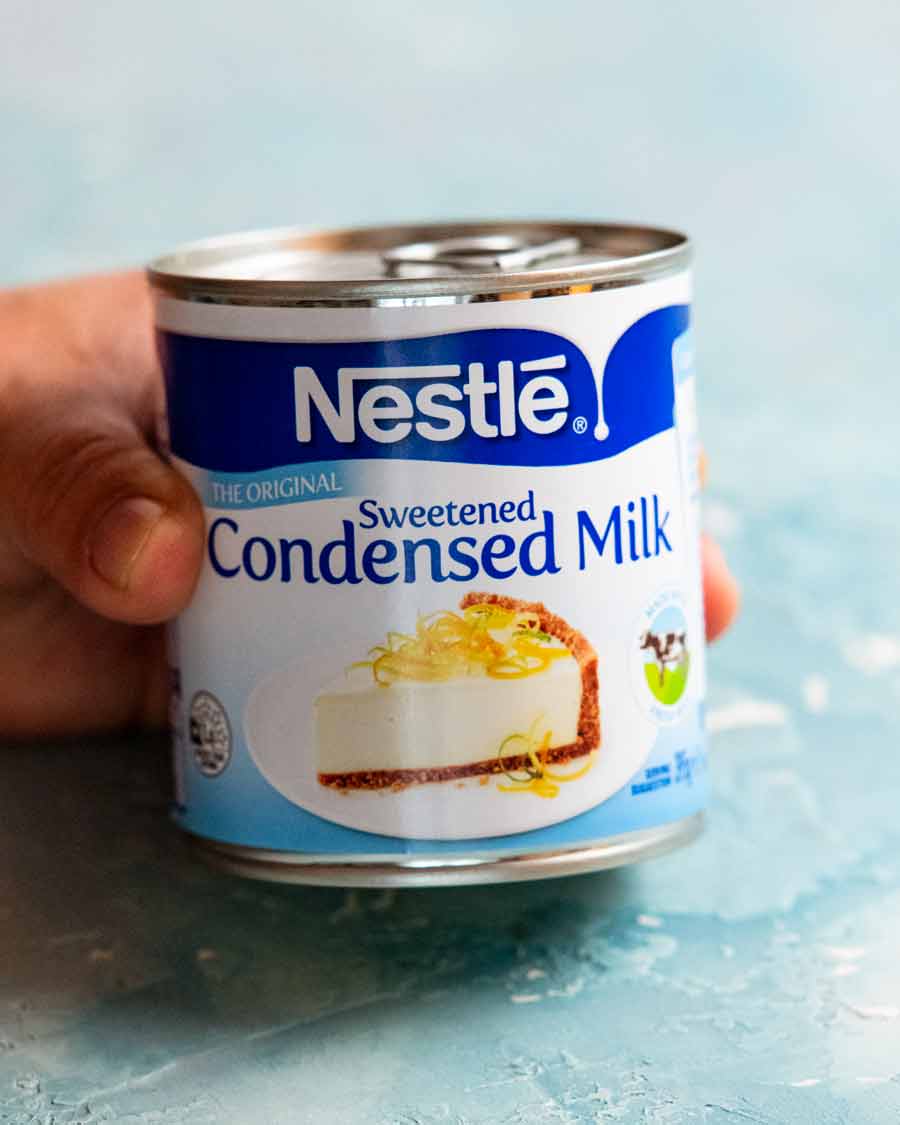
Condensed milk – Sweetened milk sold in cans which has a syrupy consistency. Find it in the long-life milk aisle. This adds sweetness into the ice cream and prevents the mixture from freezing into a block of ice, keeping the mixture scoop able like real ice cream!
Rum – Use a golden or dark (brown) rum, for colour and flavour. Not a clear/white rum like Bacardi. I use Appleton Estate (pictured above) which is a good Jamaican made rum brand available here in Australia. But any rum will work here, even an economical one (we’re not doing shots here, it’s mixed with other flavours, so it’s ok!).
Non alcoholic option – Use rum essence instead! I would soak the raisins in hot water + rum essence (to plump them up). Then add rum essence into the ice cream mixture to taste. You can just stir it in at the end – add and taste, add and taste! The ice cream texture will be fine. It will be a touch firmer than pictured which actually is a good thing because one challenge I had with this recipe was to get enough rum flavour in it without the ice cream being too soft (because rum does not freeze).
Raisins – Did the recipe name give it away? 😂 Sultanas make a fine substitute. Other dried fruit, like cranberries, cherries, even chopped dates, will work fine too as an alternative.
Allspice (oops, missing from the photo!) – For a hint of extra flavour. I tried it with and without (I know, my job, it’s so hard….) and just a bit of spicing makes it even better! But, it is optional.
Vanilla – For flavour.
How to make rum raisin ice cream
Ahh, the magic of this no-churn ice cream method!!! Ready to see how easy it is? Or do you already know because you discovered my no-churn Strawberry ice cream or Mango ice cream??
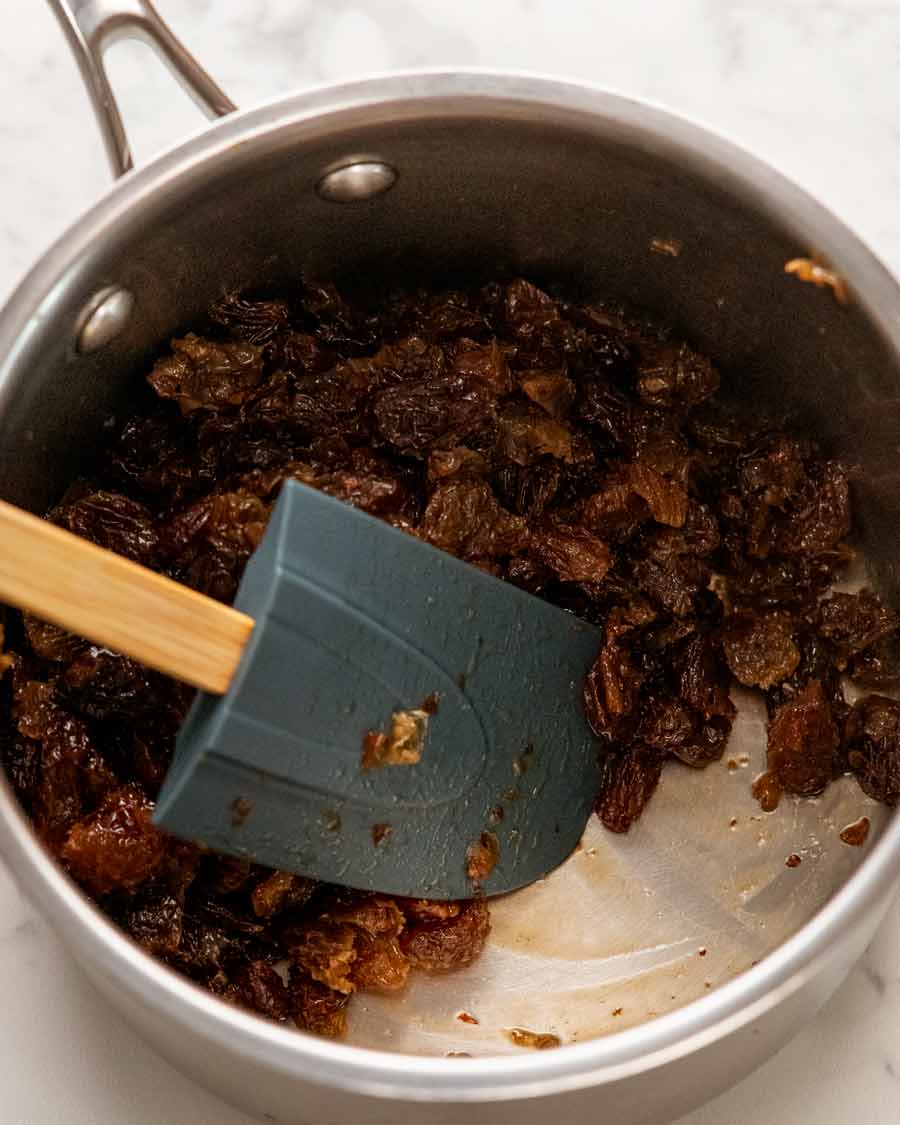
Soak raisins – Soaking raisins in rum is key not only for great rum flavour but also because the rum stops the raisins from freezing into mini ice cubes.
Give the raisins a rough chop. This helps them absorb the rum more easily. Break them up with your fingers (they are often packed together tightly in the bags) then soak in hot rum for 30 minutes.
The raisins should absorb most of the rum. If there’s any residual liquid, pour it off. You want to limit the total liquid rum in the ice cream mixture to 1/4 cup (60 ml) total. Any more than this and the ice cream won’t set enough because rum doesn’t freeze due to the high alcohol content. Yes, I did trial and error to figure out the maximum amount of rum I could get into the ice cream!!
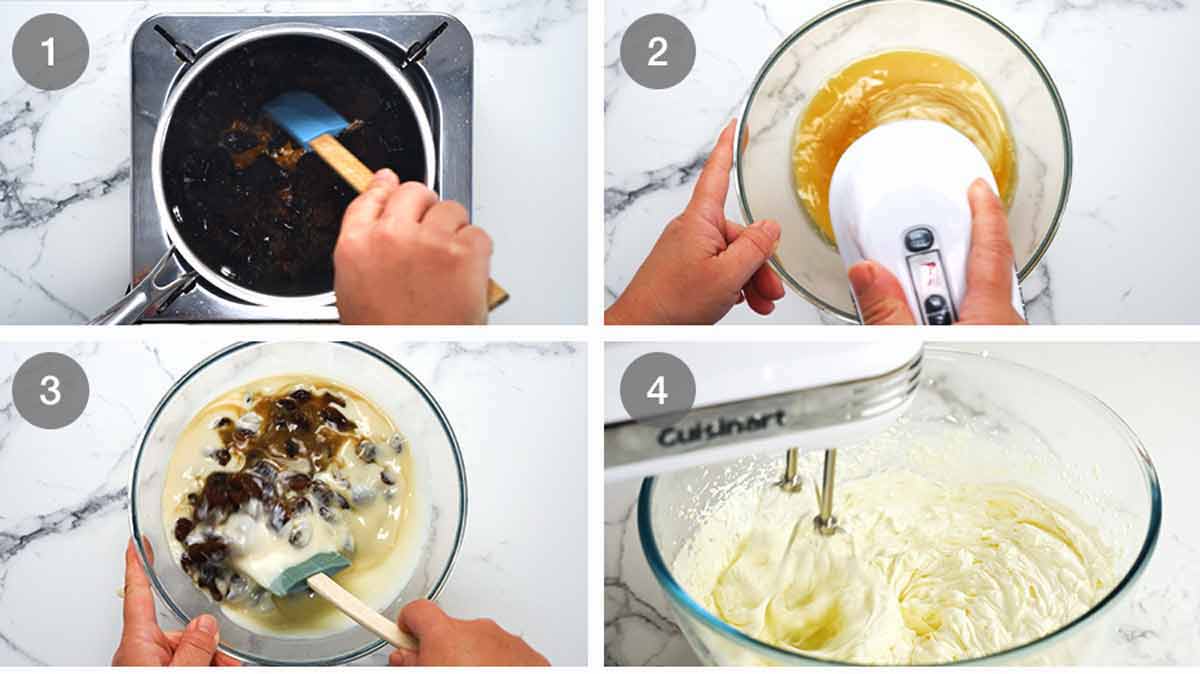
Condensed milk & flavours – Beat together the condensed milk, vanilla and allspice powder, just to combine. You don’t actually need a beater for this step, I just do because I’ve got the beater out anyway. Just give it a quick wipe before whipping the cream.
Stir in raisins – Add the rum soaked raisins and stir to mix through.
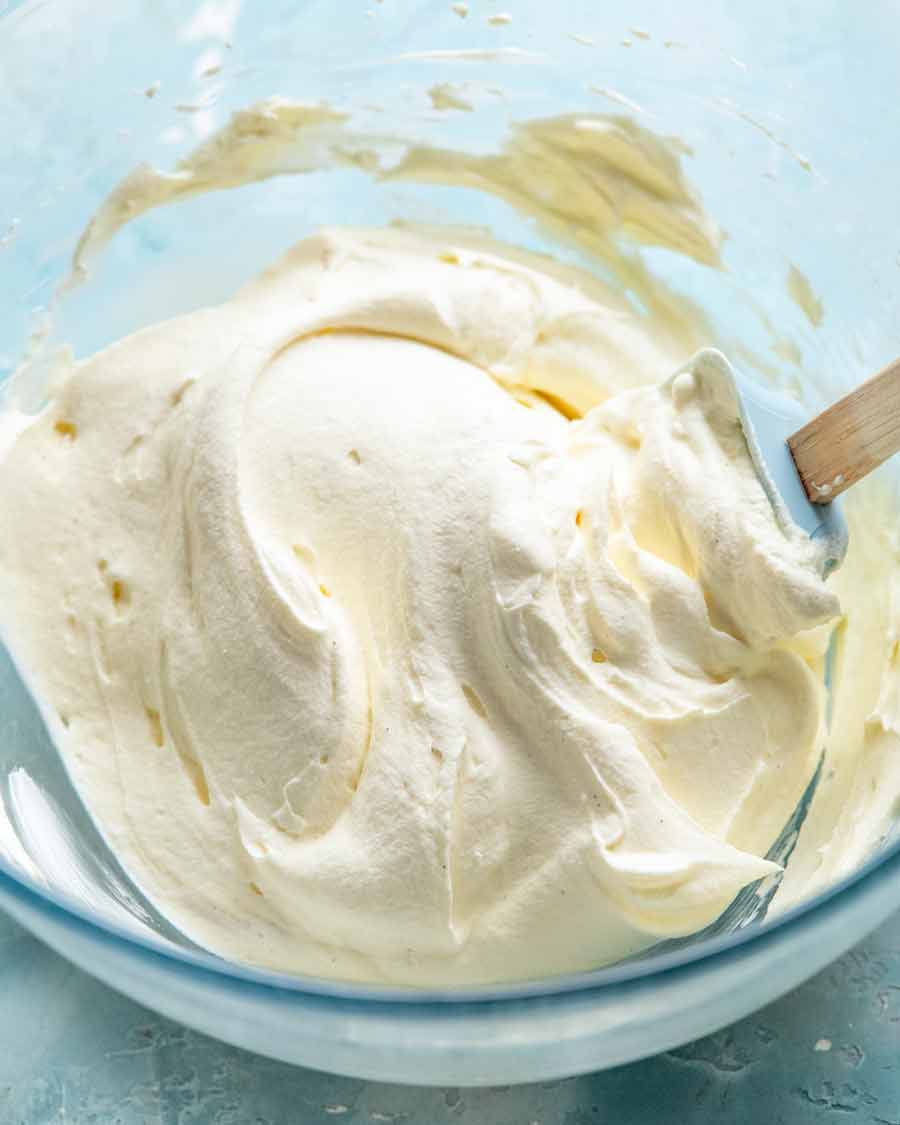
Whip cream until it is well whipped. It will take about 2 1/2 to 3 minutes with a handheld beater, or 1 to 1 1/2 minutes on high with a stand mixer. We are not looking for elegant softly whipped cream here. We want good aeration! (But not butter, which is what you’ll end up with at about the 8 minute mark, so stop before then! 😂)
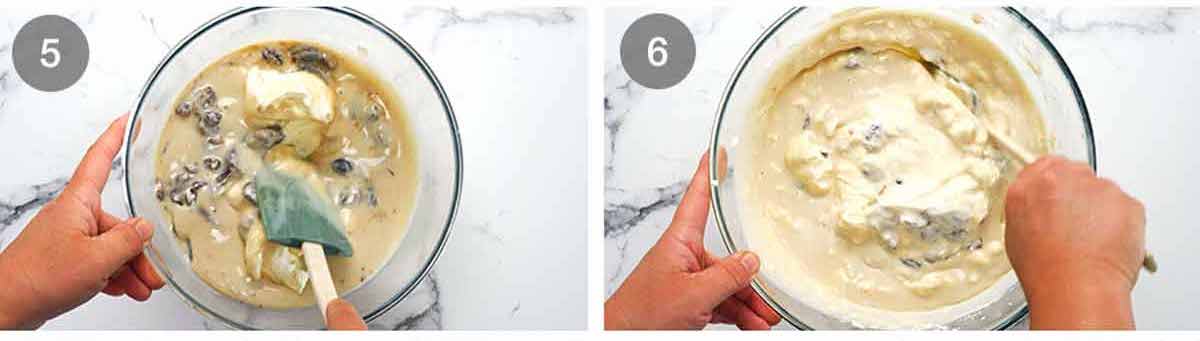
Lighten condensed milk – Add a big scoop of whipped cream into the condensed milk mixture then fold through with a rubber spatula or big scooping spoon. The purpose of this step is to lighten up the condensed milk mixture before mixing it all into the cream to maintain as much aeration in the cream as we can. More aeration = creamier ice cream!
Just gently mix the cream through until it is mostly incorporated. Some lumps is fine.
Mix with cream – Pour the condensed milk mixture into the cream them fold to combine until it is cream-lump-free.
Be gentle here, don’t mix vigorously, as we want to preserve as much of the aeration in the cream as we can. To help remove cream lumps, “smear” visible cream bits across the surface or against the side of the bowl rather than vigorously stirring.
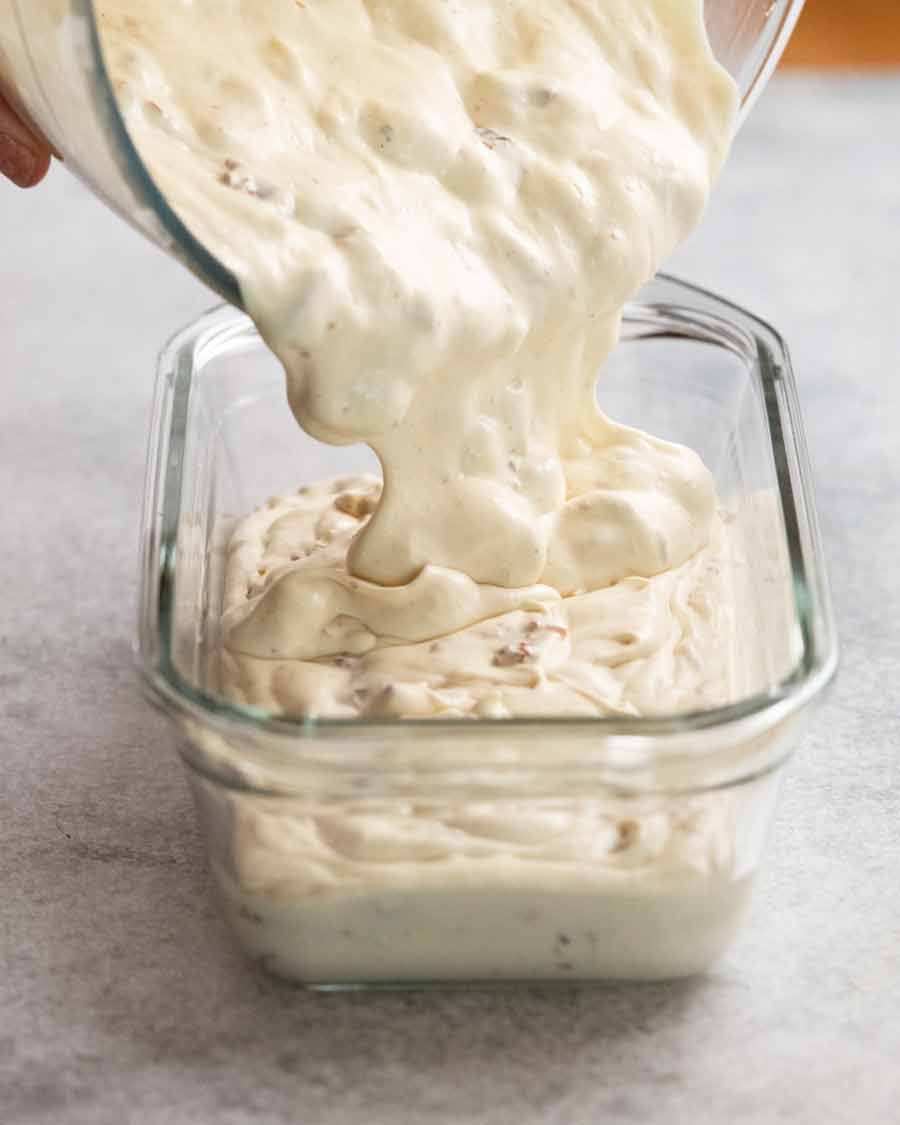
Pour the mixture into a glass or ceramic container that is at least 1.5 litres / 1.5 quarts. I use a 1.75 litre / 1.75 quart glass loaf pan (28 x 15 x 7.5cm / 11 x 6 x 3″).
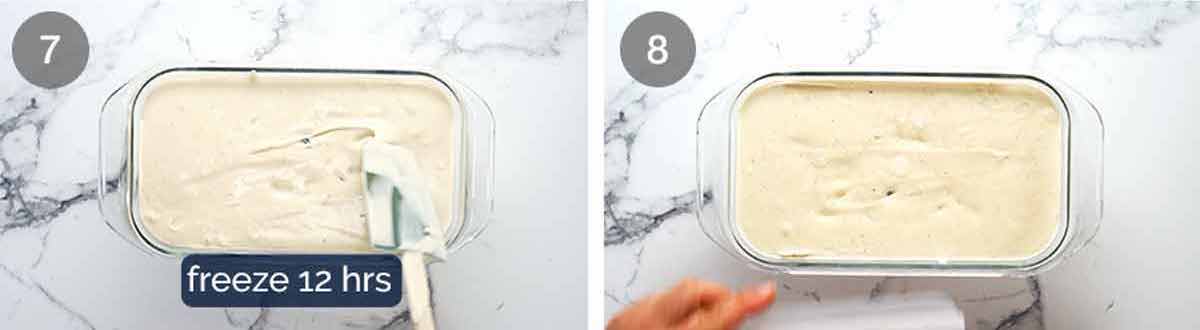
Smooth the surface, pop a lid on or cover with cling wrap.
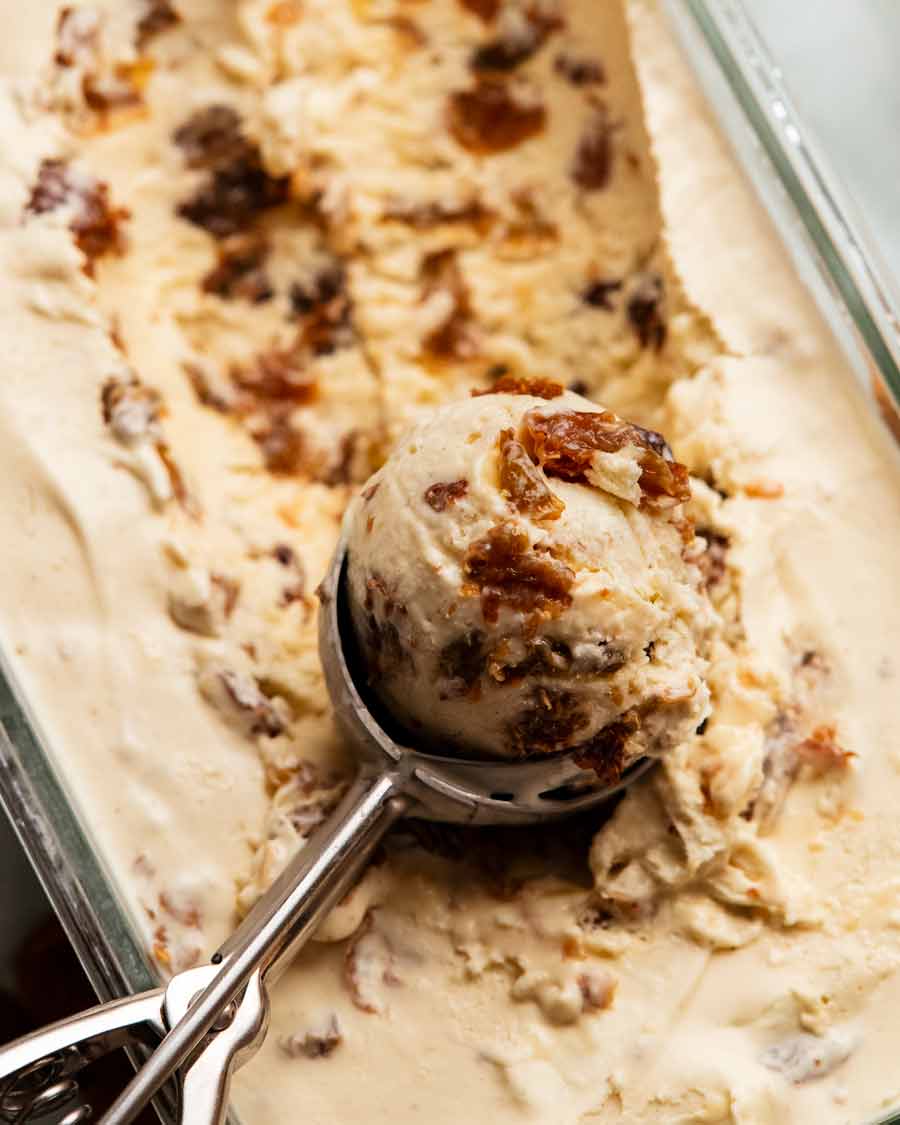
Freeze for 12 hours. Then scoop and serve like normal ice cream!
You can basically scoop it straight out of the freezer, you don’t need to leave it out even for a minute before scooping. This is the rum at work – alcohol doesn’t freeze solid. So, as noted above, actually my biggest “challenge” in this recipe was figuring out how I can max out rum flavour without the ice cream ending up like a slushy! (The answer is reflected in the recipe 😂)
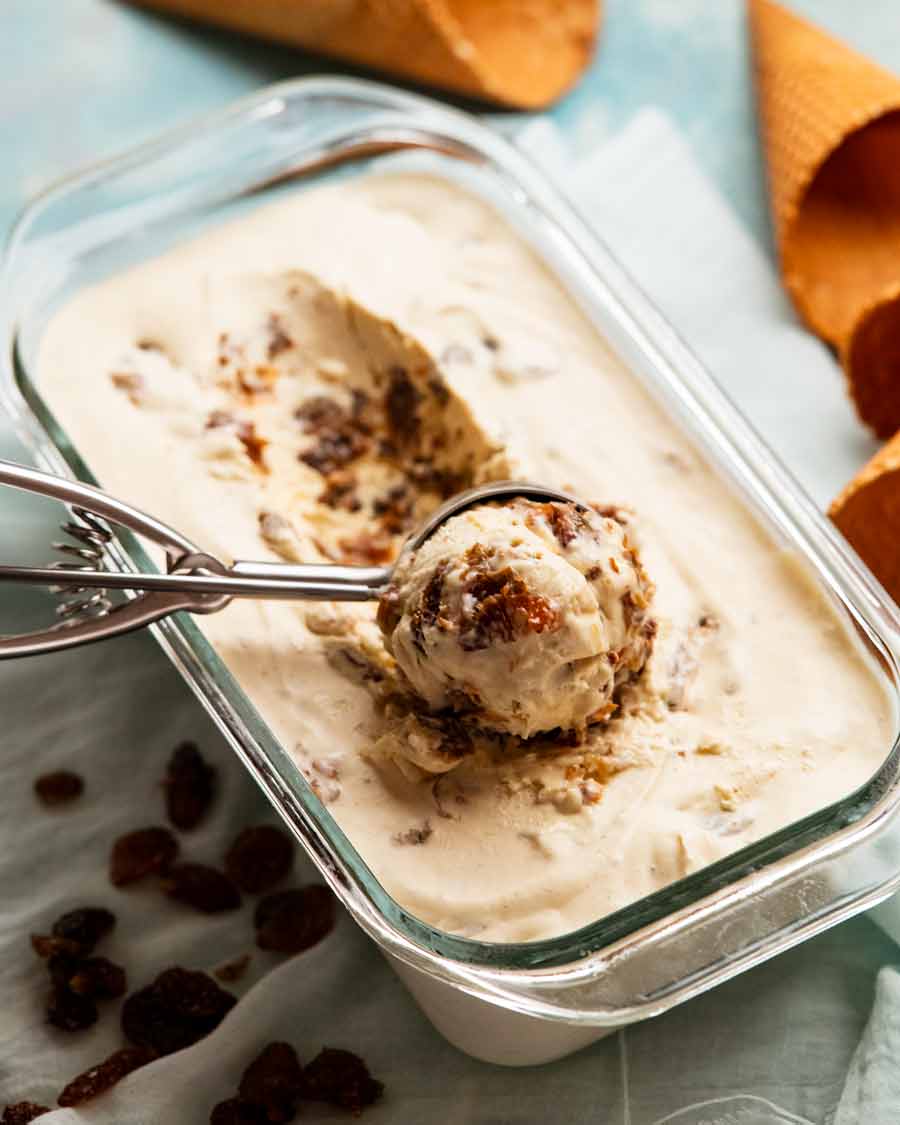
Serve in cones or in bowls, as many or as little scoops as you like.
The ice cream will keep in the freezer for months, just like “real” ice cream. It does freeze a little firmer from day 3 and beyond, it only requires a few minutes on the counter before scooping.
Lastly, just a note on the booziness of this ice cream! Even though the amount of rum per serving is not that much (3/4 cup in total), let’s keep this one away from kids and pooches. Ordinarily my recipes that use alcohol will cook the alcohol out so it’s negligible in the finished dish. But in rum raisin ice cream, it is not. And that’s just how we grown ups love it! – Nagi x
Watch how to make it

Rum raisin ice cream (easy, no ice cream maker!)
Ingredients
Rum soaked raisins (Note 1):
- 1 1/2 cups raisins (separate with fingers)
- 1/2 cup rum (preferably Jamaican! Note 2)
Ice cream:
- 1 x 395g / 14oz can condensed milk (Note 3)
- 1/4 cup rum, dark or golden (preferably Jamaican! Note 2)
- 1 tsp vanilla extract
- 1/8 tsp allspice powder , optional
- 2 cups thickened/heavy cream, fridge cold (any whipping cream works)
Serving (all optional)
- Ice cream cones
- Rum raisin chocolate , finely chopped (pictured in post)
Instructions
Rum soaked raisins:
- Chop – Roughly chop the raisins (about in half) and break them up with your fingers so they are not stuck together.
- Soak – Heat the rum in a small saucepan on medium high, just until hot. Add raisins, spread to submerge as best you can. Then leave to soak for 30 minutes.
- Pour off excess – The raisins should absorb most of the rum. If not, see Note 4.
Ice cream:
- Condensed milk & flavourings – Place the condensed milk, rum, vanilla and all-spice in a bowl. Briefly beat just to combine with a handheld beater (or mix by hand), then stir in the rum soaked raisins.
- Whipped cream – Place the cream in a separate large bowl and beat on high with an electric beater for 2 1/2 to 3 minutes until well whipped (stand mixer 1 – 1 1/2 minutes). We're not looking for "soft whipped" here, we want stiff peaks and good aeration!
- Fold together – Fold about 1 cup whipped cream into the condensed milk mixture. Once mostly incorporated (some lumps is fine), pour the condensed milk mixture into the cream and gently continue folding until smooth (minimise folding as less aeration = denser ice cream). To help remove lumps, "smear" visible cream bits across the surface or against the side of the bowl rather than vigorously stirring.
- Freeze 12 hours – Spread in a 1.5 litre / 1.5 quart container (Note 6). Cover with lid or cling wrap. Freeze at least 12 hours.
- Serve! To scoop, you'll only need to leave it out for a minute or two, like real ice cream! Then scoop and serve in bowls or in cones. I topped mine with chopped rum raisin chocolate, because, why not?

Notes
Nutrition
More no-churn ice cream to try!

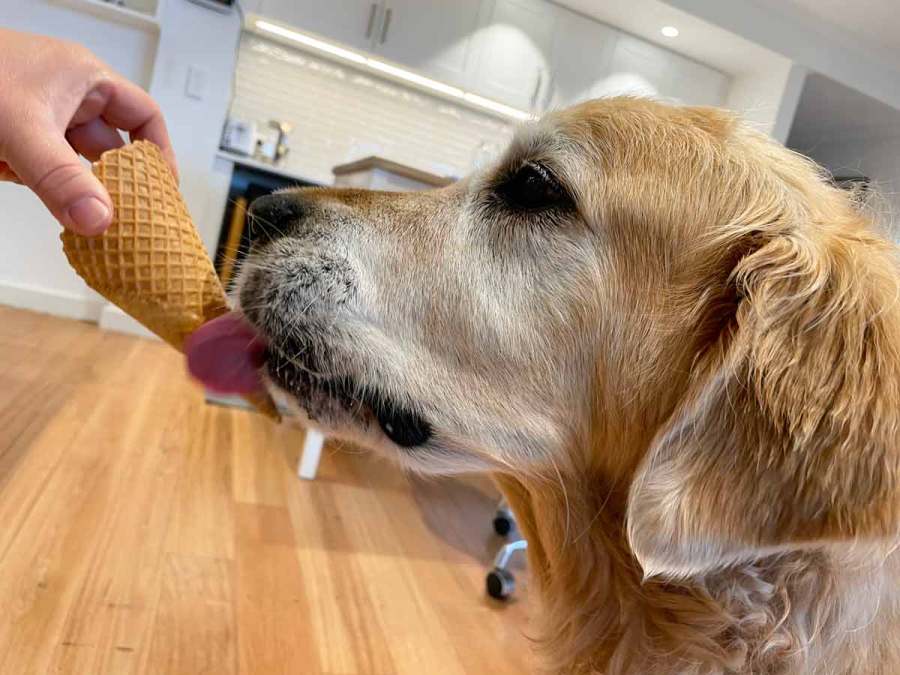
Life of Dozer
Definitely no rum and raisin ice cream for Dozer! No booze, no dried fruit. But he happily settled for a plain ice cream cone!
The post Rum raisin ice cream (easy!) appeared first on RecipeTin Eats.
]]> The fresh strawberry flavour in this will blow your mind! A no churn Strawberry Ice Cream that’s incredibly creamy, no ice crystals and perfectly scoopable. 5 ingredients, easy to make, no ice cream maker required! HOMEMADE STRAWBERRY ICE CREAM OK, so you might know an ice cream specialist or a fancy pants restaurant that makes a... Get the Recipe
The post Strawberry Ice Cream (No Churn) appeared first on RecipeTin Eats.
]]>The fresh strawberry flavour in this will blow your mind! A no churn Strawberry Ice Cream that’s incredibly creamy, no ice crystals and perfectly scoopable. 5 ingredients, easy to make, no ice cream maker required!
HOMEMADE STRAWBERRY ICE CREAM
OK, so you might know an ice cream specialist or a fancy pants restaurant that makes a stellar strawberry ice cream with fresh strawberries, and it really truly tastes of strawberries. So it’s a bit bullish to say this homemade strawberry ice cream recipe has flavour money can’t buy.
But if we’re talking about everyday strawberry ice cream sold in tubs at supermarkets and even gourmet stores, then this is off the charts compared to them.
And the reason is simple. The flavour and colour in this recipe relies solely on a whole heap of fresh strawberries that is intensified with roasting. Whereas supermarket ice cream uses artificial flavouring – and artificial colouring!

No churn ice cream
A traditional ice cream starts with a sweetened mixture of cream and eggs which is then poured into an ice cream machine which churns as the ice cream gradually freezes.
This no churn version is made with condensed milk and cream that requires no ice cream maker and yields an ice cream remarkable similar to churned ice cream. To read more about this no churn method, including the difference between No Churn and ice cream made using an ice cream maker, pop over to the no churn Mango Ice Cream recipe I’ve previously shared.

Iciness is the bain of fruit ice creams
If you’ve ever tried a homemade strawberry ice cream recipe before and been disappointed by the crunch of ice crystals from the strawberry juice, be prepared to jump for joy because this is the recipe of your dreams!
Avoiding this problem is actually quite simple – just roast the strawberries. Not only does it remove water which causes the ice crystals, it actually intensifies the strawberry flavour (oven trumps stove for flavour).
And the added bonus for strawberry ice cream is that the caramelisation of the strawberries deepens the pink colour of the ice cream!
How to make no churn strawberry ice cream
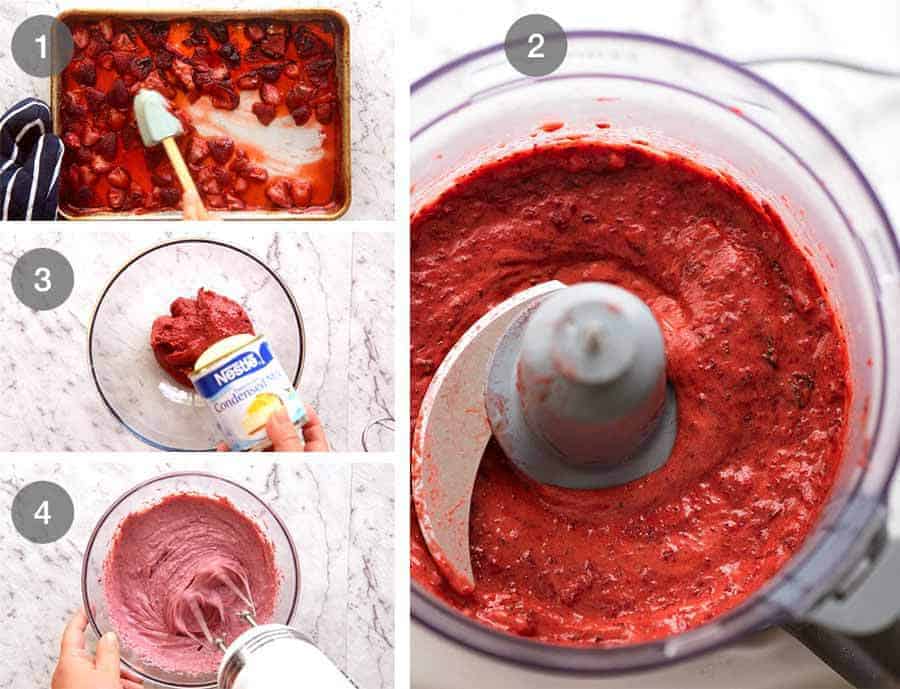
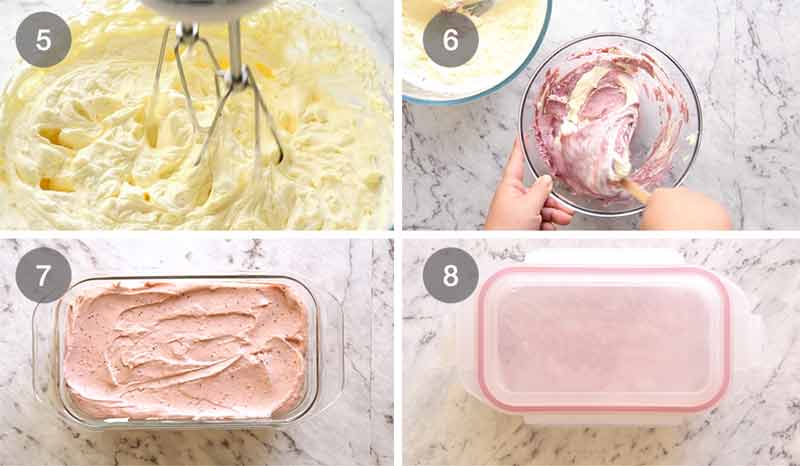
Here’s a summary of how to make this magical strawberry ice cream – the numbers correspond to the process photos above and below:
1. Halve strawberries, sprinkle with just a bit of sugar (just to kickstart the juicing process), then roast on a low heat for 1 hour.
2. Scrape into a food processor and blitz. Do not – I repeat, DO NOT taste test. Every drop is precious and I don’t trust you to stop at one tiny taste! 😂 (OK, I mean me, not you)
3 & 4. Once cooled, whip with condensed milk and vanilla to combine and aerate.
5 & 6. Whip cream until stiff peaks form. Gently fold the strawberry and cream mixture together – do not beat furiously and destroy all the fluffiness!! Watch video for folding technique (pretty please!)
7 & 8. Pour into container then freeze for 12+ hours.
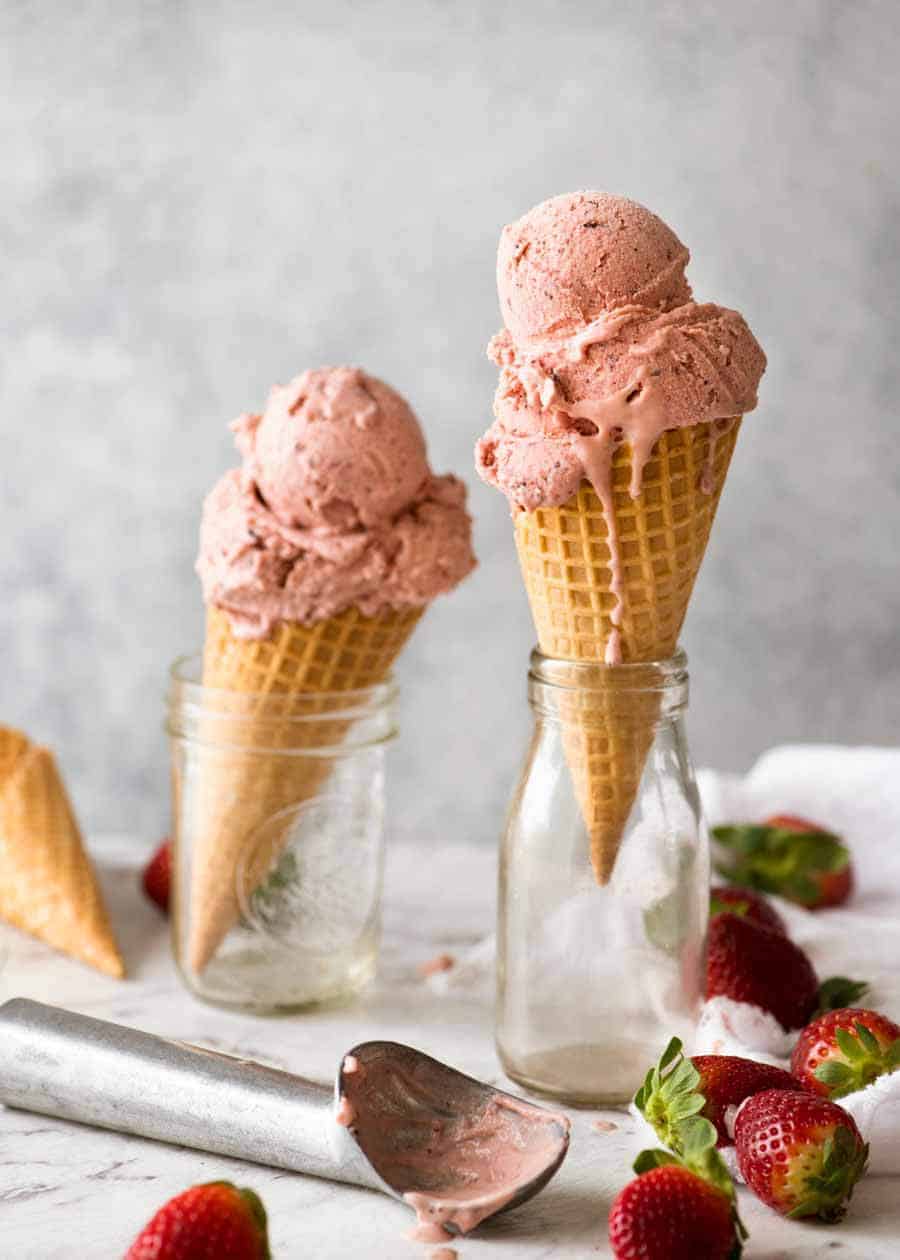
What comes out of the freezer is quite extraordinary. It looks like store bought ice cream. It scoops like store bought ice cream. It’s creamy like store bought – no ice crystals at all.
It even holds its shape when it softens like store bought ice cream – unlike other shortcut ice creams that seem to go from rock hard to a puddle of liquid in an instant with only a split second window of opportunity when it’s scoopable.

But most of all for me, the thing that makes homemade strawberry ice cream so precious is that true taste of strawberries which, in this world of artificial flavourings, is actually quite rare.
The flavour of this really will blow your mind.
REAL strawberry flavour – in vast quantities. When was the last time you tasted that – other than eating fresh strawberries?? – Nagi x
PS Also – no churn Mango Ice Cream. The flavour…. swoon…
More strawberry recipes 🍓🍓
WATCH HOW TO MAKE IT
Strawberry Ice Cream (No Churn)
Ingredients
- 1 kg / 2 lb strawberries , ripe, hulled and halved
- 1 tbsp white sugar
- 1 tsp vanilla extract (optional)
- 1 can sweetened condensed milk (395g / 13 oz)
- 2 cups / 500 ml cream , full fat, for whipping (Note 1)
Instructions
Roast Strawberries:
- Preheat oven to 160°C/320°F (140°C fan) with shelf in the middle.
- Pile strawberries on a tray. Sprinkle over sugar. Toss through, then spread strawberries out on tray.
- Roast for 45 minutes, rotating tray halfway. Remove from oven, toss strawberries, then return to oven for 15 minutes. Keep an eye on it - don't want juices to become toffee and stick to tray.
- Remove from oven, use spatula to scrape into a food processor, being sure to get all the juices and caramelised bits off the tray.
- Blitz until smooth as possible (caramelised bits won't blitz smooth), scrape into bowl then cool completely.
Ice Cream Mixture:
- Add condensed milk and vanilla into strawberries. Beat well for 1 1/2 minutes on high to aerate and combine.
- Place cream in another bowl. Use electric beater to beat into stiff peaks - about 3 minutes on high.
- Add a dollop of cream into the strawberry mixture. Fold through gently, don't beat in furiously (see video for technique). When mostly mixed through, add another dollop and for through about 5 times.
- Tip strawberry mixture into the cream bowl. Gently fold through until it's a uniform pink colour - about 15 to 20 folds max. Some streaks is ok.
Freezing & serving:
- Pour mixture into a container (preferably glass with airtight lid), smooth top.
- Place sheet of baking paper on surface and press out air bubbles (stops icicles forming). Cover with lid, freeze 12+ hours.
- Remove from freezer, remove paper. Scoop with ice cream scooper and serve in cones or bowls!
Notes
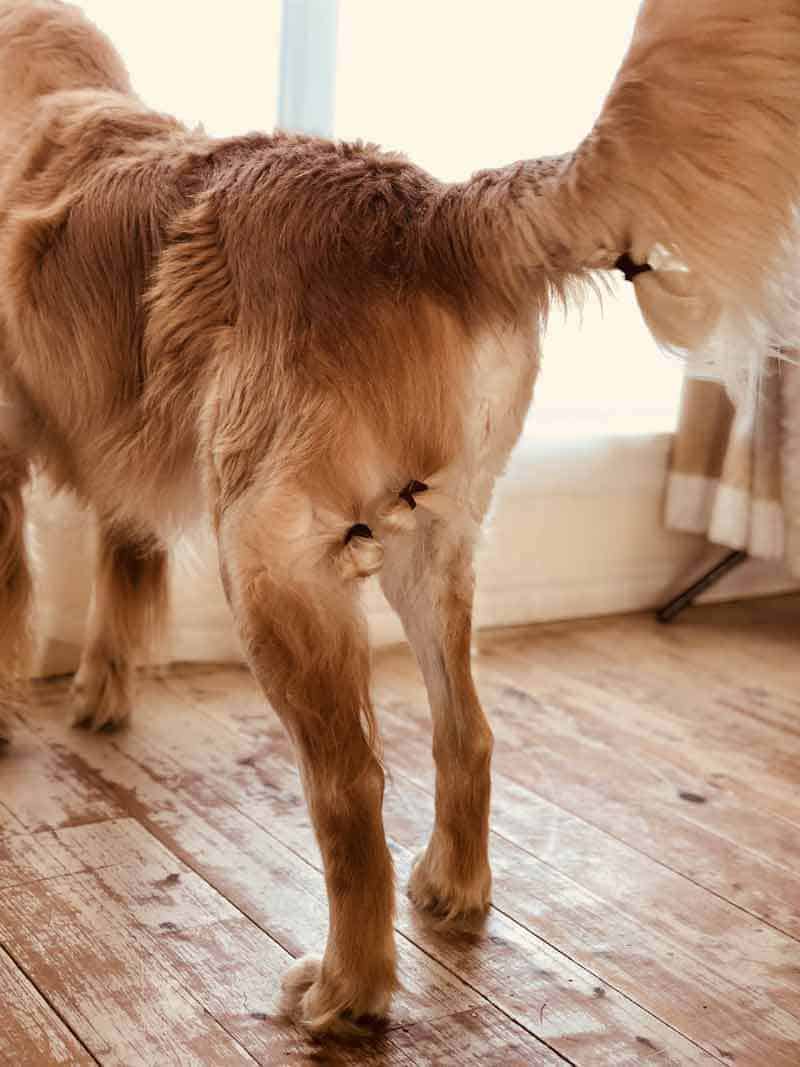
LIFE OF DOZER
If you’ve ever had a long haired dog with gastro 💩, you will totally understand the Man Buns and French Braid situation going on here. The amusement is an added bonus.😂
The post Strawberry Ice Cream (No Churn) appeared first on RecipeTin Eats.
]]> Made without an ice cream maker, all you need are mangoes, condensed milk and cream to make this homemade Mango Ice Cream recipe that is creamy and scoopable, just like the ice cream you buy in tubs at the shops. Except this is ice cream money can’t buy. Because shop bought will never be able to capture the flavour of... Get the Recipe
The post Homemade Mango Ice Cream Recipe (No Ice Cream Maker!) appeared first on RecipeTin Eats.
]]>Made without an ice cream maker, all you need are mangoes, condensed milk and cream to make this homemade Mango Ice Cream recipe that is creamy and scoopable, just like the ice cream you buy in tubs at the shops. Except this is ice cream money can’t buy. Because shop bought will never be able to capture the flavour of real mango like when you make it from scratch at home!
Homemade Mango Ice Cream
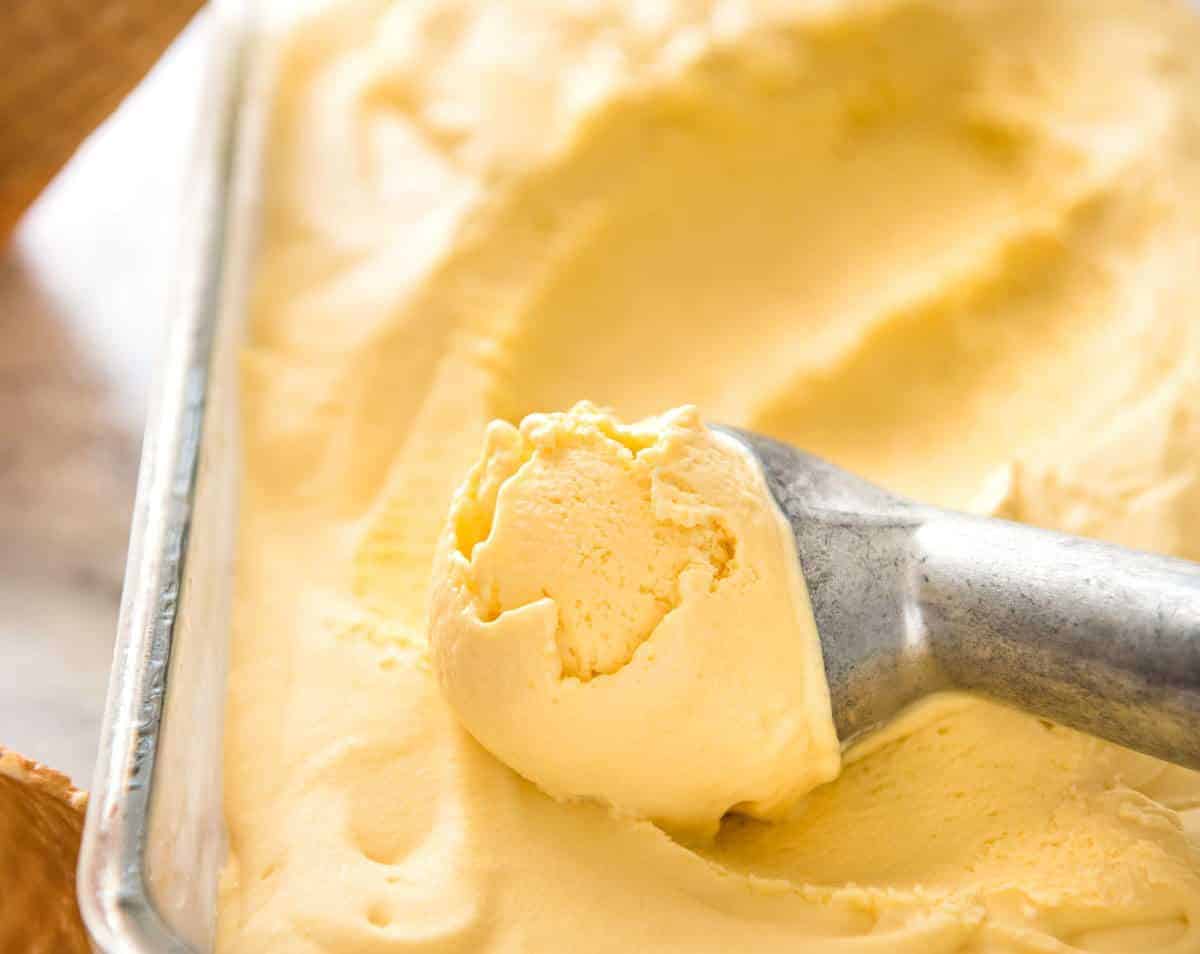
You won’t believe it until you try it. This really is a creamy ice cream made without an ice cream machine.
Regular readers know one of my big gripes is pretty photos of food for so so recipes. And my other gripe is watching cooking shows where the host is serenely scooping a perfect ball of ice cream and popping it in a cone when in actual fact, it’s a frozen solid mass, and if you leave it out to soften, it just turns into a puddle of liquid. I’ve been caught out so many times!
Such is the case with any recipe made with just milk, cream or yoghurt + sugar/honey. If you take it out of the freezer after 5 hours 17 minutes and 43 seconds, there is the chance that it will have frozen to that perfect stage where it is firm enough yet still scoopable. If you miss that window of opportunity by a mere second (or heaven forbid, you don’t eat it all in one sitting), it will be a frozen solid block of ice. Leave it out to soften, and, just like ice, it goes from frozen to melted.
So this homemade Mango Ice Cream recipe is dedicated to all of you who, like me, have been disappointed by efforts to make a homemade ice cream in the past. That is, without an ice cream maker! ?
A traditional ice cream starts with a sweetened mixture of cream and eggs which is then poured into an ice cream machine which churns as the ice cream gradually freezes. The churning serves two purposes: it aerates the mixture to make it light and fluffy and it stops icicles from forming so the ice cream is creamy rather than icy.
And all of this is replaced with two simple ingredients: condensed milk and cream. The whipped cream aerates the mixture and the condensed milk is the ingredient that keeps the mixture creamy, like ice cream. I must profess I don’t know the science behind why this works, I just know it does!
Whip the cream, fold through the condensed milk, add a touch of vanilla, freeze it and voila! 12 hours later, you will have an ice cream that looks like it’s store bought. Go wild with the add ins! Chocolate chips, coffee, spices, rum and raisin!
For this version, I added MANGOES!
FOR THE FOOD NERDS ?
The recipe base of condensed milk and whipped cream lends itself to flavour variations that can be stirred through (like choc chips) or infused into the cream (like spices). However, if you start adding liquid content into the mixture – like fruit purees – the addition of water based ingredients affects the creaminess of the ice cream.
Originally, I just plonked pureed mangoes into the mixture. It didn’t make the whole ice cream icy, it was still scoopable and creamy, but when I ate it, there was definitely teeny tiny bits of fine icy bits in the ice cream.
So to solve that problem, I reduced the mango puree by simmering it on the stove. The added bonus of this was that I could use more mango puree and thus get a more intense mango flavour in the puree, while avoiding those teeny tiny icicles in the ice cream.
Finally. After quite a number of batches, I was finally happy with my homemade Mango Ice Cream. Not that I was short of taste testers, even for the initial experimental versions!
And how does it compare to store bought tubs of ice cream?
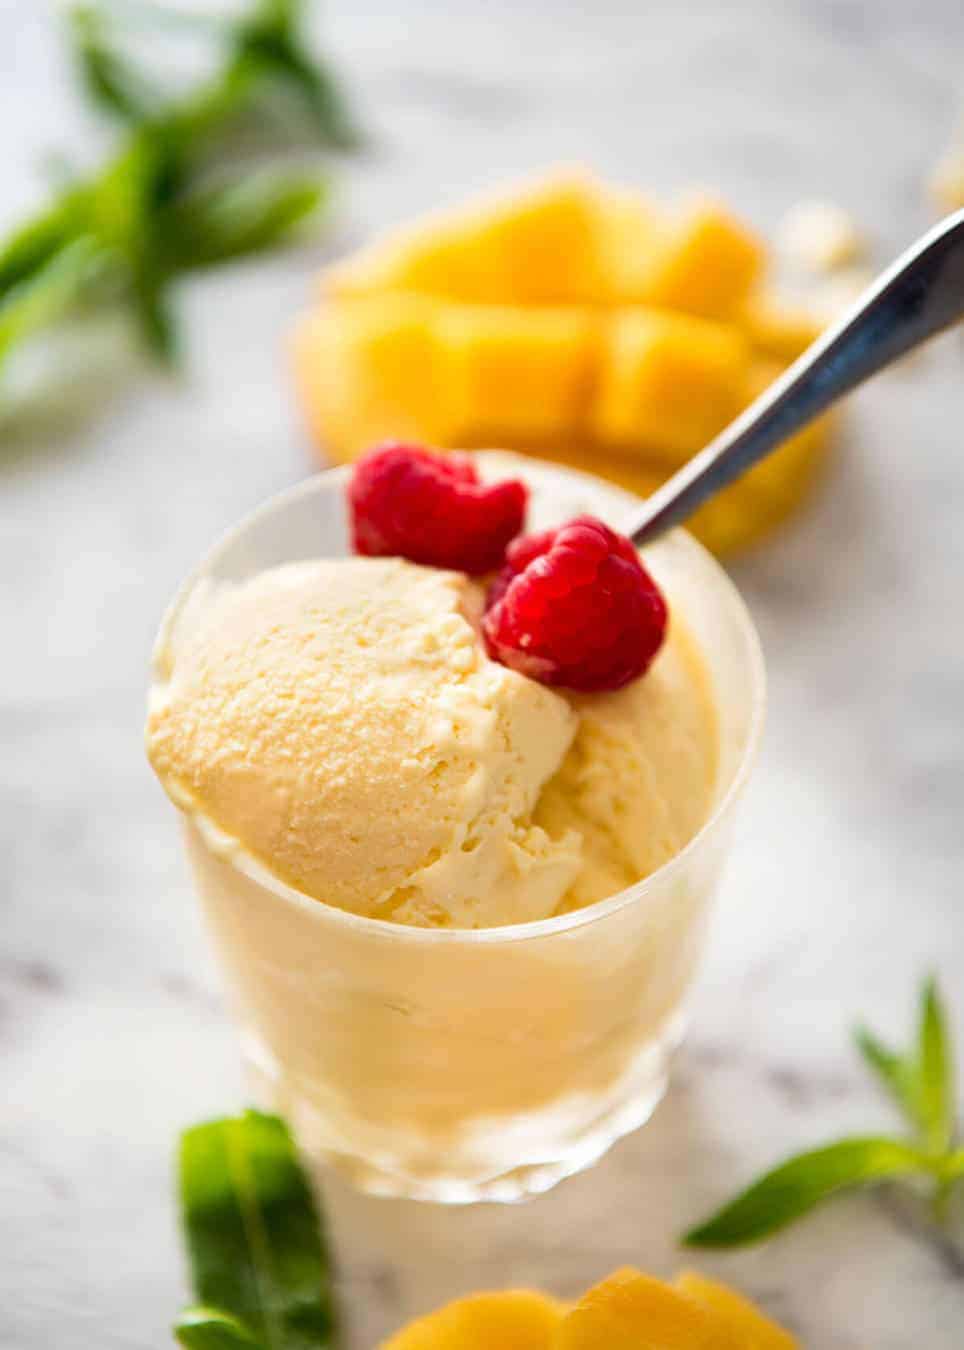
Well, here’s the clincher: this mango ice cream is something you simply can’t buy at the shops. This has the real flavour of mango, not a single bit of artificial flavouring in sight. It’s really incredible. For mango lovers everything, this is your mango dream come true!
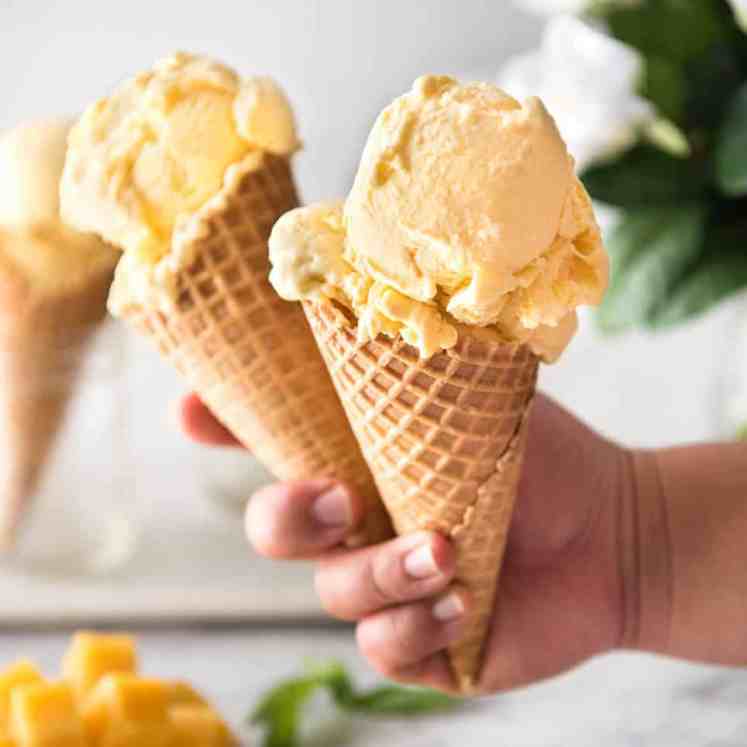
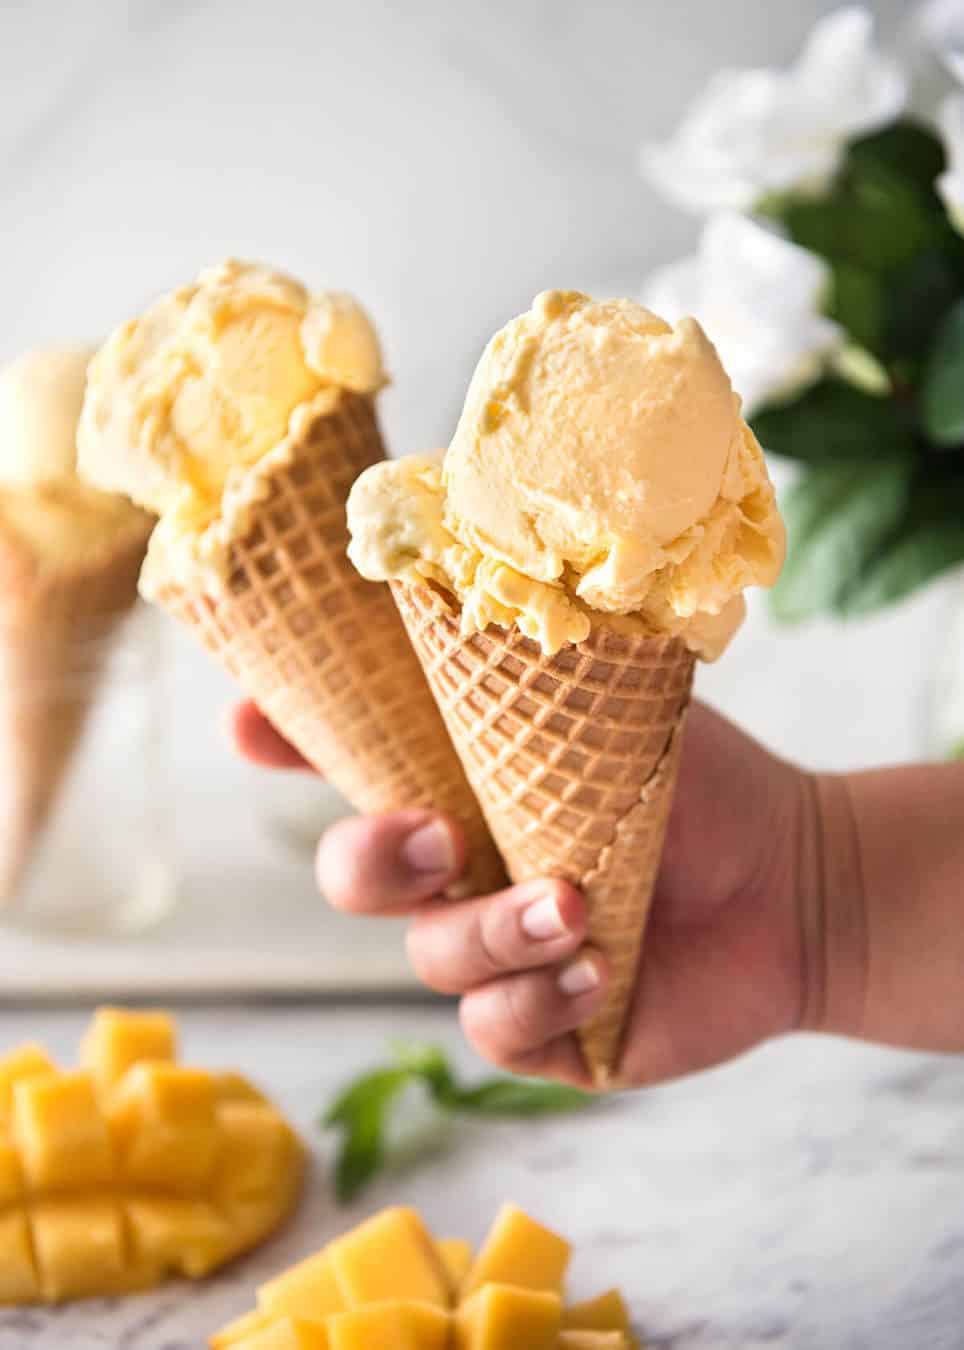
In terms of texture, this ice cream is creamier than ice cream made in an ice cream churner / store bought. You can see this in the photo above – you see how thick the drips are? If this was traditional ice cream, the drips would be thinner.
The ice cream really is scoopable, like real ice cream. Between about 12 – 18 hours of freezing, it only needs a couple of minutes out of the freezer to be easily scoopable, like what you see in the video. After about 24 hours, it freezes firmer but the key thing is that after 5 minutes or so on the counter, it softens to become scoopable without melting into liquid which is the problem with no churn ice cream recipes made without condensed milk.
I’d love to know what you think if you try it! – Nagi x

More Mango recipes
We can never have enough during mango season!!
WATCH HOW TO MAKE IT
Homemade Mango Ice Cream recipe video! Two areas to note: The stiffness of the cream (it’s not softly whipped, it’s stiff peaks) and how thick the mango puree is when cooked down (see how when I drag the wooden spoon across the skillet, it leaves a clear path through the mango puree). Oh! And of course, notice how the ice cream is truly scoopable like real store bought tubs of ice cream!

Homemade Mango Ice Cream Recipe
Ingredients
- 2 large mangoes , ripe and juicy - to make 2 cups puree (Note 1)
- 395 g / 14 oz sweetened condensed milk (1 can)
- 2 cups thickened cream / heavy cream / whipping cream , cold
- 1/8 tsp yellow liquid food colouring (optional) (Note 5)
Instructions
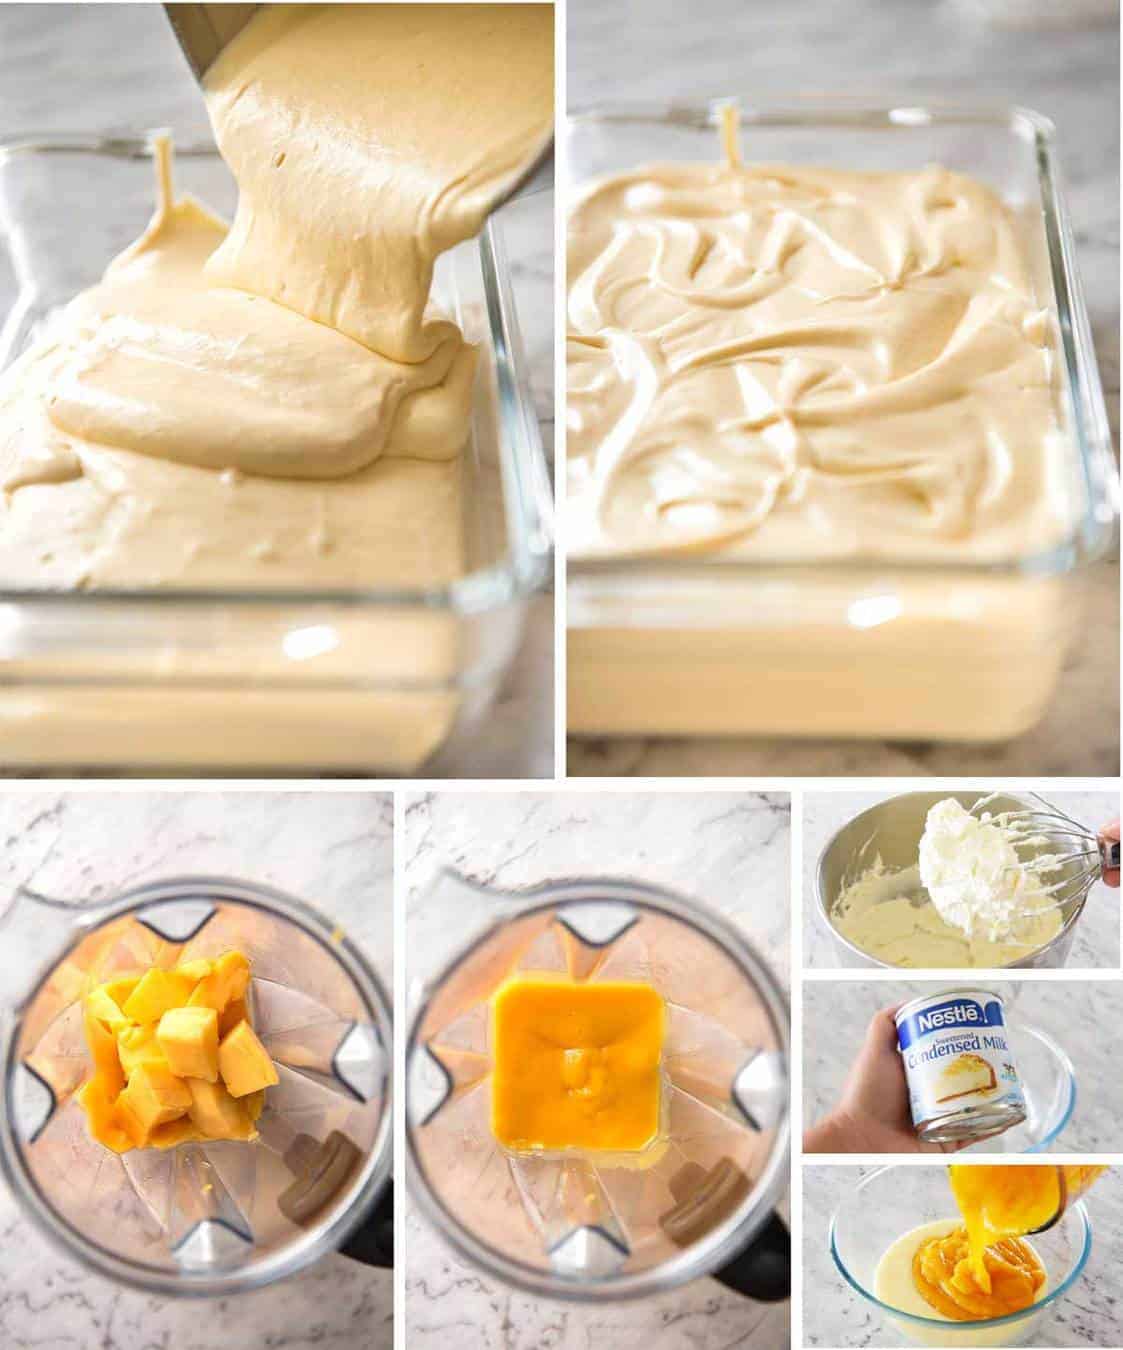
- Dice the flesh of the mango (see video for how I do it). Puree using a blender, food processor or stick blender then measure out 2 cups of mango puree (about 2 1/4 cups of diced mango).
- Pour puree into a non stick skillet over medium low heat. Cook, stirring constantly, for 8 - 10 minutes or until it reduces by half. The test is when you can drag a wooden spoon across the skillet and the path remains there for a second (see video). Or measure out the puree to ensure it's reduced to at least 1 cup - less is even better!
- Cool puree.
Ice Cream
- Combine cooled mango and condensed milk in a bowl. Add food colouring if using. Whisk until combined.
- Beat cream with a hand held beater or stand mixer until stiff peaks form (see video).
- Take a scoop of cream and put it in the mango mixture. Fold through until mostly combined - lumps is fine (this is just to lighten it up a bit).
- Then pour the mango mixture into the cream. Fold through (see video) rather than mixing vigorously like you would cake batter, until lump free. This will take a few minutes.
- Pour into a container (preferably with a lid). I recommend glass, if you can, or other non reactive container.
- Place a piece of baking / parchment paper on the surface. Then place lid on or using cling wrap.
- Freeze for 12+ hours.
- Remove parchment paper. Stand for 5 minutes to soften slightly, then scoop and serve!
- If frozen for 24 hours or longer, it will need a couple of extra minutes to soften to a scoop able consistency.
Notes
) b) it purees smoothly and can be reduced without losing flavour. Whereas, for example, strawberries don't actually have a very intense flavour. Watermelon has an incredibly high water content and I don't think reducing would work well. Etc etc. So I can't provide a guide for how to make this recipe with other fruits.
5. This is optional, if you want a nice mango yellow colour. I didn't use it in the photos because the Honey Golds I used were such an intense colour but I did use it in the video.
6. Nutrition per serving assuming 6 servings.
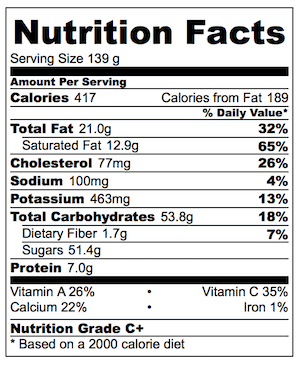
Nutrition
LIFE OF DOZER
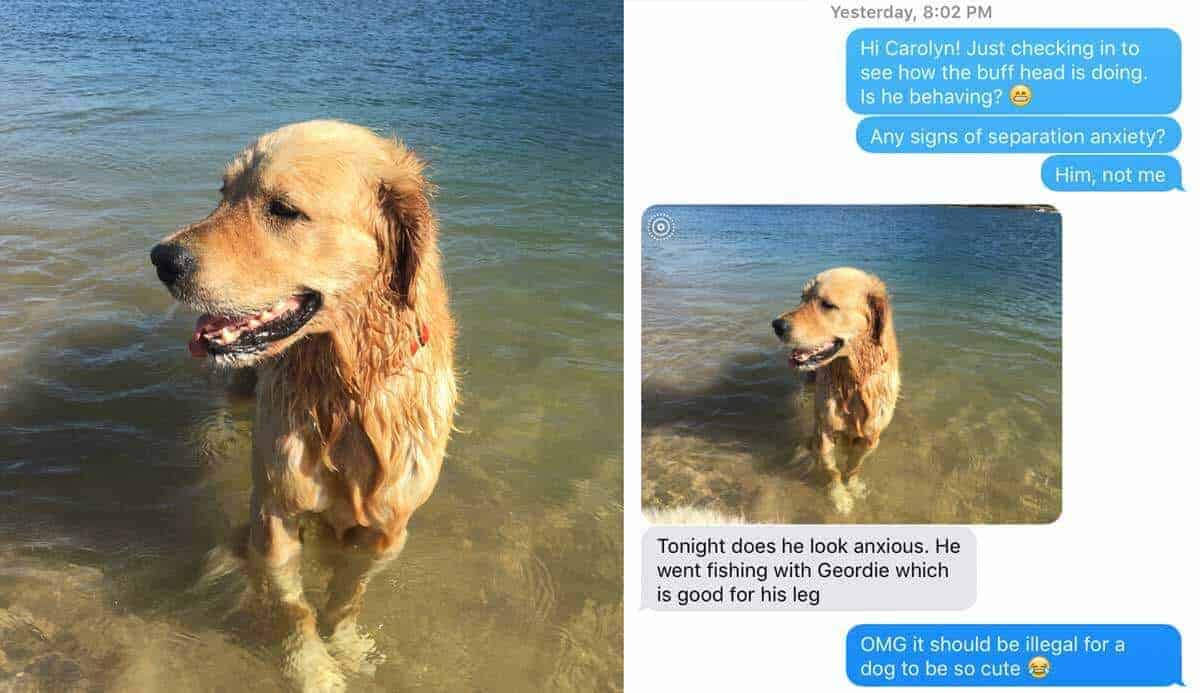
Me – currently skiing in Japan. Him – seems to be doing just fine without me….

The post Homemade Mango Ice Cream Recipe (No Ice Cream Maker!) appeared first on RecipeTin Eats.
]]>