 Mexican Chipotle Pork and Beans is a big pot of saucy, shreddable meat in a rich, spicy, chipotle sauce. Pork shoulder is slow cooked into fall-apart submission with meaty lima beans that absorbs the bold flavoured sauce. Stuff in tacos, serve over red rice, or eat like stew! Mexican Chipotle Pork and Beans This food... Get the Recipe
The post Mexican Chipotle Pork & Beans appeared first on RecipeTin Eats.
]]>Mexican Chipotle Pork and Beans is a big pot of saucy, shreddable meat in a rich, spicy, chipotle sauce. Pork shoulder is slow cooked into fall-apart submission with meaty lima beans that absorbs the bold flavoured sauce. Stuff in tacos, serve over red rice, or eat like stew!
Mexican Chipotle Pork and Beans
This food is me on a plate.
Well, in a pot.
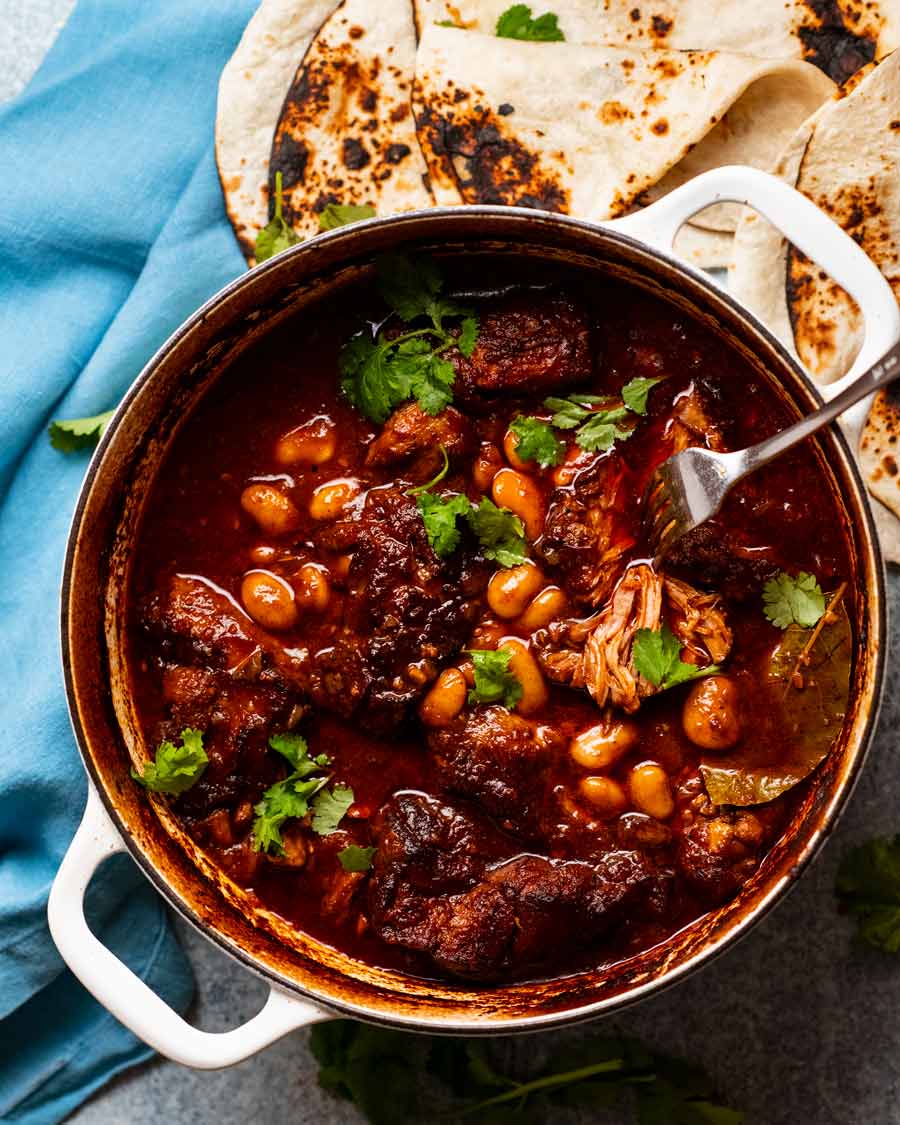
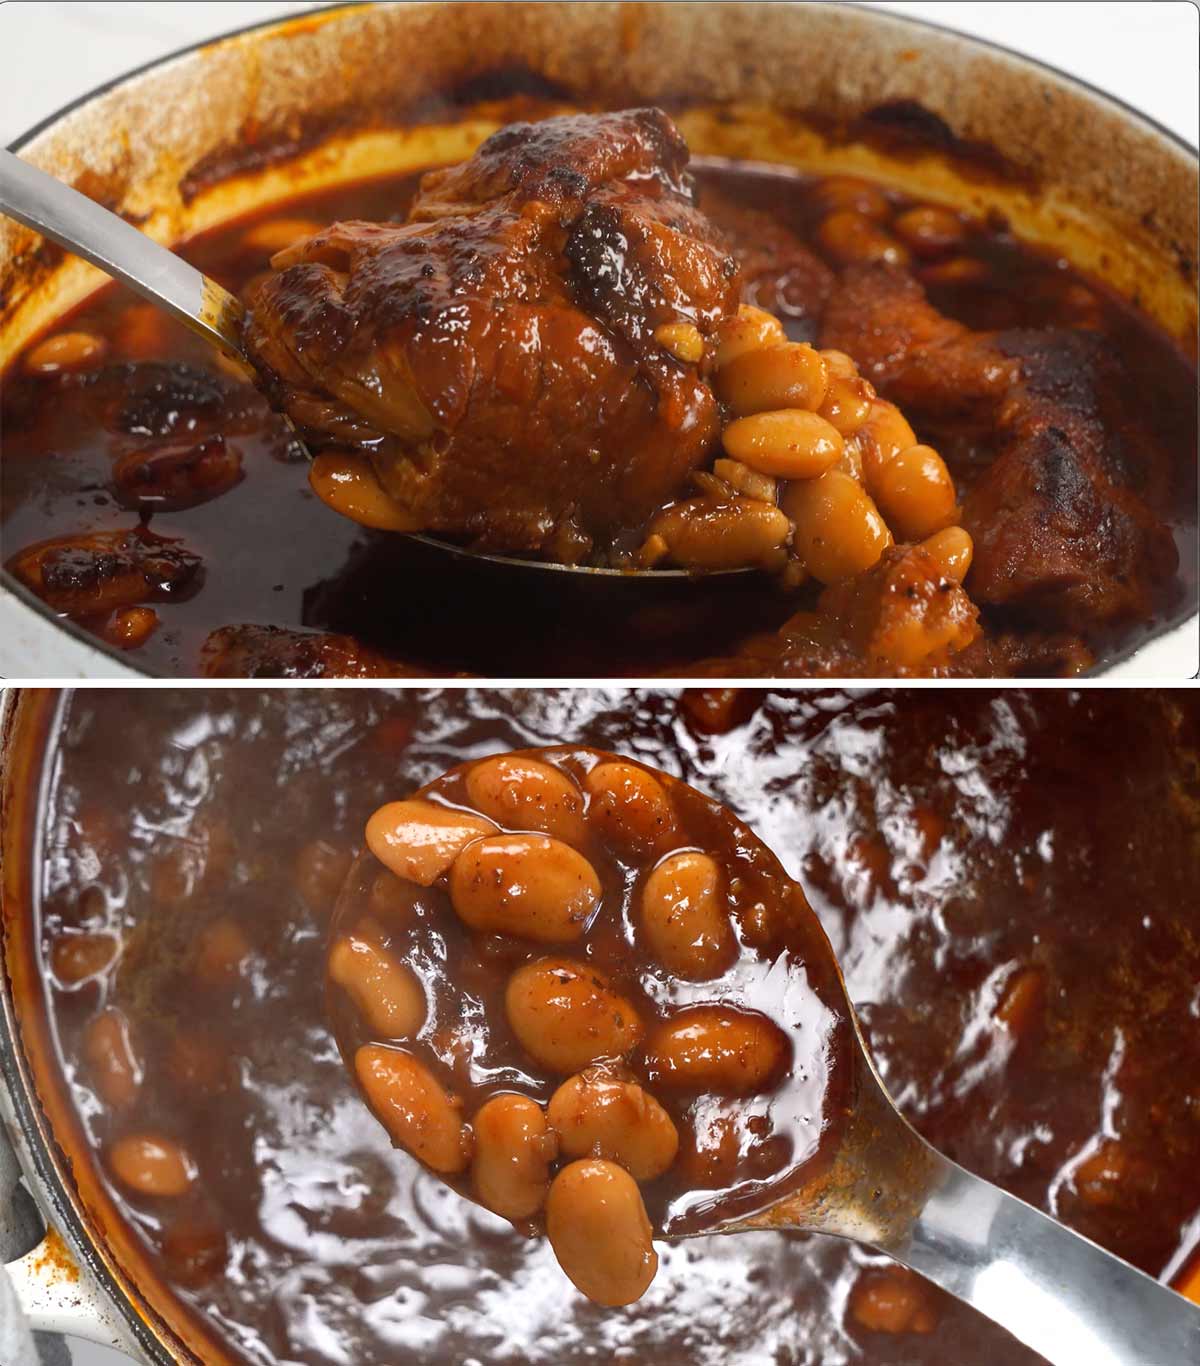
Hunks of juicy meat that’s so tender, it’s barely holding together when you scoop it out. A bold sauce that’s spicy, tangy and deeply savoury. Big creamy beans littered throughout that’s absorbed the flavour of the sauce, making beans tastier and dreamier than you ever imagined possible.
That it’s straightforward to make is a (big) bonus. It’s just like making a stew. In fact, that’s my favourite way to serve this – ladled into bowls like stew, except with tortillas on the side for dunking instead of serving it over the usual mash!
Ingredients in Mexican Chipotle Pork and Bean
Here’s what you need to make big pot of Mexican deliciousness!
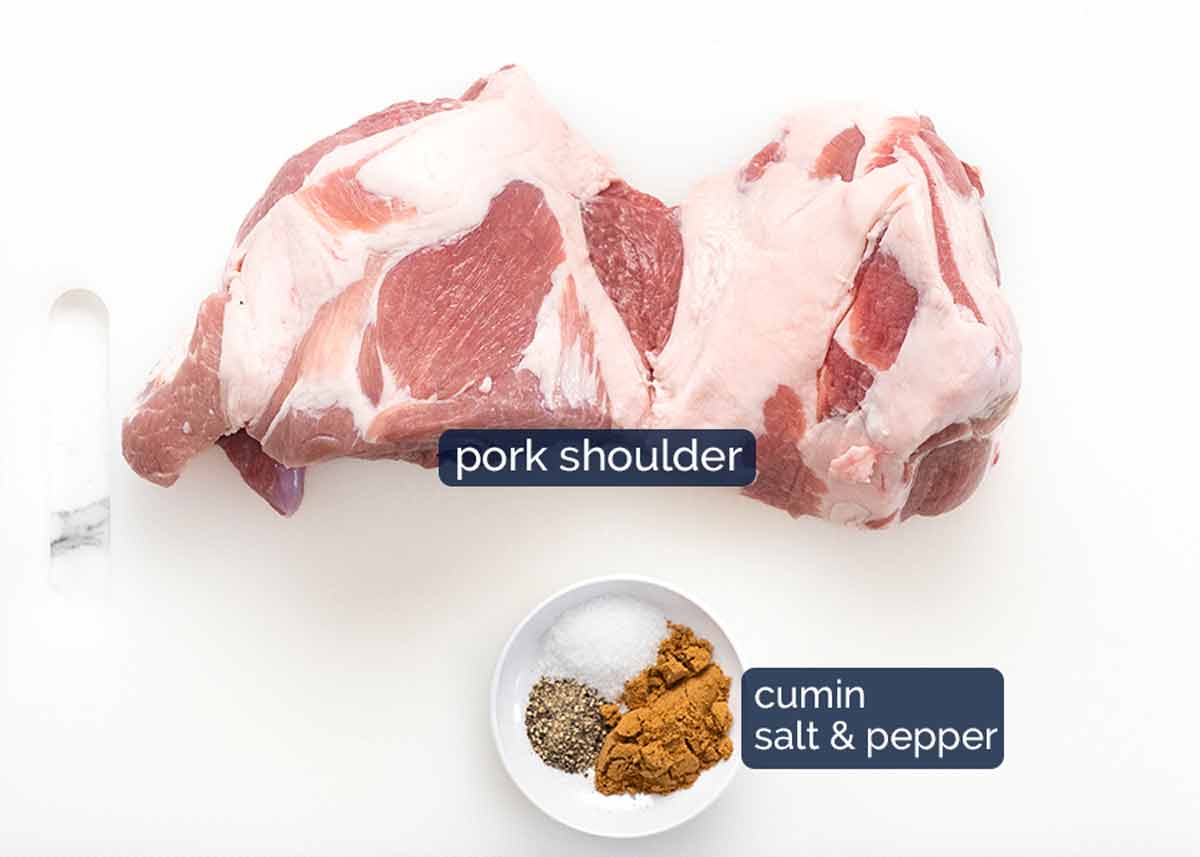
Seasoned pork
This dish is made with pork shoulder which is an economical tough cut of meat that needs to be slow cooked to fall-apart tenderness. I just use cumin to flavour it before searing because the pork absorbs so much flavour while it’s slow cooking, it really doesn’t need much on the surface!
The chipotle sauce (and beans!)
And here’s what you need to make the rich chipotle sauce that the pork is braised in. Flavour to the max!!
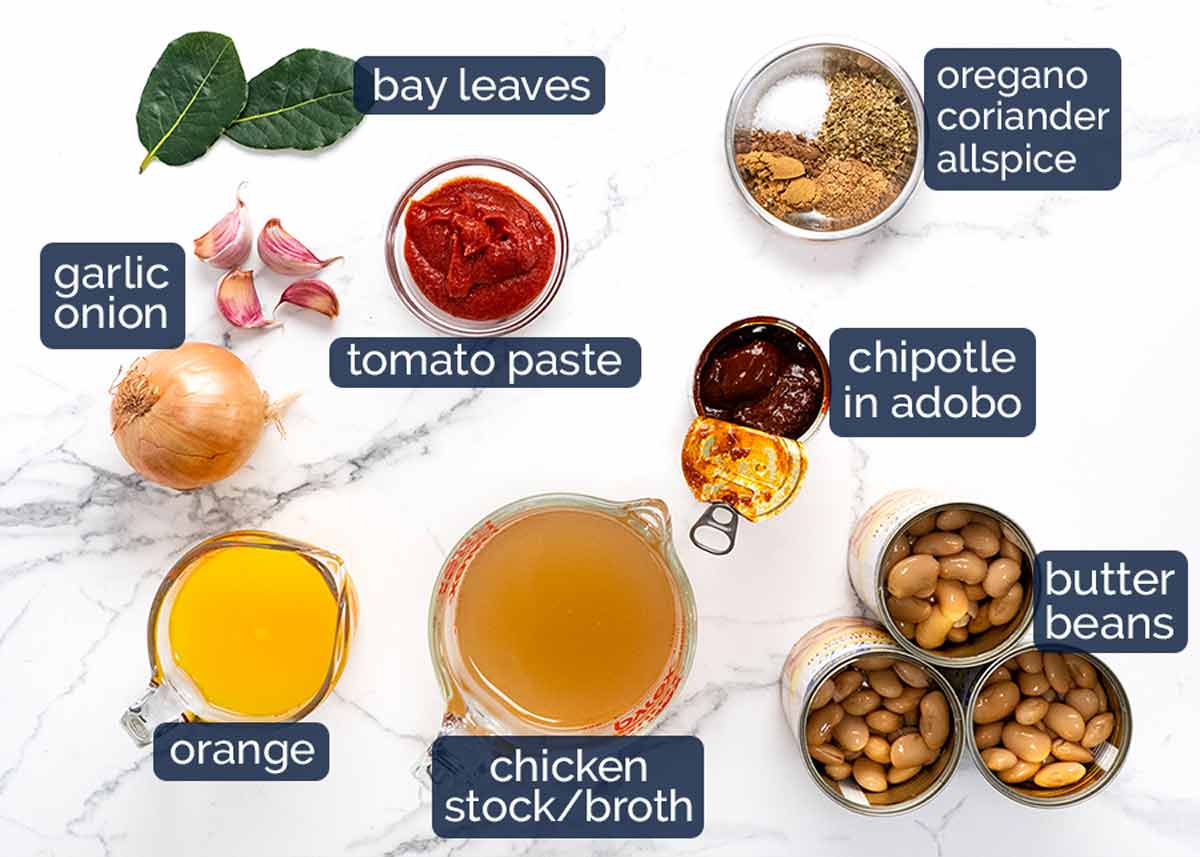
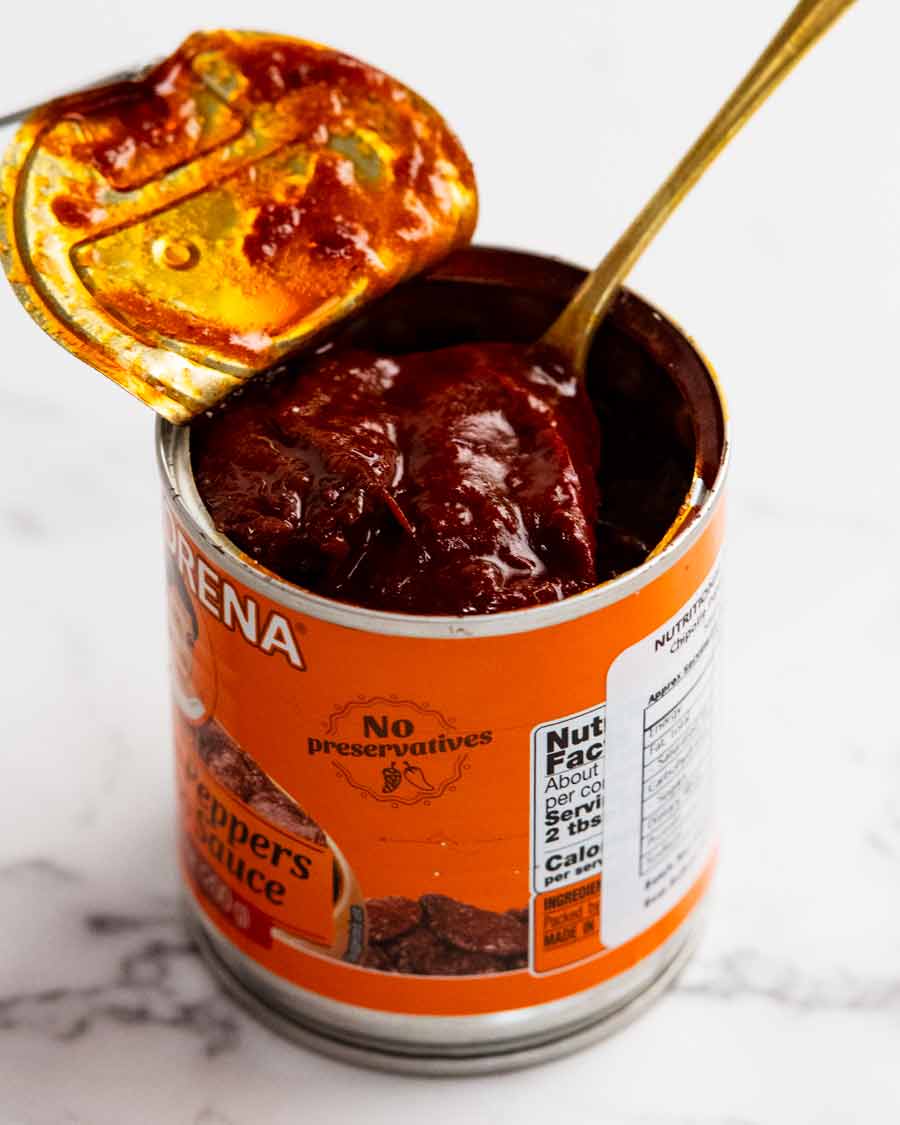
Chipotle in adobo (photo below) – The hero ingredient, I adore this Mexican sauce! It’s made with chipotles which are rehydrated and canned in a tangy, spicy red sauce that packs a load of flavour. (Chipotles are smoked, dried jalapeños).
In this recipe, we’re using both the chipotles and sauce (some recipes only use one or the other) and pureeing the chipotles for maximum flavour release and to make a smooth sauce.
Where to find it – Those of you in the States are lucky enough to find chipotle in adobo virtually “everywhere”! In Australia – find it in the Mexican aisle of large grocery stores (Coles, Woolies), Harris Farms, as well as independent grocers. I use La Morena which I buy from Harris Farms – $3.29 for 200g/7 oz (we use the whole can).
Butter beans (aka lima beans) – The big, fat, meaty beans you always see at the store that you wonder what to do with. Well, now you know! 😂 Feel free to substitute with other beans, though I do think creamy beans work better than smaller, firm ones like black beans, chickpeas etc.
Why canned instead of dried beans? I find that the cook time for dried beans (especially large ones like butter beans) can vary quite drastically depending on the age, size and quality of the beans. Which means for dishes like this, sometimes the beans are done before the pork is, sometimes they are still hard when the pork is done. It’s not too bad pulling the pork out and leaving the beans to cook for longer. But it is a pain to take the beans out to continue cooking the pork! So, canned is my preference here.
Orange juice – Yes! A secret ingredient used in Mexican cooking to add sweetness and more flavour than just adding sugar into things (eg carnitas, fajitas). Doesn’t make it taste orangey because once it’s slow cooked, the flavour completely transforms.
Chicken stock – For the braising liquid. Low sodium please, otherwise your dish might end up too salty.
Tomato paste – For flavour and thickening. It’s sautéed to cook out the raw, sour flavour before mixing into the braising liquid.
Herbs and spices – Nothing unusual here! Oregano, coriander, allspice, bay leaves.
Onion and garlic – Flavour base.
How to make Chipotle pork and beans
This recipe starts off by searing the pork on the stove before transferring to the oven to braise until the pork is fall-apart tender, giving the sauce time to develop fabulous deep, savoury flavour.
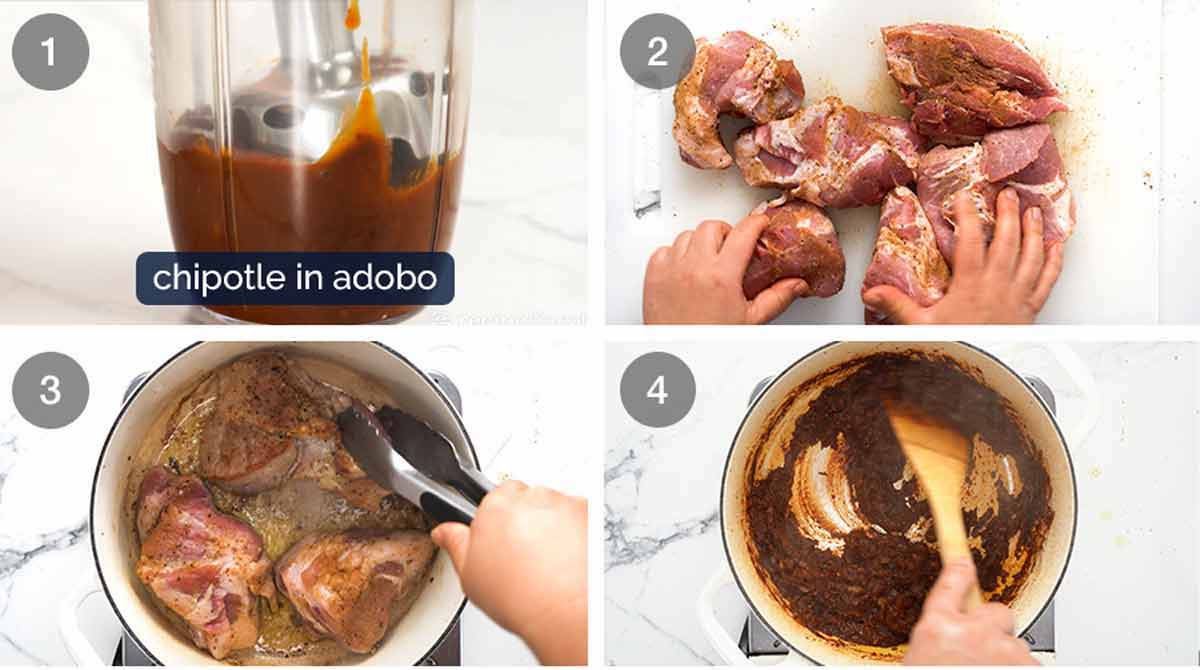
Puree the chipotle in adobo using a stick blender. The chipotle is really soft so it literally takes seconds.
Season pork – Cut the pork into 6 equal pieces, for ease of handling to sear, more surface area for browning and so they cook faster than a whole pork shoulder. Then sprinkle with the cumin, salt and pepper.
Brown the pork in two batches, using a heavy based oven-proof pot. Rotate the pork to brown all over. Remember, colour = flavour! Once done, remove the pork onto a plate.
Sauté sauce flavour base – Using the same pot, sauté the garlic, onion, dried herbs and spices. Sautéing dried herbs and spices is a neat trick for getting extra flavour out of them – it makes them “bloom”.
Next, cook off the tomato paste followed by the pureed chipotle in adobo. Cooking off pastes is a great flavour trick as it intensifies flavour as well as taking off the raw, sour edge. It also depends the savoury flavour so you get more out of less!
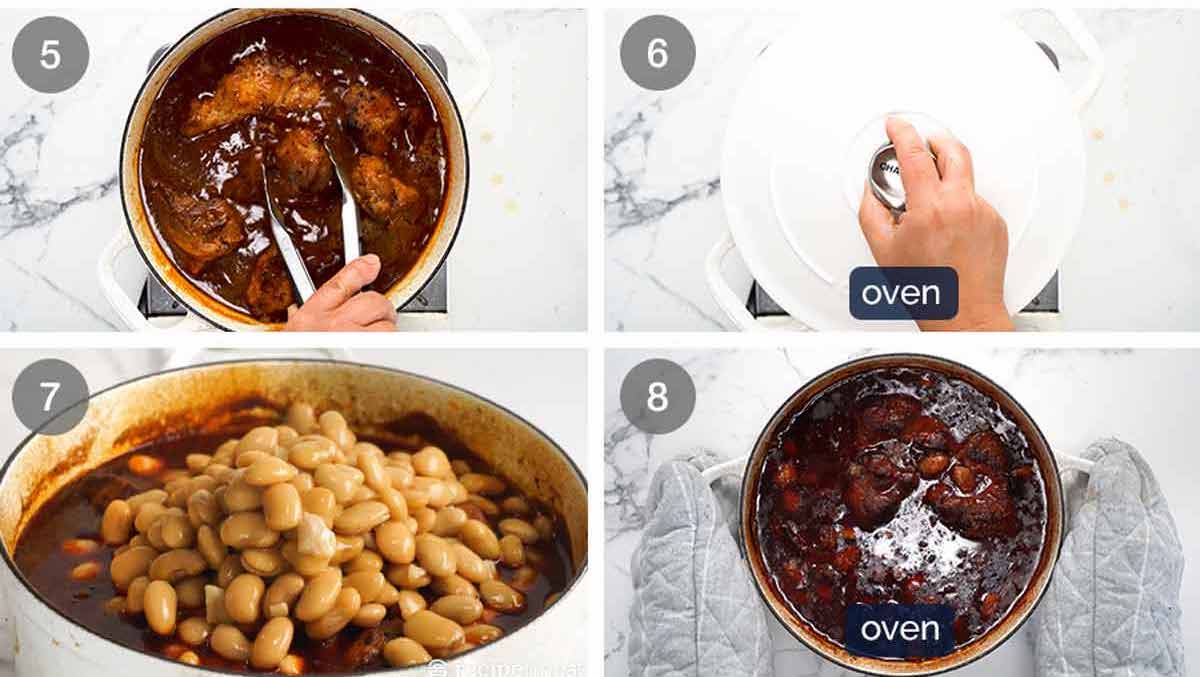
Braising liquid – Add all the remaining ingredients except the beans into the sauce – the orange juice, stock, spices and bay leaves. The beans are added later else they will overcook and become too mushy.
Give it all a good mix then place the pork in, along with any juices pooled on the plate (never waste free flavour!). Arrange the pork as best you can so they are submerged under the liquid. But don’t worry if there’s some of the surface poking above because it will steam-cook and also the pork will shrink as it cooks so it will eventually sink below the surface.
Slow cook – Put the lid on and transfer to the oven to slow cook for 2 hours at 180°C/350°F (160°C fan). This temperature might sound high for slow cooking but it equates to a gentle simmer on the stove, which is suitable for slow cooking meats.
Other cook methods – 6 hours in a slow cooker on low or 2 hours on the stove.
Beans – Remove the pot from the oven. The pork should be pretty much fork tender by this stage. Add the beans and push them in as best you can under the liquid.
Bake uncovered – Return the pot to the oven to bake uncovered for 30 minutes to caramelise the surface which adds extra flavour. Also by this stage, the pork should be tender enough so you can pry it apart using two forks without any effort at all.
If you used your slow cooker or the stove, I do recommend doing this final step in the oven because the caramelising of the surface does add extra flavour!
And that’s it! To serve, just scoop up pieces of pork and beans, and ladle into bowls or onto a plate for serving. See below for ways to eat this pot of fall-apart-spicy-meaty-beany deliciousness!
How to serve Chipotle Pork and Beans
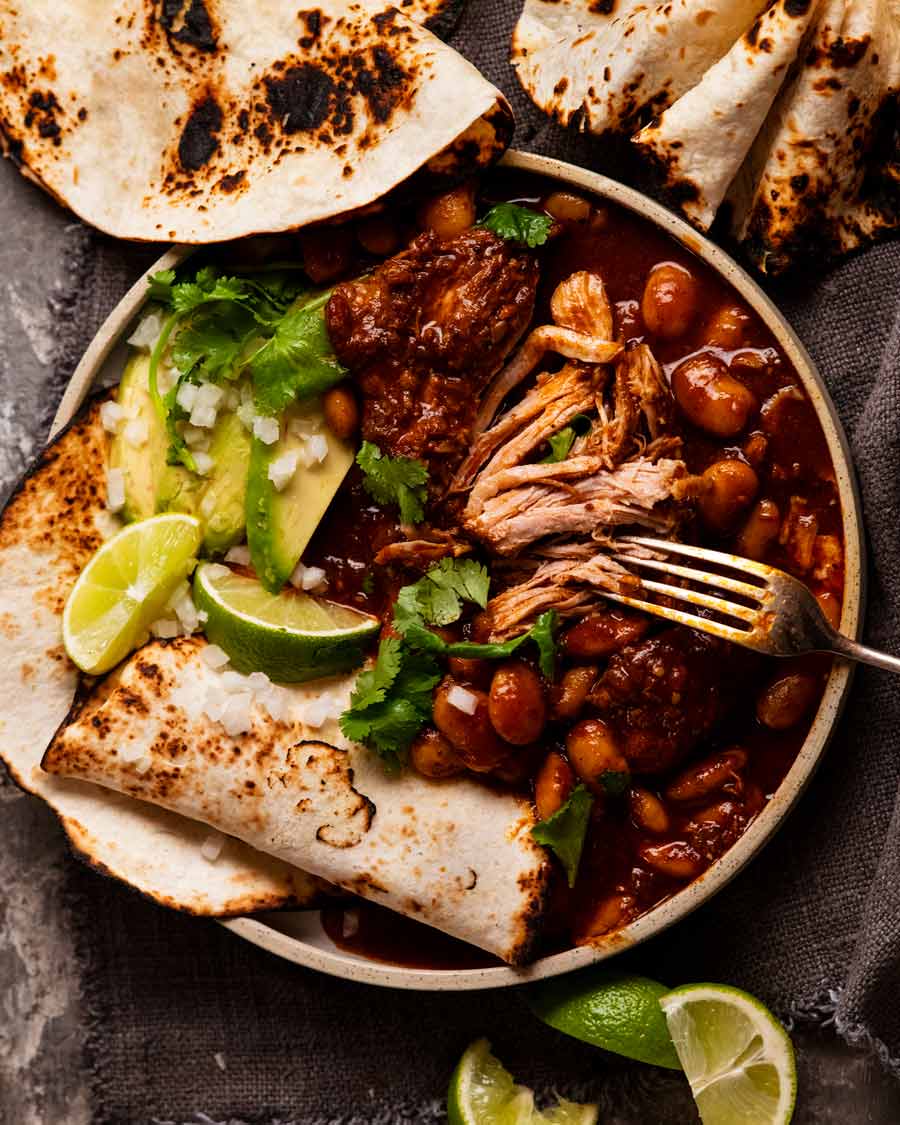
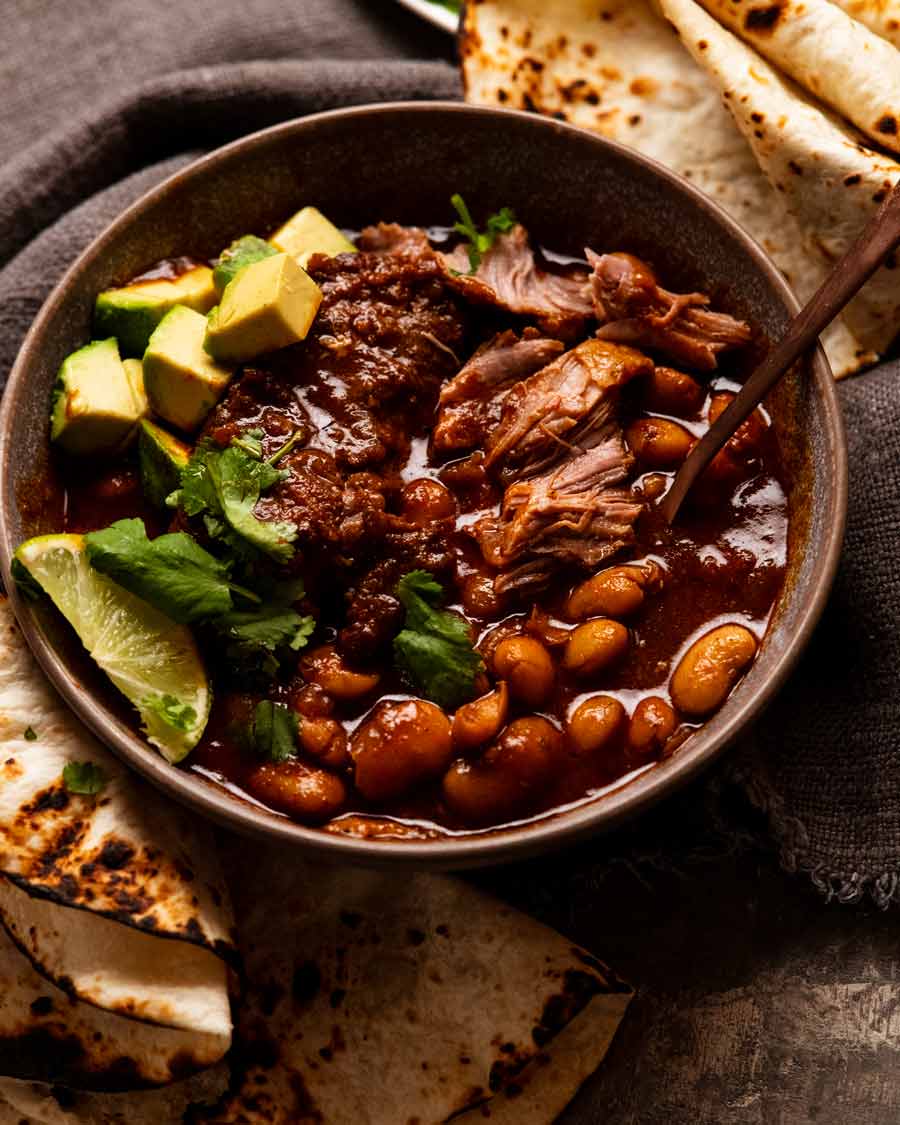
As I mentioned at the beginning, my favourite way. to serve Chipotle Pork and Beans is in a bowl like stew. Just use a spoon or fork to cut off bits of pork (which takes barely a touch!) then get a big scoop with beans and plenty of sauce.
I like to add a bit of avocado and sprinkle of coriander/cilantro for freshness, and tortillas for dunking / bowl mopping is essential in my world.
Having said that, here are some other options – all dish worthy!
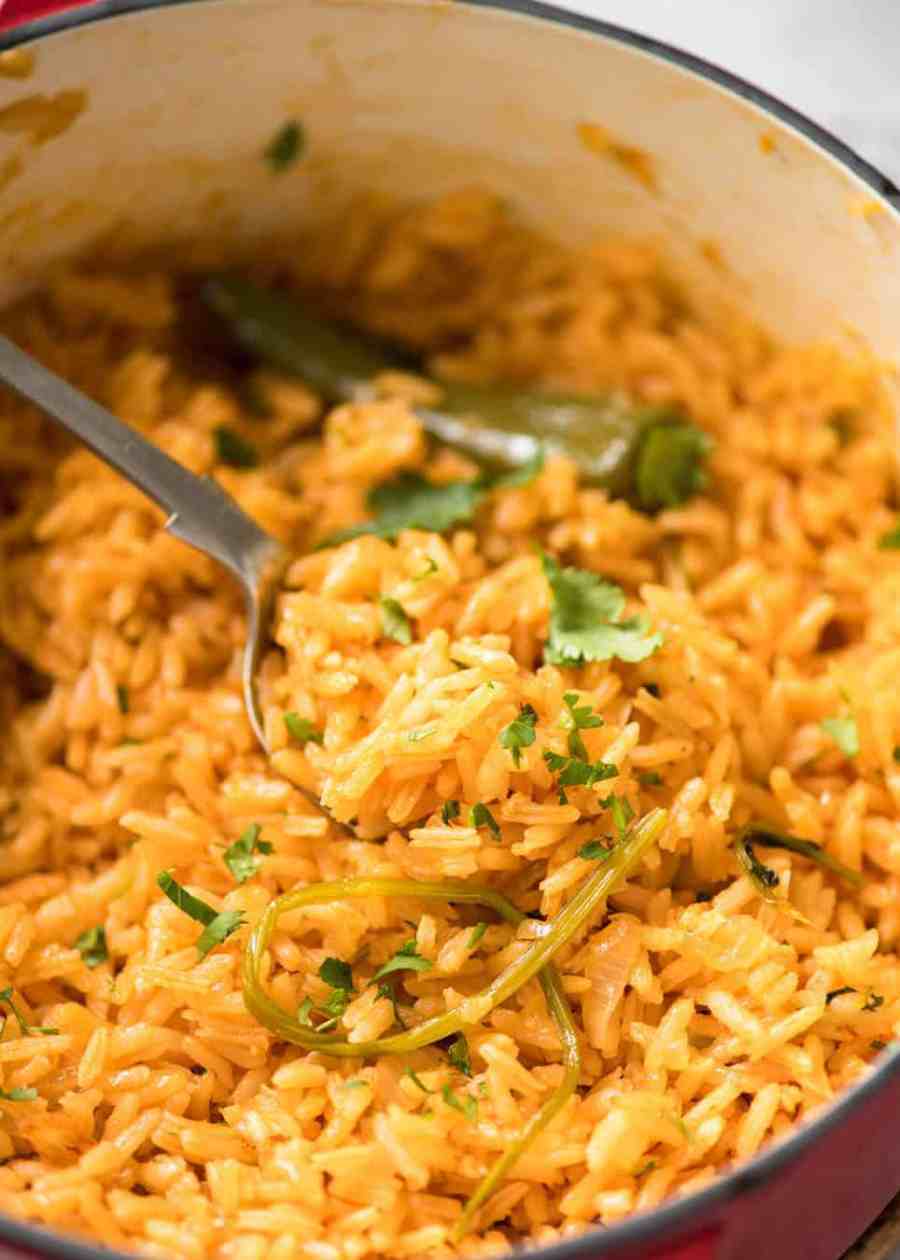
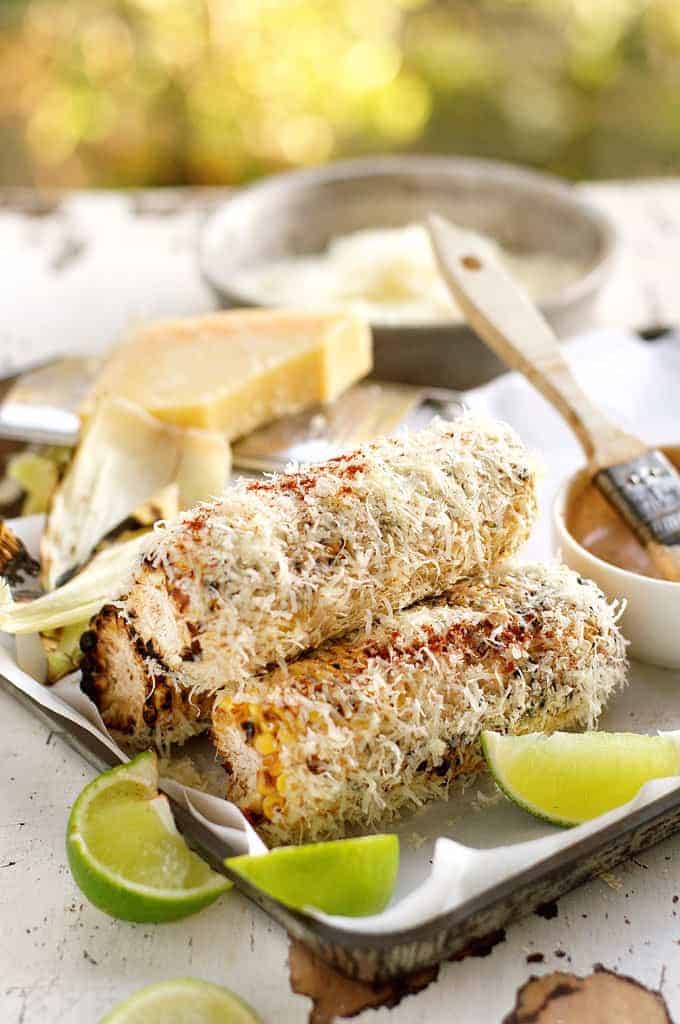
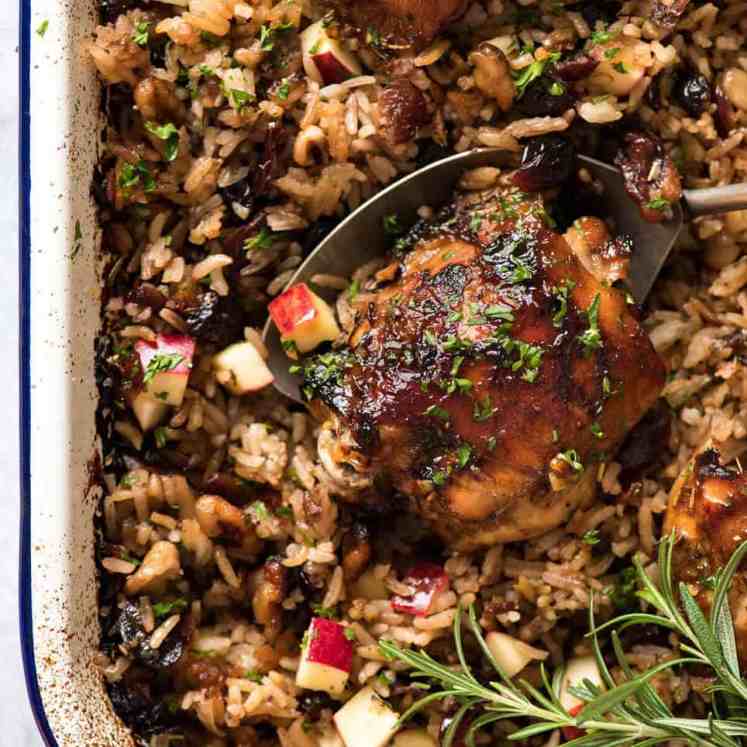
Served over Mexican red rice – or put a big Mexican plate together with Mexican corn cobs (pictured above).
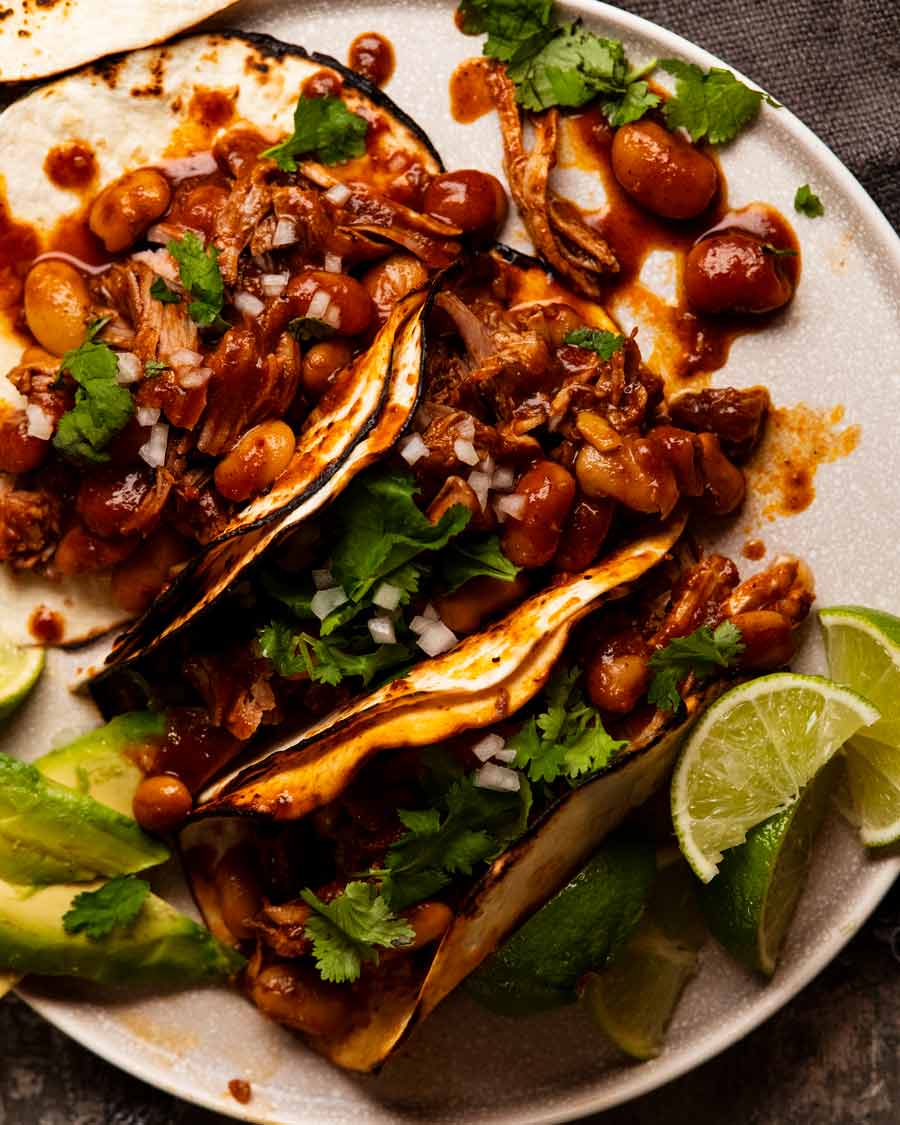
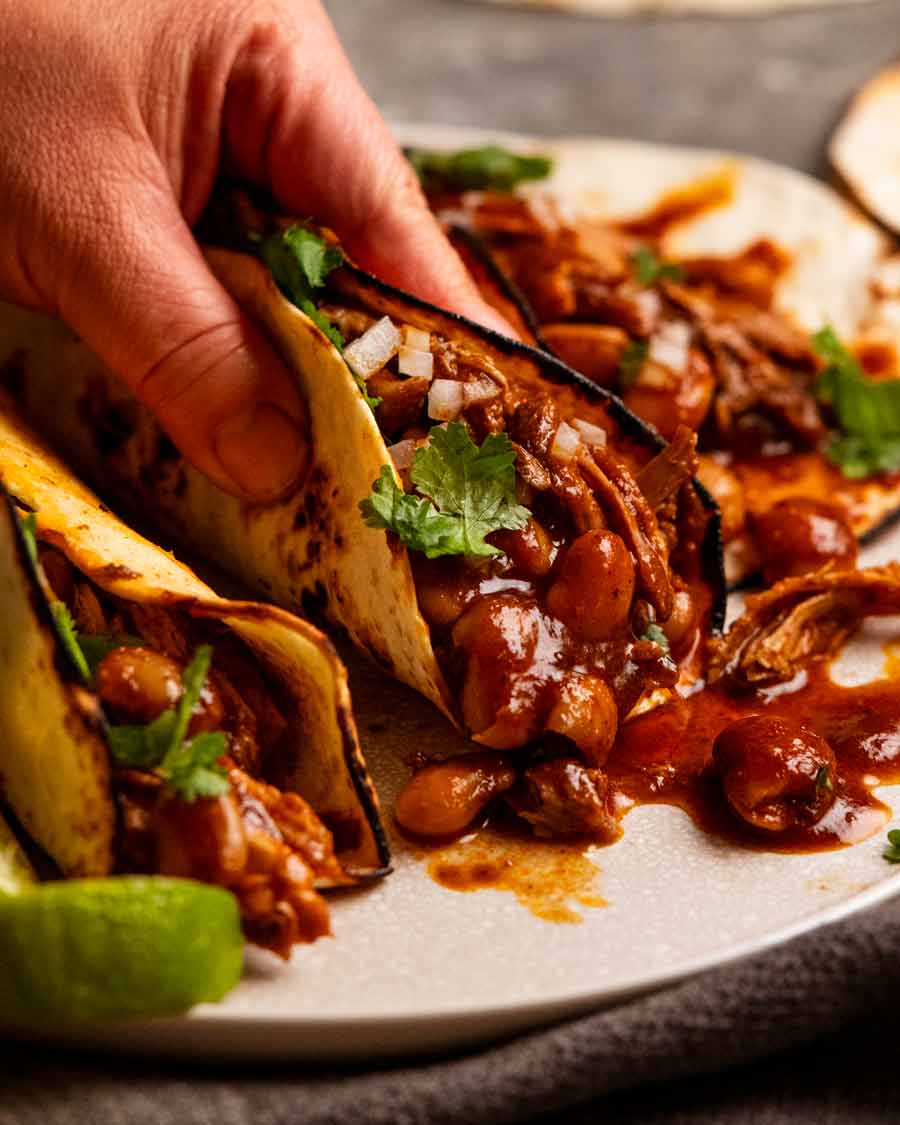
As a taco filling with your toppings of choice! It’s pictured above with avocado slices, finely chopped white onion, fresh coriander/cilantro leaves and lime wedges. There’s no need for a separate sauce – this is saucy enough as is!
Burritos to die for! Switch the chicken in this burrito recipe.
Shred up the pork and mix it up into the sauce with the beans. Then use it to make a giant nachos (switch out the chicken in this nachos recipe), as an enchilada filling, make tostada or simply scoop up with corn chips.
Turn it into a hearty soup – Add extra chicken stock/broth to thin the sauce and make it less intense, so it becomes suitable to be a soup broth. Then serve it as soup!
So many possibilities! What do you think? Which serving option appeals to you? – Nagi x
Watch how to make it

Mexican Chipotle Pork and Beans
Ingredients
Pork:
- 1.5kg / 3lb pork shoulder (skinless, boneless), cut into 6 equal pieces (Note 1)
- 1 tsp cooking/kosher salt
- 1/2 tsp black pepper
- 2 tsp cumin powder
Sauce:
- 200g / 7 oz chipotle in adobo – the chillis + sauce (Note 2)
- 2 tbsp olive oil
- 1 onion , finely chopped
- 4 garlic cloves , finely minced
- 1/4 cup tomato paste
- 1 cup orange juice (real, not reconstituted sweetened stuff – Note 3)
- 2 cups chicken stock/broth , low sodium
- 2 bay leaves (fresh, else dried)
- 1 tsp cooking/kosher salt
- 3 x 420g / 16 oz canned butter beans / lima beans , or other of choice (Note 4)
Dried herbs & spices
- 1 tbsp dried oregano
- 1 tsp cumin powder
- 1 tsp coriander powder
- 1/2 tsp allspice powder
Instructions
- Preheat oven to 180°C/350°F (160°C fan).
- SPICINESS – Read note above about spiciness!
- Puree chipotle in adobo until smooth using a stick blender or similar.
- Sprinkle pork all over with salt, pepper and cumin.
- Brown pork – Heat all the oil in a large oven-proof pot over high heat. Brown the pork all over in 2 batches, the remove onto a plate (~ 1 minute each side).
- Sauté – Cool the pot slightly then return to medium heat. If the pot looks dry, add 1 tbsp oil. Sauté onion, garlic, the herbs & spices for 3 minutes.
- Cook off tomato & chipotle – Add tomato paste and cook it off for 2 minutes. Add chipotle puree and cook for 2 minutes.
- Slow cook 2 hours – Add remaining ingredients EXCEPT beans. Stir, then bring to simmer. Place pork in – arrange so its submerged as best as possible. Cover with lid. Place in oven for 2 hours. (Note 6 other cook methods)
- Add beans, cook 30 min – Remove lid, add beans. Return to oven for 30 minutes without lid to caramelise the surface. The pork will be fork-tender!
- Serve like stew over Mexican red rice or with tortillas for dunking. Or make wickedly food tacos with finely chopped white onion, fresh coriander/cilantro, avocado slices and a squeeze of lime. More serving options above the recipe video.
Notes
Nutrition
Life of Dozer
The Coronation of Prince Edward Dozer Maehashi the first.

The post Mexican Chipotle Pork & Beans appeared first on RecipeTin Eats.
]]> A bubbly casserole of sorts, this Mexican beef and bean is like a baked version of chilli con carne with lots of melty cheese – but faster to make. Think of it like your ultimate all-purpose Mexican beef – stuff in tacos, DIY burrito wraps, dunk with corn chips – like nachos! Cheesy Mexican beef... Get the Recipe
The post Cheesy Mexican beef and bean bake appeared first on RecipeTin Eats.
]]>A bubbly casserole of sorts, this Mexican beef and bean is like a baked version of chilli con carne with lots of melty cheese – but faster to make. Think of it like your ultimate all-purpose Mexican beef – stuff in tacos, DIY burrito wraps, dunk with corn chips – like nachos!
Cheesy Mexican beef and bean bake
I can’t remember how this Mexican beef and bean dish first came to be. All I know is that when it came out of the oven in all its bubbly, melty cheesy glory, I wanted to get stuck into immediately but paralysed with indecision for how. So many options!
Like chili, with a warm tortillas on the side for dunking??
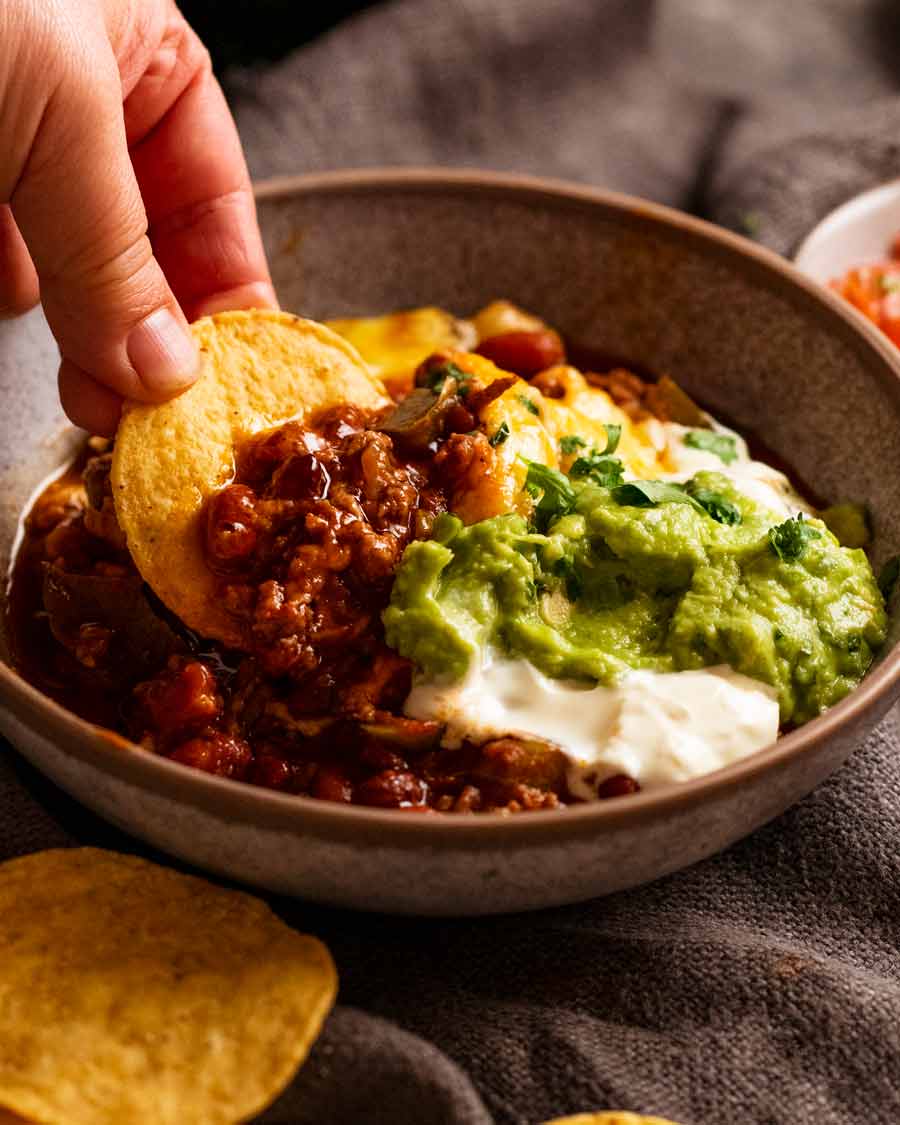
OR with corn chips, deconstructed nachos style?
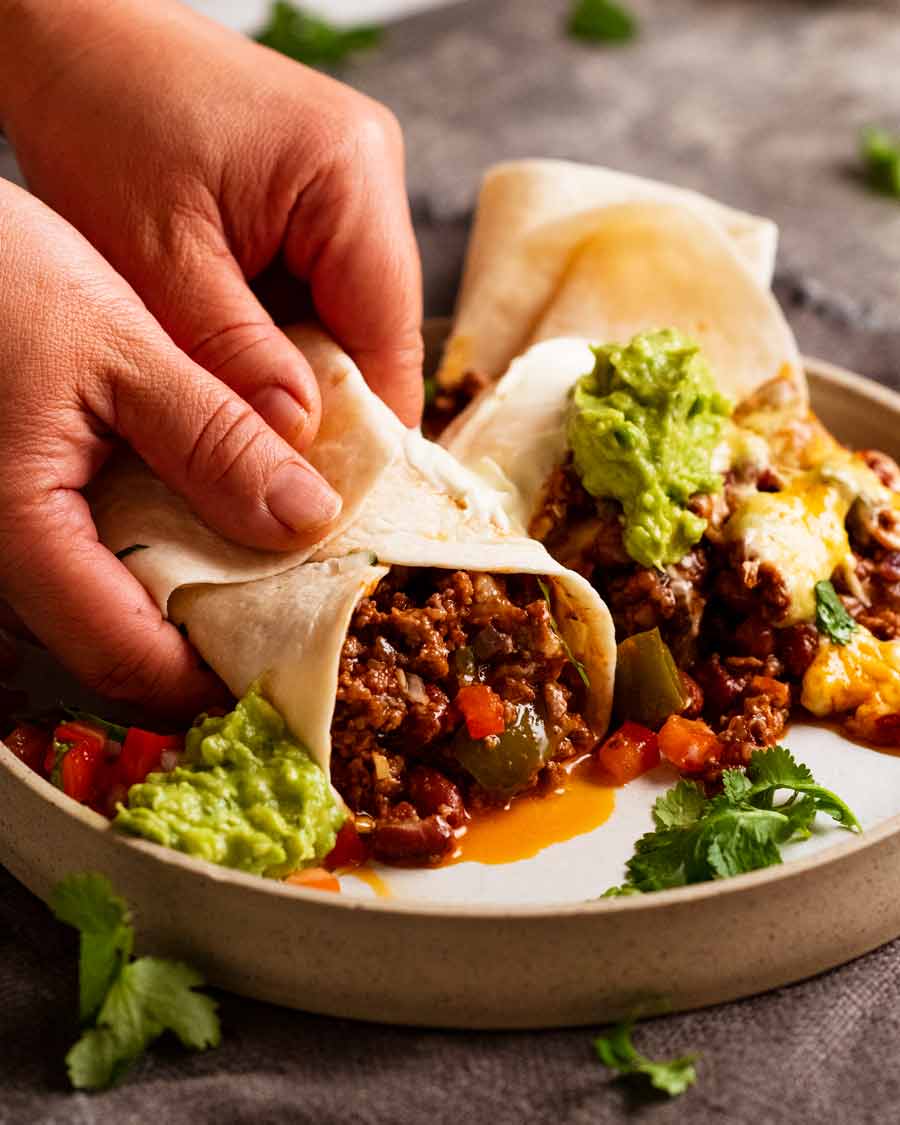
Making stuffed tortilla pillows?? Which, I realised, is just a burrito actually. 😂 *Light-bulb-moment* DIY burritos! Add a pile of warm tortillas, sour cream + guacamole or quick avocado sauce for dunking. Everybody make your own!
All-inclusive-taco filling? So juicy and cheesy already, it’s like a good ole’ classic beef mince taco filling + taco sauce + cheese, all rolled into one. Efficiency, for the win!
Then another light-bulb moment. This is like the ultimate all-purpose Mexican beef filling!! It’s almost a little concerning how excited I was when I came to this conclusion. Good food has a habit of doing that to me. 🤭
What you need for Mexican beef and beans
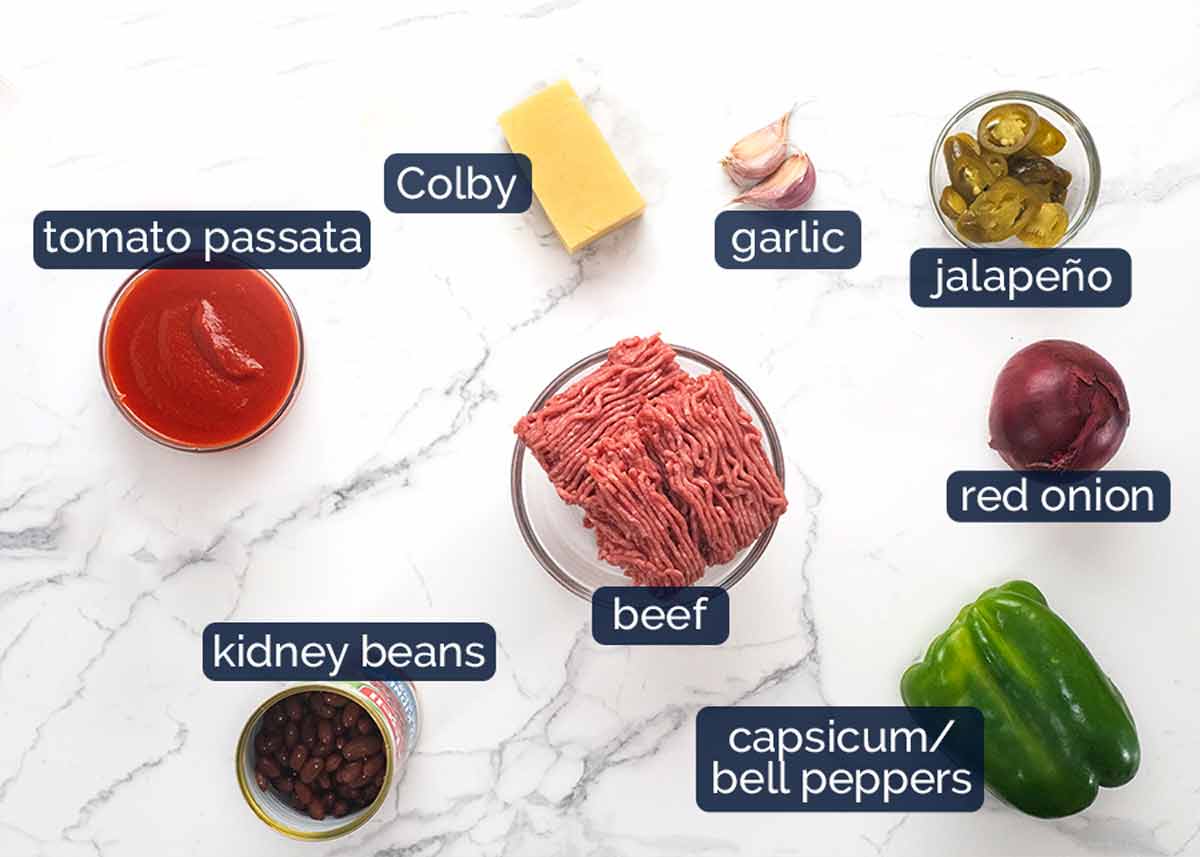
Here’s what you need to make this Mexican beef and bean bake:
This is a casual, rustic dish – which means, lots of flexibility. I’m not so relaxed with substitutions for some recipes, so take it when you can! 😂
Ground beef / beef mince – Or chicken, turkey or pork. Any of these would work. (Even lamb actually).
Red onion – Or ordinary brown / yellow onions.
Green capsicum (bell pepper) – Or other colour capsicum, or other sauté-able vegetables like diced zucchini/courgette, carrot, green beans (chopped), corn. Even a cup of diced mixed frozen vegetables would work here!
Red kidney beans – Or black beans (on theme with Mexican food), or any other beans of choice. Or, more vegetables.
Tomato passata – This is pureed, strained tomato that is smooth, rather than lump like canned tomato. Substituted with crushed canned tomato, or what’s called tomato sauce or tomato puree in the US (eg Hunts).
Pickled jalapeno – Adds a sprinkle of spiciness plus tang because it’s pickled which is nice in this beefy dish. Canned chopped green chillies would be an excellent sub here (but this is a US thing, hoping it becomes a staple here in Australia one of these days!).
Garlic – Can’t be flexible here!

Cheese – Definitely not flexible here! Well, not flexible about the inclusion of some form of melting cheese. I’ve opted for Colby – adds flavour, melts well, gets a nice bit of golden colour on the surface, not too greasy. Feel free to use any of choice. If you use mozzarella, I’d suggest adding a sprinkling of parmesan on top (because mozzarella, while it melts beautifully, doesn’t have a much flavour).
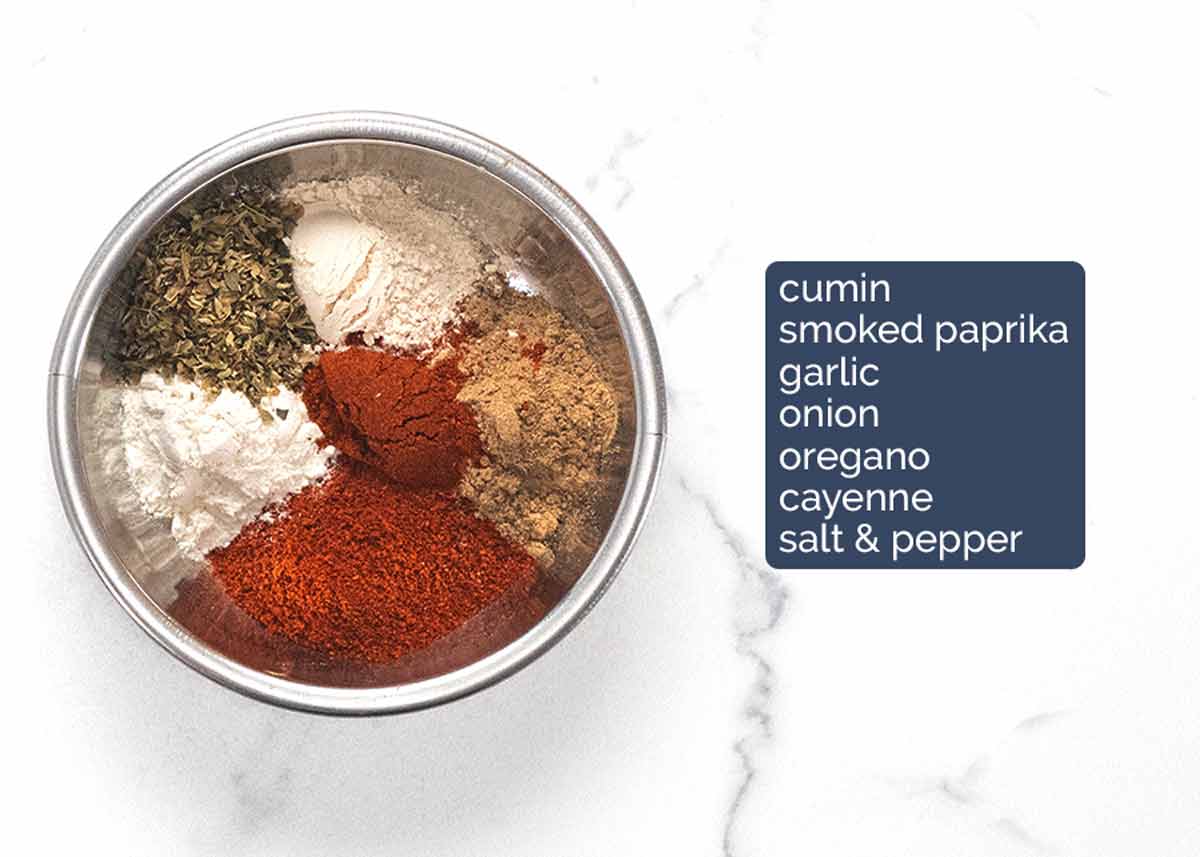
The Mexican spice mix
And here’s what you need for the homemade Mexican spice mix. Some Mexican recipes I share have a longer list of spices. For me, this is about the minimum you can go without the flavour missing something. All staple spices! (You can substitute smoked paprika with plain).
How to make Cheesy Mexican beef and beans
It’s like chili cone carne – but faster to make because by finishing it off in the oven with a generous sprinkling of cheese, we can skip the stove simmer.
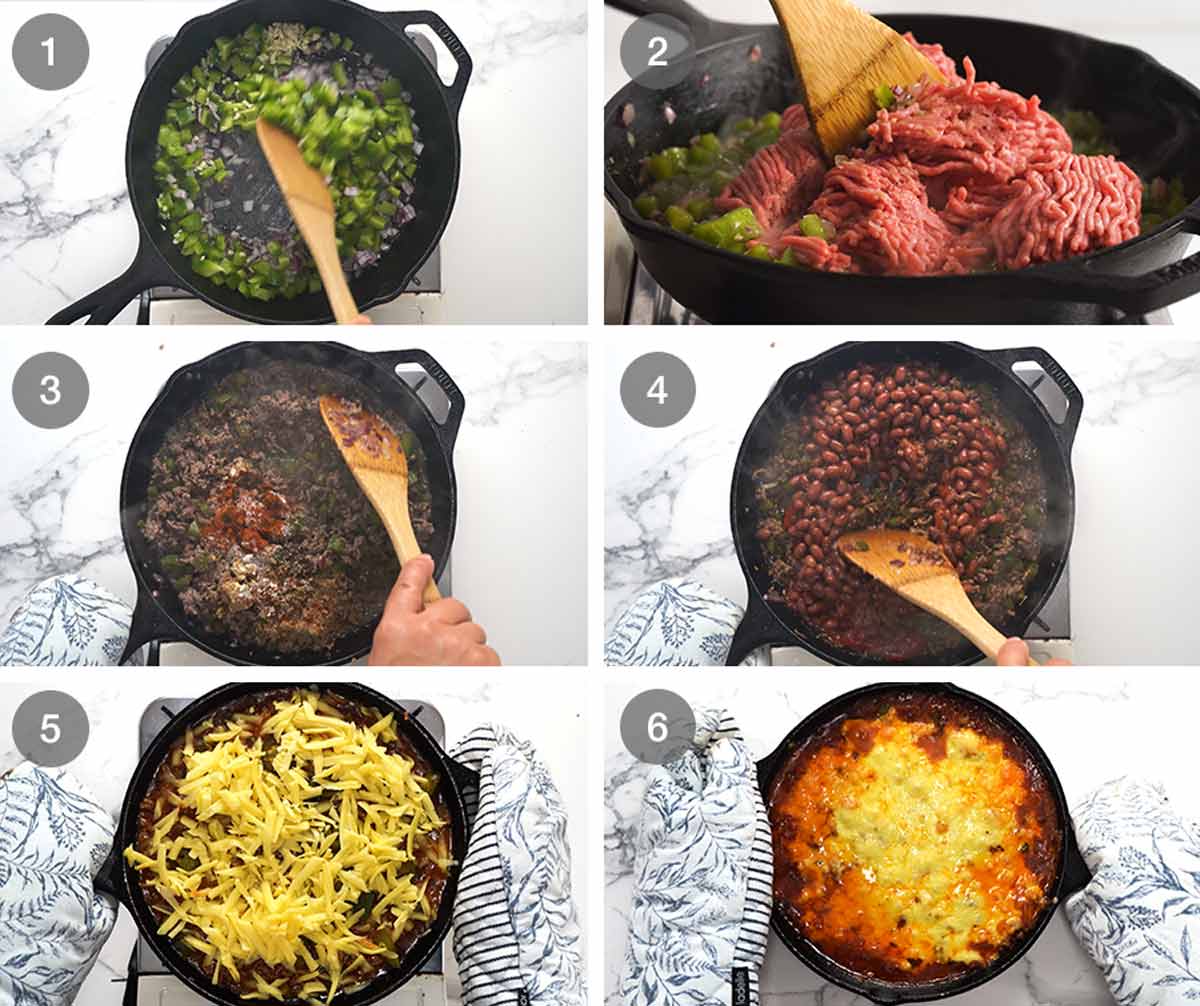
Sauté the onion, garlic and capsicum first. Use an ovenproof skillet. Pictured is my much-loved 26cm / 10.5″Lodge cast iron skillet (my essential kitchenware list is here!).
Cook the beef, breaking it up as you go.
Toast the spices with the beef. Good way to bring out flavour in spices plus get better flavour into beef mince / ground beef – FAST.
Add beans and tomato passata, give it a good mix then bring to a simmer.
Top with cheese then bake for 15 minutes just to melt the cheese.
Remove from oven and start the agonising process of deciding how to serve it! Tacos? Corn chip dunking? Burrito stuffing? ENCHILADAS? Nachos?? #FirstWorldProblems

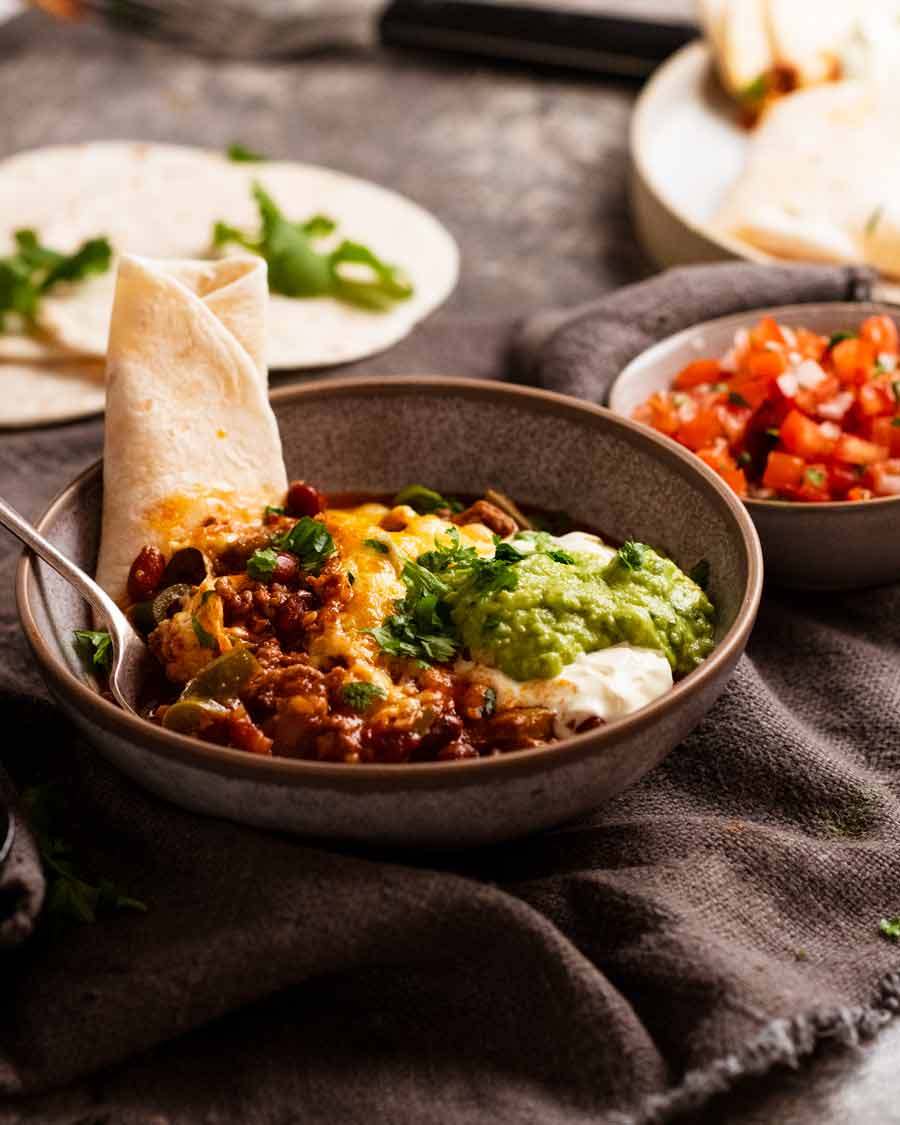
Sides / toppings
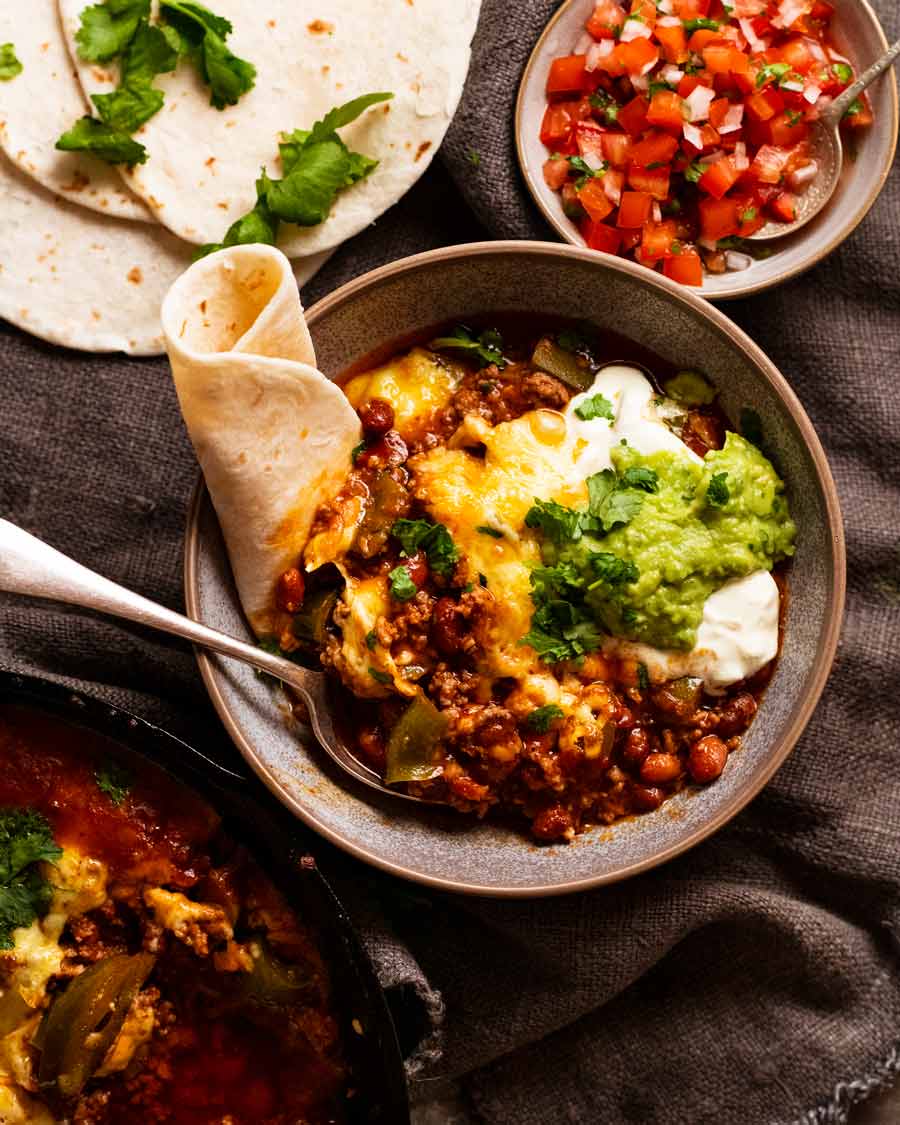
Pictured in post for serving in all the above listed forms are:
Guacamole, and sometimes avocado sauce (essentially a smooth, faster version of guac)
Pico de gallo (fresh tomato salsa). Also this pureed tomato salsa would be great.
Sour cream (sub yogurt)
Fresh coriander/cilantro
Tortillas – small ones and larger enchilada size ones (for making small burritos).
Corn chips – for dunking
Other excellent options includes:
Mexican red rice, plain white rice (or brown, or cauliflower rice if you’re doing the low-carb thing). Rice in bowls then smother with the Mexican beef and beans.
And….. eeer… I’m stuck. Help?
– Nagi x
Watch how to make it

Cheesy baked Mexican beef and beans
Ingredients
- 2 tbsp olive oil
- 1 red onion , finely chopped
- 2 garlic cloves , finely minced
- 1 green capsicum / bell pepper , cut into 1cm / 1/2″ cubes (or other colour)
- 500g/ 1 lb beef mince (ground beef) (Note 1)
- 400g/ 14oz can red kidney beans or black beans , drained (or other beans)
- 1 cup tomato passata (Note 2)
- 1/3 cup pickled sliced jalapeño (Note 3)
- 1 1/2 cups Colby cheese , shredded (or other cheese, Note 4)
Mexican spice mix:
- 1 1/2 tsp cumin powder
- 1 1/2 tsp smoked paprika (sub normal paprika)
- 1 tsp garlic powder (sub onion powder)
- 1 tsp onion powder (sub garlic powder)
- 1 tsp dried oregano
- 1/2 tsp cayenne pepper (sub black pepper)
- 1 tsp cooking/kosher salt
Instructions
- Preheat oven to 200°C / 400°F (180°C fan).
- Sauté – Heat the olive oil in a cast-iron skillet over medium high heat (or other oven-proof pan). Cook onion, garlic and capsicum for 3 minutes.
- Cook beef & spices – Add beef and cook, breaking it up as you go, until you no longer see raw meat. Add spices, then cook for 1 minute.
- Beans & tomato – Add kidney beans and passata. Stir, then bring to a simmer.
- Cheese it! Scatter the jalapeño across the surface, top with cheese.
- Bake 15 minutes (no lid) then remove from the oven.
- Serve! Scoop into bowls and serve with corn chips or tortillas with your favourite Mexican fixings (guacamole or avocado sauce pico de gallo or restaurant style salsa, fresh coriander/coriander, sour cream). Dunk like nachos, make DIY burritos or tacos!
Notes
Nutrition
Life of Dozer
Dozer’s idea of obeying my command to stay outside the shop.

The post Cheesy Mexican beef and bean bake appeared first on RecipeTin Eats.
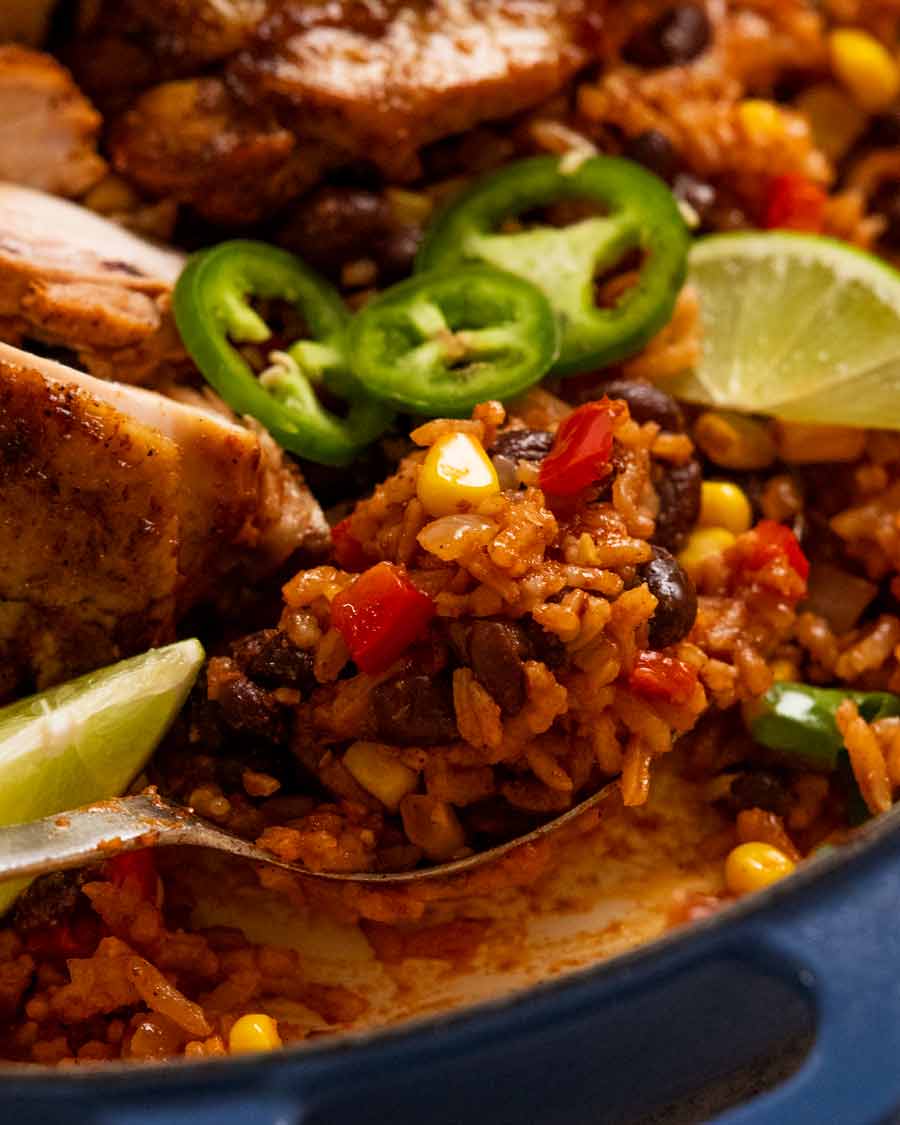
]]> This Mexican Chicken and Rice brings together your favourite Mexican Red Rice with sweet pops of corn and black beans with a fajita seasoned chicken. Big Mexican flavours. One pot. Sheer perfection! One Pot Mexican Chicken and Rice This is a really handy recipe if you’ve got a family of big eaters and are short... Get the Recipe
The post One Pot Mexican Chicken and Rice appeared first on RecipeTin Eats.
]]>This Mexican Chicken and Rice brings together your favourite Mexican Red Rice with sweet pops of corn and black beans with a fajita seasoned chicken. Big Mexican flavours. One pot. Sheer perfection!
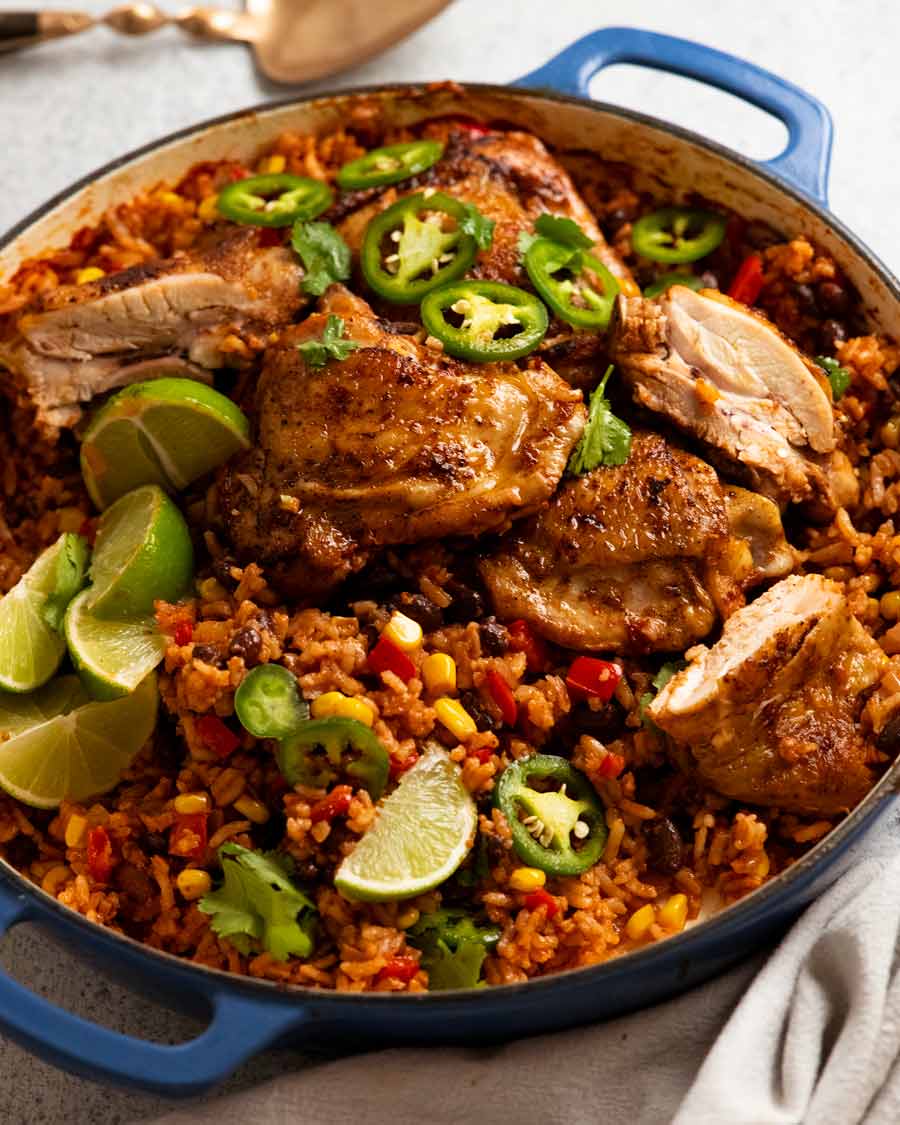
One Pot Mexican Chicken and Rice
This is a really handy recipe if you’ve got a family of big eaters and are short on time because it makes a substantial amount of food, it’s a complete meal (no need to make starch and veg sides as well as a separate protein!) and it’s all done in one pot.
Readers also tell me they love that it’s finished in the oven. No need to worry about scorching the base of the pot. No stirring or watching to ensure it doesn’t bubble over. It’s entirely hands off.
Plus, it’s Mexican flavoured. “Everybody” loves Mexican food, right!??
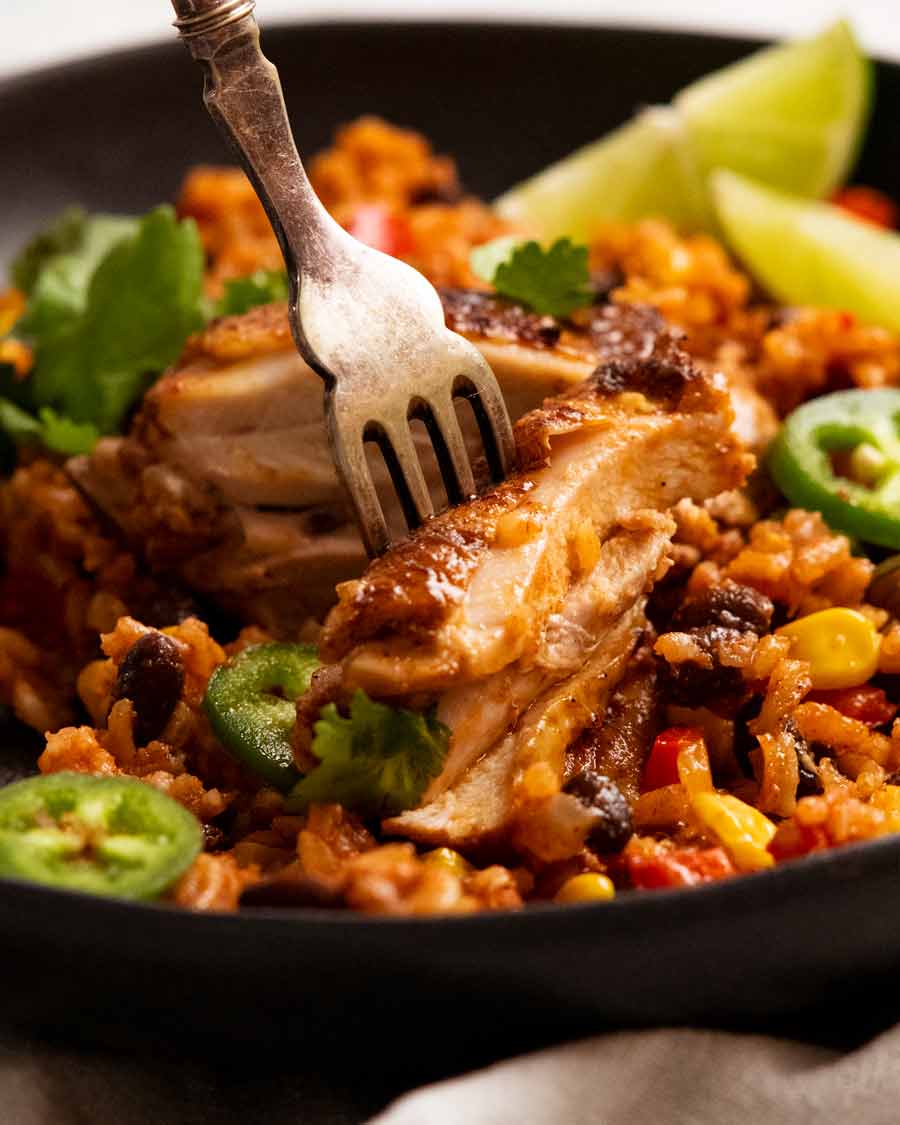
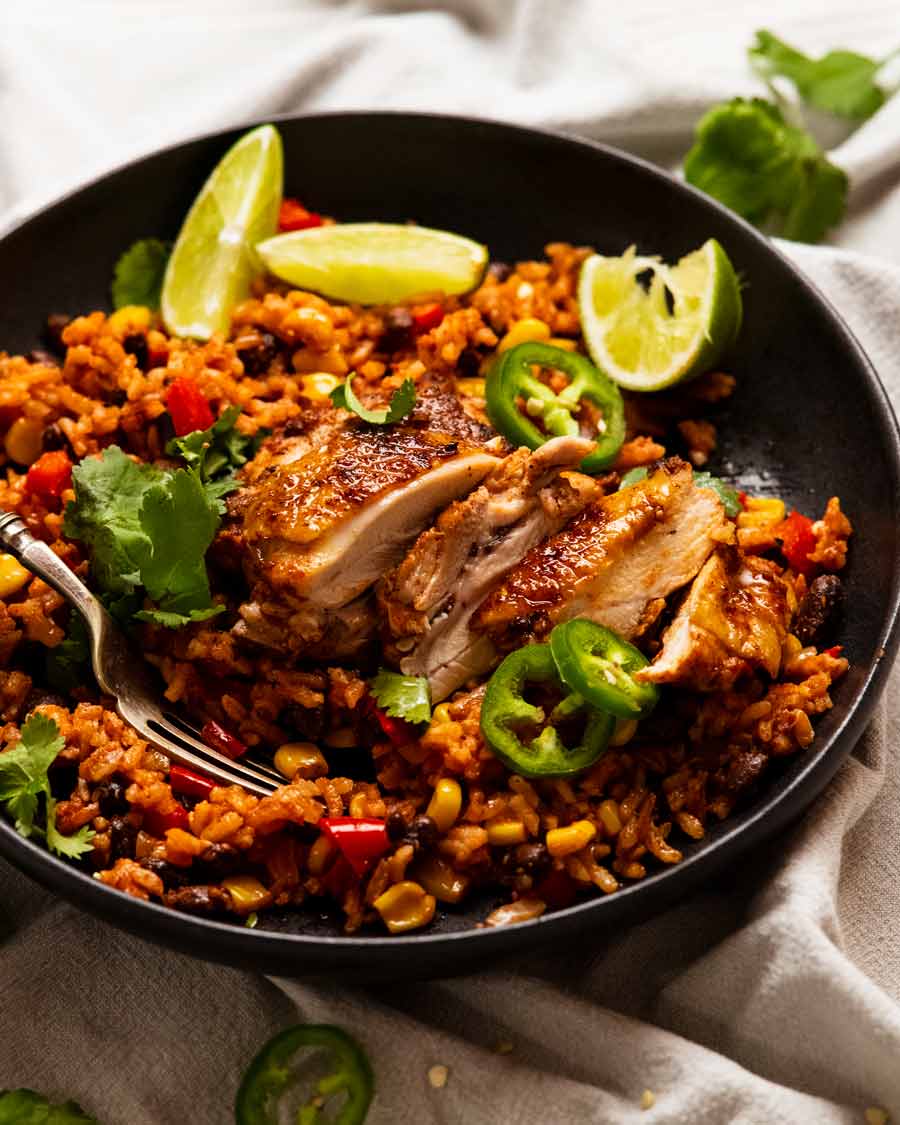
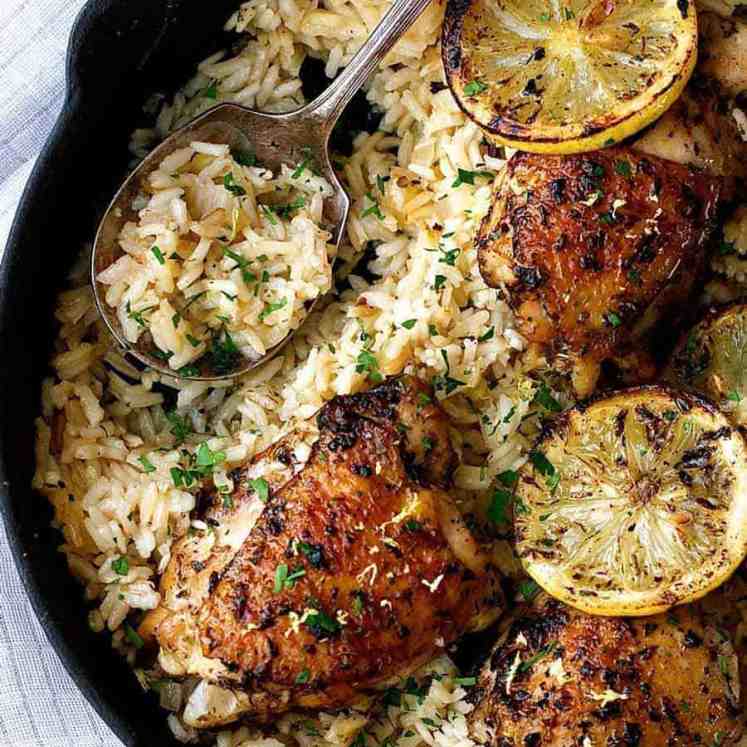
And look – proof of juicy chicken and fluffy rice. No mushy rice in my world!
What you need
Here’s what you need to make this One Pot Mexican Chicken and rice:
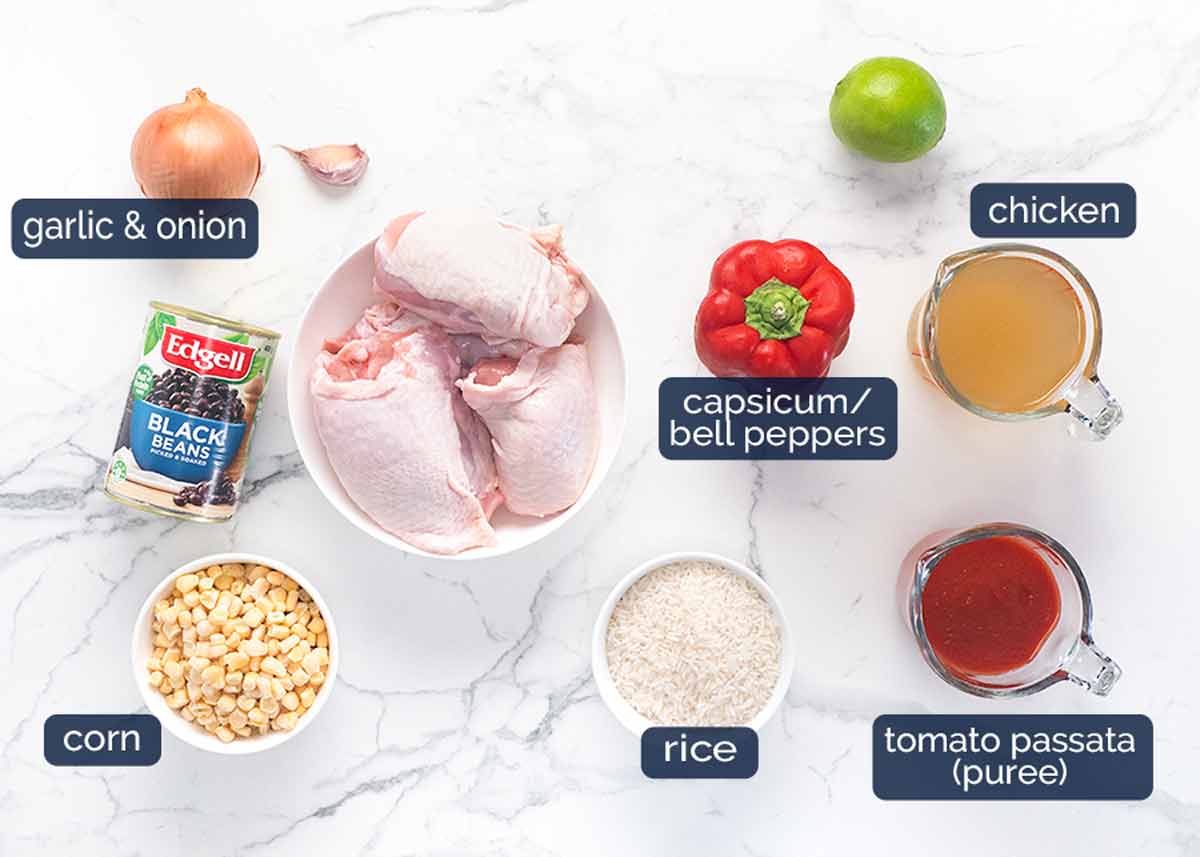
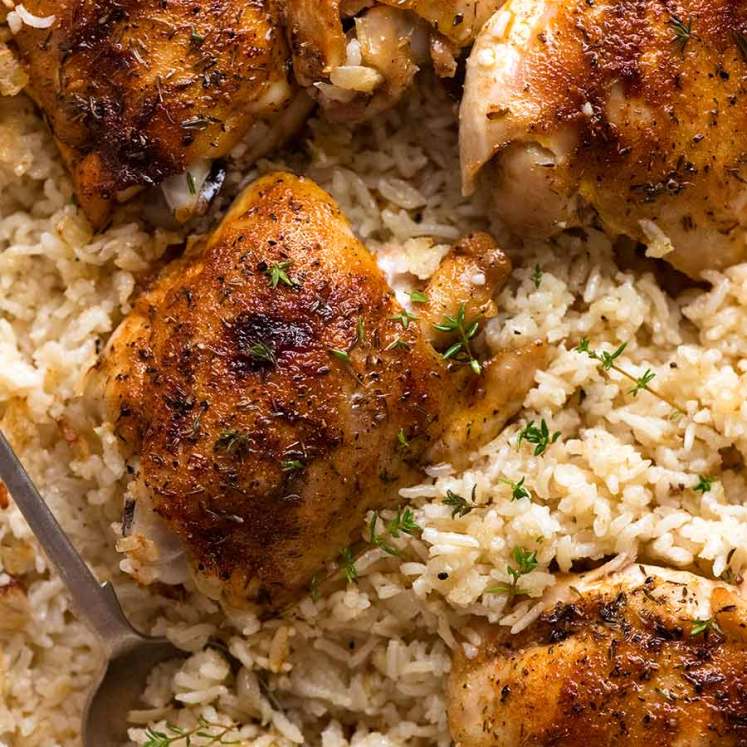
Chicken thighs (bone-in, skin on) – For the best, juiciest results and golden, flavour infused skin. This cut of chicken cooks in the same time it takes for the rice to cook in the oven which makes it the perfect choice. Plus, because it’s the juiciest chicken cut, you get a stack of free flavour added into your rice as the chicken bakes. Win, win!
Prefer boneless thighs or breast? Because these cook faster, they will need to be added partway through the oven cook time. I’ve included directions in the recipe notes!
Mexican spice blend for chicken – see below.
Rice type to use – Long grain rice is best here, for the fluffiest results. Basmati will yield a similar texture in the end result but you’ll have a subtle perfume of basmati rice flavour in the dish. Not necessarily a bad thing, just not Mexican! 😂 Medium grain rice will yield a a good result albeit slightly stickier (because that’s the nature of the rice) as will short grain / sushi rice which is stickier still.
Rice to avoid – Risotto rice (arborio), jasmine, brown rice and faux rice (quinoa, cauliflower rice etc).
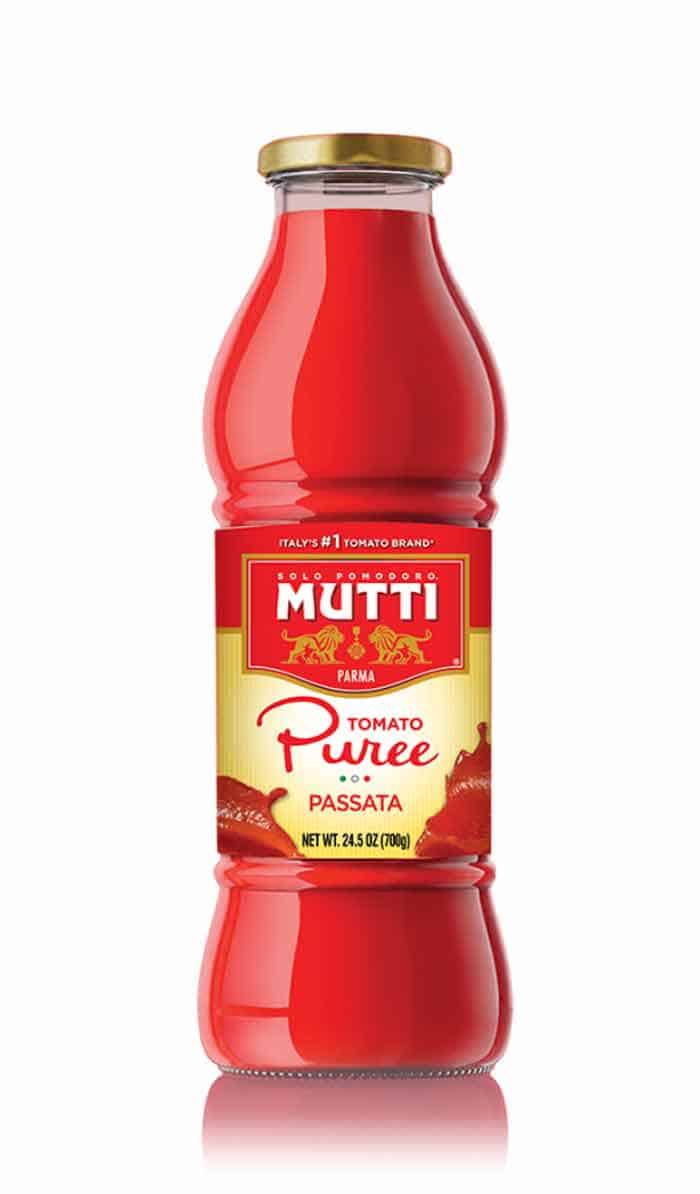
Tomato passata (puree) – Pureed, strained pure tomatoes, sometimes labelled “tomato puree” in the US (here’s a photo of Mutti tomato passata sold at Walmart). It’s readily available in Australian supermarkets nowadays, alongside pasta sauces. More on tomato passata here.
Substitute with canned crushed tomato though just bear in mind that your rice will not be quite as red.
Garlic and onion – Essential flavour base.
Capsicum / bell peppers – On theme for the fajita flavours going on here in this dish. You can really use any colour you like, or switch it out with other vegetables like zucchini, carrot etc.
Frozen corn – Adds lovely pops of sweetness and colour into the rice! I use frozen for convenience, because I always have it. Canned (drained) can also be used or, as with capsicum, substitute with another diced vegetable.
Black beans – On theme for this Mexican rice, plus it adds flavour and protein, and fills out the rice. I just use a can (drained). Black beans are on theme for Mexican food but can be substituted with any other beans such as red kidney beans.
Chicken stock/broth – The liquid in which the rice is cooked. Substitute with vegetable stock, or water plus stock powder. Please don’t use water, the dish will lack flavour!
Lime – For a finishing spritz of freshness at the end.
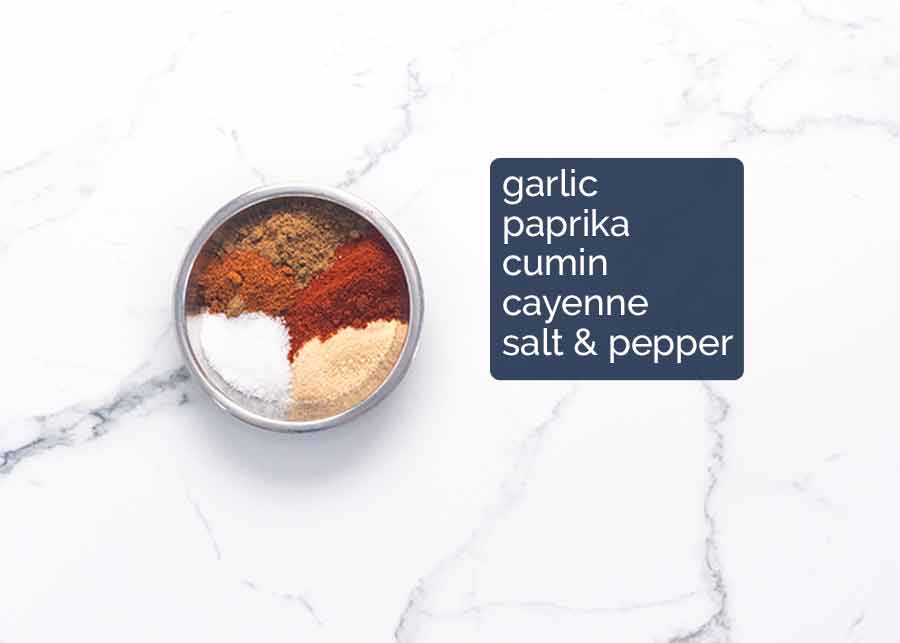
Mexican spice mix
Here’s all you need for a great Mexican spice mix – garlic powder, paprika, cumin, cayenne (for a touch of heat – skip or reduce if desired), salt and pepper. All pantry staple spices!
For this recipe, most of it is used on the chicken but we reserve a bit to season the rice. Love one spice mix that serves duel purposes!
How to make One Pot Mexican Chicken and Rice
It’s as easy as 1-2-3:
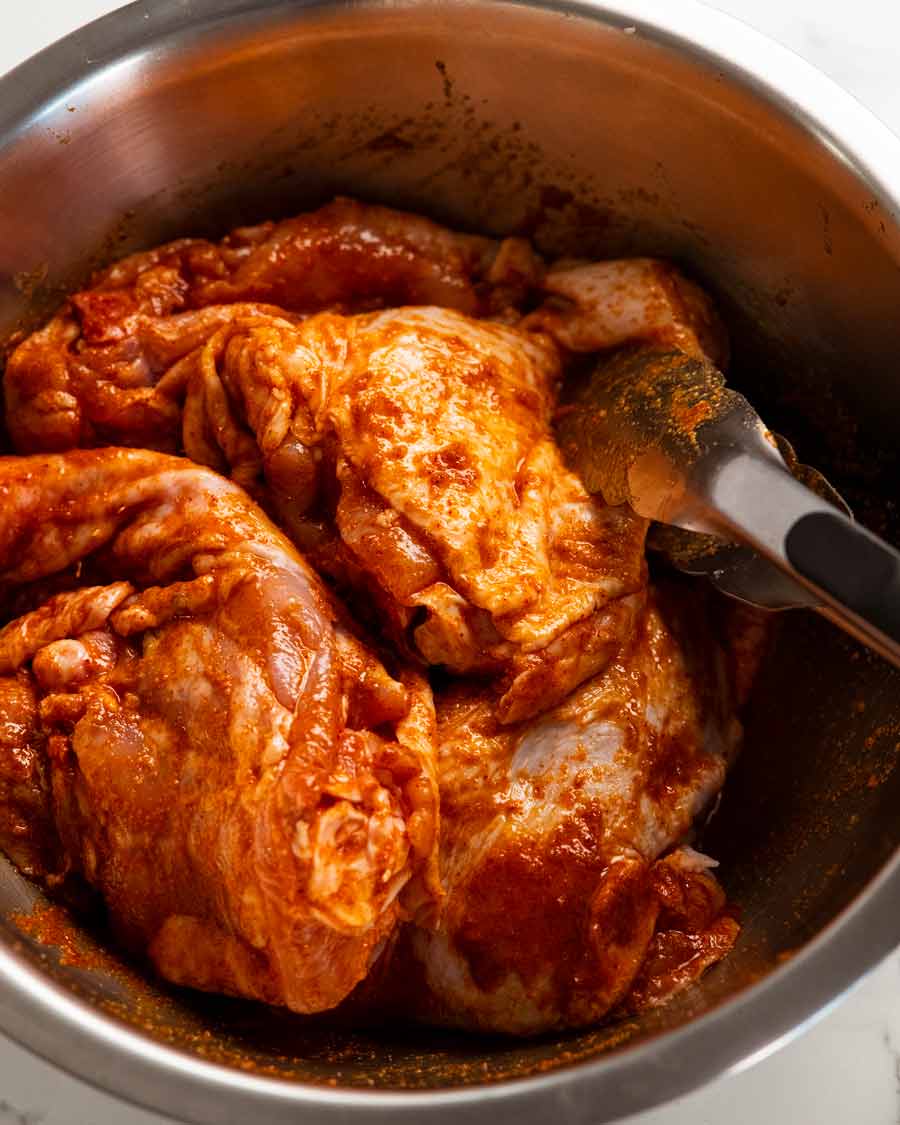
Marinate chicken in Mexican spice mix, if time permits.
Sear chicken, then sauté veg (onion, garlic, capsicum/bell peppers).
Add rice and everything else, pop it in the oven.
Dinner. Done!
1. Marinate chicken (if you can)
The chicken is tastier if you have the time to marinate for 1 hour (or overnight) because the flavour infuses into the flesh. But even if you don’t, the chicken is still super tasty because of the seasoning and also it absorbs flavour as it cooks with the rice.
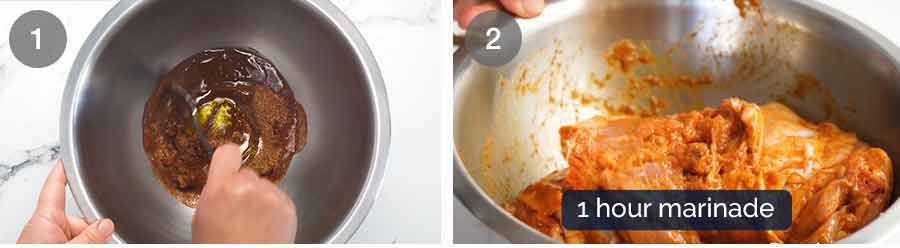
Mix Mexican Spices with olive oil and lime juice in a large bowl to form a paste.
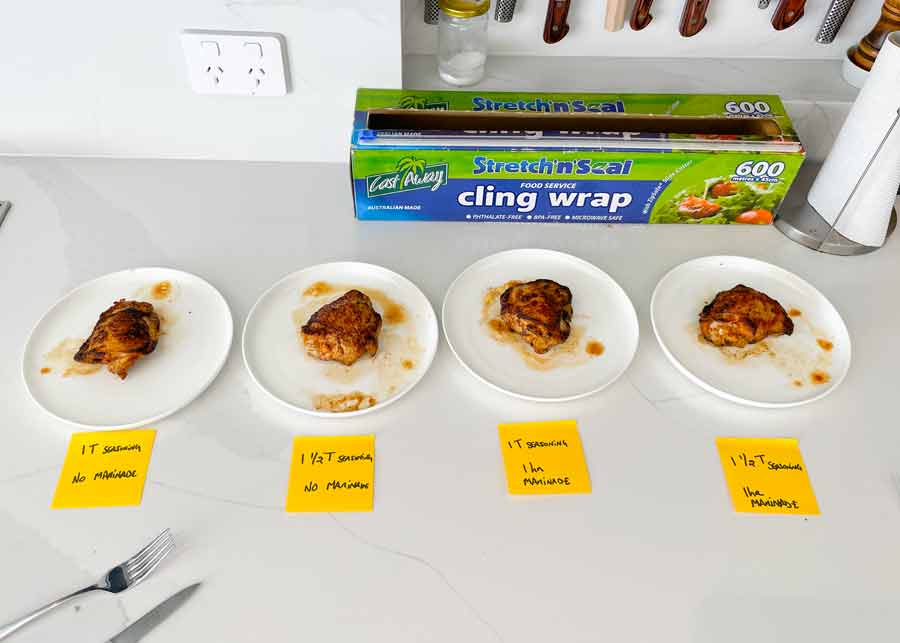
Marinate chicken 1 hour – Add the chicken and toss to coat. Leave to marinate for 1 hour in the fridge, or even overnight if you want. But as noted above, don’t fret if you don’t have time. This dish is absolutely worth making even without marinating – and I know this for a fact because I tried it with and without marinating! See?
Cooking vessel
I use my 30cm / 12″ shallow casserole dutch oven (2.5 lt / 2/5 qts) which is the ideal shape for dishes like this, and goes from stove to the oven. I have this Chasseur one (pictured in post and video) and this Le Creuset one. I didn’t pay full price for either – shop around! They are an investment but should last a lifetime if you look after them.
However, you can make this in any large ovenproof dutch oven or deep skillet. If you don’t have a matching lid, just cover with foil for the baking part. If you don’t have an oven-proof skillet, just do the stove steps using any frying pan then transfer everything into a baking dish. I’ve popped directions in the recipe notes for how to do this.
2. Searing and sautéing
This recipe starts off on the stove to sear the chicken (flavour!) and sauté the vegetables. Then you add the rice and liquids, pop the chicken back on top and put it in the oven. Hands off cooking is the best!
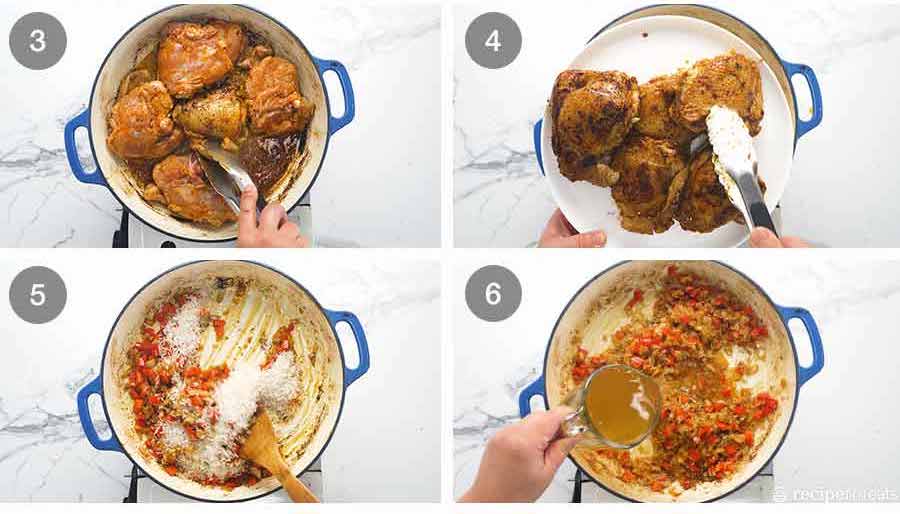
Sear the marinated chicken to brown the skin. The inside will / should still be raw. We just want to get some lovely colour on the chicken skin which we wouldn’t achieve in the bake time.
Remove chicken onto a plate and set aside.
Sauté aromatics – In the same pot / pan, sauté the onion, garlic and capsicum. Using the same pot to cook the rice is a path to express flavour because all the tasty flavours left in the pan from sautéing the chicken gets soaked up by the rice.
Then add the rice, stir to coat it in all the tasty flavours (bit like making risotto!).
Flavoured rice liquid and add-ins – Add the liquids (stock/broth, tomato passata), reserved Mexican Spice Mix, corn and beans. Then stir to combine.
3. Baking
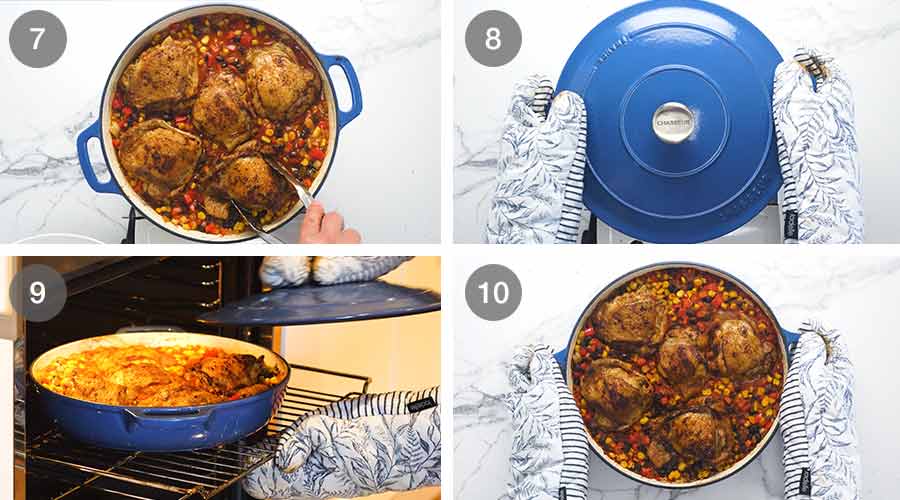
Top with chicken – Place the chicken on top. It will be partially submerged under the liquid and that’s fine. In fact, that’s exactly what we want because the flesh under the liquid will absorb flavour from the seasoned rice stock. And the skin exposed above the liquid will brown!
Bake 25 minutes covered – Cover with a lid and bake for 25 minutes.
Bake uncovered 15 minutes – Remove the lid and bake for a further 15 minutes or until the liquid has been almost completely absorbed by the rice. Some puddles remaining on the surface is fine as they will absorb while the rice rests.
Note: If you taste the rice at this stage and it is still a touch firmer than you want, that’s fine. It will finish cooking as it rests in the next step, just as ordinary white rice does during the resting stage.
Rest 10 minutes – Remove from the oven then rest, uncovered, for 10 minutes.
Remove or push the chicken to the side, then fluff the rice with a rubber spatula or fork. Squeeze over lime juice, sprinkle with coriander/cilantro and jalapeño if you want to garnish it. Then serve!
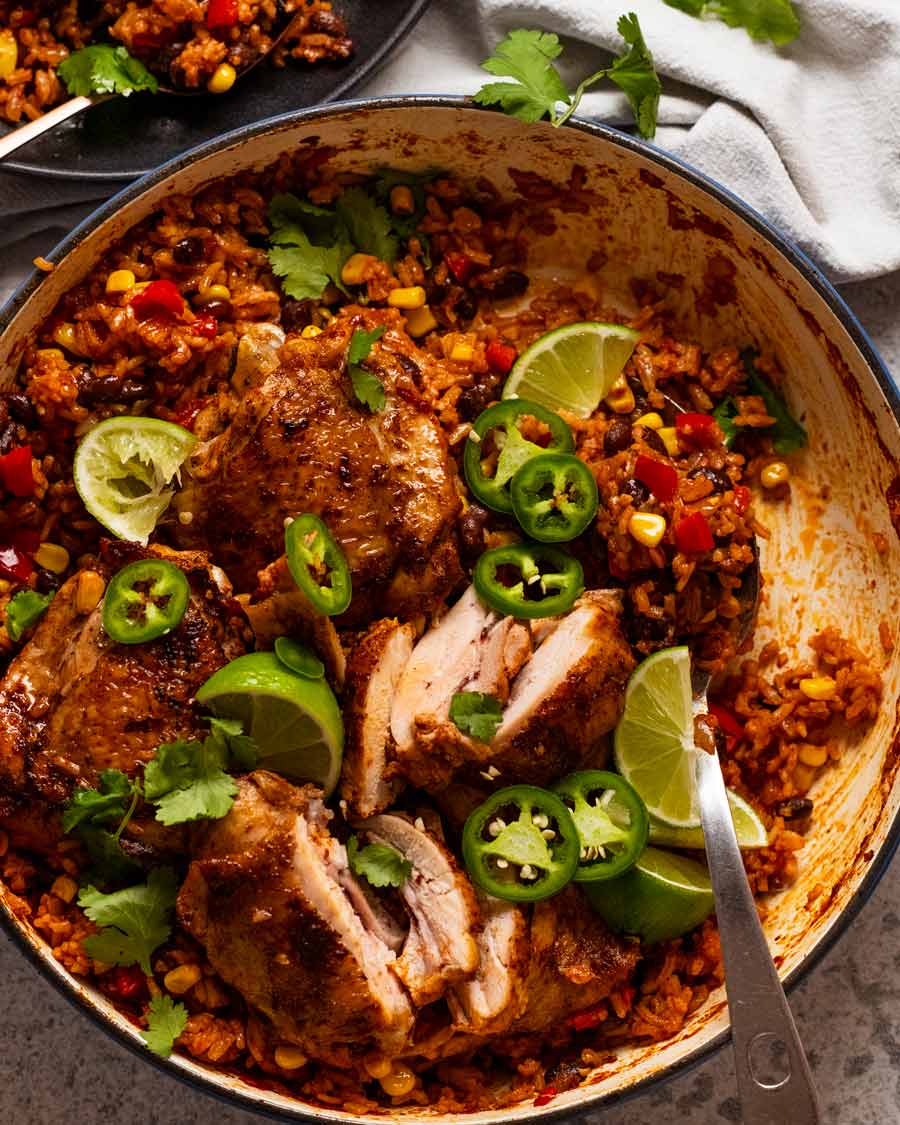
With the right cooking vessel, it can be placed on the table as a sharing dish, for everybody to help themselves. By “right cooking vessel”, I’m mainly referring to shape. I’d put a shallow pot / casserole pan, like pictured in this post and in the recipe video, in the centre of a table. But I were using a deep pot, I’d probably plate it up individually. Mainly for practical reasons (reaching into a deep hot pot isn’t ideal).
Complete meal in one!
With the tomato and vegetables in this dish, I consider it a complete meal. But if you’d like to add some more vegetables on the side, have a browse of my side salads and vegetables sides recipe collection here. It’s organised by primary vegetable so you can find something to make using what you’ve got. It’s work in progress – I’m continuing to build up the collection.
Love to know what you think if you try this Mexican chicken and rice!
– Nagi x
Watch how to make it

One Pot Mexican Chicken and Rice
Ingredients
Mexican Spice Mix
- 2 tsp garlic powder (or 2 garlic cloves, minced)
- 2 tsp paprika
- 2 tsp cumin powder
- 1 3/4 tsp salt
- 1/2 tsp cayenne pepper (Note 1), optional
- Black pepper
Chicken
- 5 chicken thighs, bone-in, skin on (Notes 2 and 3)
- 2 tbsp olive oil
- 1 tbsp lime juice
Rice
- 1 small onion , peeled and diced (or 1/2 large)
- 1 garlic clove , minced
- 1 red capsicum (bell pepper), diced or sliced
- 1 cup long grain rice , uncooked (Note 4)
- 1 cup chicken stock/broth , low sodium (or vegetable stock)
- 3/4 cup tomato passata (US: tomato puree) (Note 5)
- 1 cup frozen corn kernels (or canned – drained)
- 1 can (400g/16oz) black beans , drained and rinsed (sub red kidney beans)
Garnish
- 1 lime , plus extra to serve
- Coriander/cilantro
- Sliced jalapeño peppers (optional)
Instructions
- Preheat oven to 180°C/350°F (160° fan).
- Mexican spice mix – Mix the ingredients in a small bowl.
- Rub Chicken – Place 1 1/2 tablespoons of the Mexican Spice Mix in a large bowl (reserve rest for rice) with 1 tablespoon olive oil and lime juice. Mix to form a paste then add the chicken and toss to coat the chicken.
- Marinate (optional) – Marinate chicken for 1 hour, or even overnight, if you have the time. Otherwise, it's fine to proceed with the recipe!
- Sear chicken – Using a large deep skillet preferably with a lid (Note 6), heat the remaining 1 tbsp olive oil over medium high heat. Sear the skin side of the chicken for 4 minutes until light golden, then sear the flesh side for 1 1/2 minutes (will still be raw inside). Remove onto a plate.
- Sauté aromatics – If you've got a lot of burnt spices on the base, scrape off and discard some of it. Then in the same skillet, still over medium high heat, add the onion, garlic and capsicum (bell peppers). Sauté for 3 minutes until the onion softens.
- Rice & liquid – Add the rice and stir. Add chicken stock, tomato passata, corn, beans and remaining Mexican Spice Mix. Stir to combine.
- Top with chicken – Place chicken on top of the rice, skin side up. It will be partially submerged but most of the skin should be above the liquid.
- Bake covered 25 min – Bring to simmer, then cover skillet with a lid or foil and place in the oven for 25 minutes.
- Bake uncovered 15 min – Remove the lid/foil and bake for a further 15 minutes until only small puddles of liquid remain on the surface of the rice.
- Rest 10 minutes – Remove from the oven and allow to rest for 10 minutes (uncovered). Any remaining liquid will evaporate in this step.
- Serve – Squeeze the juice of 1 lime over the chicken and rice. Remove chicken or push to the side then fluff the rice. Serve, garnished with coriander/cilantro leaves, extra lime wedges and sliced jalapeños, if desired. Sour cream also goes well with this, or a dollop of guacamole or avocado sauce!
Notes
Nutrition
Recipe originally published in 2016. Updated with much needed recipe video and more importantly, Life of Dozer added!
One Pot Chicken and Rice recipes
I’m a big fan of cooking chicken and rice together – for the extra flavour you get! Less washing up is a bonus. Here are some reader faves.


Life of Dozer
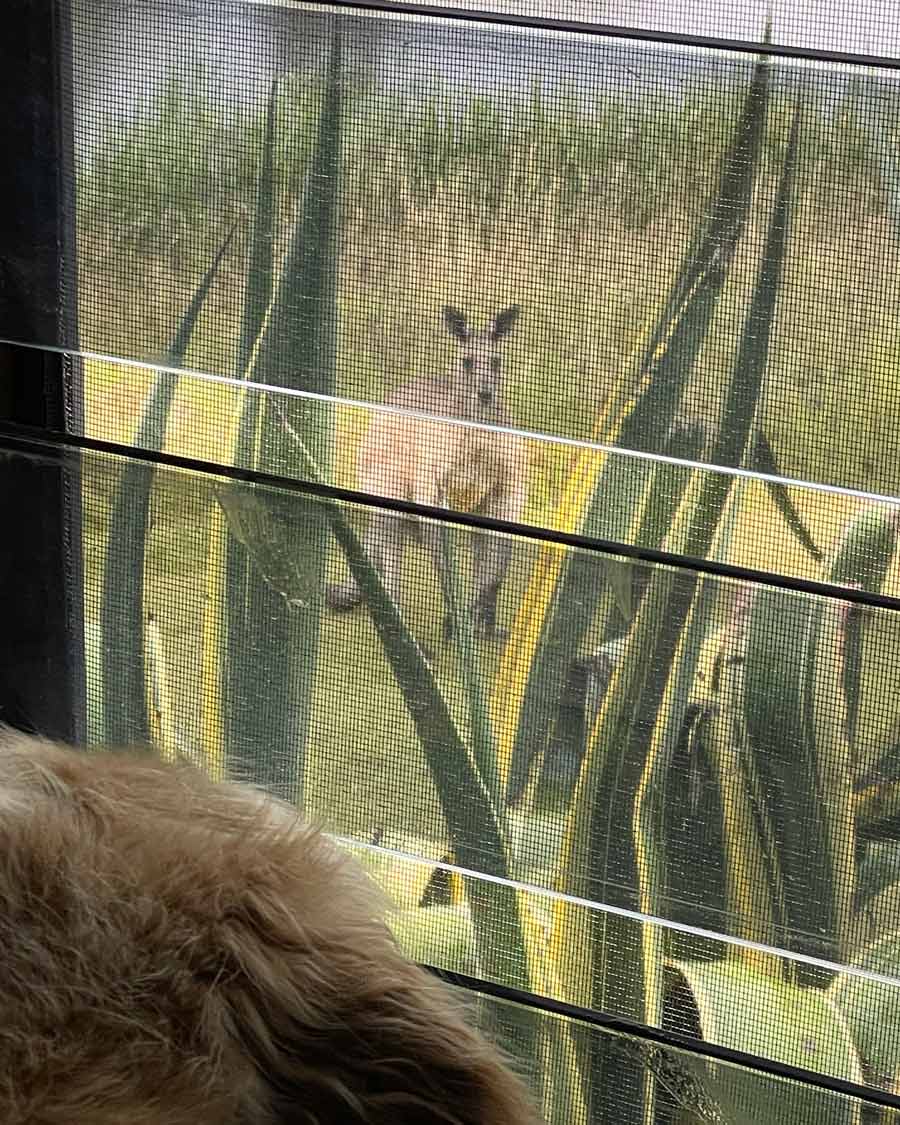
Took Dozer up to the Hunter Valley* last weekend. Stayed at lovely dog friendly cabins called Tonic. Plans to sleep in didn’t quite happen due to his “enthusiastic” barking at the sight of early morning kangaroo visitors (below). Visions of him prancing around vineyards also did not eventuate after being warned of kangaroos beating up dogs (seriously) and seeing this video on YouTube. Dozer would stand no chance against a roo. We both know it!
* Wine region, 2 hours drive from Sydney

The post One Pot Mexican Chicken and Rice appeared first on RecipeTin Eats.
]]>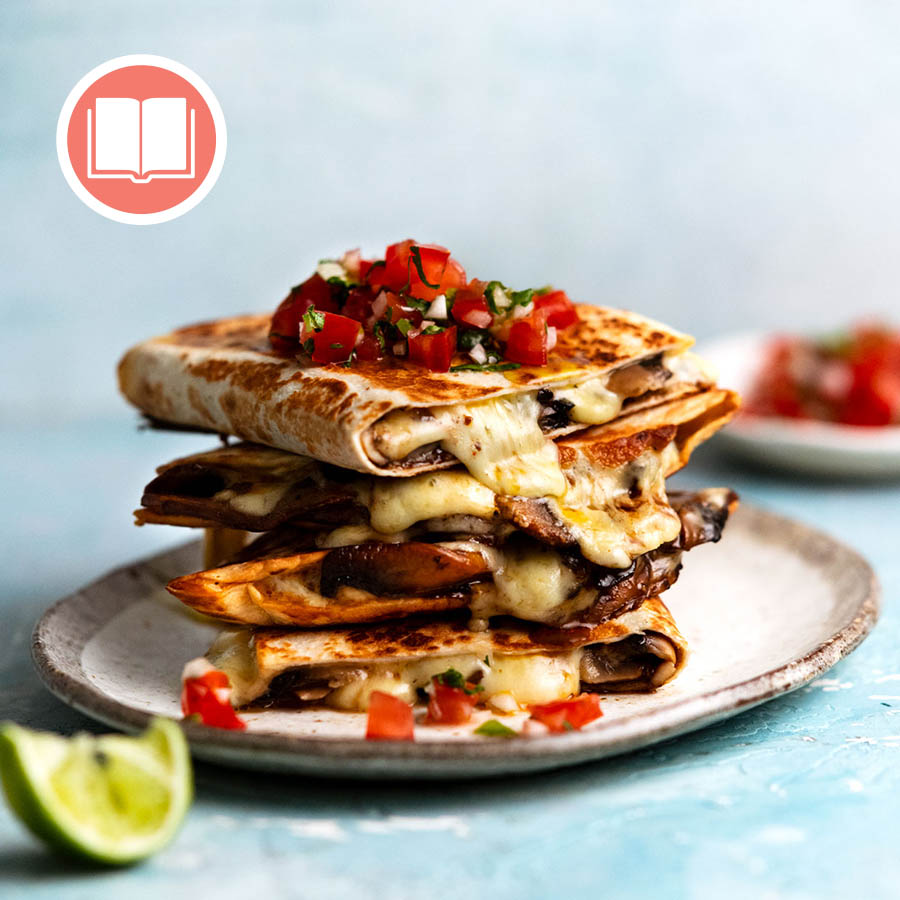 Big juicy slices of mushrooms sprinkled with chipotle then seared until golden on the outside and juicy on the inside, smothered in molten cheese inside a crispy tortilla. It’s amazing what a little chipotle powder brings to the party! Find the recipe on page 217 of Dinner.
The post Mushroom Quesadillas appeared first on RecipeTin Eats.
]]>Big juicy slices of mushrooms sprinkled with chipotle then seared until golden on the outside and juicy on the inside, smothered in molten cheese inside a crispy tortilla. It’s amazing what a little chipotle powder brings to the party!
Find the recipe on page 217 of Dinner.
This is a cookbook exclusive recipe!
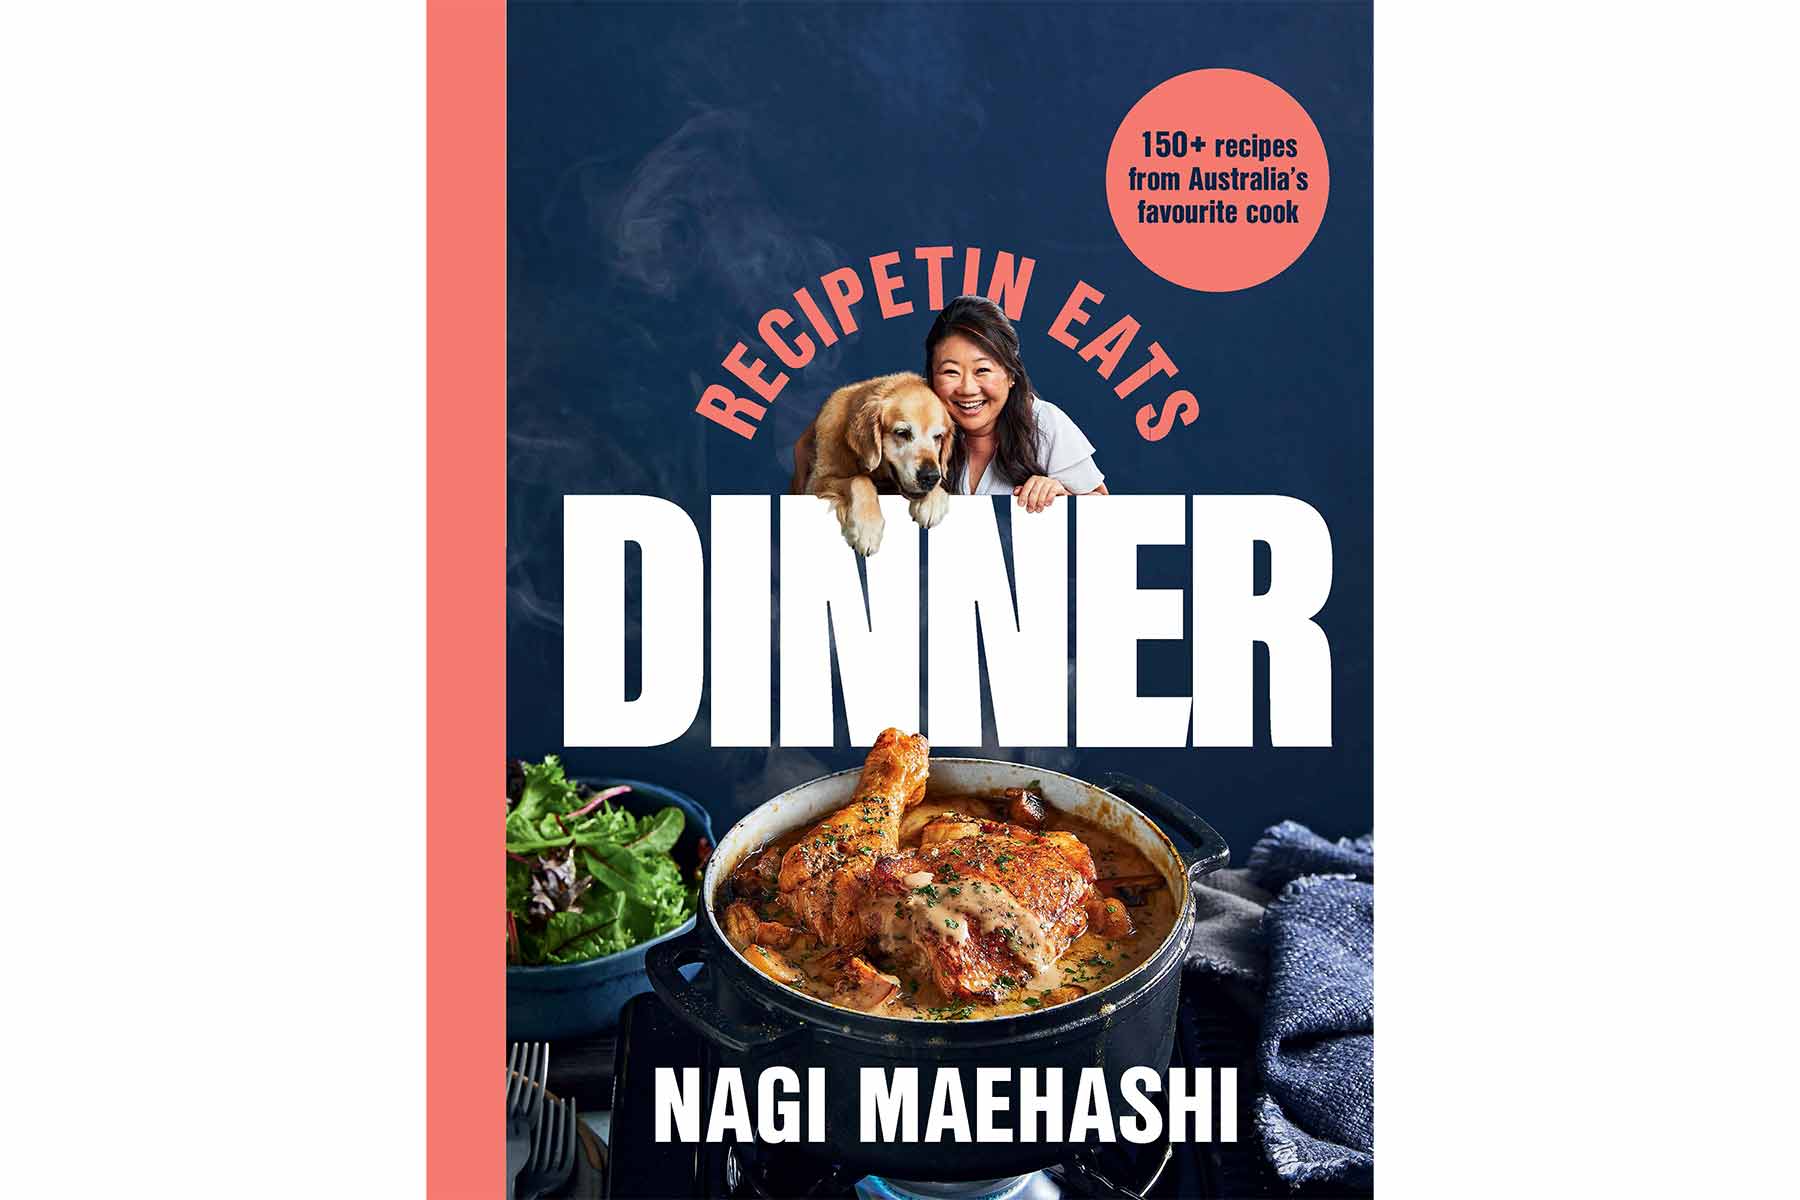
This recipe is exclusive to my debut cookbook Dinner which includes a how-to video for every recipe. Just scan the QR code!
Just to explain….
I know, it’s confusing! You’re so used to getting recipes on my website – there’s over 1,200 of them, after all. And here you are looking at a tasty recipe video and I haven’t provided the recipe. 🙀
I’m not just doing this to torture you, I promise.
This page exists to display the how-to video for this recipe which I exclusively created for my debut cookbook, Dinner. Every recipe in the cookbook has a tutorial video. To watch it, you simply scan the QR code with your phone or tablet and it will take you straight to the recipe video like the one shown above!
Curious about my cookbook?
Read the cookbook overview
Browse all cookbook exclusive recipes here
Read the Cookbook Tales. Spoiler alert: there’s A LOT of dirty dishes!! And quite a lot of Dozer. 😂
Stay tuned for more on this page! Some cookbook exclusive recipes will have extra information added as well as extra tips. I am also looking at enabling comments for selected recipes so I can answer reader questions about cookbook recipes. I’m just a little snowed under during this launch period – book tours, getting 131 recipe videos out, launching the book overseas. Please bear with me! – Nagi x (10 October 2022)
The post Mushroom Quesadillas appeared first on RecipeTin Eats.
]]>