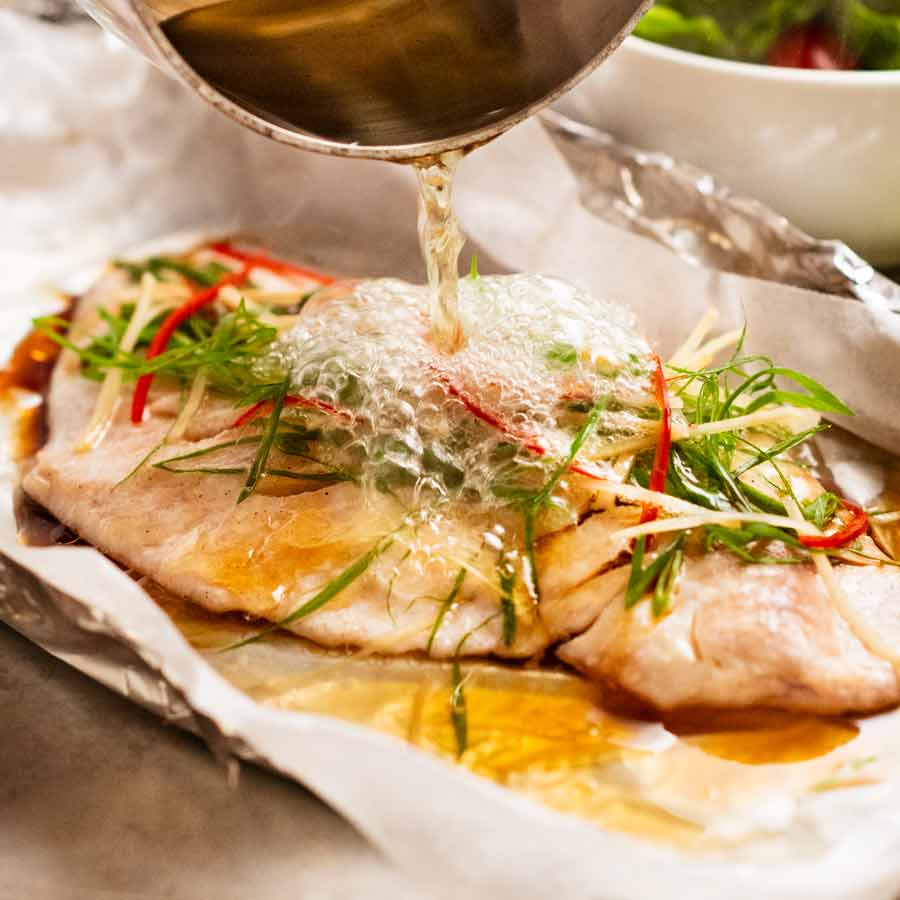
 Sizzling Ginger Steamed Fish – named as such because the ginger and green onion topping sizzles dramatically when you pour hot oil over oven steamed fish! An incredibly simple way to make a healthy fish recipe a whole lot more exciting with fresh Asian flavours. Sizzling Ginger Steamed Fish Does anybody jump up and down... Get the Recipe
The post Sizzling Ginger Steamed Fish appeared first on RecipeTin Eats.
]]>Sizzling Ginger Steamed Fish – named as such because the ginger and green onion topping sizzles dramatically when you pour hot oil over oven steamed fish! An incredibly simple way to make a healthy fish recipe a whole lot more exciting with fresh Asian flavours.
Sizzling Ginger Steamed Fish
Does anybody jump up and down with excitement at the thought of steamed fish for dinner? Healthy , yes. But also….kinda bland….
I know, I know, I really need to grow up. I can already see my mother rolling her eyes when she reads this. 😂
However, today’s Sizzling Ginger Fish is a steamed fish recipe I DO get excited about!
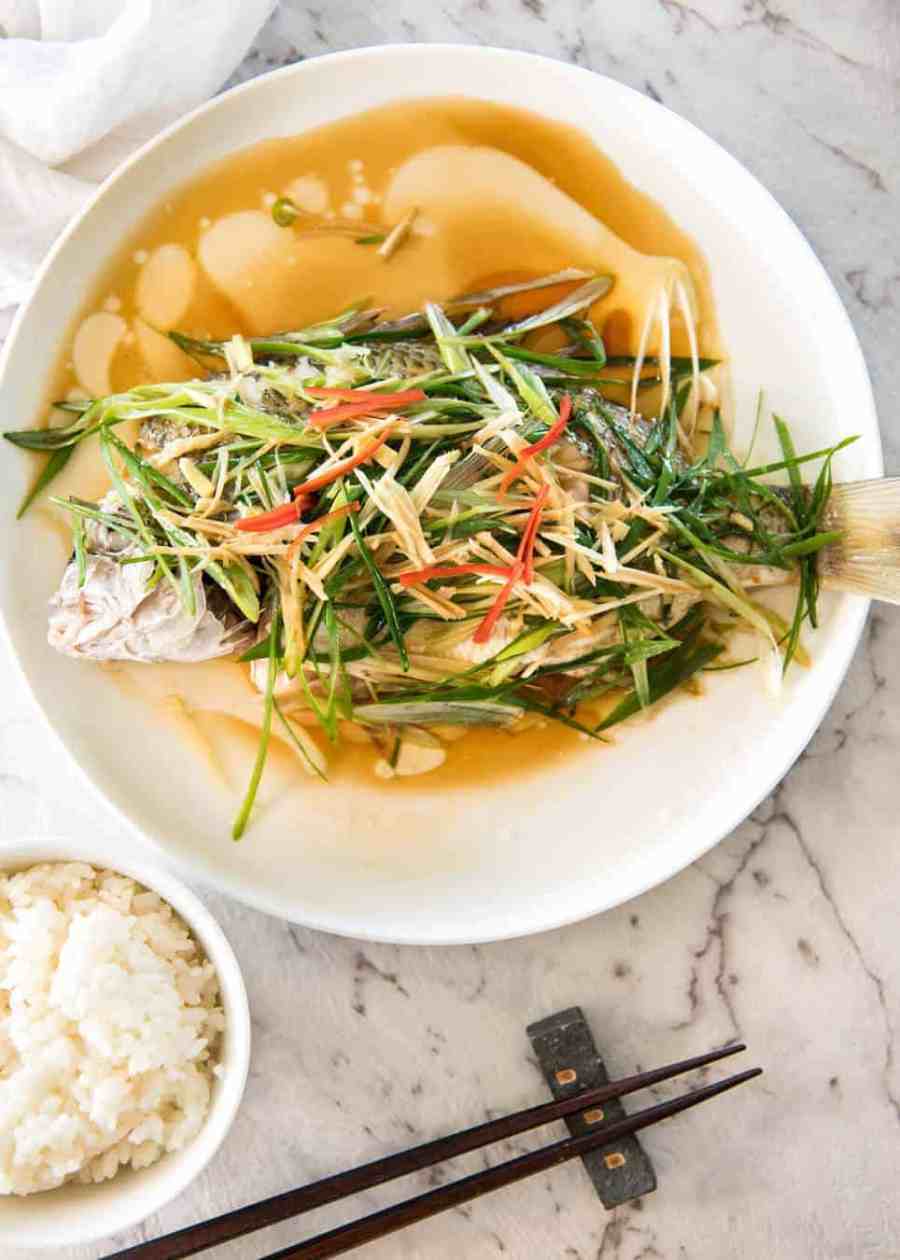
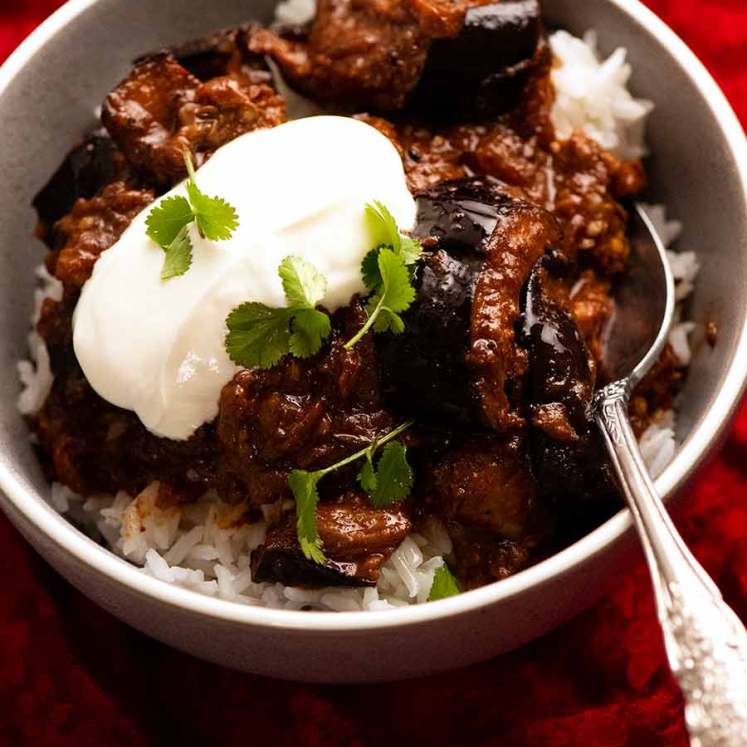
It’s a simpler version of a Cantonese dish where a whole fish is steamed, drizzled with soy sauce then hot oil is poured over a green onion and ginger topping which makes it sizzle dramatically. If you’re a whole fish kind of person (and every chef will tell you it’s the best way to cook fish) here’s my recipe, pictured below.
Traditional Cantonese whole Sizzling Ginger Fish which today’s recipe is based
Today, I’m sharing an easier version. Same flavours and the same dramatic sizzling (I was never going to give that up!). Except we’re using fish fillets and steaming them in the oven inside foil packets. Which means – less washing up. Excellent!
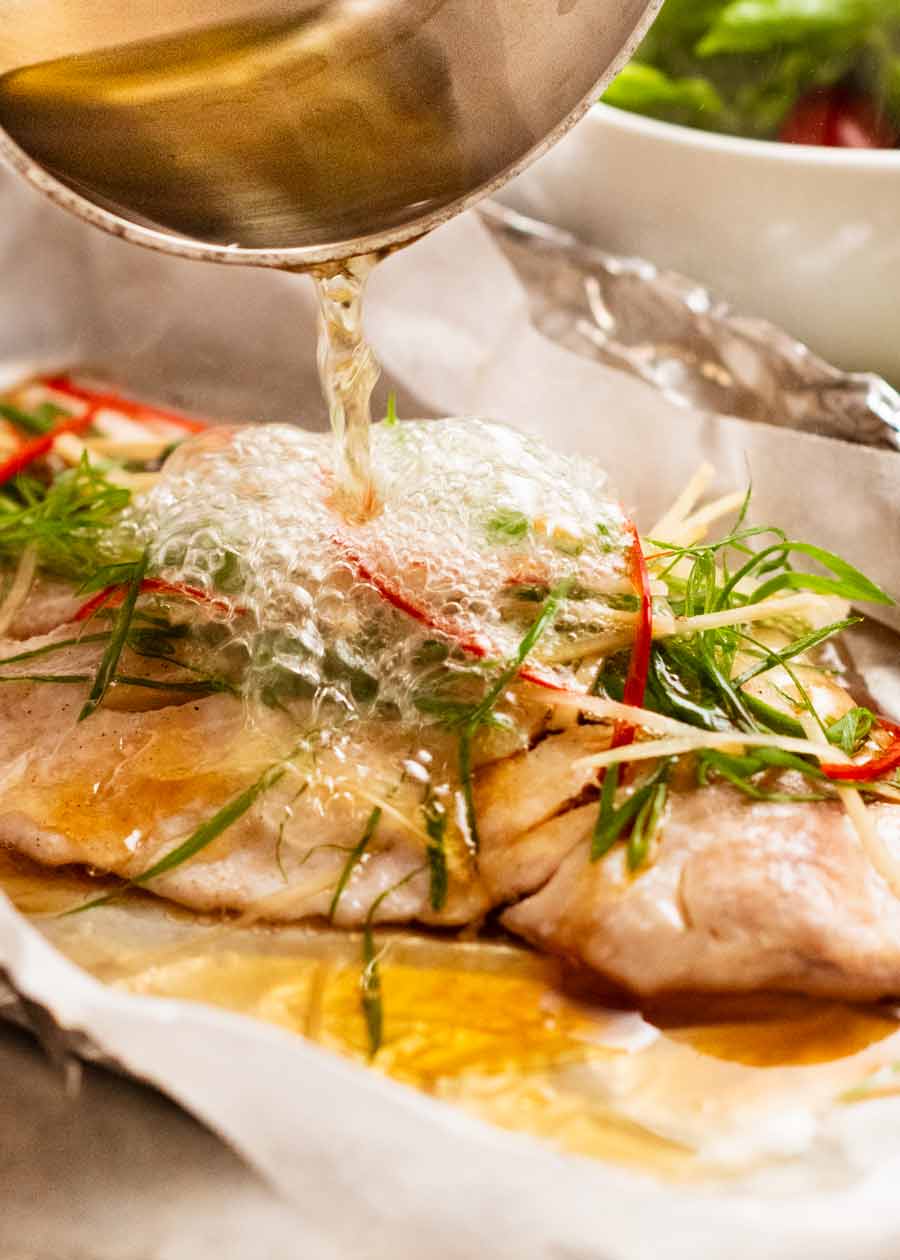
That dramatic hot oil sizzle!
The key step in this recipe is the hot oil drizzle. Just 1 tablespoon per fillet, and 3 important things happen:
the hot oil semi-cooks the green onion and ginger which also flavours the oil itself;
it gently sears the surface of the fish; and
the oil runs off the fish into the foil boat to mingle with the soy sauce, sesame oil, cooking sake and fish juices to create an extraordinarily tasty sauce.
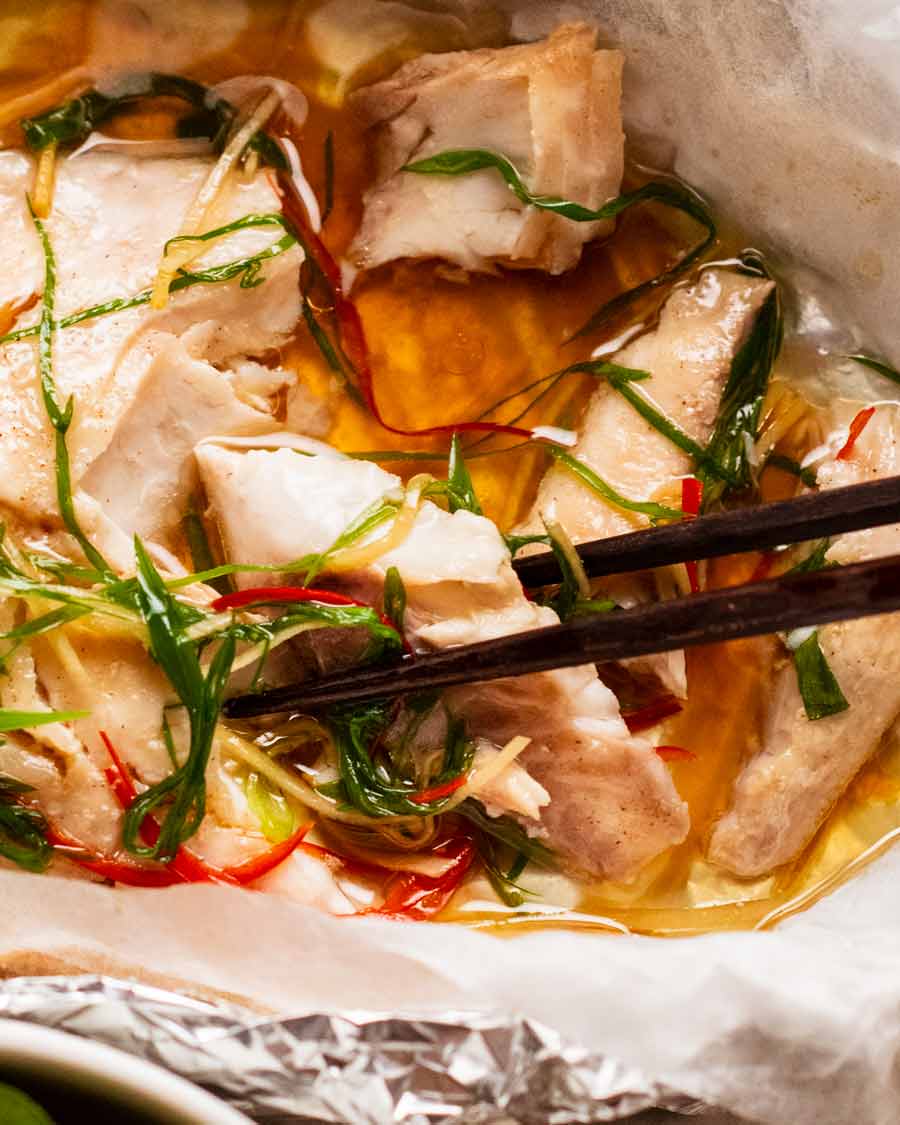
Excessive squidging of every bite of fish in that tasty sauce is not only strongly encouraged, it’s an essential part of the eating experience!
Ingredients in Sizzling Ginger Steamed Fish
Here’s what you need to make this.
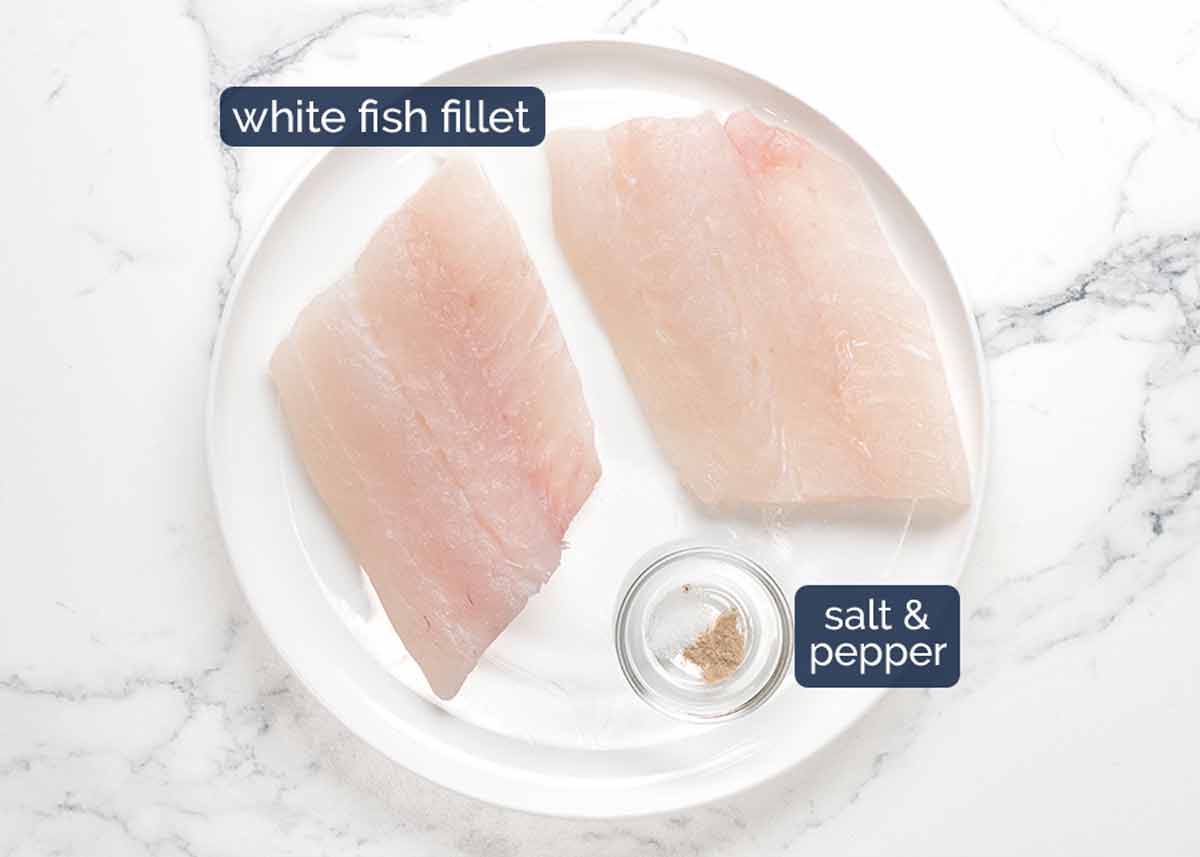
Best fish
Fish type and shape – More delicate white fish fillets, skinless. Thin fillets recommended, around 1.5cm / 2/3″ thick (at the thickest point), for better sizzling surface area to fish ratio. The recipe does work fine with thicker fillets but the bake time will be longer than the 12 minutes per the recipe.
Great fish for this recipe – barramundi, snapper, basa, jewfish, blue eye cod (trevalla), tilapia, cod, halibut, pollock, hake, John Dory, silver dory, gummy shark (flake). I think salmon and trout are a little too strong flavoured – though the recipe will work fine.
Meatier, firmer fish like ling and monkfish work fine but personally for this dish, I think it’s better with slightly softer white fish fillets (better sauce dispersion throughout flakes).
Remember, the shape of fish means that you get thick cuts from the main body as well as thin cuts from towards the tail. Opt for the thinner cuts!
Frozen fish works just fine, thaw then pat dry well before using.
Fish to avoid
I recommend avoiding:
Fish that dry out easily when cooked – Like swordfish, tuna, bonito, kingfish, marlin, mackerel. Unless you’re extremely careful they can become dry inside so are very prone to overcooking in the oven. I feel these fish are (mostly) better in raw/rare form such as Ceviche, Poke Bowls, Tartare (also see Tuna Steak);
Oily, “fishy” fish – Like mullet and sardines (try this recipe for sardines!).
The sizzling sauce & toppings
The sesame oil, soy and cooking sake are the seasonings. The ginger and green onion are the fresh aromatics, the red chilli is for colour and a hint of warmth (entirely optional). The oil creates the sizzle – when poured over the ginger and green onion!
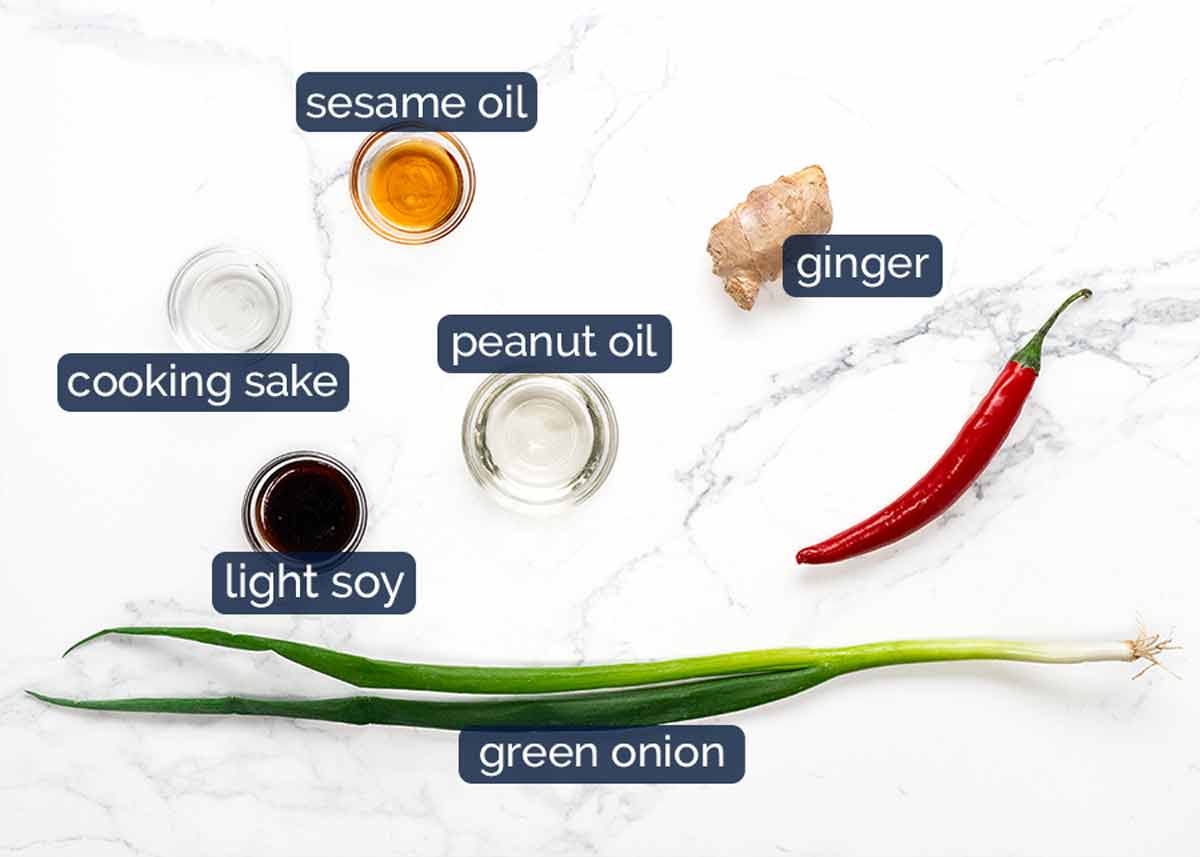
Cooking sake – This is Japanese sake intended for cooking purposes (not pleasant to drink). Like Chinese cooking wine, white and red wine used in Western cooking, it adds a touch of depth of flavour that you can really only get from alcohol.
Find it in the Asian aisle of large grocery stores, and Asian stores. If you can’t consume alcohol, just leave it out.
Soy sauce – Use light or all-purpose soy sauce. Do not use dark soy sauce, too intense!
Sesame oil (toasted) – Use toasted sesame oil which is brown and has more flavour than untoasted (which is yellow). Default sesame oil sold in Australia is toasted, untoasted is harder to find.
Peanut oil – Or any other neutral flavoured oil.
Ginger – Fresh ginger, julienned finely (ie very fine batons) so they partially cook when the hot oil is poured over!
Green onion – The green part only, finely sliced on the diagonal. We only use the green part because it’s more delicate so it too partially cooks when the hot oil is poured over.
Red chilli is for visual purposes mainly and a touch of warm spice (large chillies are not that spicy). Feel free to omit.
How to make Sizzling Ginger Fish
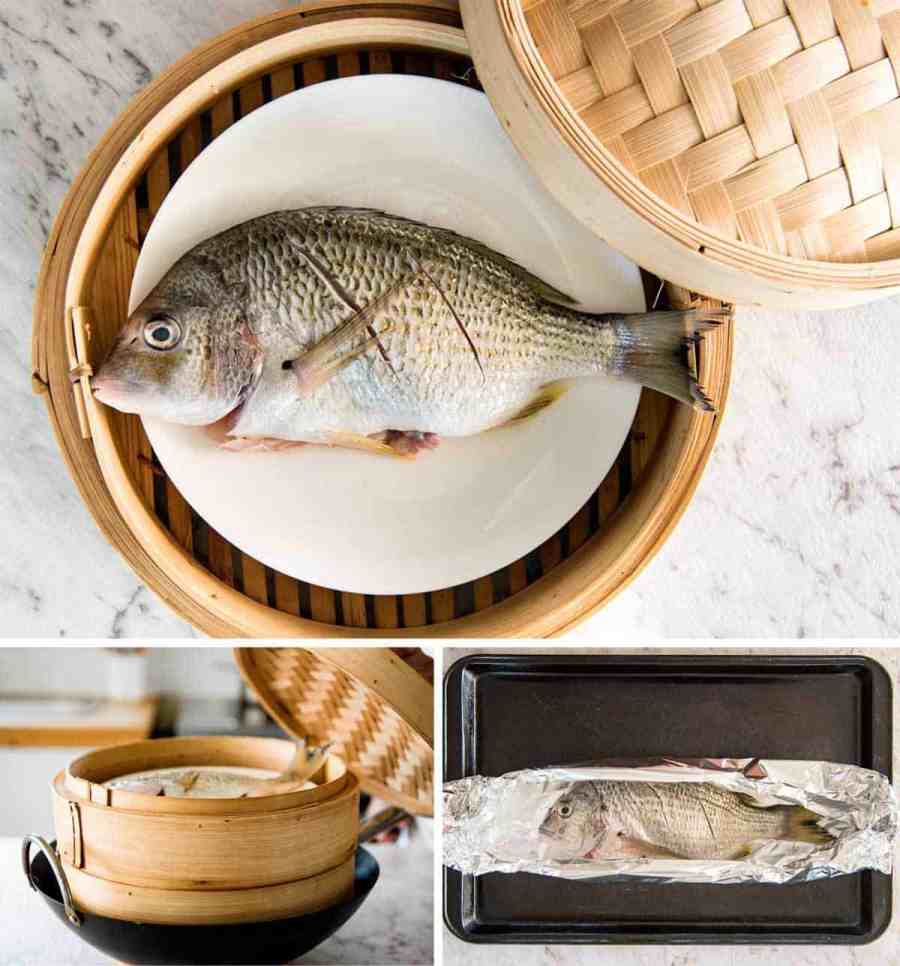
Foil packets serve a double purpose – all the moisture is locked inside as the fish steams gently, plus minimal washing up!
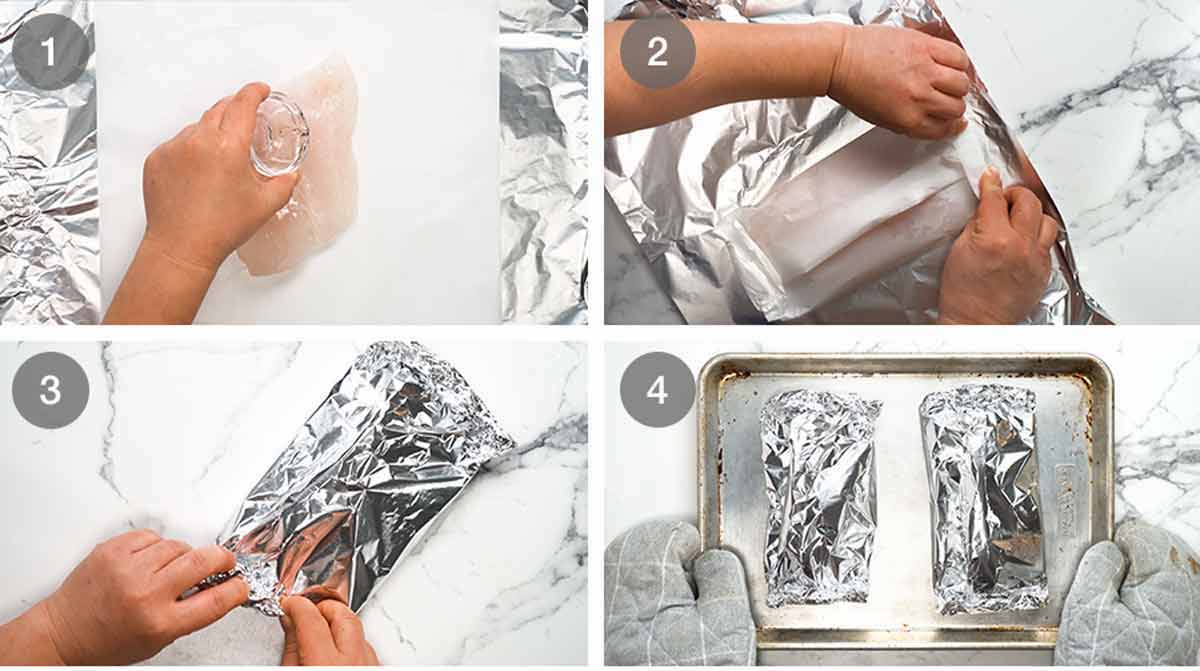
Season fish – Place a ~25cm/10″ sheet of foil on a work surface and top with a piece of paper that is slightly smaller, as pictured. Put the fish on the paper, sprinkle each side with a pinch of salt and pepper then drizzle the top only with the cooking sake.
Paper packet – Wrap the fish up in the paper first, folding the seams to seal. No need to be a present-wrapping master here, just as long as it’s mostly sealed to keep in the steam!
Foil packet – Then wrap the paper packet up with the foil.
Bake – Place the foil packets on a tray and bake for 12 minutes at 200°C/400°F (180°C fan) or until the internal temperature is 55°C/130°F. I pierce thermometer through foil. If you don’t have a thermometer, just open the packet and ensure the fish flesh flakes.
12 minutes?! Is that long enough? Yes it is, if you have a fairly thin fillet around 1.7cm / 2/3″ thick that weighs 180g/6 oz. Thin fish cooks fast when enclosed!
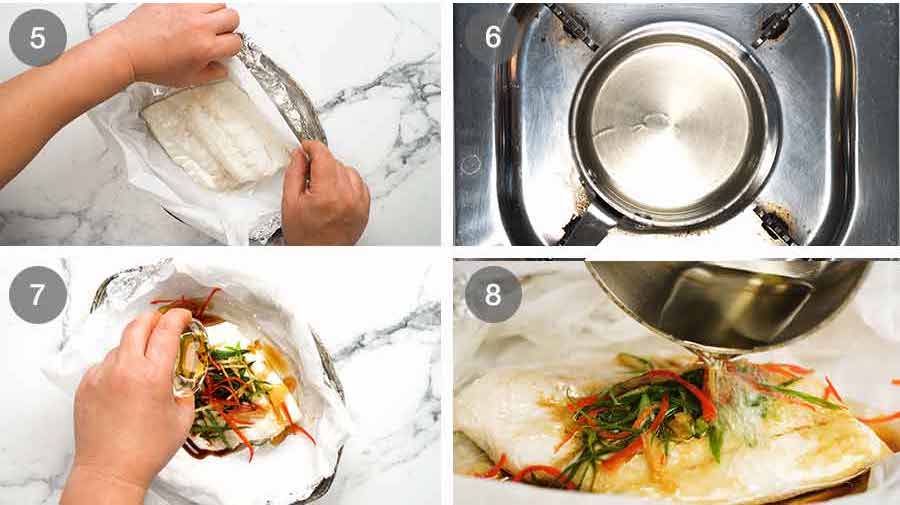
Rest 3 minutes – Remove fish from the tray and put on dinner plates. Open the packets – careful of hot steam! Scrunch/fold down the sides to form a sauce-catching moat around the fish. Leave to rest for 3 minutes while you heat the oil.
Heat oil – Put the oil in a small saucepan or skillet on medium high. Heat the oil up – it will take less than a minute. You don’t need it so hot the oil is smoking. Just hold your hand above the oil and you will feel the heat. Also, oil gets thinner when hot.
Fish toppings – Pile the green onion, ginger and chilli (if using) on each fish. Drizzle over the soy and sesame oil.
Sizzle! Pour the hot oil over the toppings. True to it’s name, it will bubble and sizzle dramatically! As described earlier, the oil cooks / is flavoured by the green onion and ginger and it gently sears the surface of the fish. Then when it settles in the foil boat it mixes up with the soy sauce, sesame oil, cooking sake and fish juices to form part of a tasty sauce that you squidge every bite of fish in.
Now – time to dig in!

Matters of eating Sizzling Ginger Fish
Sizzling Ginger Fish is designed to be eaten out of the foil boat. The idea is that the foil boat holds all the sauce in, and as you break off the tender flakes of fish, you swish it around in the sauce before eating it.
Plus, if you’ve used a good juicy piece of fish, you should actually have plenty of sauce to use for dressing up a bowl of rice on the side to fill out your meal. Add a bowl of instant miso soup (THERE IS NO SHAME) and you’ve got a brilliantly effortless, healthy dinner that’s something a little bit different to the usual.
And look at that! Hardly any dishes to wash up. You kitchen goddess, you. (Or god) – Nagi x
Watch how to make it

Sizzling ginger steamed fish
Ingredients
- 2 x 180g/ 6 oz thinnish white fish fillet , skinless (~1.5 cm/ 2/3" thick) (Note 1)
- 1 tsp cooking sake (sub mirin, Chinese cooking wine, dry sherry) (Note 2)
- Small pinch salt
- Small pinch white pepper (sub black)
TOPPING (divide between 2 fish):
- 1/2 cup green onion , green part only, finely sliced on diagonal (Note 3)
- 2 tbsp ginger , finely julienned (Note 3)
- 1 tbsp large red chilli , deseeded finely julienned on diagonal, optional (Note 4)
SAUCE (divide between 2 fish):
- 2 tsp light soy sauce , or all-purpose soy (Note 5)
- 2 tsp sesame oil , toasted
- 2 tbsp peanut oil (or veg, canola, grapeseed)
Instructions
- Preheat oven to 200°C/400°F (180°C fan).
- Prepare parcel – Place a 2 x 25cm / 10" piece of foil on a work surface. Top with a piece of parchment/baking paper slightly smaller. Place fish on paper.
- Season fish & wrap – Sprinkle each side of the fish with a SMALL pinch of salt and pepper. Drizzle the top of each fish with 1/2 tsp sake. Form a parcel – make a parcel with the paper first, then the foil. (See video or step photos).
- Bake – Place parcels on a tray. Bake for 12 minutes or until the internal temperature is 55°C/130°F (I pierce thermometer through foil) or the fish flesh flakes (open to check). Thin fish cooks fast when enclosed!
- Rest 3 min – Put each parcel on a plate and unwrap, folding down the sides to create a “boat” that will catch the sauce that you can squidge the fish in. Rest for 3 minutes – heat the oil while it rests.
- Heat oil until hot in a tiny saucepan or small pan over medium heat.
- Sizzle! Top the fish with green onion, ginger and chilli. Drizzle with soy and sesame oil. Pour oil all over the green onion and ginger – it will sizzle dramatically!
- Serve immediately. Eat fish out of foil, squidging the flaky pieces well in the sauce before eating. See post for what I served it with!
Notes
Nutrition
Life of Dozer
Dozer had a very special guest over on the weekend to make lunch for him – Andy Hearnden (“Andy Cooks”), a professional chef turned social media “mega-star” who has lots and lots of followers on social media (as in, 12 million or so across various platforms!)


I don’t ordinarily connect or network with “big” social media influencers because I’m so focussed on sharing recipes here on my website rather than worrying about social media. Can’t do it all!  Andy is the first such-person whose message I have responded to. Because despite the insane social media following he has, he’s so normal, humble, down to earth and we have very similar taste in food.
We had a fun day sharing war stories of making a living in the online world, the experience of making a cookbook (he just launched his debut cookbook!) and we also filmed a video together that Dozer stars in! I look forward to sharing it with you.


The post Sizzling Ginger Steamed Fish appeared first on RecipeTin Eats.
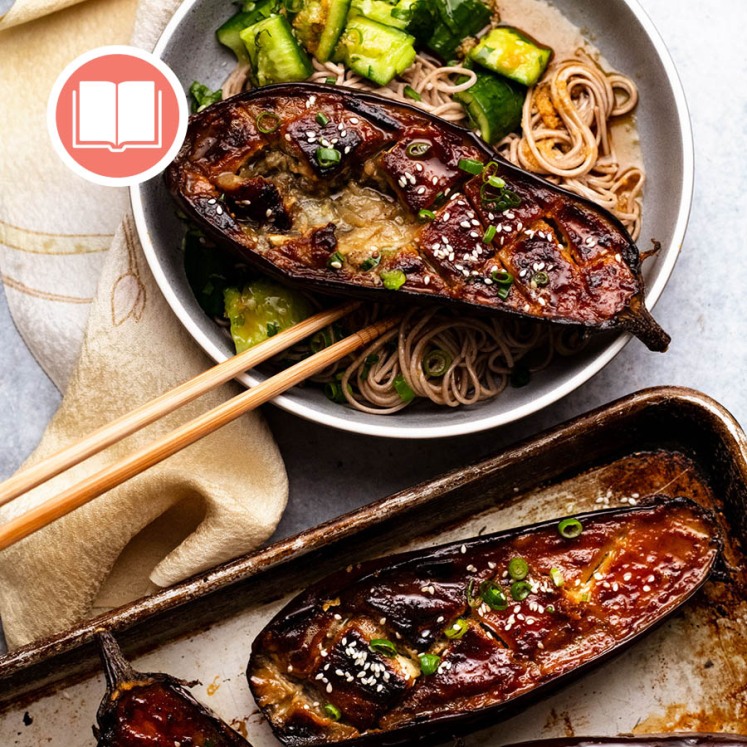
]]> Try this irresistible, simple recipe for stuffed eggplant: oven-roasted eggplant halves topped with Moroccan spiced lamb or beef. Low-cal, low-carb, low effort and utterly delicious! Moroccan stuffed eggplant You’ll often hear me declaring quite passionately that I think eggplant is one of the most underrated vegetables around. They’re cheap. They’re meaty. And they’re fabulously versatile,... Get the Recipe
The post Easy Moroccan Stuffed Eggplant (beef or lamb) appeared first on RecipeTin Eats.
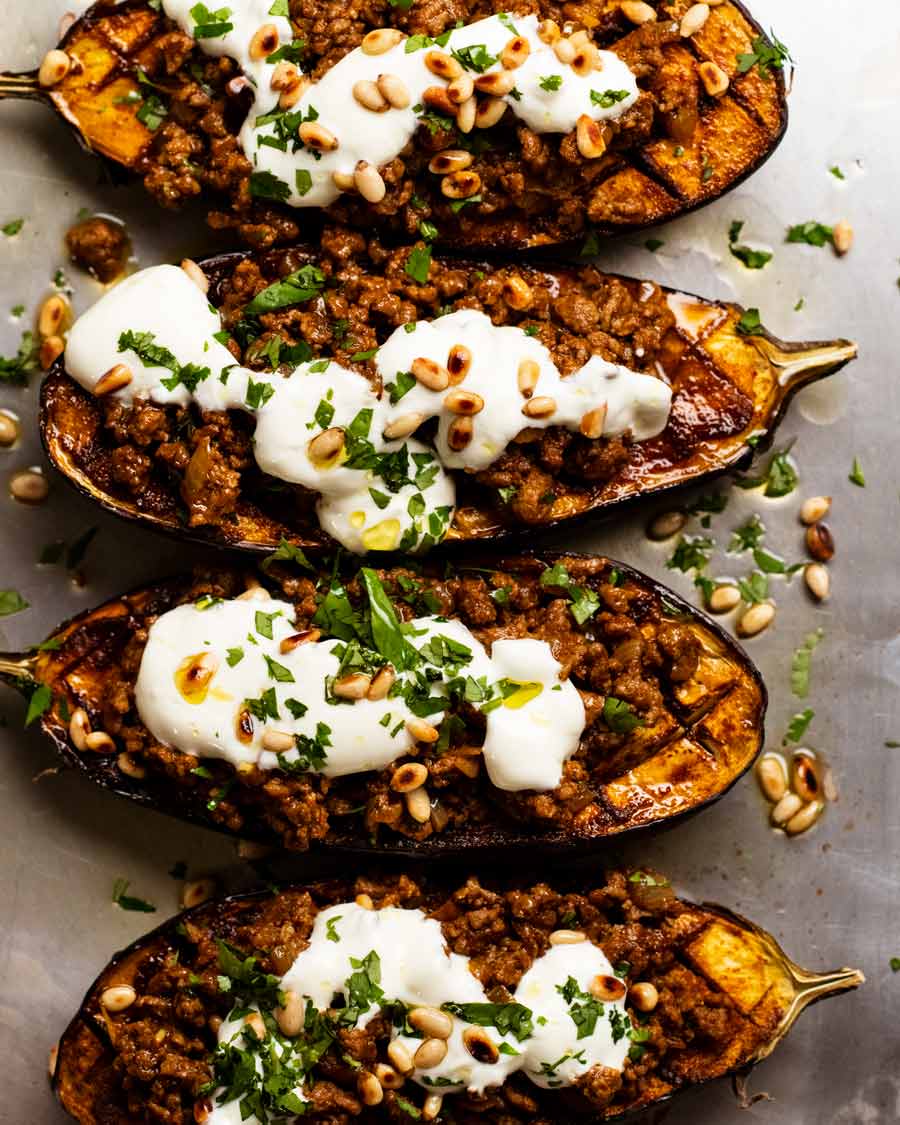
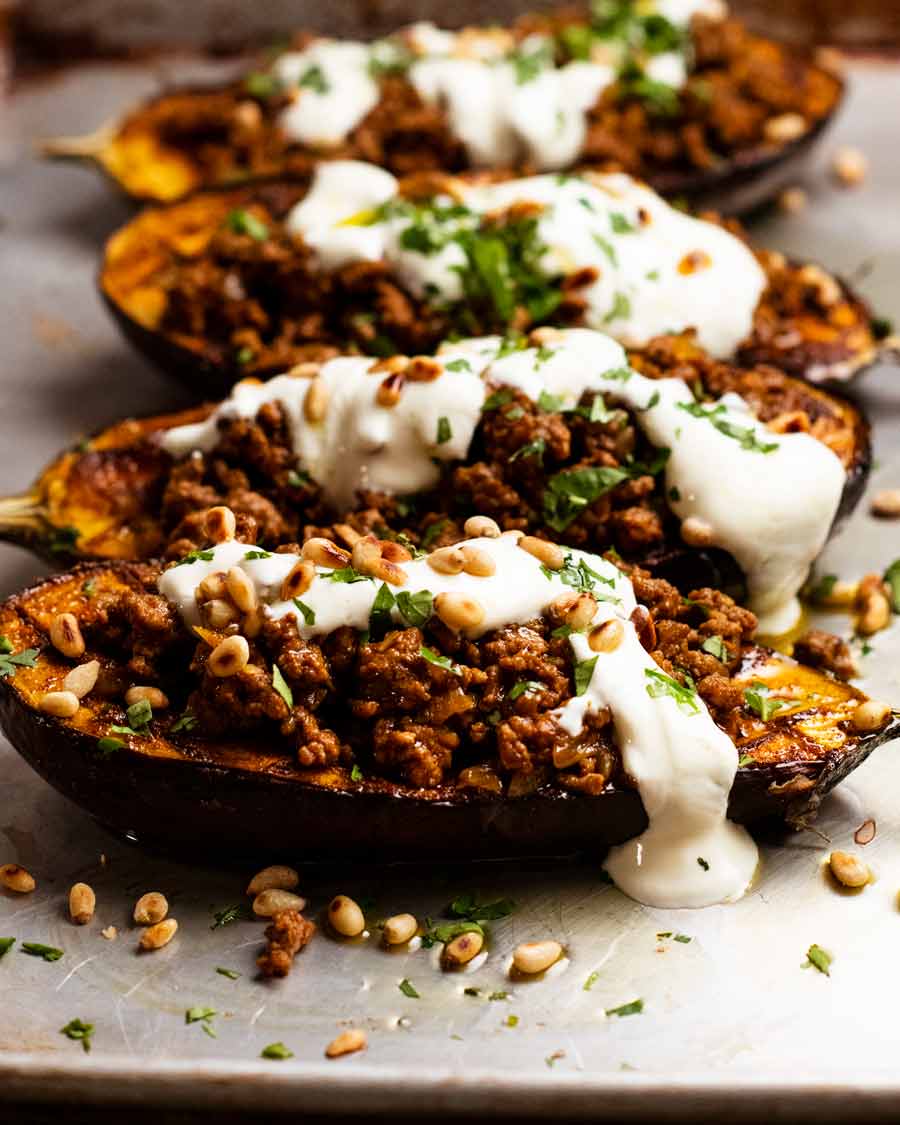
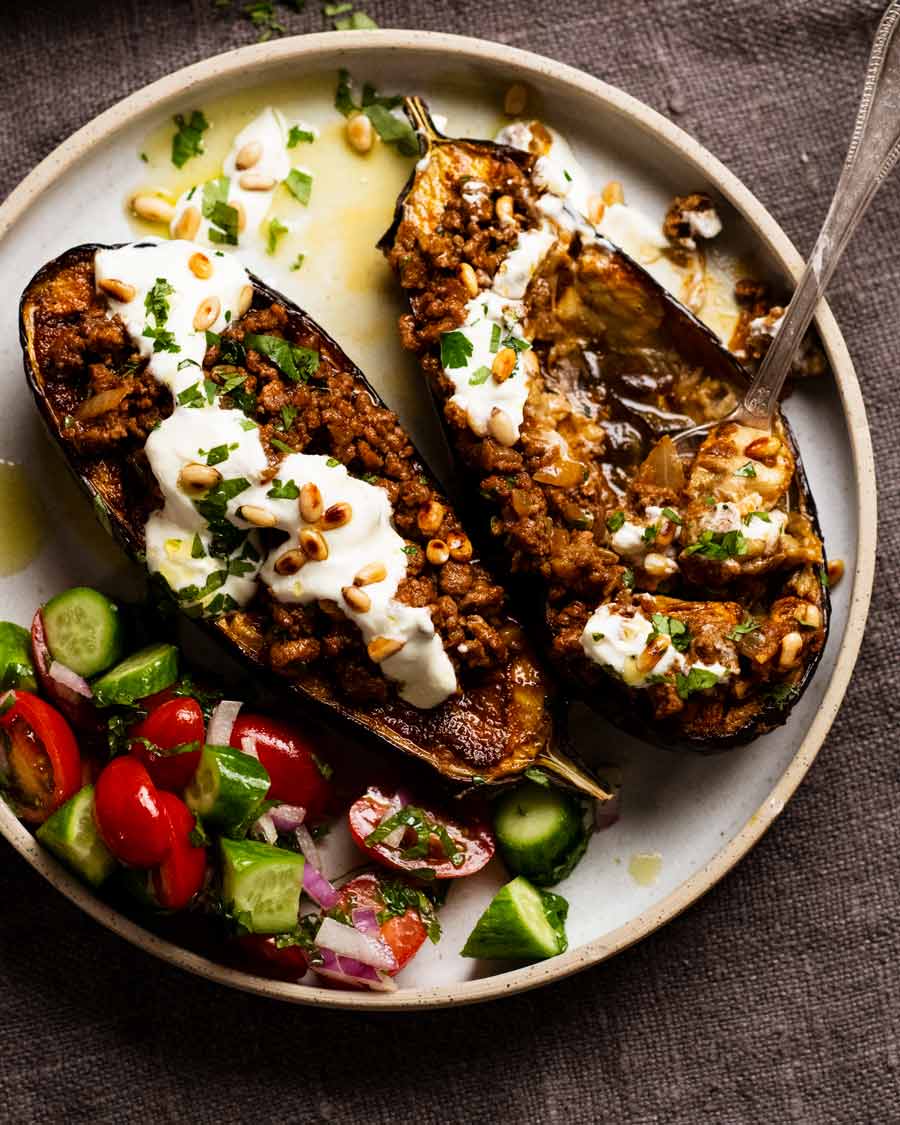
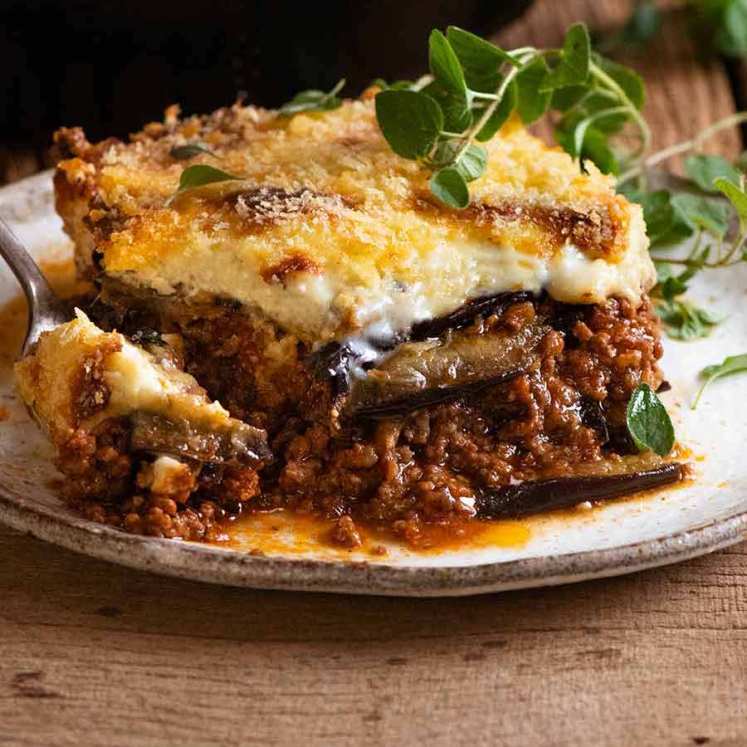
]]>Try this irresistible, simple recipe for stuffed eggplant: oven-roasted eggplant halves topped with Moroccan spiced lamb or beef. Low-cal, low-carb, low effort and utterly delicious!
Moroccan stuffed eggplant
You’ll often hear me declaring quite passionately that I think eggplant is one of the most underrated vegetables around. They’re cheap. They’re meaty. And they’re fabulously versatile, used in cuisines worldwide like Asian, Italian, Greek and Indian, prepared through various cooking methods including frying, steaming, roasting and simmering.
Today, we’re smearing, roasting and stuffing. Well, topping, not scooping-and-stuffing, in a manner that gives it a semi-stuffed vibe. Think of this as a mid-week take on traditional stuffed eggplant dishes you find in Arabic cuisine that involves hollowing out eggplants, stuffing with rice, meat, herbs and nuts, often baked in a tomato sauce. Sounds magnificent, doesn’t it? And it is. but there’s a lot more pots and pans involved! We’re going simple today. You can make this tonight, after work!!


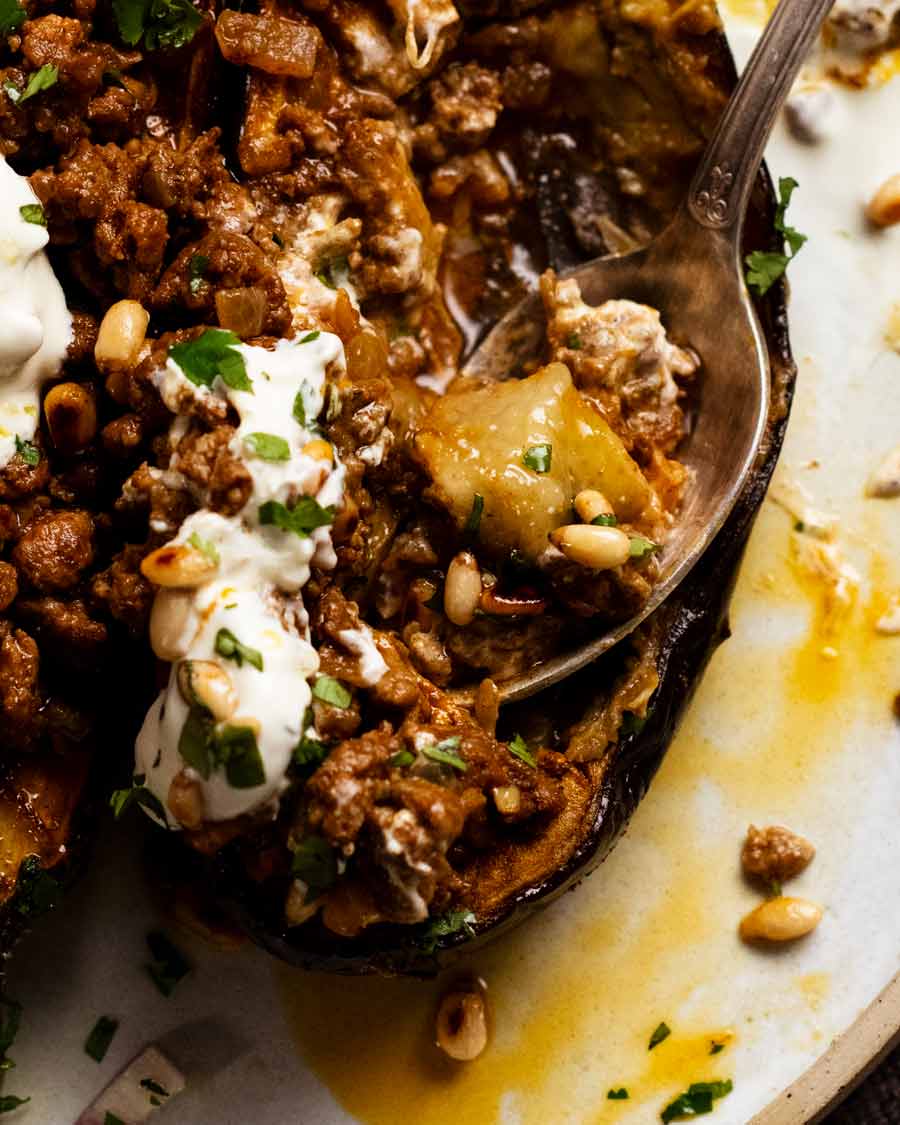
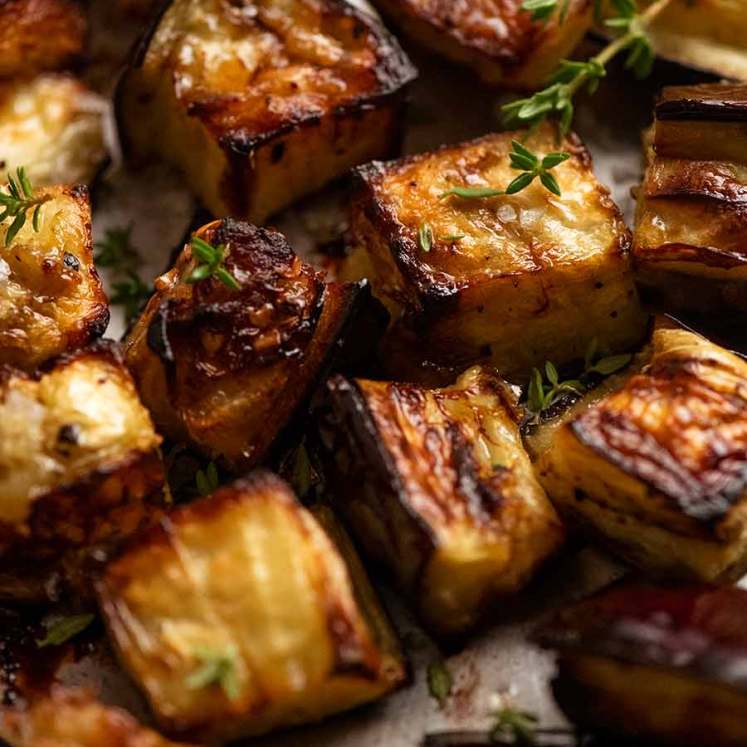
Nice close up of said soft juicy eggplant!
Ingredients in Moroccan stuffed eggplant
The base flavouring for this Moroccan stuffed eggplant is a homemade Chermoula spice mix which does double duty as the spice paste for the eggplant as well as flavouring the meat filling.
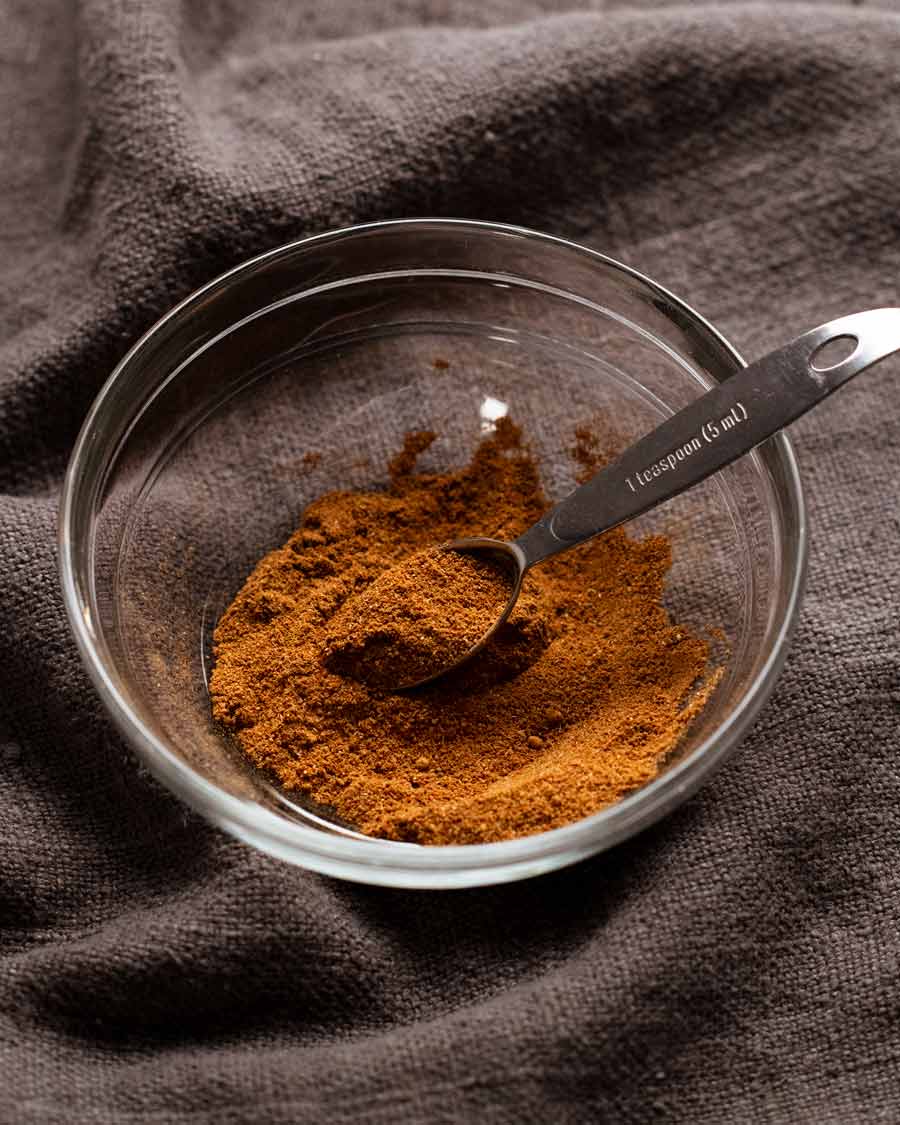
Chermoula spice mix
Chermoula is a North African spice mix that traditionally is a marinade or sauce containing fresh coriander, garlic and spices. Sometimes you can also find it in a dry spice mix form. We’re using the dry blend today for our purposes.
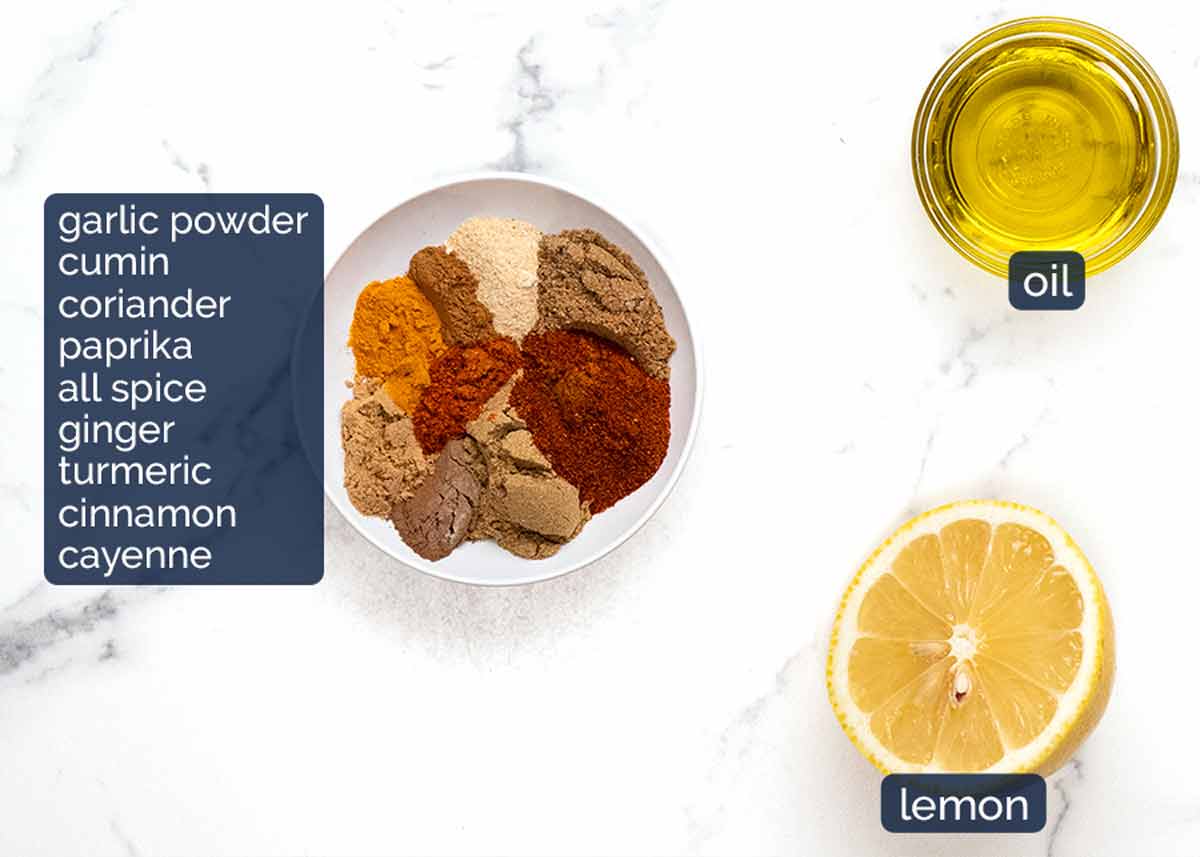
The spices – The majority of the spices are pantry staples, but don’t make a special trip out if you’re missing one or two…or even three! There’s enough in the blend that you can substitute with something else – suggestions are in the recipe notes.
Olive oil and lemon juice – These are used to make the paste. I like to use lemon juice to add a bit of tang as well as cutting down on the oil required to make a smear-able paste.
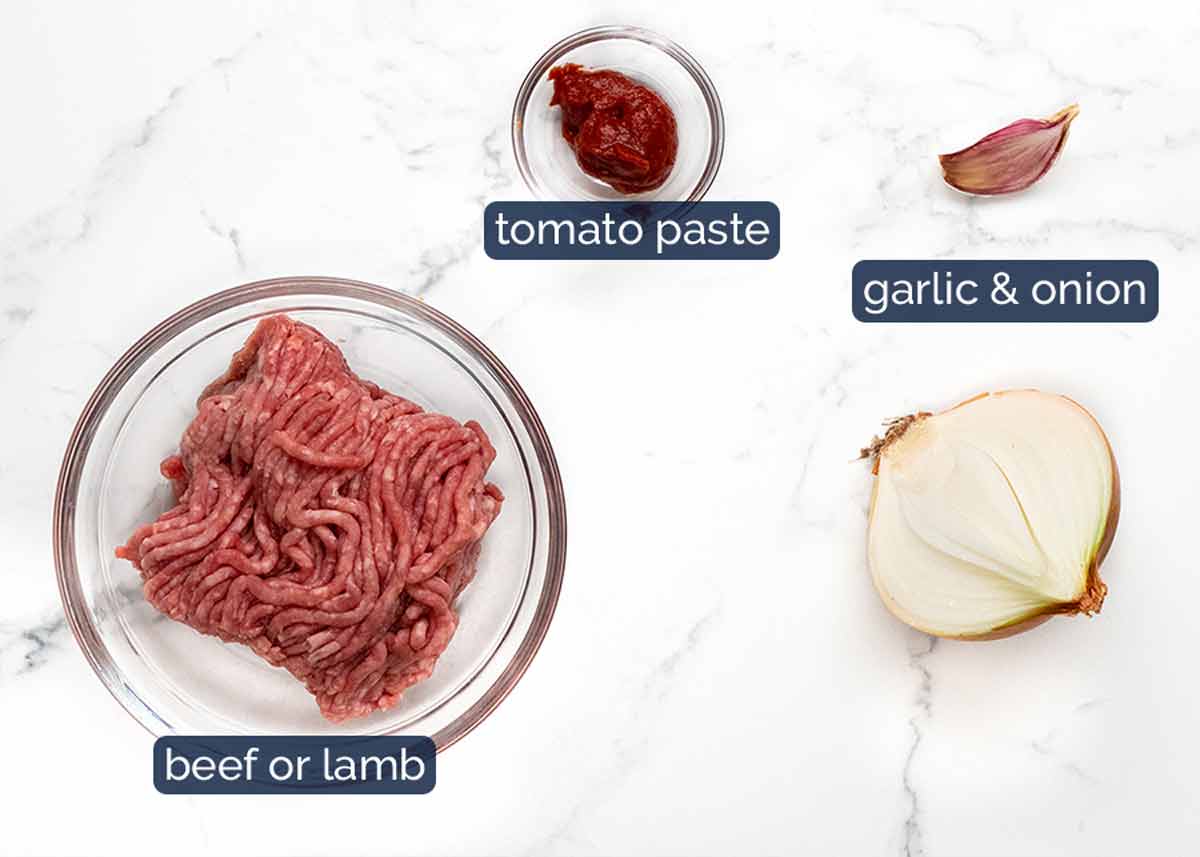
The meat filling (lamb or beef)
Here’s what you need to make the meat filling. You can use lamb or beef, though if I had my pick I’d choose lamb as it’s a classic pairing with flavours from the Arab world.
3 teaspoons of the Chermoula spice blend is used to flavour the filling. In addition to this, we have garlic and onion for aromatics, and a little tomato paste to bind the filling together.
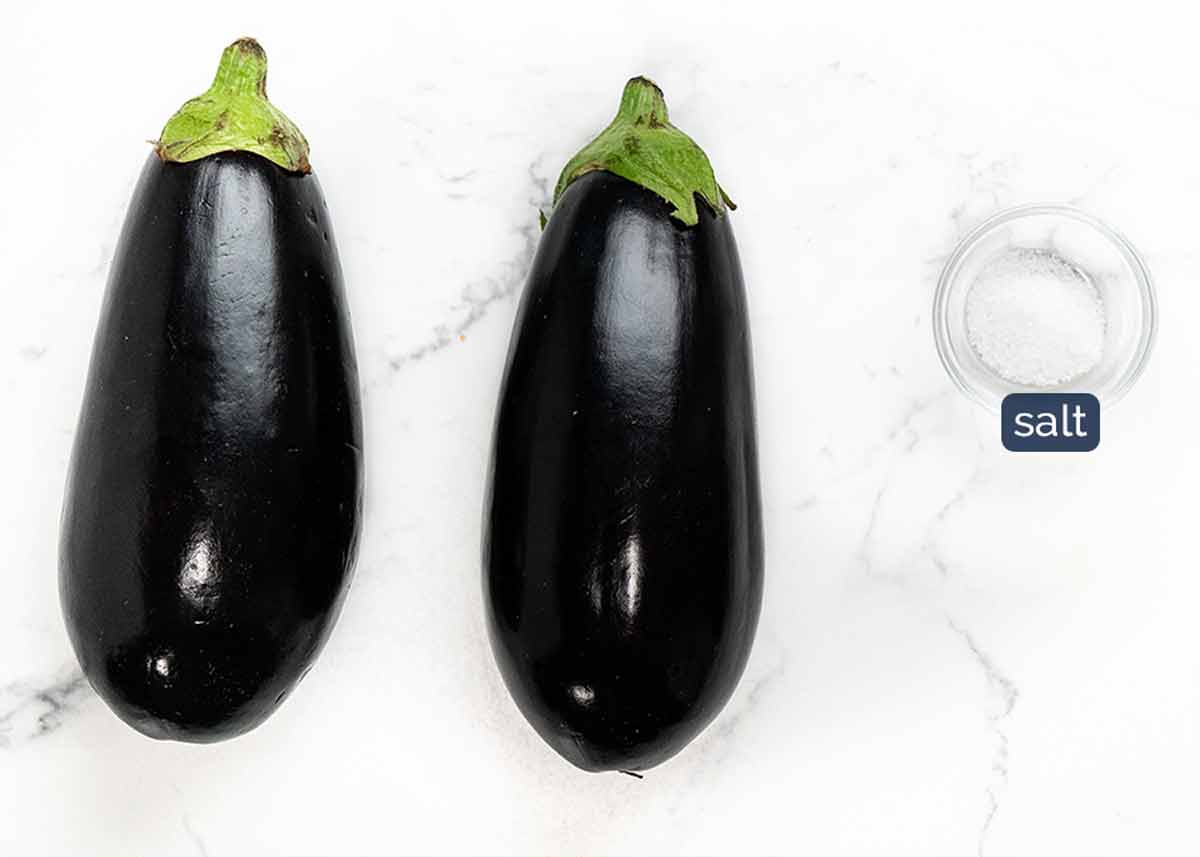
The eggplant
Choose eggplants around 250g/8oz and 17cm/7″ long. Don’t worry about exact size – adjust toppings accordingly. If you end up with larger eggplants, the topping layer might be slightly thinner, but the dish will still be packed with flavor.
Salt helps remove moisture from eggplants. More on this below!
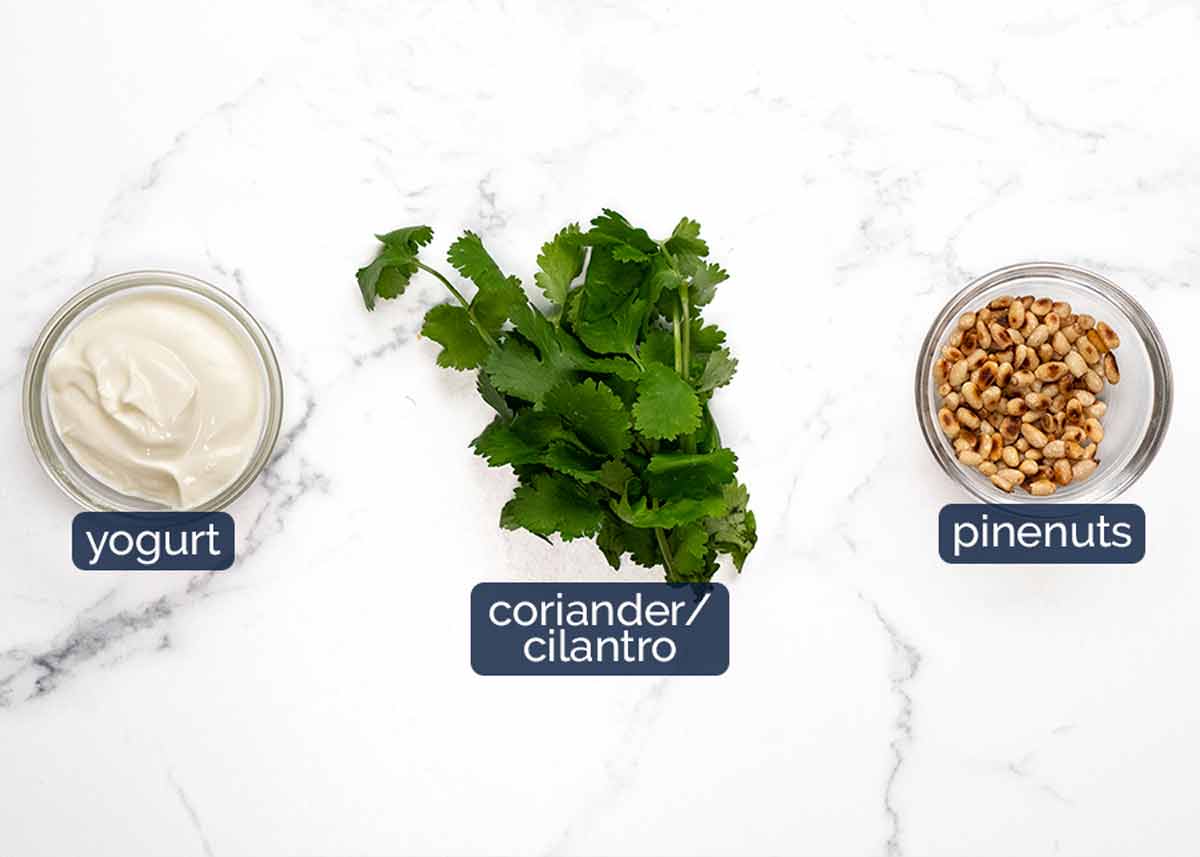
Toppings
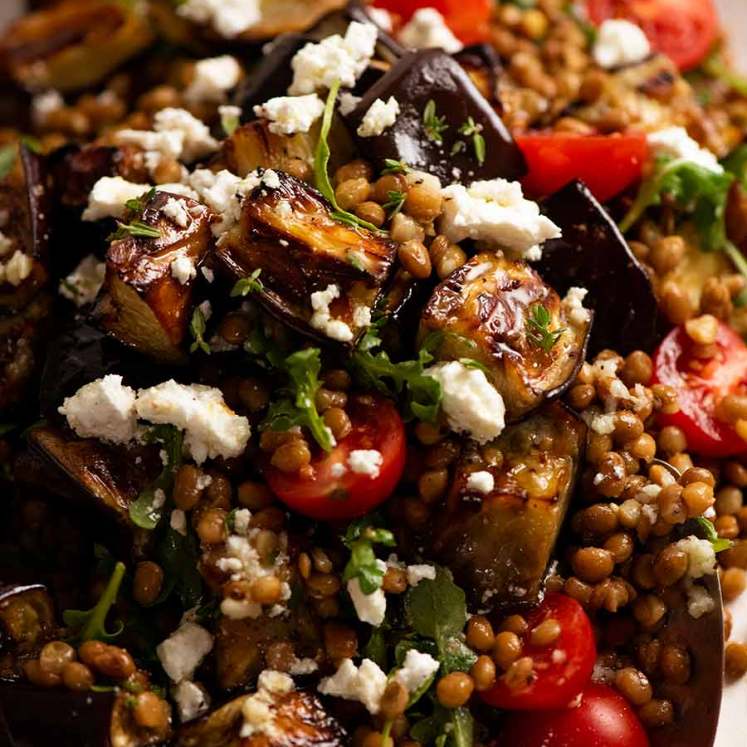
And lastly, the toppings! It really finishes this dish so I urge you to use them. The pine nuts are a great finishing touch, though other nuts will make an adequate substitute (almonds, macadamia, walnuts, or seeds).
If you’re anti-coriander/cilantro, switch with parsley!
How to make Moroccan Stuffed Eggplant
As mentioned above, I call it stuffed because describing it as a “topped” eggplant just doesn’t seem to capture the essence of this dish. 😂 But actually, it’s not properly stuffed – which means no scooping necessary, which means it’s easier to make. Win!
Sweating the eggplant (recommended)
Sweating the eggplant to remove excess water is a recommended but not essential step. It seasons the flesh as well as drawing out excess water that otherwise pools in the eggplant which dilutes flavour when you’re eating it.
But you can mostly get around this problem by simply cutting slits in the skin to let the water escape as it roasts. So don’t sweat it if you don’t have time to sweat it! *Sorry, I couldn’t resist!*
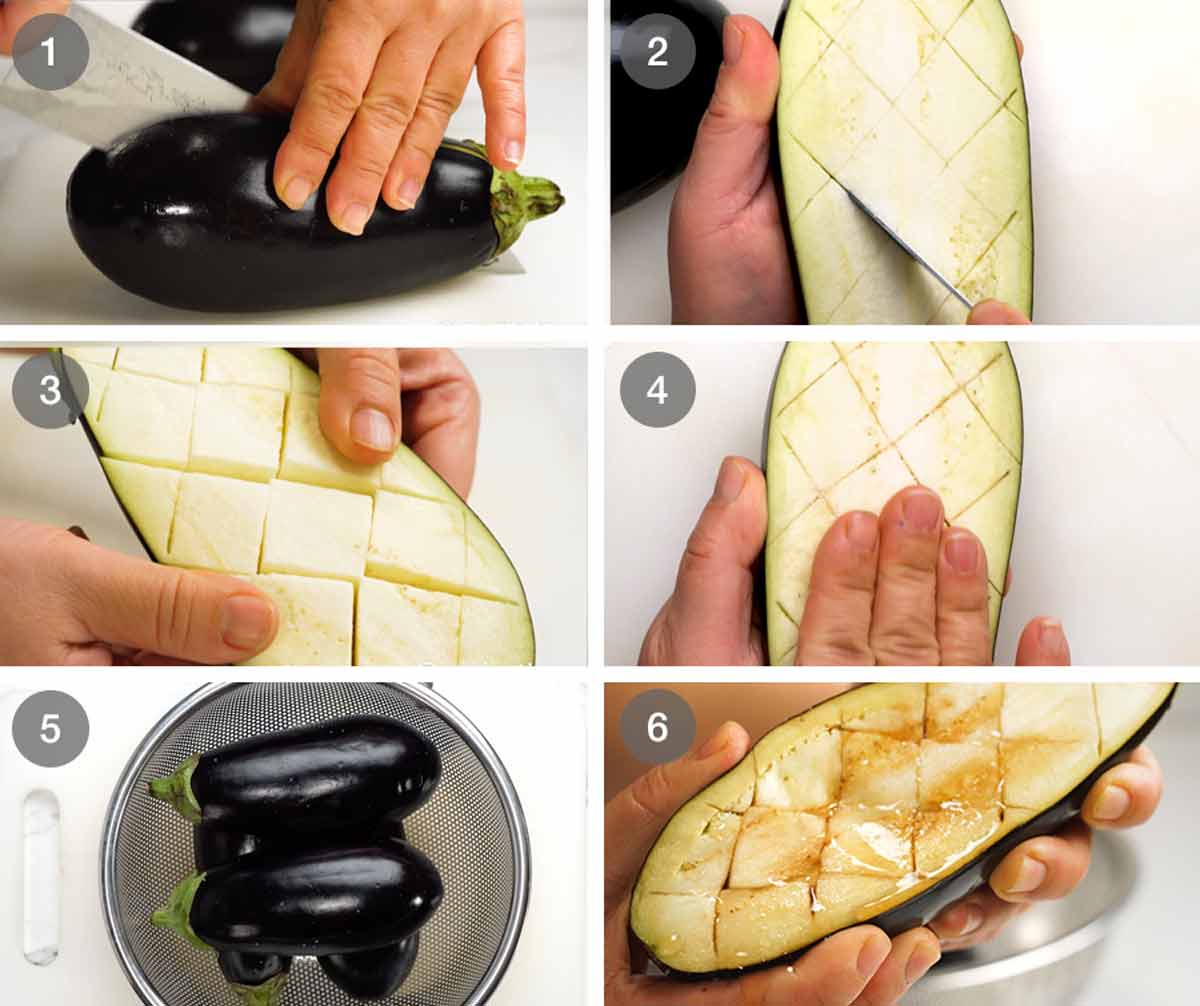
Cut the eggplant in half lengthwise. Keep the cap/stem intact and cut through it, it helps hold the eggplant together once roasted and soft.
Diamonds – Using a small sharp knife, cut 2.5cm/1″ diamonds into the flesh, cutting down as far as you are comfortable without piercing the flesh.
The said diamonds!
Salt – Sprinkle the surface with salt and rub it in. It’s good to get it into the slits but even if you just rub the surface, the salt will make it’s way into the slits.
Sweat for 30 minutes. I put the eggplant upside down in a colander to allow the water to drip out.
Squeeze like sponge to remove the excess water then pat the surface dry.
Making the “stuffed” eggplant
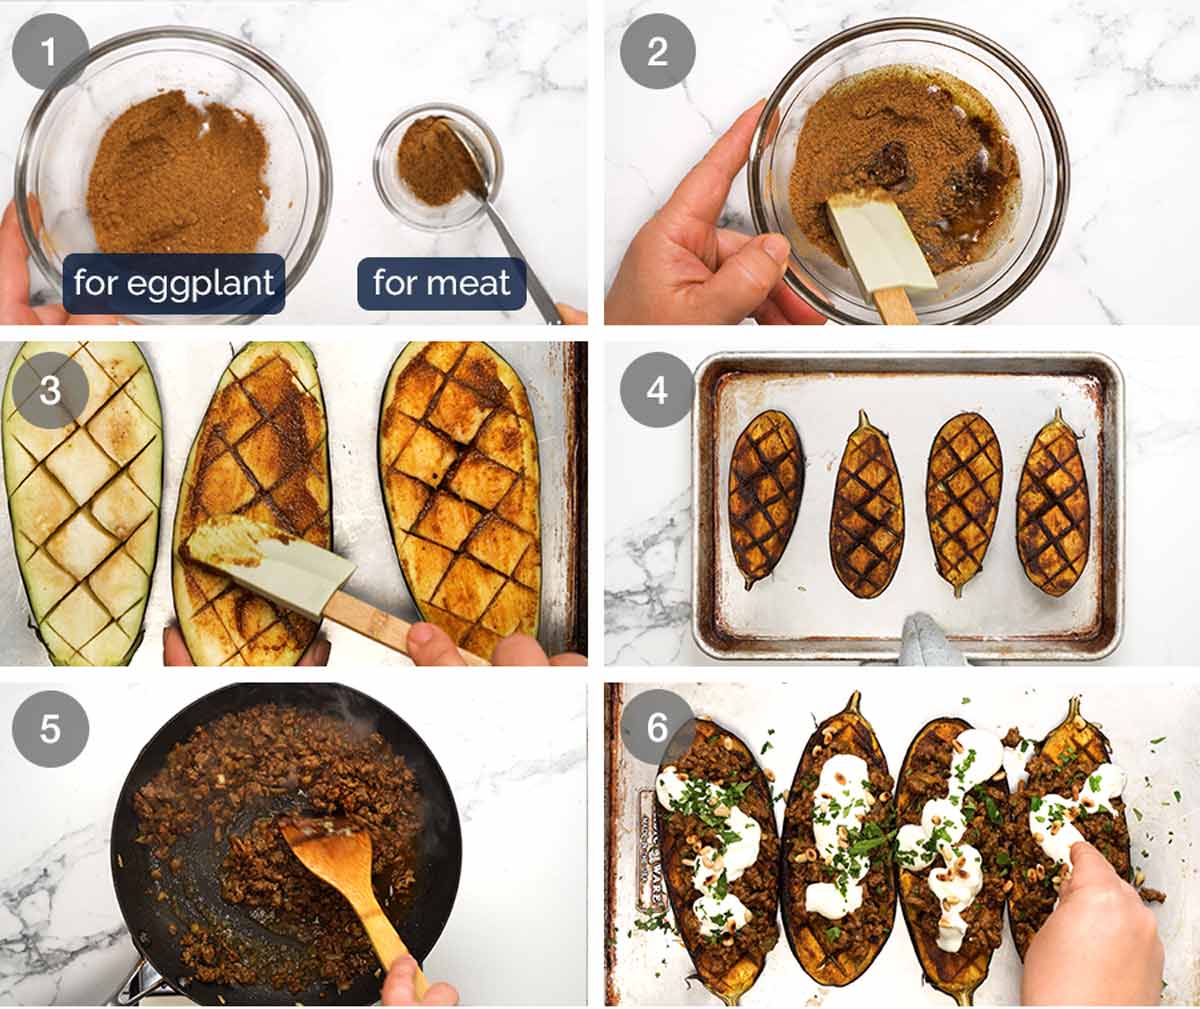
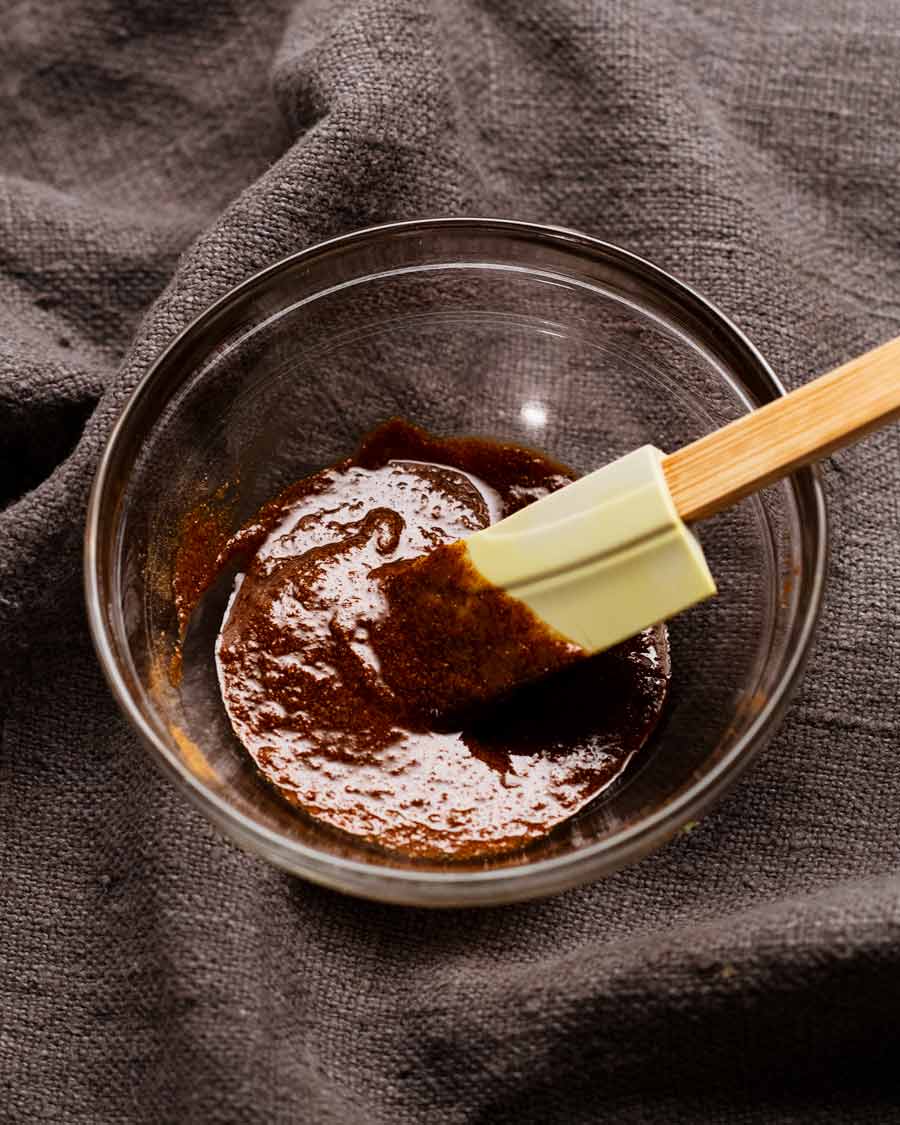
Mix the Chermoula spice blend in a bowl. Measure out 3 teaspoons and set aside for the meat.
Paste – Add olive oil and lemon juice into the remaining chermoula and mix to form a paste.
Smear the paste onto the surface of the eggplant.
Roast for 45 minutes at 180°C/350°F (160°C fan) or until the eggplant is softened. Sometimes it takes longer – don’t forget to check the edges.
Spiced meat – A quick cook! Sauté the garlic and onion, then cook the lamb with the reserved Chermoula spice blend. Finally, add the tomato paste and water to make the filling “juicy” (rather than dry and crumbly).
Assemble – Top the roasted eggplant with the lamb filling. Dollop on yogurt, sprinkle with pine nuts and coriander then dig in!
Matters of serving
Servings
This recipe is designed to serve:
2 people as a generous dinner with a small side salad;
4 as a meal with a starch (flatbread, couscous) and a substantial side (like Honey Cinnamon Pumpkin Lentil Salad, roast veg, chickpea salad); or
4 people as a generous starter.
Low carb, low calorie!
For the eggplant alone, it’s a mere 450 calories for a whole eggplant (ie 2 halves) with only 22 grams of carbs. To be honest, a serving of the eggplant alone makes for a satisfying meal – you have protein and vegetables covered! Though I do like to add something fresh on the side, even if it’s just some plain fresh cucumber and tomato.
So, it’s low calorie, low carb, simple to make and a something different to make with beef mince rather than the usual Spag Bol. What do you think?? Feel like giving this a go? I HOPE SO! – Nagi x
Watch how to make it
Easy Moroccan Stuffed Eggplant (beef or lamb)
Ingredients
Eggplant
- 2 x 250g/8oz eggplants (aubergines), ~17cm/7" long (Note 1)
- 3/4 tsp cooking salt / kosher salt
- 1 tbsp extra virgin olive oil
- 1 tbsp lemon juice (or more oil)
Chermoula spice mix (Note 2)
- 1 1/2 tsp EACH coriander, paprika
- 1 tsp cumin
- 3/4 tsp all spice powder
- 1/2 tsp EACH garlic powder, ginger, turmeric powder
- 1/4 tsp cinnamon
- 1/4 tsp cayenne pepper
Spiced beef or Lamb topping
- 1 tbsp olive oil
- 1 garlic clove , finely minced
- 1/2 onion , finely chopped
- 250g / 8oz beef or lamb mince , lean if you can (chicken, turkey, pork also ok)
- 1/2 tsp cooking/kosher salt
- 2 tsp tomato paste (Note 3)
- 1/4 cup water
To Serve
- Yoghurt , plain
- 2 tbsp coriander/cilantro leaves , roughly chopped (sub parsley)
- 2 tbsp pinenuts , toasted (Note 4)
Instructions
- Preheat oven to 180°C/350°F (160°C fan).
- Sweat eggplants (recommended, see Note 5 to skip) – Cut eggplants in half then score with 2.5cm / 1" diamonds. Rub surface with salt, getting some into the slits. Place face down in a colander and set aside for 30 minutes. Gently squeeze like a sponge to remove excess water, pat surface dry.
- Mix Chermoula spice mix ingredients in a bowl. Remove 3 teaspoons for the meat and set aside. Add olive oil and lemon juice into the remaining spice mix and mix into a paste.
- Roast eggplant – Place eggplant on baking tray. Slather spice mix onto the surface. Roast for 45 minutes until softened.
- Spiced topping – Heat oil in a non stick skillet over medium high heat. Cook onion and garlic for 1 minute. Turn heat up to high, add lamb/beef and cook, breaking it up as you go, until you no longer see red. Add reserved spices and salt, then cook for a further 1 minute. Add tomato paste and cook for 1 minute. Stir in water, cook for 1 minute until it's juicy but not watery.
- Assemble – Top eggplant with beef/lamb. Sprinkle over coriander, dollop with yogurt and pine nuts. Finish with an extra drizzle of extra virgin olive oil, if desired!
Notes
- All spice – mixed spice
- Garlic powder – onion powder, or fresh garlic
- Ginger – more garlic
- Turmeric powder – saffron
- Cinnamon – more all spice
Make ahead – Roast the eggplant and meat filling. Fully cool both, uncovered, then put into containers in the fridge. Re-warm both using method of choice (juice up the meat with a splash of water if needed) then assemble!
Leftovers will keep for 3 days in the fridge. Not convinced cooked eggplant will freeze well but the meat will be fine for 3 months!
Nutrition per serving, using lean beef – 2 eggplant halves (i.e. one whole eggplant) per serving. This is a satisfying meal even by itself!Nutrition
Originally published in March 2016. Majority spruced up in 2023 with a better, more streamlined recipe with better flavour, sparkling new photos and a brand new recipe video!
Proof of eggplant fondness
Life of Dozer
Can’t even whiteboard recipe ideas without Mr D hovering around.

The post Easy Moroccan Stuffed Eggplant (beef or lamb) appeared first on RecipeTin Eats.
]]> Healthy muffins that are actually delicious! A copy-cat of the raspberry bran muffins from Sydney’s beloved Bowan Island Bakery, these breakfast muffins are a nutritious, convenient breakfast option that’s far better for you than take-away on the way to school or work. Up-and-go Breakfast Muffins Being a savoury gal, I’ve always been partial to savoury... Get the Recipe
The post Up-and-go breakfast muffins! appeared first on RecipeTin Eats.
]]>Healthy muffins that are actually delicious! A copy-cat of the raspberry bran muffins from Sydney’s beloved Bowan Island Bakery, these breakfast muffins are a nutritious, convenient breakfast option that’s far better for you than take-away on the way to school or work.
Up-and-go Breakfast Muffins
Being a savoury gal, I’ve always been partial to savoury muffins for breakfast (proof here, here and here). But a breakfast muffin with a sweet slant has been on my list for a while. I’m talking about the type that doesn’t make you feel like you’re eating cake for breakfast, a muffin that is just sweet enough but still good for you and good to eat.
So here it is!
Why these muffins are better for you
Low fat – just 1 1/4 tsp coconut oil per muffin
Refined-sugar free
Lightly sweetened – Just 2 teaspoons honey per muffin
Extra dietary fibre – keeps your insides….err….moving, shall we say ☺️ as well as keeping you full for longer and stabilising your blood sugars.
Convenient – Grab and go! No need to reheat, eat on the move.
Long shelf life – These last for 4 to 5 days, and are freezable.
Easy to make – One-bowl batter mixed with just a wooden spoon
Add-ins of choice – dried fruit and nuts, oats, fruit, choc chips!


Ingredients in breakfast muffins
Here’s what you need to make these breakfast muffins. Add-ins are flexible – see below for suggestions.
The key ingredient in this for goodness and flavour is wheat germ. Good-for-you extra fibre that gives these muffins a fabulous nutty flavour and lovely warm brown colour!
Dry ingredients
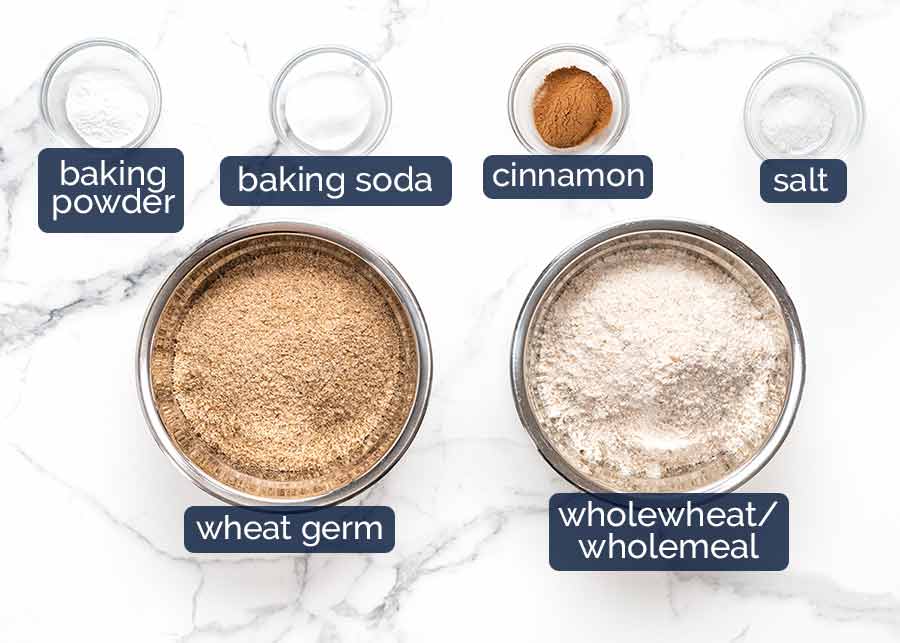
Wheat germ (sub wheat bran) – The good-for-you extra fibre boost! Found in either the cereal aisle, health food section or flour aisle or grocery stores. While both wheat germ and wheat bran work, I think wheat germ is nicer. It has lovely nutty flavour because it’s the seed inside wheat kernels. Whereas wheat germ is the exterior of wheat kernels so it gives the muffins a slightly earthier flavour. Both have similar nutrition characteristics – high in dietary fibre as well as other nutrients. Better for you than plain flour!
Wholewheat / wholemeal flour – In keeping with the better-for-you spirit of these muffins, I’ve opted for wholemeal rather than plain white flour. It has more nutrients because it’s less processed, plus it enhances the nutty flavour of these muffins.
Baking powder AND baking soda (bi-carbonate) – These both make things rise but baking soda is 3x as strong and they each have different rising characteristics. For this recipe, using a combination of both delivers the muffin top shape and crumb texture I want.
The baking soda can be substituted with more baking powder but the crumb is not quite as soft. See recipe card notes for quantity.
Cinnamon – For flavour!
Salt – Brings out the other flavours in the muffins, doesn’t make it salty!
Wet ingredients
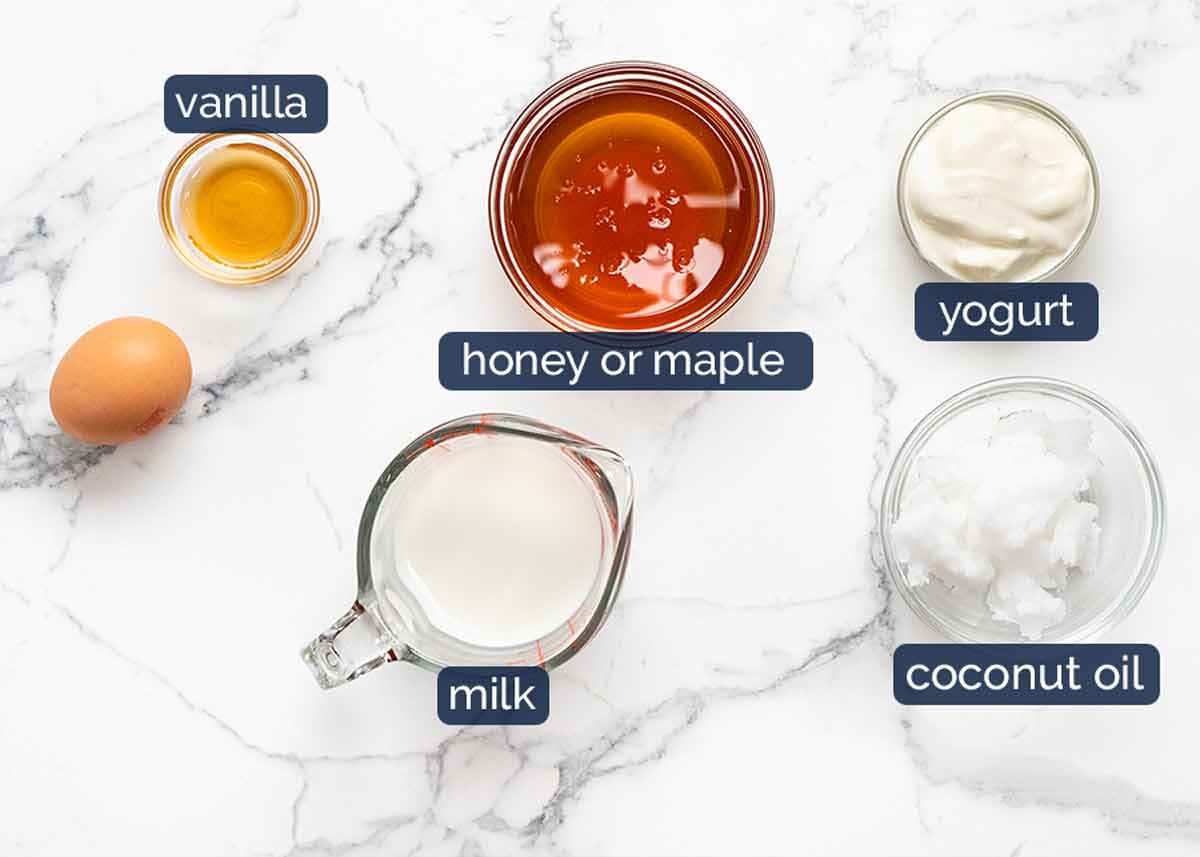
Honey or maple syrup – For sweetening! We only use 1/2 cup across 12 muffins which equates to 2 teaspoons per muffin. See commentary below on why honey is better for you than sugar.
Coconut oil – This is the fat in the muffins. I like to use unrefined / virgin coconut oil which adds a lovely very subtle coconut flavour into the muffins. By no means would anyone call these “coconut muffins”! Use the type that is firm like butter and needs to be melted to mix into batters, rather than the pourable type.
Note: There is also refined coconut oil which is stripped of all coconut oil and aroma. This and other oils will work in this recipe but will not add flavour. If you opt for another oil, I’d suggest doubling the vanilla and adding extra cinnamon.
Yogurt and milk – This is the wet in the batter. Using yogurt serves two purposes. Firstly, it has acid in it which gives the baking soda a rising kick start. Sometimes I use a teaspoon of vinegar in recipes to serve the same purpose, like in my Magic Stay-Moist Apple Muffins.
Secondly, yogurt is not as watery as milk. So it adds wetness to batters without making it as loose which means less flour needed = muffin more moist!
Egg – Just one, to hold the muffins together. Using only 1 egg makes a massive difference to the moistness of the crumb of muffins as the more egg you use, the sturdier but drier the crumb gets.
Vanilla – For flavour.
Why is honey better than sugar?
Because honey is:
sweeter than sugar so you can use less in recipes;
lower GI so your blood sugar levels won’t spike as quickly – which keeps you feeling full for longer; and
more nutritious than sugar which is “empty calories”. That is, sugar literally just contains sugar and nothing else! Honey contains nutrients such as amino acids, enzymes, vitamins and minerals.

Add-ins of choice!
I’ve used raspberries in these because they were on special. However, you really can add any add-ins you want. See suggestions below.
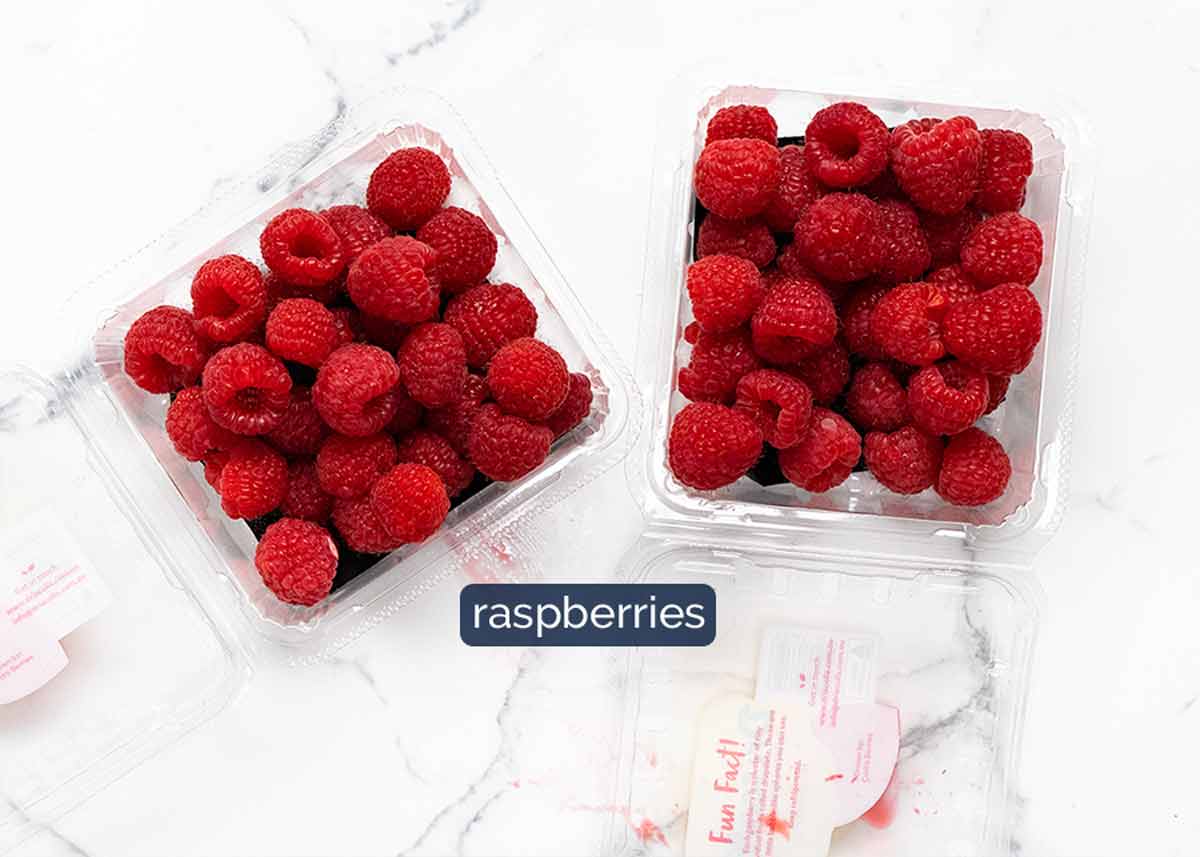
Add-in options:
Raspberries or blueberries, other berries – 250g/8oz, 2 heaped cups
Chopped fruit like apple, pears, cherries, grapes. (Not overly juicy fruit like oranges, peaches etc as they will leech too much liquid into the batter)
Dried fruit – sultanas, apricots, cranberries, apple, mango – anything goes!
Nuts and seeds
Chocolate chips – I mean, the rest of the muffin is healthy. So this tips the scales back to neutral? 😈
How to make breakfast muffins
It’s as easy as 1-2-3:
Mix wet ingredients
Mix in dry ingredients
Fill muffin holes and bake!
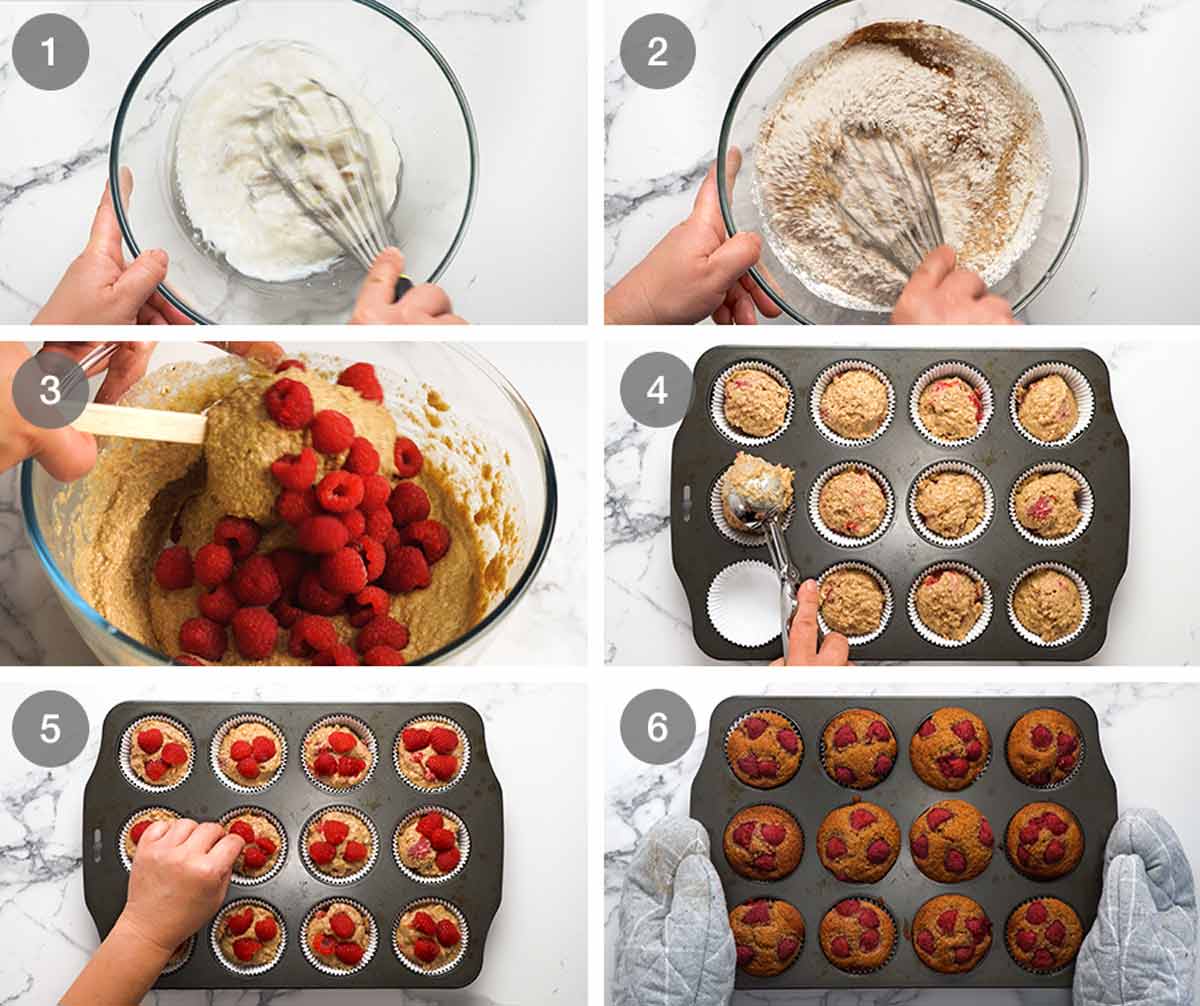
I like to reserve some raspberries to decorate the top, but this entirely optional – for visual purposes only. I know some people prefer more INSIDE the muffins!
Whisk wet – Melt the coconut oil in a microwavable bowl. Then whisk in all the wet ingredients: egg, yogurt, milk, honey and vanilla.
Mix in dry ingredients – Scatter across the surface (incorporates easier) then whisk in. Once you can no longer see flour, stop! Don’t get too enthusiastic with mixing as it will make the muffins tough.
Add-ins – Fold through the raspberries or whatever add-ins you’re using.
Divide between 12 holes. I used liners but it’s not essential, you could just spray with oil.
Top with reserved raspberries, if using.
Bake for 25 minutes at 190°C / 375°F (170°C fan) or until golden brown on the surface. Cool then devour!

Other matters of Up-and-Go Breakfast Muffins
Breakfast on the run – I’ve named these breakfast muffins as such because they are a great grab-and-go breakfast that doesn’t need heating and can be literally eaten on the run. More filling and less sweet than than muesli bars which I personally consider to be more suitable for a snack rather than breakfast.
Storage – These will keep for 4 to 5 days without going stale because they are more moist than typical muffins thanks to the coconut oil and yogurt. If it’s hot where you are, best to keep them in the fridge, otherwise just keep them in the pantry in an airtight container. They will also freeze for 3 months.
And with that, I think I’ve said all I need to on the matter of these breakfast muffins! Just to reiterate, these are less sweet than your usual muffins. To me, they are the perfect sweetness to have as breakfast without feeling like you’re being naughty and eating cake. And they are just sweet enough to have as a morning tea treat. In fact, people who often find Western cakes and cookies too sweet will probably find these the perfect level of sweetness.
Hope you give them a go! Love to know what add-ins you use if you do. – Nagi x
Watch how to make it

Up-and-go breakfast muffins!
Stays fresh for days.Ingredients
Wet:
- 1/3 cup coconut oil , virgin or unrefined (normal oil also works but not as tasty, Note 1)
- 1 large egg , at room temperature (~55g/2oz)
- 2/3 cup milk , at room temperature – full fat best (low fat and non-dairy ok too)
- 1/3 cup yogurt , plain/unsweetened
- 1/2 cup honey (or maple syrup)
- 1/2 tsp vanilla extract
Dry:
- 1 1/4 cups wheat germ (best) OR 1 1/4 cups (80g) wheat bran (Note 2)
- 1 1/2 cups wholemeal flour (sub ordinary flour – Note 3)
- 1/4 tsp salt
- 1 tsp cinnamon powder
- 1 tsp baking powder (Note 4)
- 1 tsp baking soda , sifted if lumpy (or 3 tsp extra baking powder) – Note 4
Add ins – CHOOSE ONE:
- 250g / 8 oz raspberries , 18 set aside and cut in half to decorate top if desired
- 2 cups diced fresh fruit (not watery) – like apples, pears
- 1 1/4 cups dried fruit, nuts, choc chips etc
Instructions
- Preheat oven to 190°C / 375°F (170°C fan). Line a 12 hole standard muffin tin with muffin cases OR spray generously with oil.
- Whisk wet – Place coconut oil in a microwave proof bowl. Microwave for 45 seconds on high or until melted. Add remaining Wet ingredients, whisk until smooth.
- Mix in Dry – Sprinkle the Dry ingredients across the surface in the order listed. Mix just until combined.
- Raspberries – Gently stir in the whole raspberries or other add-ins of choice.
- Fill muffin tin – Divide batter between the 12 holes using an ice cream scoop. Decorate top with halved raspberries.
- Bake 25 minutes. Cool 5 minutes then transfer to a cooling rack.
Notes
Nutrition
Life of Dozer
While I’m in Melbourne for the Good Food & Wine Show, Dozer is with the golden retriever boarder and apparently not showing any signs of separation anxiety. Hmmph!

The post Up-and-go breakfast muffins! appeared first on RecipeTin Eats.
]]> *** BIG THANK YOU for all your lovely messages in response to the news that Dinner made the New York Times best sellers list! Who ever thought a cookbook with a dog on the cover would become a NYT best seller. 😂*** As for today’s recipe – a healthy dose of cumin plus a good... Get the Recipe
The post Sweet Potato Soup – simple but great! appeared first on RecipeTin Eats.
]]>*** BIG THANK YOU for all your lovely messages in response to the news that Dinner made the New York Times best sellers list! Who ever thought a cookbook with a dog on the cover would become a NYT best seller. 😂***
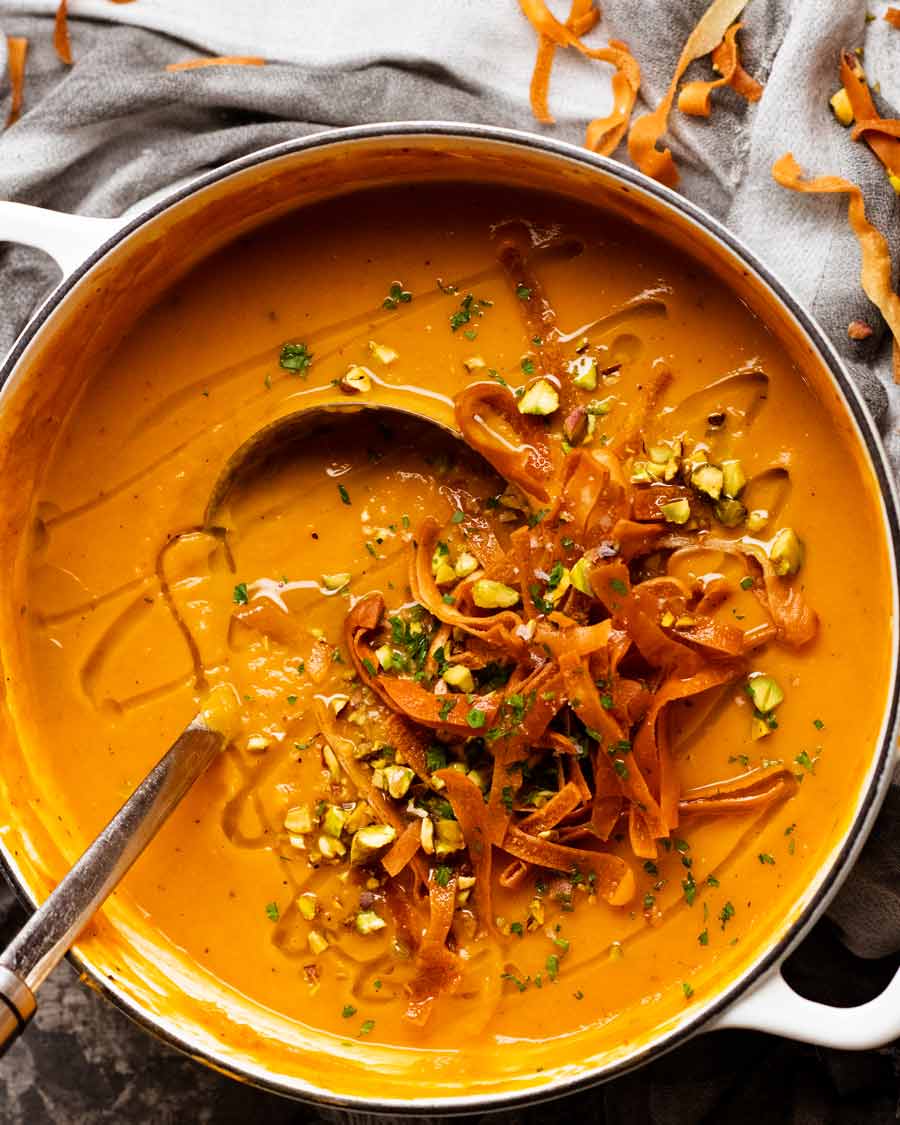
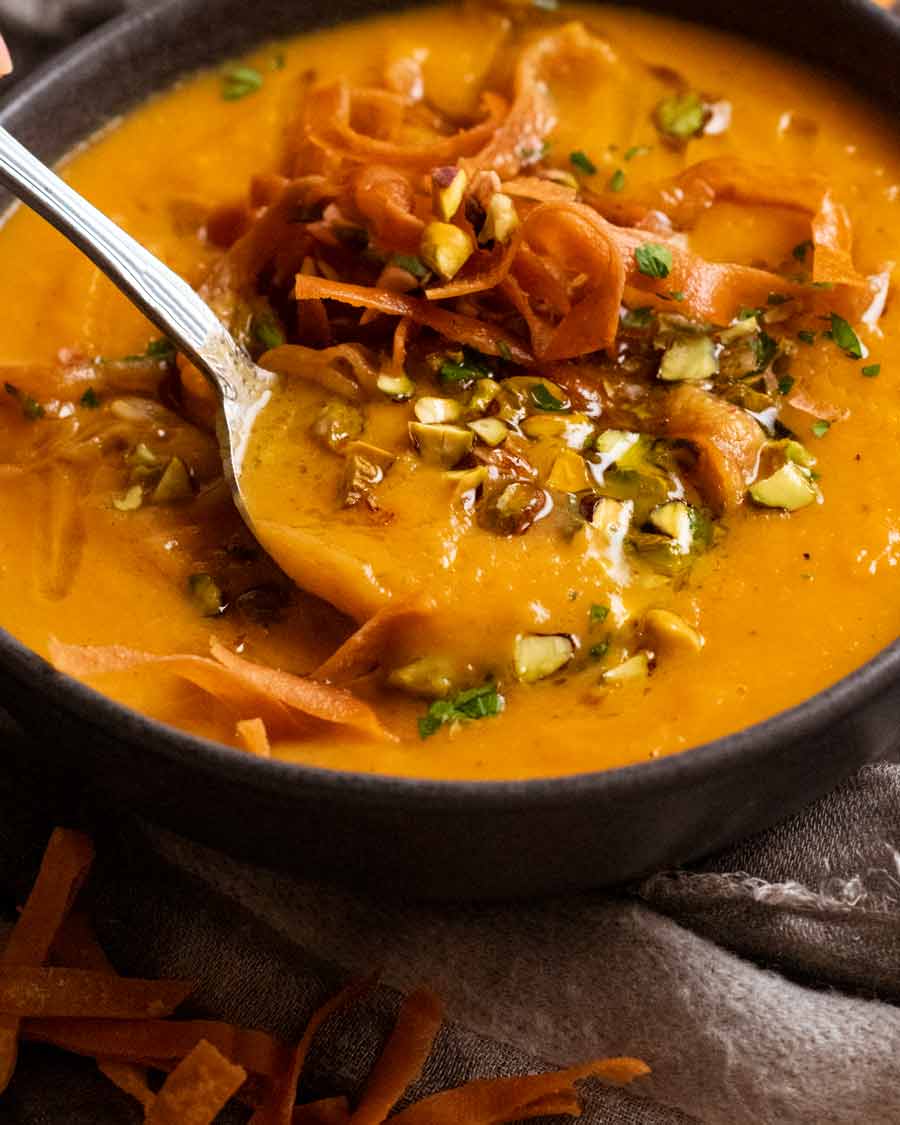
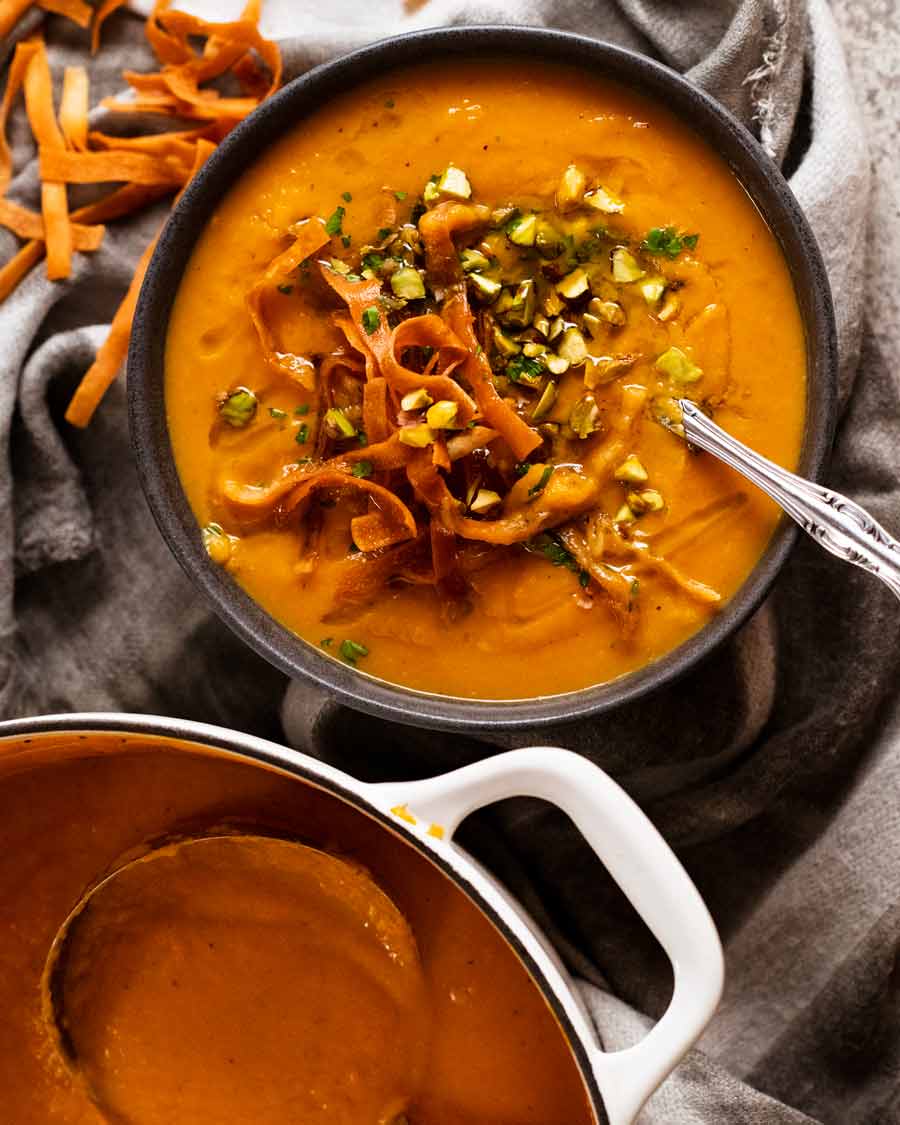
As for today’s recipe – a healthy dose of cumin plus a good amount of onion and leek keeps things interesting with this Sweet Potato Soup! If leeks are a bit pricey, use more onion instead. Serve with a shower of something crunchy – croutons, nuts, crispy shallots. I used flatbread ribbons and pistachios.
Sweet potato soup
A basic sweet potato soup is made with garlic, onion and sweet potato boiled in stock that is then blitzed. It’s fine, but it’s kind of boring (sorry!).
A carton of cream and giant hunk of cheesy garlic bread will go a long way to make it more interesting. But as a general rule, I like my soups to be able to stand on their own two feet without relying on too many extras to prop it up.
Today’s flavour dial ups come in the form of lots of onion and leek, plus a whole tablespoon of cumin. Gosh, it’s amazing what a difference it makes to turn “fine” into “OMG THIS IS SO DELICIOUS!!”
All you need for The Sweet Potato Soup
Here’s all you need. The recipe only calls for 1/3 cup cream (80 ml!) for a touch of creamy mouthfeel. We don’t need much because the generous amount of leek & onion plus the cumin adds great flavour. Without these, I’d be using a lot more cream!
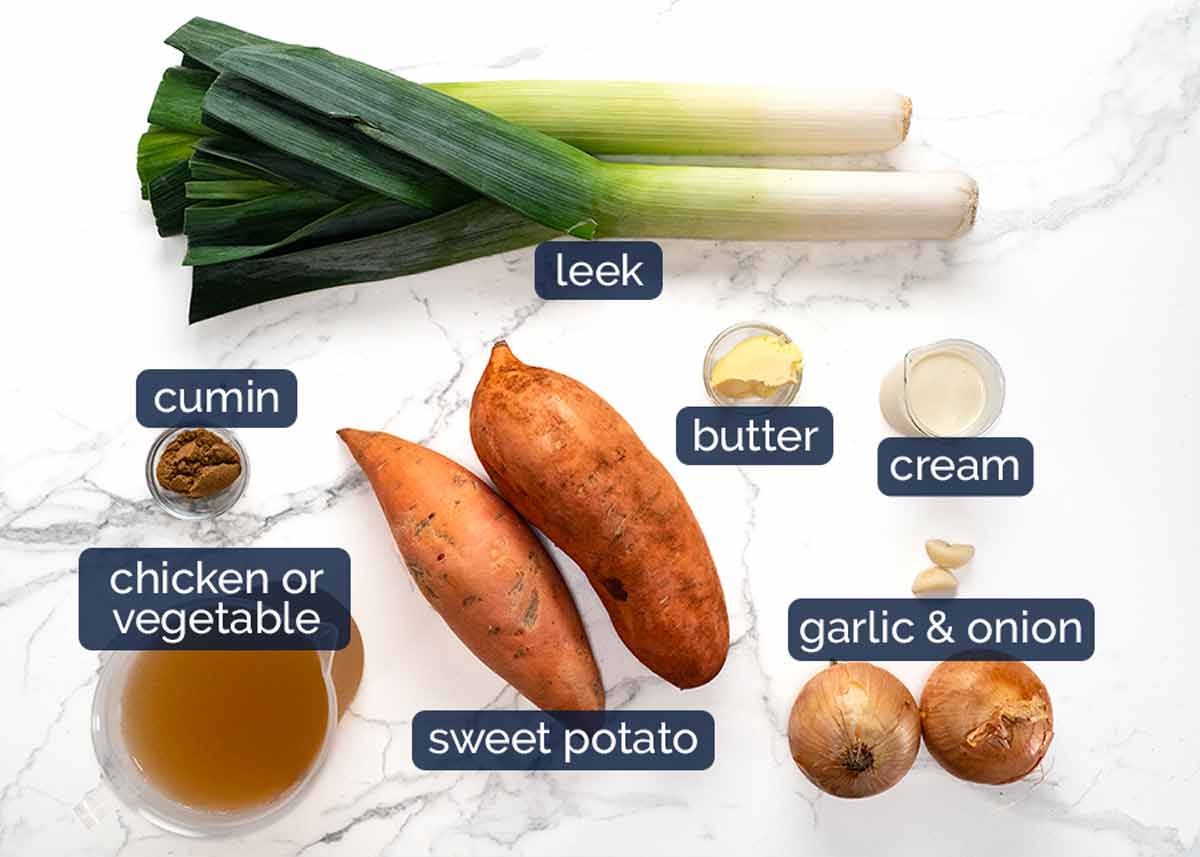
Leeks and onions – These add a flavour boost without having to resort to loads of cream or tons of spices to make this soup really tasty. If leeks are a bit pricey (as they can be during some months of the year) just use an extra onion instead. Just one onion to replace two leeks. Why? Because leeks have a more subtle, mild taste than onion. Two extra onions would make this soup too oniony, I think.
Bonus – Leeks don’t make your eyes water when you cut them! 👏🏻
Sweet potato – 2 medium ones totalling 1 kg / 2 lb (unpeeled weight), or one gigantic one.
Cumin powder – A spice that really compliments the sweet flavour of sweet potato. Gives this a flavour reminiscent of Moroccan food which you know is a good thing!
Garlic – This soup was never going to happen without garlic!
Butter and oil – Because of the sheer volume of onion and leek that is sautéed, we need 4 tablespoons of fat to cook them. I felt like using just butter makes the soup a little too buttery, but using just oil isn’t as fun. So I took the best of both worlds by using equal amounts of each.😎 You can double up on either of them, if you prefer.
Chicken stock (or vegetable stock) – I know it’s counterintuitive to use chicken stock for an otherwise vegetarian soup. But it really does give the soup deeper flavour than vegetable stock. However, I freely substitute vegetable stock.
Cream – Any dairy cream will work here. Thickened or heavy cream, pure cream, single cream, double cream etc.
Alternatives – I haven’t tried coconut milk or cream but I think they’d work nicely here. Sour cream and yogurt can also be used but they won’t add that touch of creamy mouthfeel that cream gives this soup. I’d rather use an extra knob of butter, personally.
How to make sweet potato soup
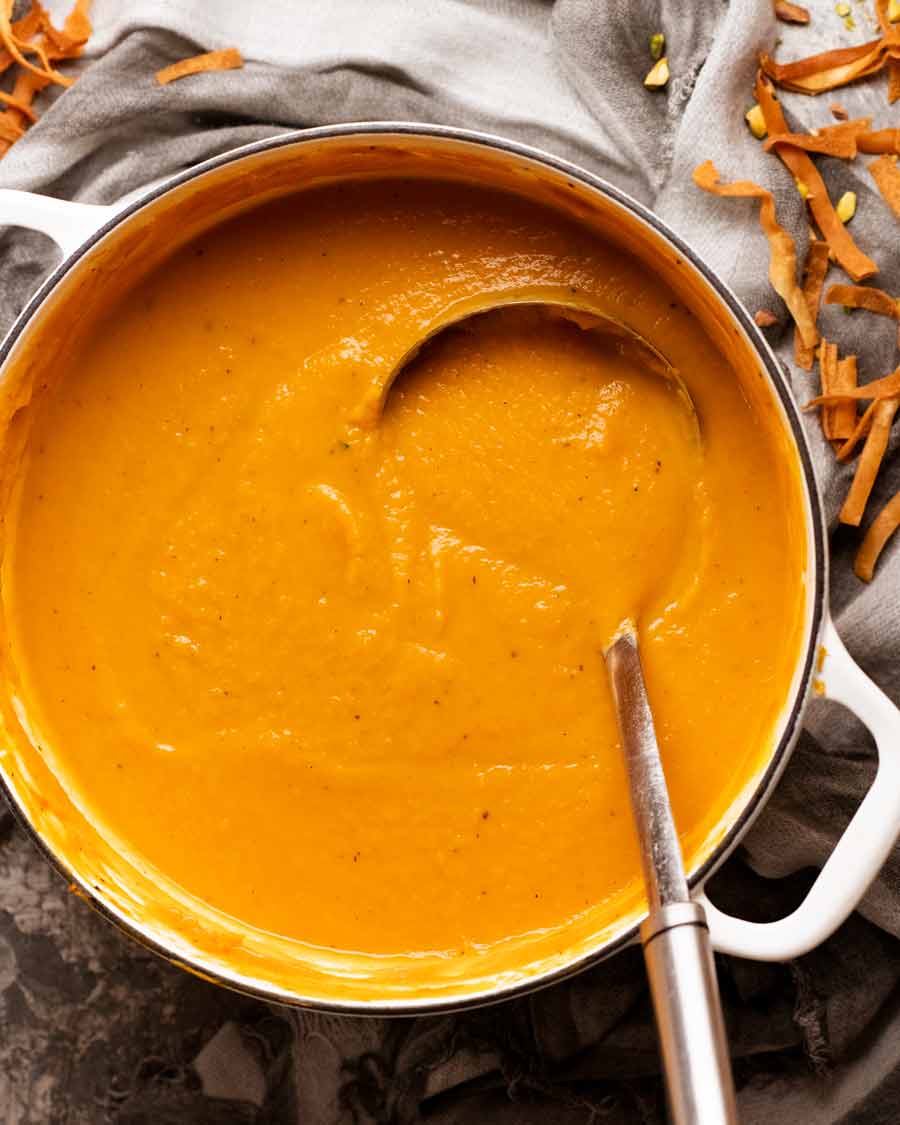
I’m a stick blender girl, when it comes to soups. So much less mess than using a blender.
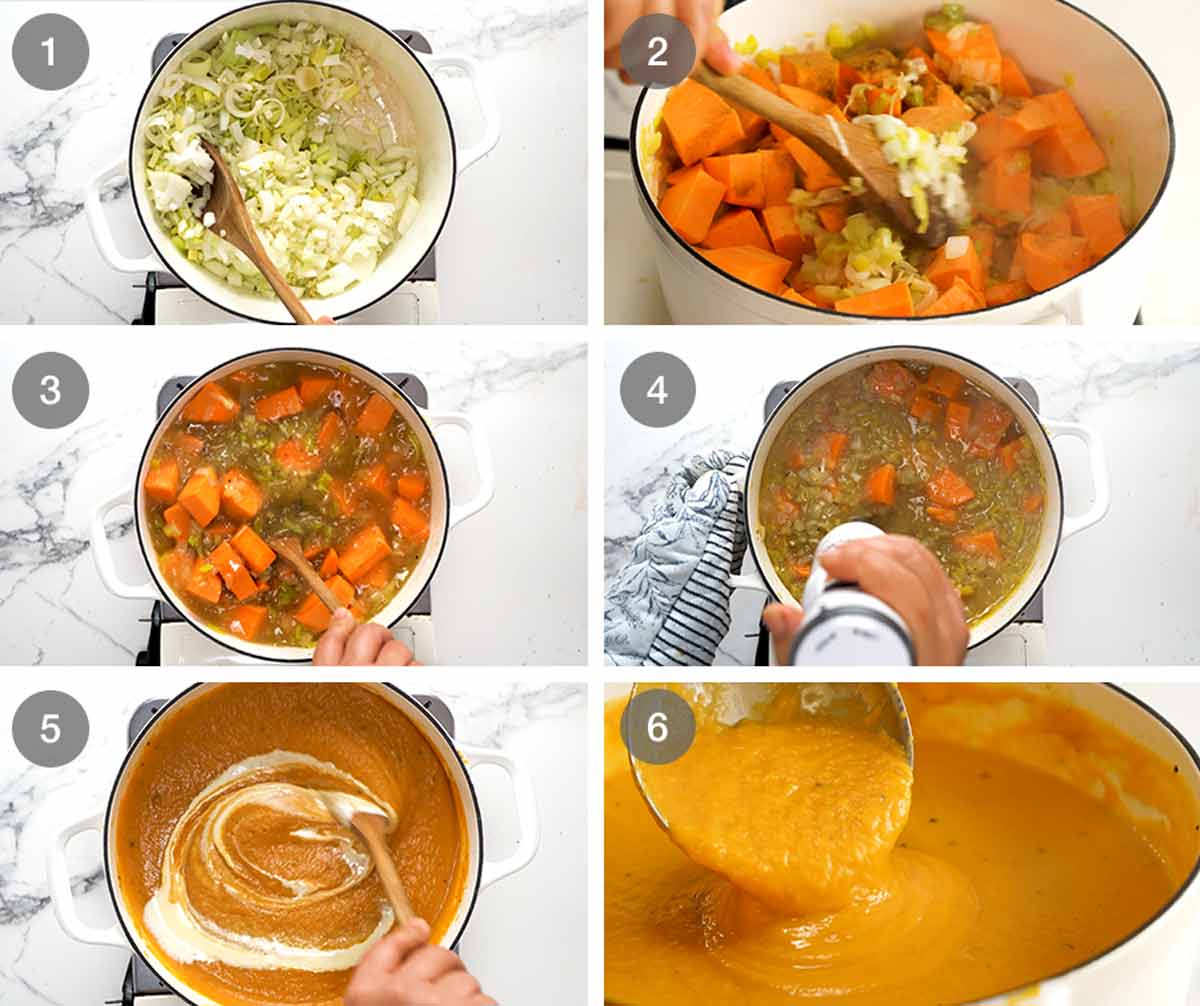
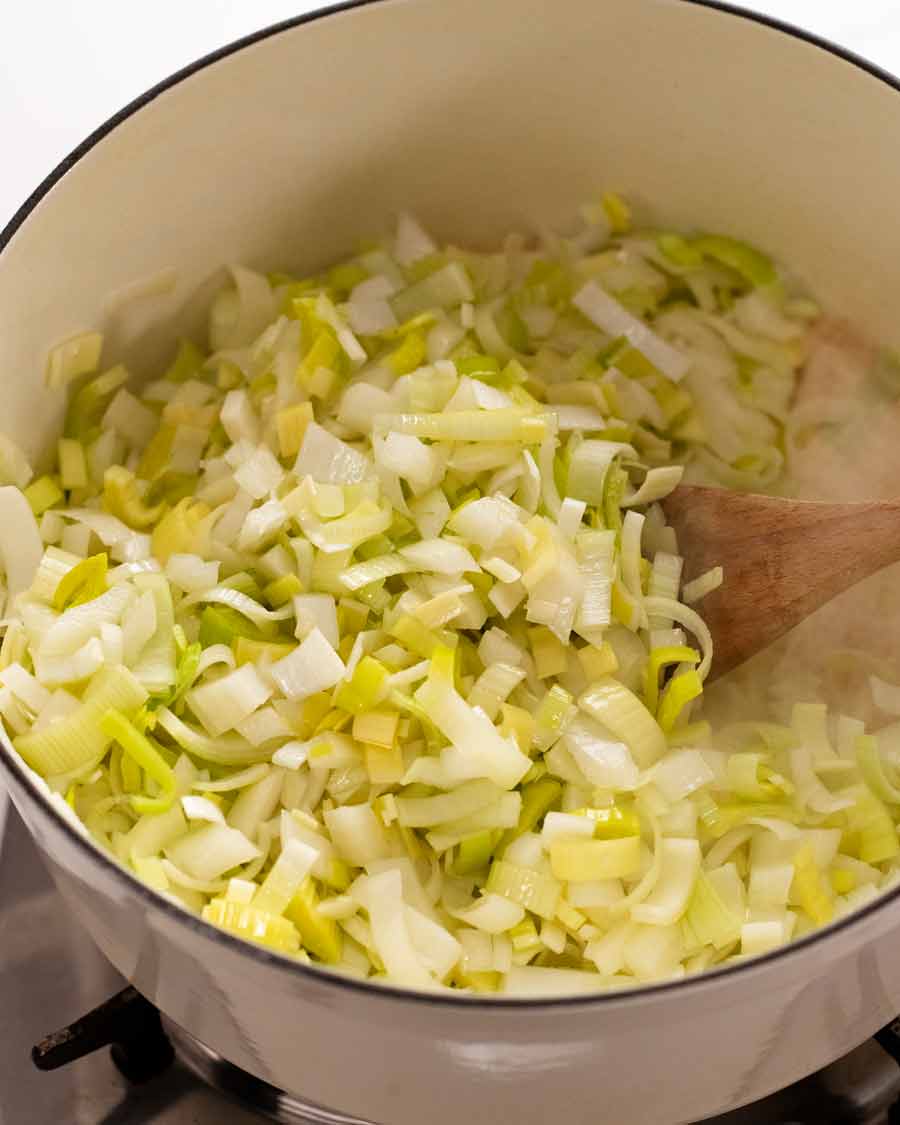
Sauté leek, onion and garlic for 5 minutes until sweet and softened.
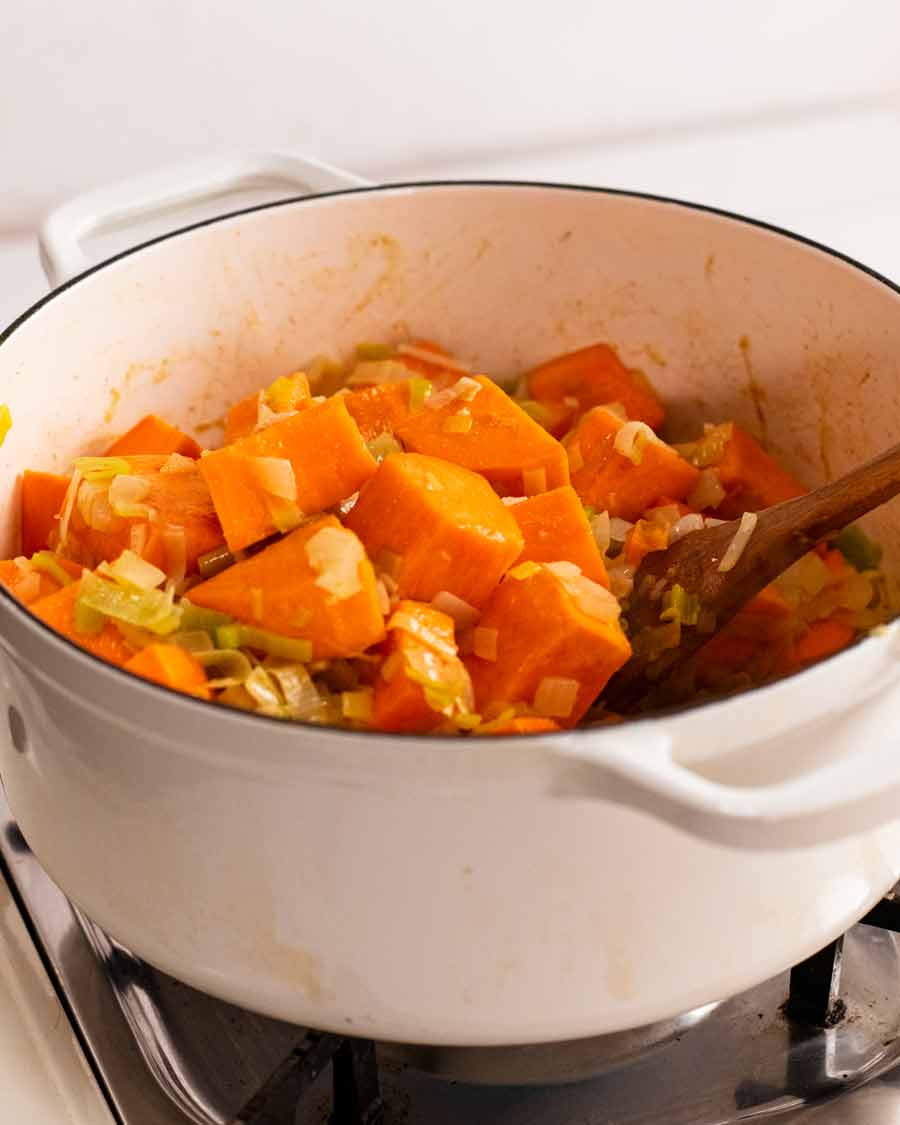
Stir sweet potato and cumin for 3 minutes so it’s nicely coated in the flavoured oil and the cumin gets toasted, which brings out the flavour.
Simmer 20 minutes – Add the stock and simmer for 20 minutes with the lid off.
Blitz with a stick blender until smooth.
Stir in cream.
Serve – Ladle into bowls and shower with something crispy! More chat on this below.
Soup toppers
I know I said at the beginning that this is a soup that stands on its own two feet. And it does. I drink it by the mugful, plain.
That said, I am a soup toppings gal and I will always encourage you to make soups more interesting with toppers. And wow, yes, we can do something different to the usual croutons and a swirl of cream!!! Today – crispy flatbread ribbons, a sprinkle of pistachio and swish of olive oil. Chosen as a nod to the Moroccan vibes in this soup.
I fried the crispy ribbons – for shooting speed purposes – but they are just as easily baked. Directions in the recipe. – Nagi x
PS And yes, you can absolutely do croutons instead if you prefer. Don’t let me deter you!
Watch how to make it
The Sweet Potato Soup
Ingredients
- 2 tbsp extra virgin olive oil
- 30g / 2 tbsp unsalted butter – or more oil
- 2 onions , diced
- 2 leeks , white and pale green part only, quartered, cut into 1cm / 1/2″ slices (Note 1)
- 2 garlic cloves , chopped
- 1 kg/ 2 lb sweet potato , peeled, quartered lengthwise, cut into 2cm / 0.8″ chunks
- 1 tbsp cumin powder
- 1.25 litre / 1.25 quarts chicken or vegetable stock , low sodium (Note 2)
- 1.5 tsp cooking / kosher salt
- 1 tsp black pepper
- 1/3 cup cream (any type) or an extra knob of butter
Garnishes (Note 3)
- Something to drizzle / dollop – extra virgin olive oil, cream, yogurt, sour cream
- Something crunchy – flatbread strips (pictured, Note 3), croutons, pistachios, pepitas, crispy fried shallots
Instructions
- Sauté aromatics – Heat the oil and melt the butter in a large heavy based pot over medium heat. Cook the onion, leek and garlic for 5 minutes until softened.
- Add the sweet potato and cumin, cook for another 3 minutes, stirring regularly.
- Simmer 20 minutes – Add the stock, salt and pepper. Bring to a simmer, then cook for 20 minutes at a gentle simmer until the sweet potato is very tender (no lid).
- Blitz – Remove the pot from the stove. Blitz with a hand-held stick until smooth. (Note 4 for blender) Stir in cream.
- Garnish – Ladle into bowls. Drizzle with yogurt, cream or olive oil with a sprinkle of something crunchy – pictured with pistachios and crispy flatbread strips (Note 3).
Notes
3. Garnishes – Something drizzled and something crunchy is my standard soup baseline. I used crispy flatbread strips in a nod to the vaguely reminiscent Moroccan flavours in this (I say that only because of the cumin!).
CRISPY FLATBREAD STRIPS – Cut 1cm / 0.4″ strips. Scrunch in hand (to curl) then fry in 3cm / 1″ 180°C/350°F oil for 20 seconds until light golden. Sprinkle immediately with salt while hot (so it sticks).
BAKED OPTION – Coat strips generously with olive oil spray, sprinkle with salt, bake at 180°C/350°F (160°C fan) for 10 to 13 minutes or until golden and crisp, tossing once or twice. Exact time will depend on thickness of flatbread.
Croutons – Cut any bread (crustless) into 0.75 cm / ⅓” cubes. Toss in a little olive oil to coat, sprinkle with a pinch of salt. Bake at 180°C/350°F for 10 min, tossing halfway, until golden and crunchy. Cool fully on tray before using.
4. Blender option – Allow soup to cool for 10 minutes then transfer half into a blender. Remove the lid of the feeder tube (it might blow-off due to the heat inside!), then put the lid on. Use a folded tea towel to cover the hole then blitz until smooth. Transfer to a separate pot. Repeat with remaining soup. (Stick blender really is easier!)
Silky smooth soup – You’ll need a high powered blender like a Vitamix or Blendtec. Note: soups as is might look a bit lumpy but it tastes smooth.
5. Leftovers will keep for 4 days in the fridge. Great for freezing too!
Nutrition per serving, soup only (because I can’t be held responsible for how crazy you go with toppings – and I fully endorse excessive toppings!).Nutrition
More cosy bowls of soup


Life of Dozer
Crashed out in his kennel at the end of a big Easter long weekend. (By “big”, I am obviously referring to extreme amounts of food scavenging and play time.)

The post Sweet Potato Soup – simple but great! appeared first on RecipeTin Eats.
]]>